Introduction
Whether you’re developing a web application or working on an Internet of Things (IoT) project using your laptop or a Raspberry Pi, the need to send SMS or text messages is a common requirement. If this sounds like your task, then look no further! The SIM800C USB to GSM Module is an excellent and powerful choice for seamlessly integrating cellular communication into your setup. It’s important to be aware of one key detail: the SIM800C module relies on 2G Network connectivity. While this is a limitation in areas transitioning to 4G/5G, if your local mobile network still supports 2G, this module remains a reliable, highly effective, and economical option for all your texting and data needs.
If you prefer a video presentation of this post, then please watch it on my YouTube channel.
About the SIM800C USB to GSM Module?
The SIM800C USB to GSM Module is a small cellular modem that allows you to communicate with your mobile network to send and receive SMS and calls.
- Supports quad-band GSM/GPRS (850/900/1800/1900 MHz), which means it can work in many countries (as long as 2G/GSM is supported).
- Can handle SMS (text messaging) — both sending and receiving. ― useful for alerting, remote commands, notifications, and sensor alarms.
- (In many variants) supports voice calls and GPRS data (modest data rates) — so you can use it as a basic internet-over-GSM modem (for telemetry, small data transfers), or even remote-call / IVR-type functionality.
You can attach this to your Laptop, PC, or Raspberry Pi if your Internet of Things (IoT) projects need these networking features. This is an excellent module to use if you need to send out alarms, monitor sensor readings, or just plain notifications about some workflow in your system, like OTP (One Time Pins) verifications.
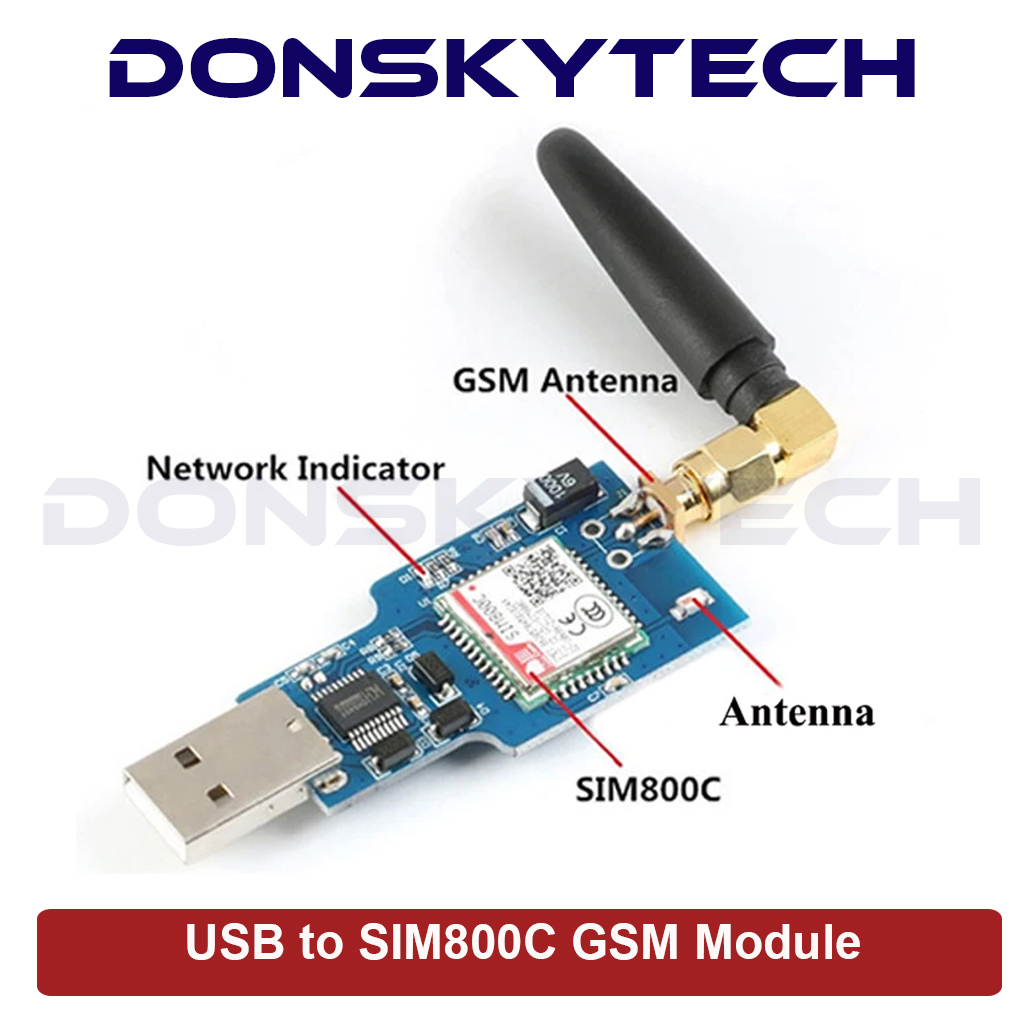
Parts of the SIM800C USB to GSM Module
When you buy this module, it comes with its own antenna, so the only thing that you need to add is the SIM card. Any 4G or 5G SIM can be used as long as the underlying telecom network still supports the legacy 2G Network. After you have inserted the SIM Card then you can now plug it into any USB Port of your laptop or Raspberry Pi. Make sure that the SIM card is properly registered and has sufficient load.
Important Note about this module
This module only support 2G wireless connection and if your country have already phased out this in favor of the more modern mobile networks such as 4G or 5G then this will not work for you. Verify with your local mobile telecoms provider before purchasing this module.
Important Note about the built-in LED blinking
After attaching the SIM and connecting it to the USB port then take note of how the built-in LED of this module blinks. Initially, it will blink once very 1 second but after it has successfully connected to your mobile network then it should blink once every 3 seconds. If the LED does not blink then it means that you have a defective SIM800C USB to GSM Module
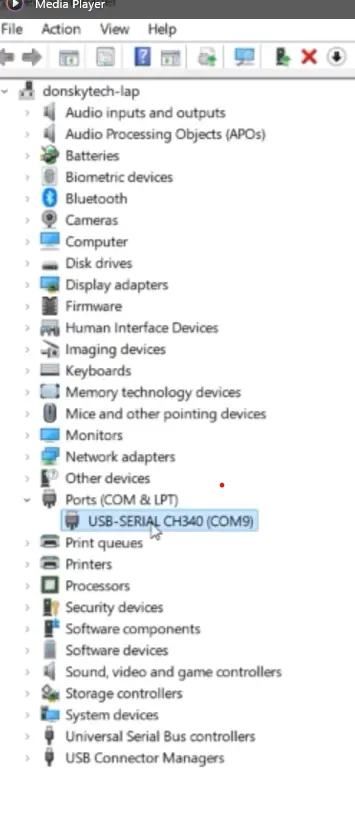
Install the device driver
This module requires the CH340 module USB driver to use, so you need to download this from the internet, or you can follow my earlier guide on How to install the CH340/CH341 driver.
Once you have installed this driver then it should appear in the COM and LPT sections of your device manager.
Parts/Components Required
The following are the components required to follow along with this post.
- SIM800C USB to GSM Module – Amazon | AliExpress
- Laptop/PC – Amazon | AliExpress
- Raspberry Pi 5 – Amazon | AliExpress
Disclosure: These are affiliate links and I will earn small commissions to support my site when you buy through these links.
How to test SIM800C USB to GSM Module using AT Commands?
You can test your SIM800C USB to GSM module without using any programming language by using AT Commands. AT commands, or Attention for short, are text commands that you can send directly to any module that is configured to receive such commands. So by sending these commands, such as:
# Check AT Command Response
AT
# Check SIM card status
AT+CPIN?
# Check Signal Strength
AT+CSQ
You can communicate with your SIM800C USB to GSM Module and send SMS or text messages by sending these textual AT commands.
To send AT commands, just download PuTTY SSH and telnet client from the internet. Set the connection type to Serial and the Serial Line to the COM Port assignment of your Windows or PC.
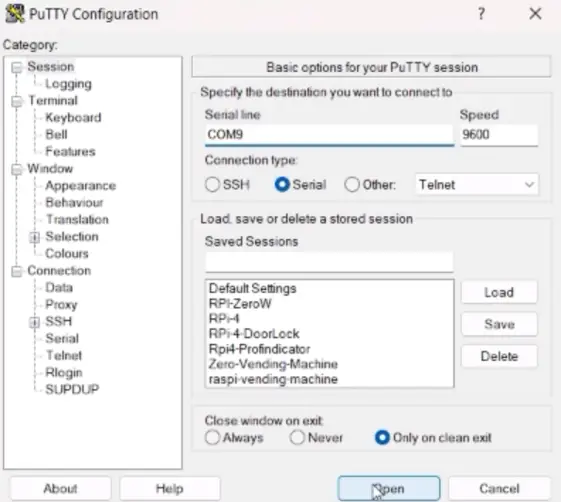
Once you are connected then type in the text “AT” and you should receive the “OK” response.
AT
OK
If you have received this response, this means that your GSM module is functional. You can experiment with the list of possible AT commands by following the SIM800 AT Commands.
We can now proceed to programming this module.
Testing the SIM800C USB to GSM using Python
The SIM800C USB to GSM Module can be programmed using different programming languages of your choice, such as PHP, Node.js, or Python. Any programming language has some features that will allow it to communicate serially. We will use this exact feature to communicate with our SIM800C USB to GSM Module.
In this post, we will use Python to program this device as it is easier to set up and beginner-friendly.
Install Python and Visual Studio Code
If your Windows/PC does not have the Python interpreter, then you can follow this How to install Python in Windows.
We are going to use Visual Studio Code, or VSCode, to run the test script here. If you don’t have this installed, then you can follow the following tutorial Install Visual Studio Code or VSCode on Windows
Code
The code for this project is available on my GitHub account, which you can access from here. You can either download the project manually or use Git to clone the repository.
To clone the repository and open the project in VSCode, you can execute the commands below on your command prompt.
git clone https://github.com/donskytech/python_projects_snippets.git
cd usb-to-gsm
code .
This will open the project in your Visual Studio Code. When the VSCode window opens then click Terminal and then New Terminal.
Create a Virtual Environment for this project by executing the command below. This will create a folder called .venv
py -m venv .venv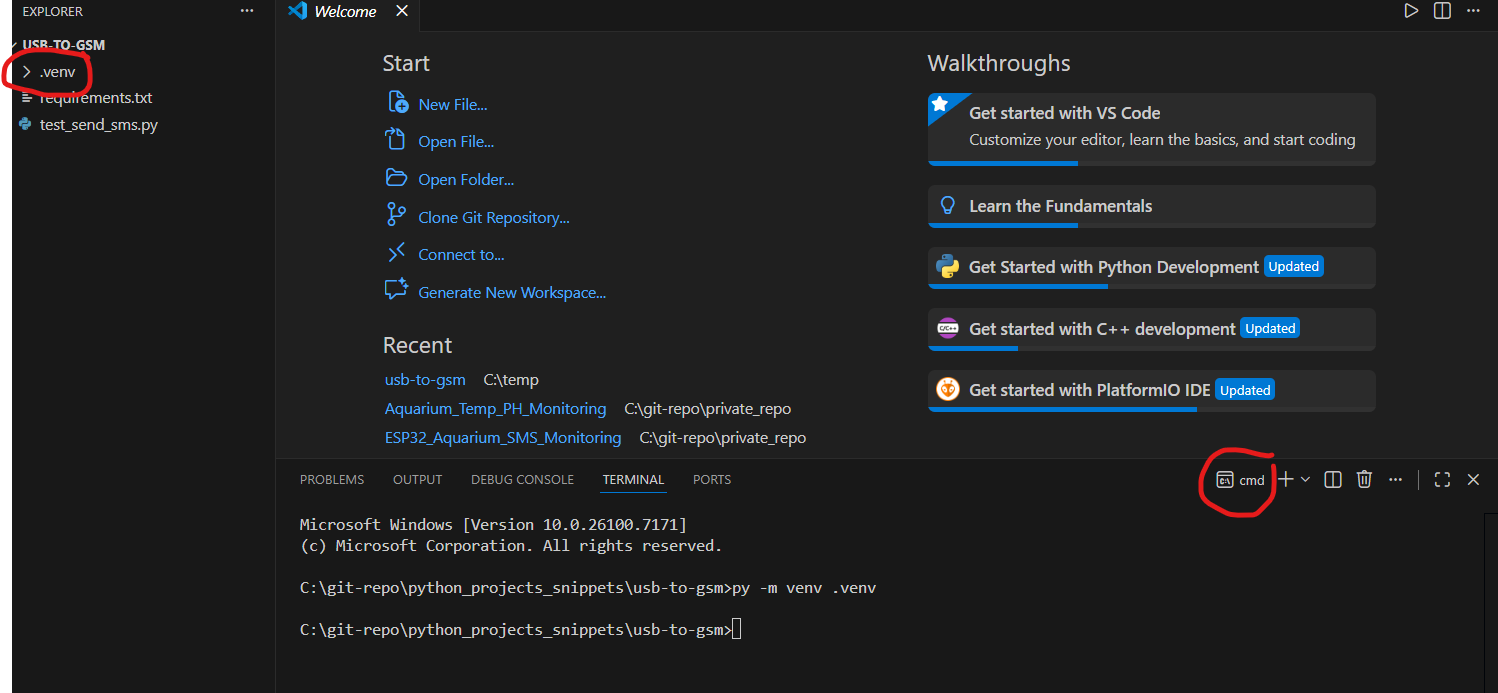
Activate the Python Virtual Environment by executing the code below.
.venv\Scripts\activate.batYour terminal should display the following image.

Next, install the required libraries for this project on VSCode by executing the command below
pip install -r requirements.txtYou should see the following message when the PySerial library is installed. This is the library that we will be using to communicate with the SIM800C USB to GSM module using the Serial protocol.

If everything is okay, then we can now begin going through the code. This is the small script that I have written to communicate with our SIM800C USB to GSM Module.
import serial
import time
# Create a Serial Object to communicate with our USB to GSM 800C
ser = serial.Serial(
port='COM9',
baudrate=9600,
timeout=2,
xonxoff=False,
rtscts=False,
dsrdtr=False
)
def send_at_command(command, delay=2):
ser.write((command + '\r\n').encode())
print("Waiting for AT Response")
time.sleep(delay)
response = ser.read_all().decode('utf-8')
return response
try:
print("Testing SIM800C Module...")
# Check AT Command Response
response = send_at_command("AT")
print("Response to AT: ", response)
# Check SIM card status
response = send_at_command("AT+CPIN?")
print("SIM Card Status: ", response)
# Check Network Registration
response = send_at_command("AT+CREG?")
print("Network Registration: ", response)
# Check Signal Strength
response = send_at_command("AT+CSQ")
print("Signal Strength: ", response)
# Check Operator Name
response = send_at_command("AT+COPS?")
print("Operator Name: ", response)
# Test SMS Sending (Optional)
response = send_at_command('AT+CMGF=1')
print("SMS Mode Set: ", response)
# Replace with your phone number
phone_number = "+639082233631"
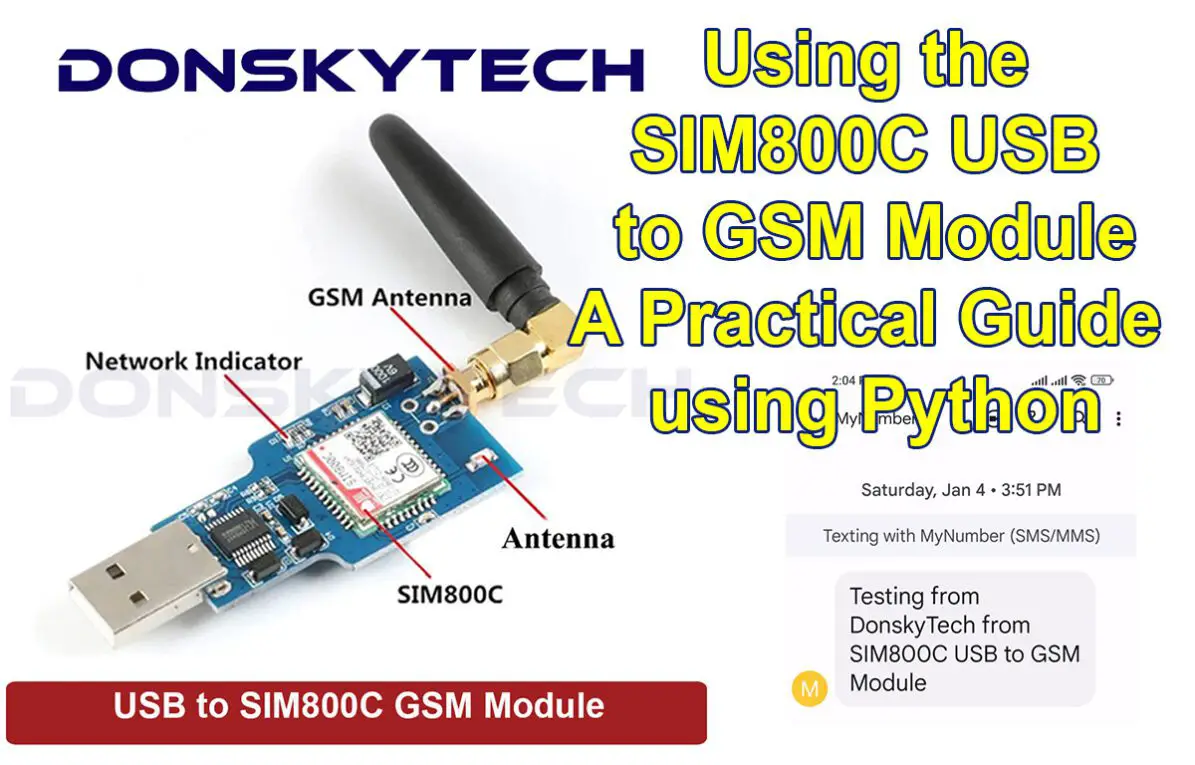
message = "Testing from DonskyTech from SIM800C USB to GSM Module"
send_at_command(f'AT+CMGS="{phone_number}"')
time.sleep(1)
ser.write((message + '\x1A').encode())
print("Message Sent!")
except Exception as e:
print("Error: ", e)
finally:
ser.close()
Let us go over what each line of the code does.
import serial
import time
At the top of the file are our library or module imports. We are going to use the PySerial library to manipulate our Serial communication with our USB device.
# Create a Serial Object to communicate with our USB to GSM 800C
ser = serial.Serial(
    port='COM9',
    baudrate=9600,
    timeout=2,
    xonxoff=False,
    rtscts=False,
    dsrdtr=False
)
We create a Serial object with some default parameters and set the port assignment to COM(. This may change depending on your laptop setup, so check with your device manager.
def send_at_command(command, delay=2):
    ser.write((command + '\r\n').encode())
    print("Waiting for AT Response")
    time.sleep(delay)
    response = ser.read_all().decode('utf-8')
    return response
The function send_at_command() will accept our AT commands with a default delay to wait for the response. It writes into the Serial object, waits for some time, reads all at once and converts it to text, and returns it to the calling function.
try:
    print("Testing SIM800C Module...")

    # Check AT Command Response
    response = send_at_command("AT")
    print("Response to AT: ", response)

    # Check SIM card status
    response = send_at_command("AT+CPIN?")
    print("SIM Card Status: ", response)

    # Check Network Registration
    response = send_at_command("AT+CREG?")
    print("Network Registration: ", response)

    # Check Signal Strength
    response = send_at_command("AT+CSQ")
    print("Signal Strength: ", response)

    # Check Operator Name
    response = send_at_command("AT+COPS?")
    print("Operator Name: ", response)

    # Test SMS Sending (Optional)
    response = send_at_command('AT+CMGF=1')
    print("SMS Mode Set: ", response)

    # Replace with your phone number
    phone_number = "+639081234567"
    message = "Testing from DonskyTech from SIM800C USB to GSM Module"
    send_at_command(f'AT+CMGS="{phone_number}"')
    time.sleep(1)
    ser.write((message + '\x1A').encode())
    print("Message Sent!")

except Exception as e:
    print("Error: ", e)

finally:
    ser.close()
This is a series of AT commands that will allow us to test our connection to our GSM module. Make sure to change the mobile number of the one you are sending the SMS or text messages.
It checks for the following information:
- SIM Card Status
- Network Registration details
- Signal Strength
- Mobile network operator name
- Sending of the SMS or Text Messages
Using this series of AT commands, we can send SMS or text messages from our web/mobile/IoT application.
How to run the code
To run the code snippet then type the following in your terminal.
py test_send_sms.pyYou should see the following displayed on your terminal.
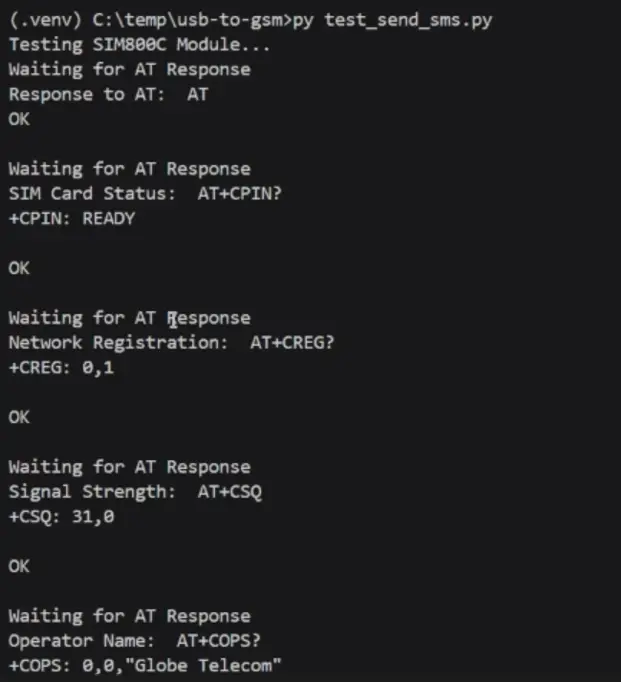
If no issue or error was encountered, then you should see the following SMS or Text messages

Congratulations! You are now able to use the SIM800C USB to GSM Module using Python.
Final Words
We have explored how to use the SIM800C USB to GSM module in this post and discussed the different aspects of how to test this module. This device will allow you to add alarms, notifications, and messaging features to your web/mobile/IoT application. The only downside is its 2G Wireless connectivity, but if this is not a problem for you, then using this cheap module is an excellent choice.
I hope you learned something. Happy exploring!
Read Next:
Pico W -MicroPython MQTT – BMP/BME 280 Weather Station
Raspberry Pi BME280 Weather Station Using Python and Flask
Leave a Reply