Introduction
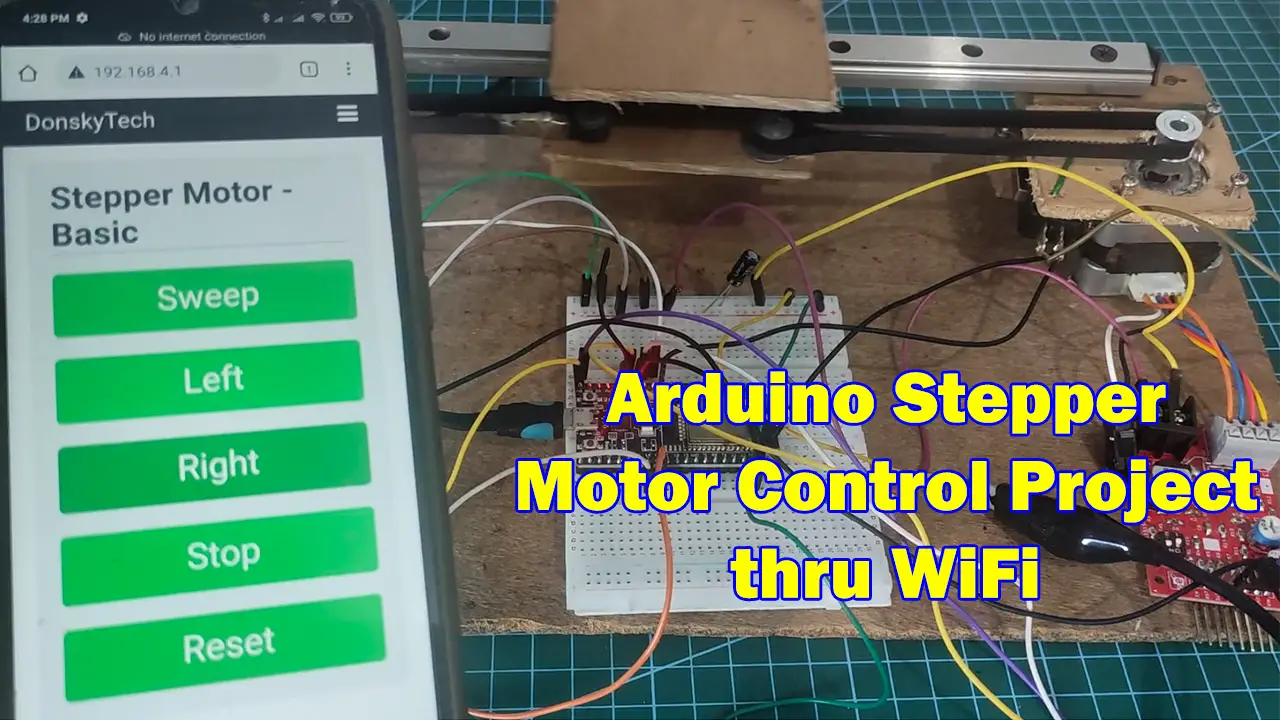
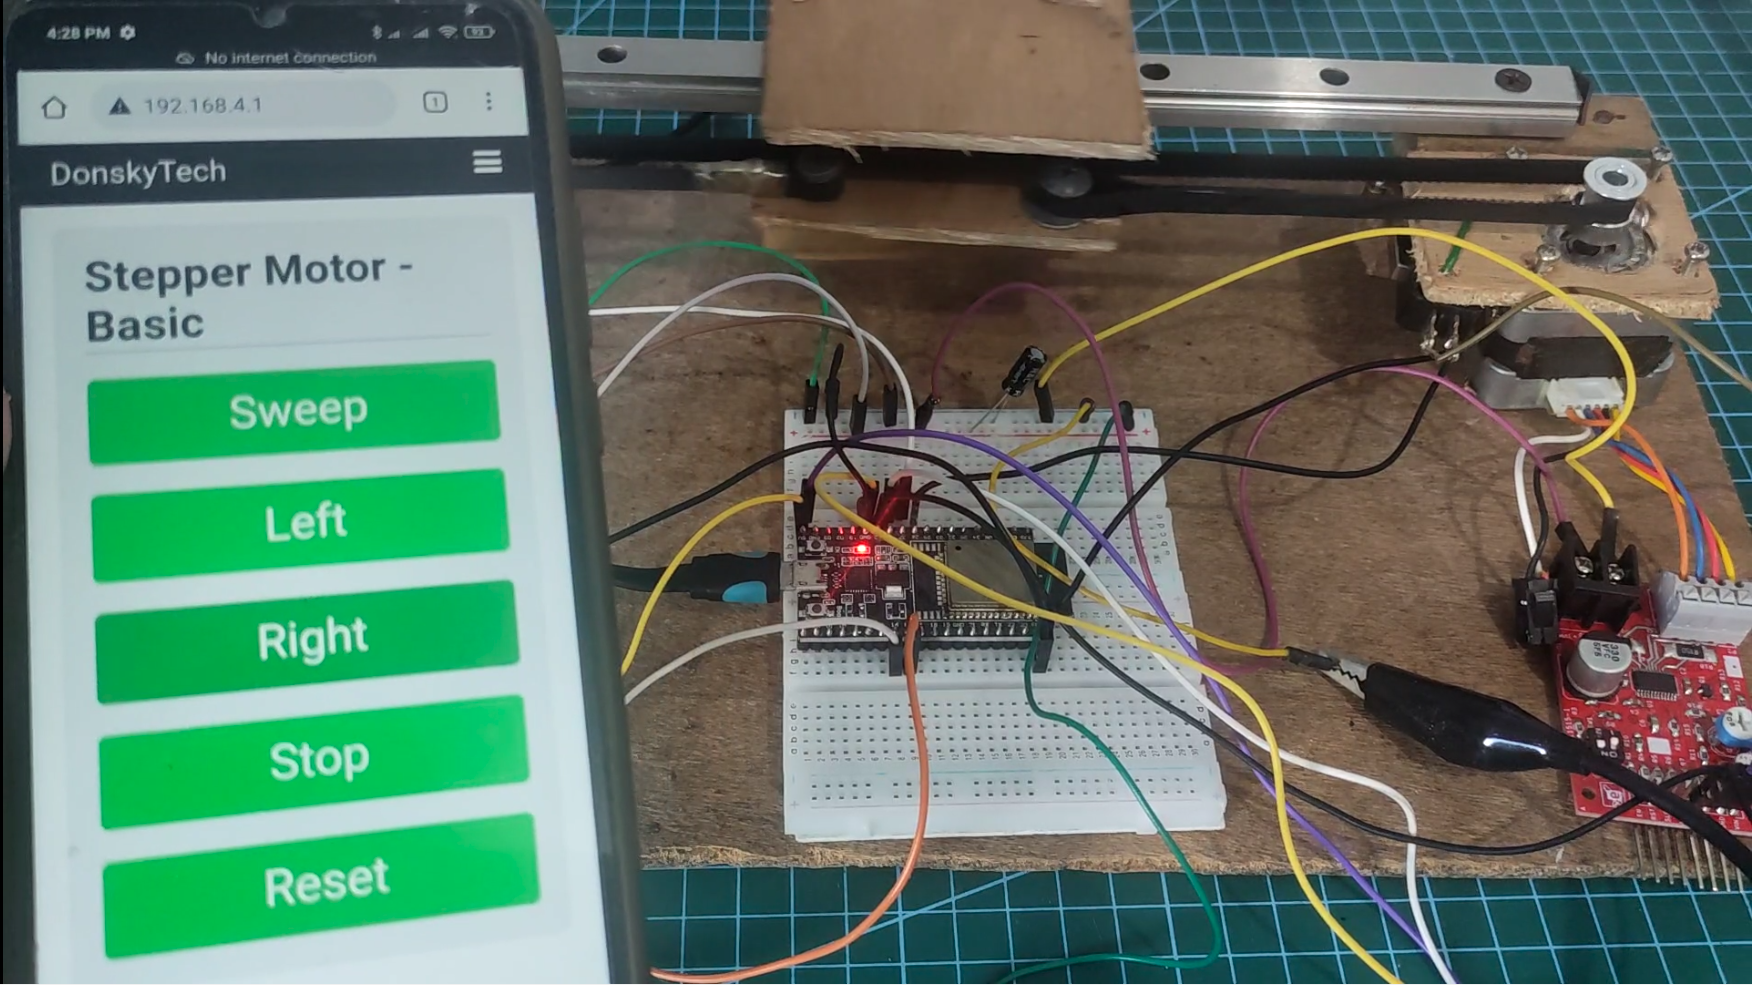
Stepper motors are widely used in multiple applications such as your 3D Printers, robotics, or home automation projects. These motors can be precisely controlled to move at certain positions, unlike the regular DC motors that continually run when power is supplied. In this post, I am going to feature a simple prototype created by a group of students that I am mentoring wherein we simulate the movement of a printer head using wood as a base. This is a simple project that I have programmed wherein I used an Arduino-powered microcontroller board (ESP32) in interfacing with your Stepper Motor and controlling its precise movement thru WiFi.
If you want to see a demo of this project then please see the below video or watch it on my YouTube channel.
Why I featured this project?
We live in the 3D printer world right now and everything can be 3D printed with ease as long as you have the hardware device which is the 3D printer itself. However, I live in a country where not everyone has access to such hardware devices.
But it does not mean that students should just stop learning and prevent themselves from experimenting. They have used wood as a cheaper alternative for this prototype. I find this prototype really cool so that is why I am featuring it here. 🙂
What is this project all about?
This prototype project with a wood base simulates how a printer head could be controlled using your mobile phone. It uses an ESP32 WiFi-enabled board and is programmed using the Arduino Framework. The Arduino program running in the ESP32 board creates a web server that sends a signal to the stepper motor to control its movement.
The movement of the printer head comes from the mobile phone which sends a WebSocket message to the ESP32 that controls the A4988 driver modules. If you are not familiar with what WebSocket is then I have written a post about this below.
Related Content:
Using WebSocket in the Internet of Things (IoT) projects
Parts/Components Required
The following are the components that I have used in this Arduino Stepper Motor Control Project.
- ESP32 – Amazon | AliExpress | Bangood
- Nema17 Bipolar Stepper Motor – Amazon | AliExpress
- A4988 Stepper Motor Driver – Amazon | AliExpress
- Limit Switch – Amazon | AliExpress
- Breadboard – Amazon | AliExpress | Bangood
- Connecting Wires – Amazon | AliExpress | Bangood
Note: The timing belt, sliding rail, and stick can be sourced locally.
Note: The stepper motor driver that I have used in this project is a locally manufactured product and I could not find a matching product on either Amazon or AliExpress. However, I am assuming that any A4988 driver module would be able to drive the stepper motor.
Disclosure: These are affiliate links and I will earn small commissions to support my site when you buy through these links.
Where is the Wiring/Schematic and the Code?
There is no wiring/schematic for this project in this post but I would show it later in the next post. The same also with the code so I would be discussing the concept of Arduino State Machine which I have used in programming the ESP32 board.
Wrap Up
The purpose of this short featured post is just to share how the lack of necessary equipment should not stop students from pursuing their goal of learning. You only need to make use of your imagination to come up with the solution to your problem.
Leave a Reply