Introduction
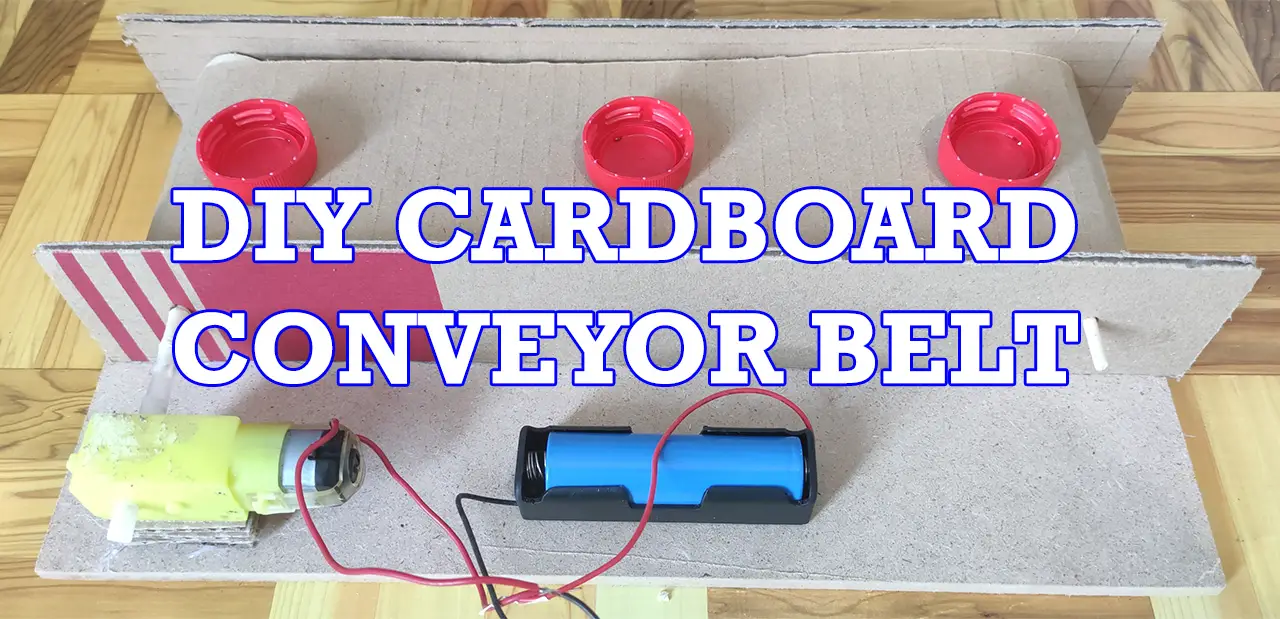
We are going to create our DIY Cardboard Conveyor Belt in this post and we will use this in our Internet of Things (IOT) projects. This is a fun project to do especially for kids as they would see some motor movement and basic mechanisms.
Using cardboard when prototyping is an excellent idea as it is inexpensive and I hope you will have fun while doing this project.
If you like to see this in action then please refer to the following video.
Materials
We need the following materials and tools to create this project
- Cardboard (any hard box is ok)
- Rolled Cardboard (the one used in wallpaper material)
- BBQ Sticks
- A plastic tube (the one used in balloons)
- Gear Motor
- Battery
- Hot Glue Gun
- Quick Dry Glue
- Scissors
- Cutter
- Ruler/Compass
- MDF Board
- Masking tape
Steps
Note: Please be careful when using sharp and hot tools like cutters, scissors, and hot glue guns. For kids, ask assistance from adults.
- Cut the rolled cardboard into your desired length. Mine is 8 cm and we need two of these.
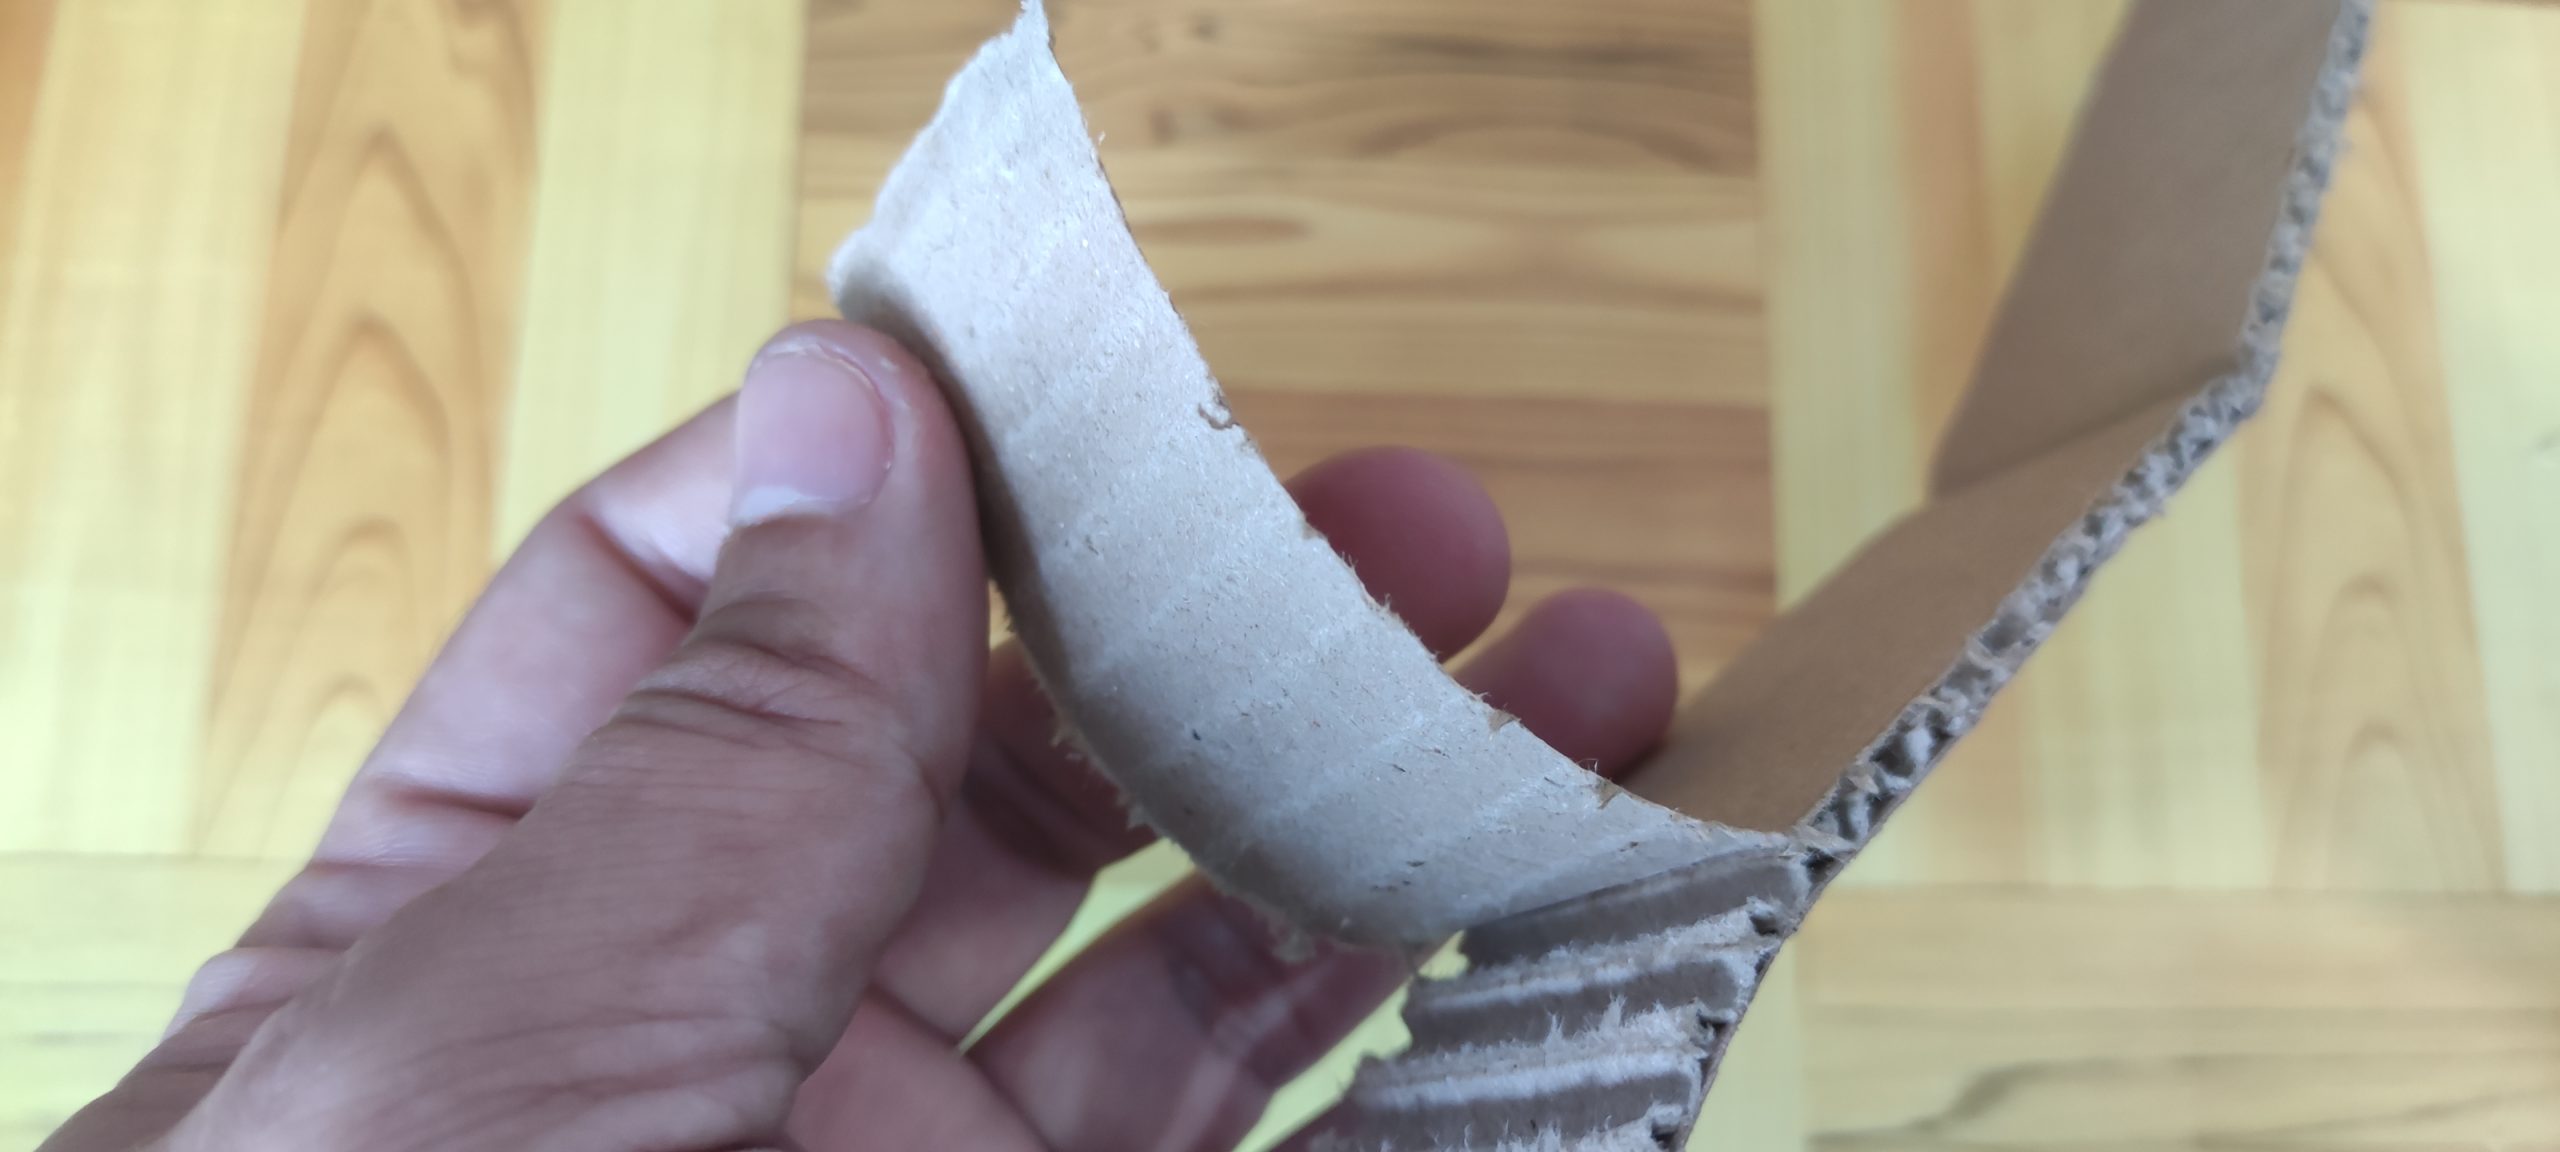
- Cut 4 circles in the cardboard that will fit the size of the inside of your rolled cardboard then using any pointed object create a hole in the middle.
- Place the 4 circular shapes on the rolled cardboard and use quick dry glue to tighten it.
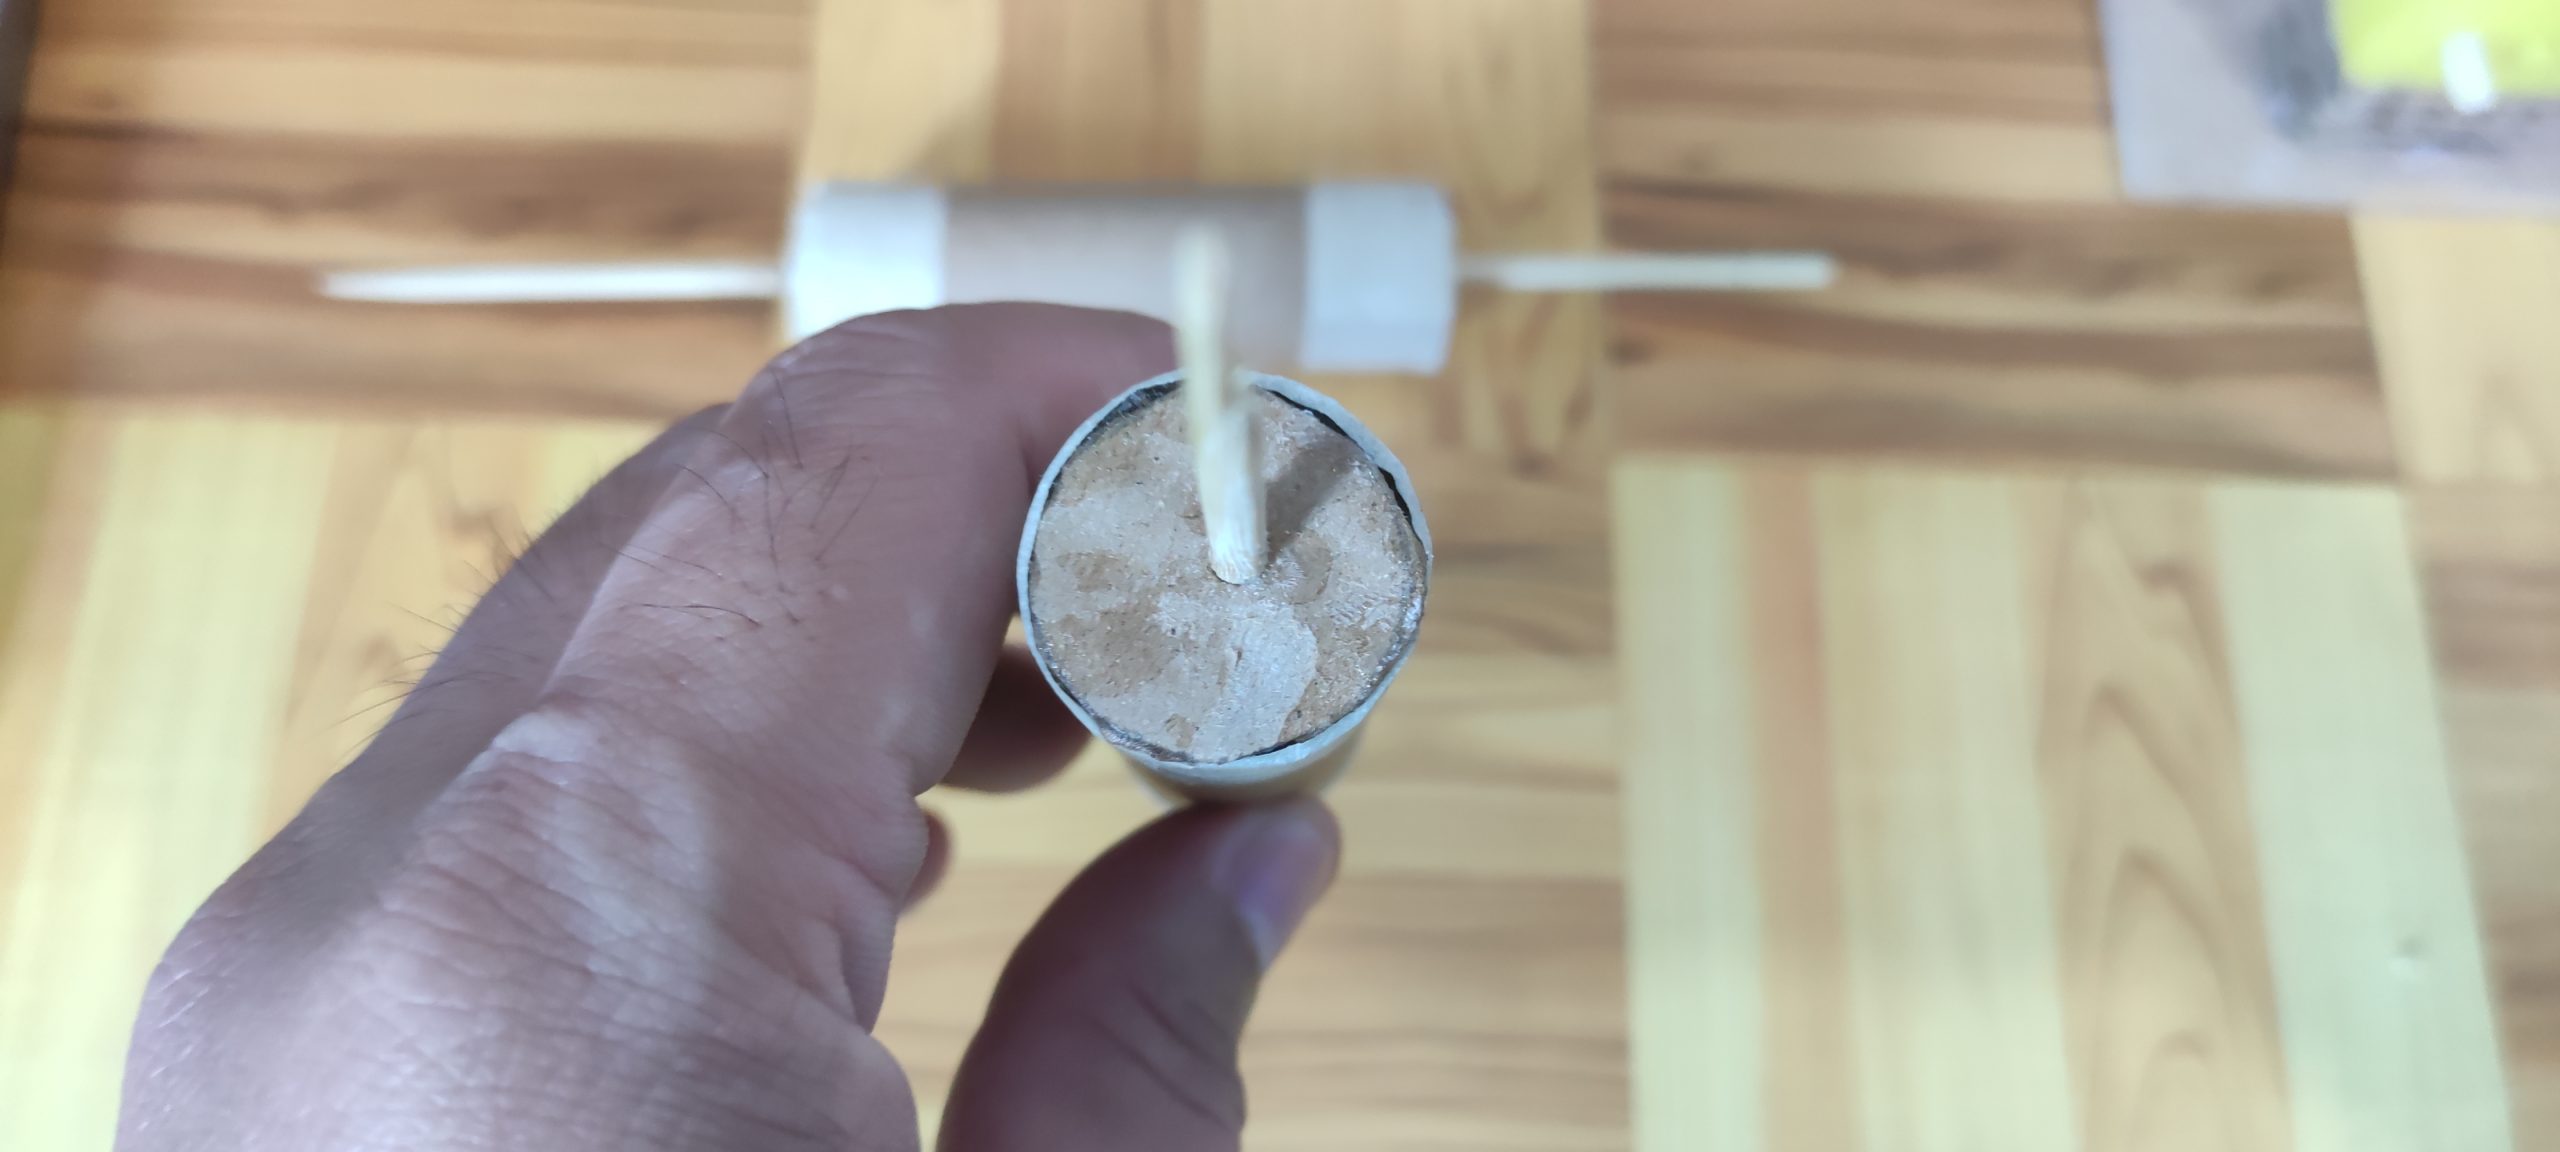
- Insert the BBQ Sticks on the inside circular shape towards the other end of the hole and set them aside for a moment. We now have a cylinder that will serve as the roller of our conveyor belt.
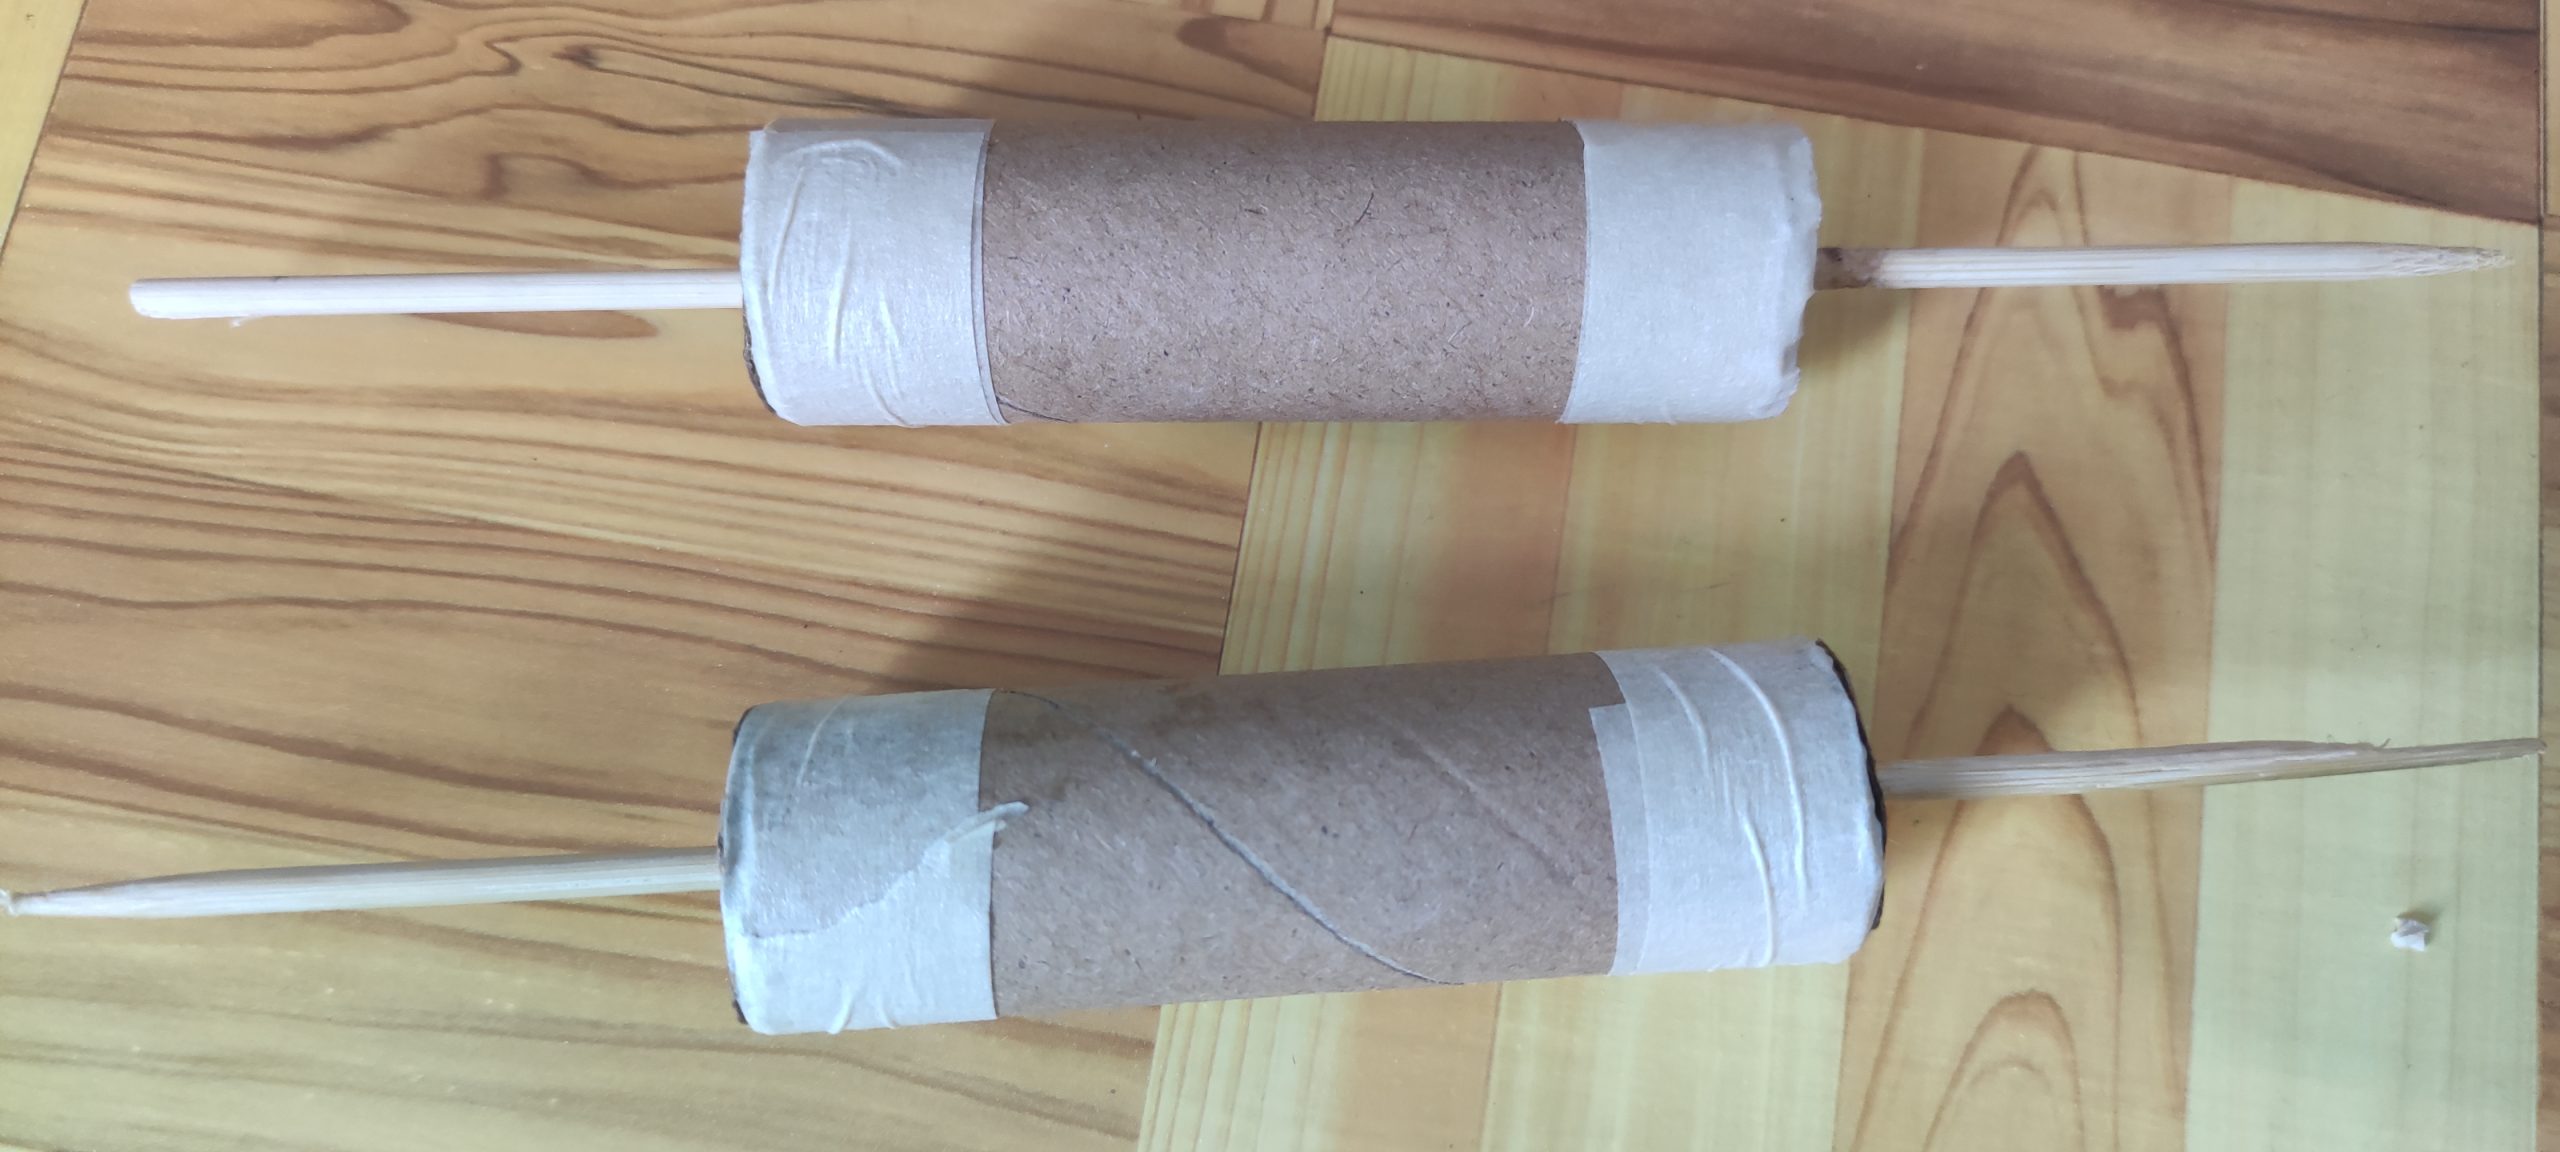
- Place masking tape on each side as added support.
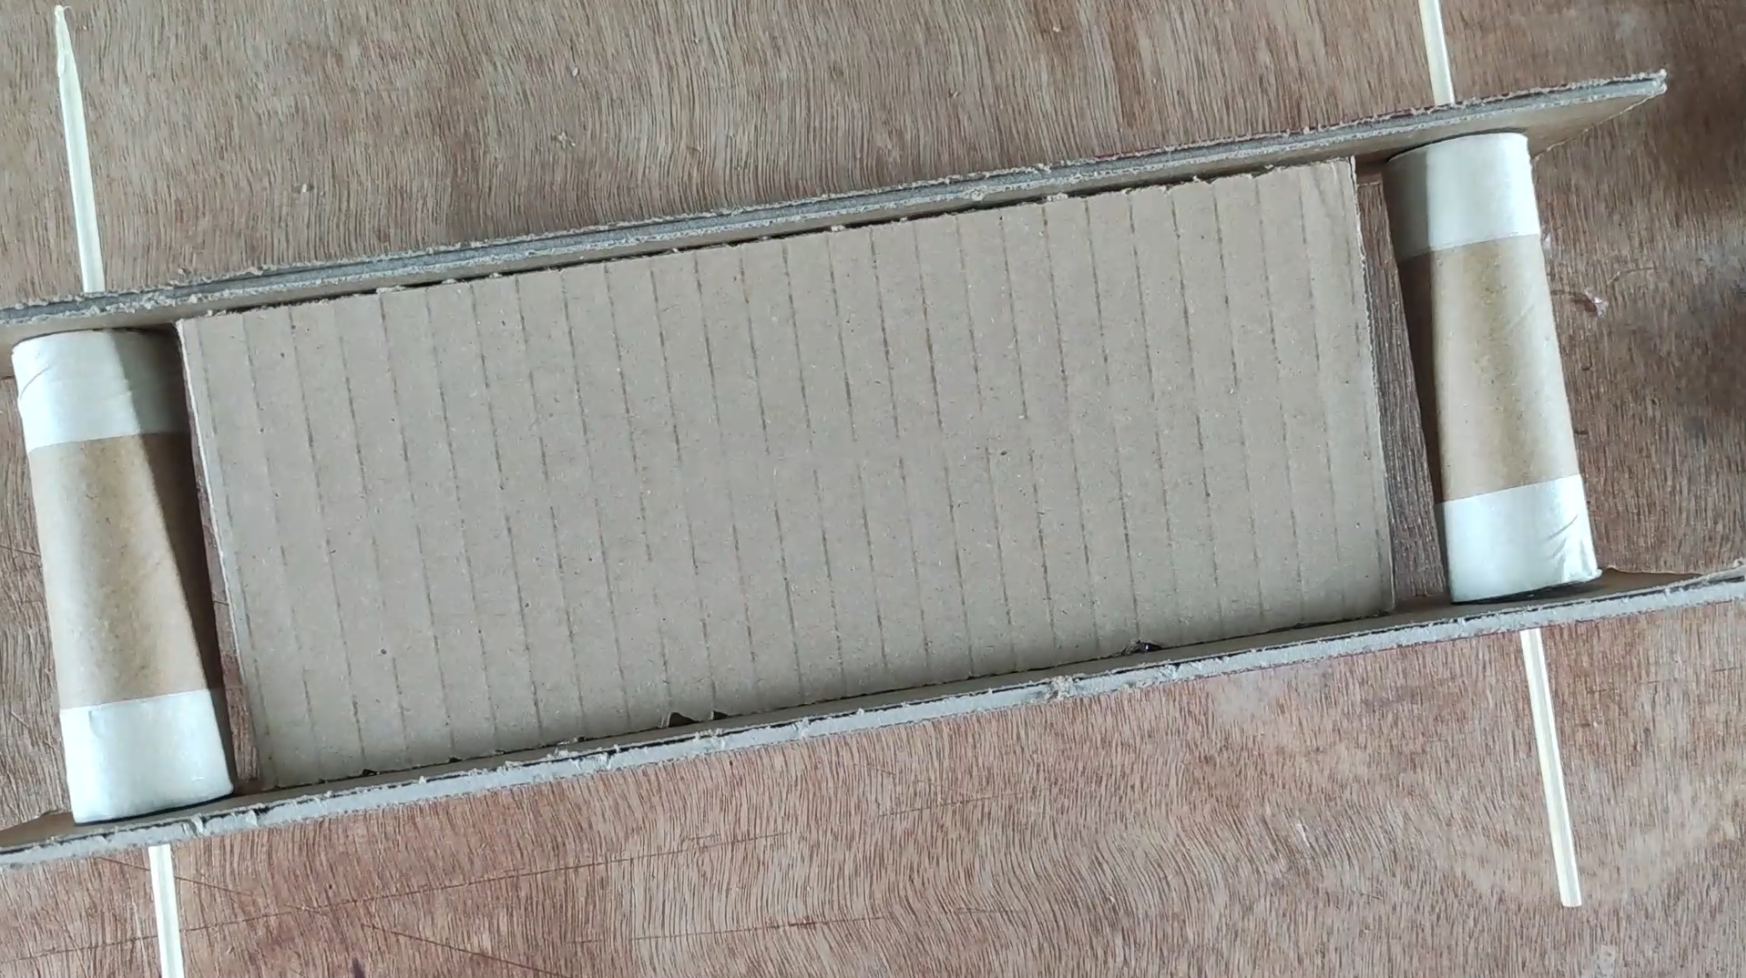
- Cut two rectangular pieces of cardboard equal to your desired length. Mine is 10 inches and this will serve as the sidings of our conveyor belt.
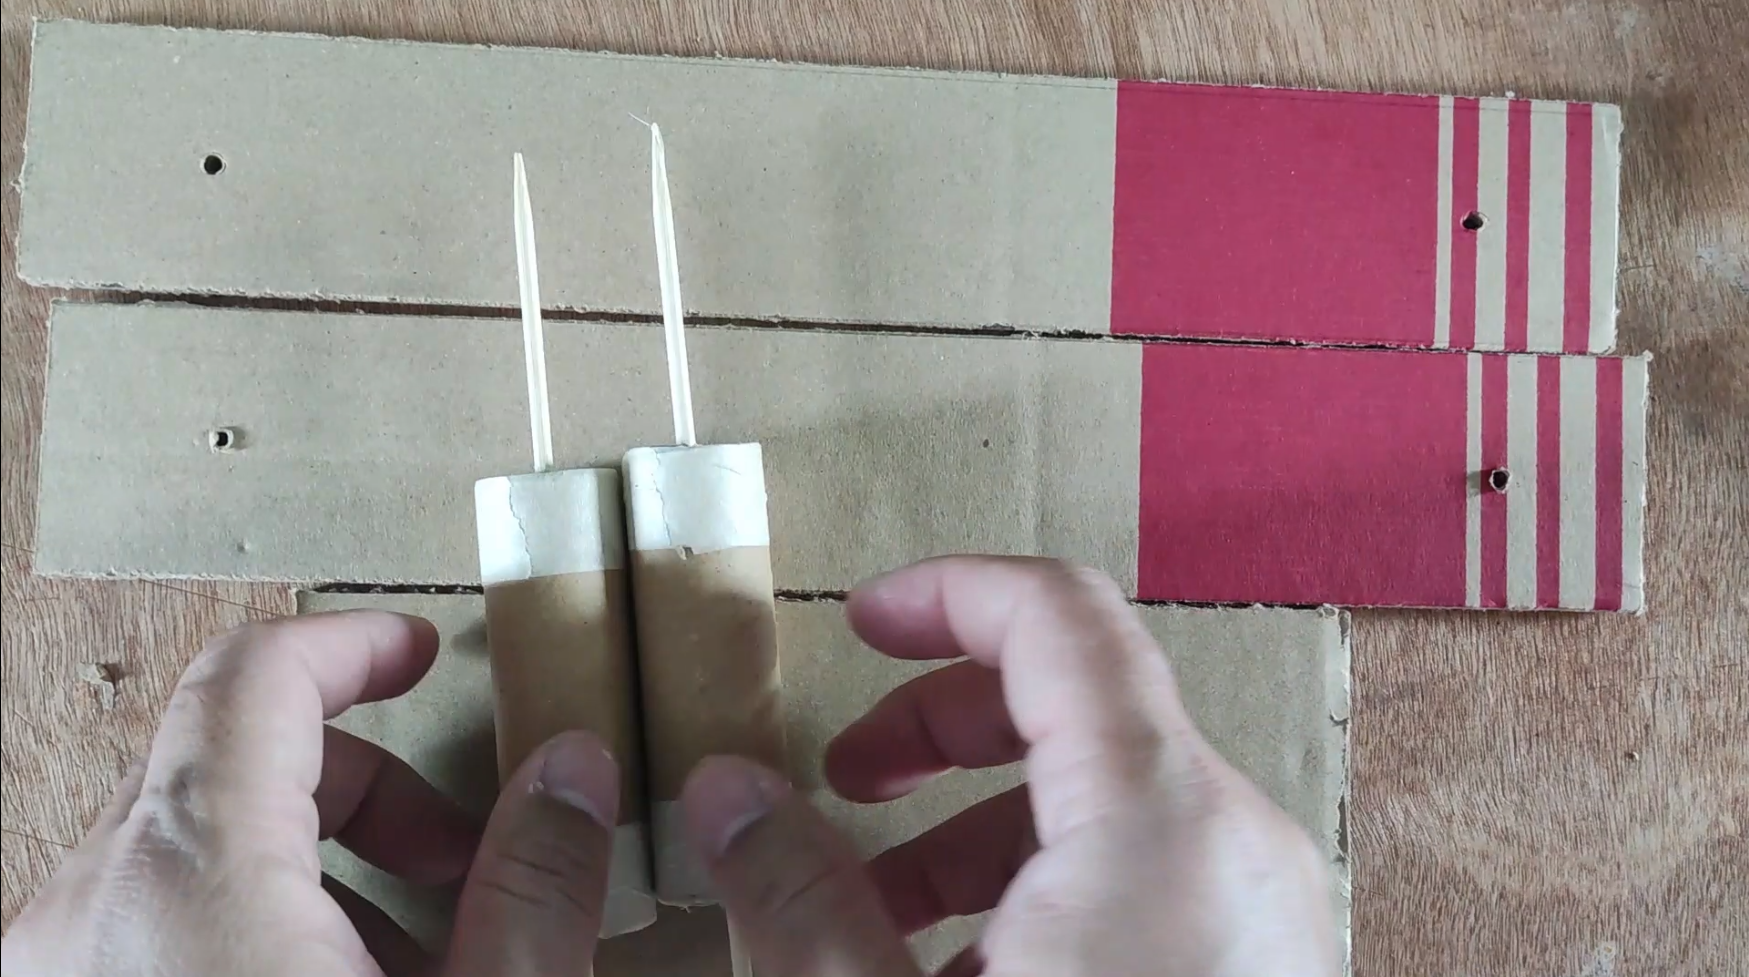
- Draw a line at the center of our rectangular shape sidings and at both ends create a hole using your BBQ sticks or any pointed object.
- Insert the roller at both ends.
- Create another rectangular shape that will serve as glue for our sidings. The width should equal the length of the roller and the length should equal more or less the length of your sidings. Glue it at both sides of the sidings using the line that you drew at the center as a reference.
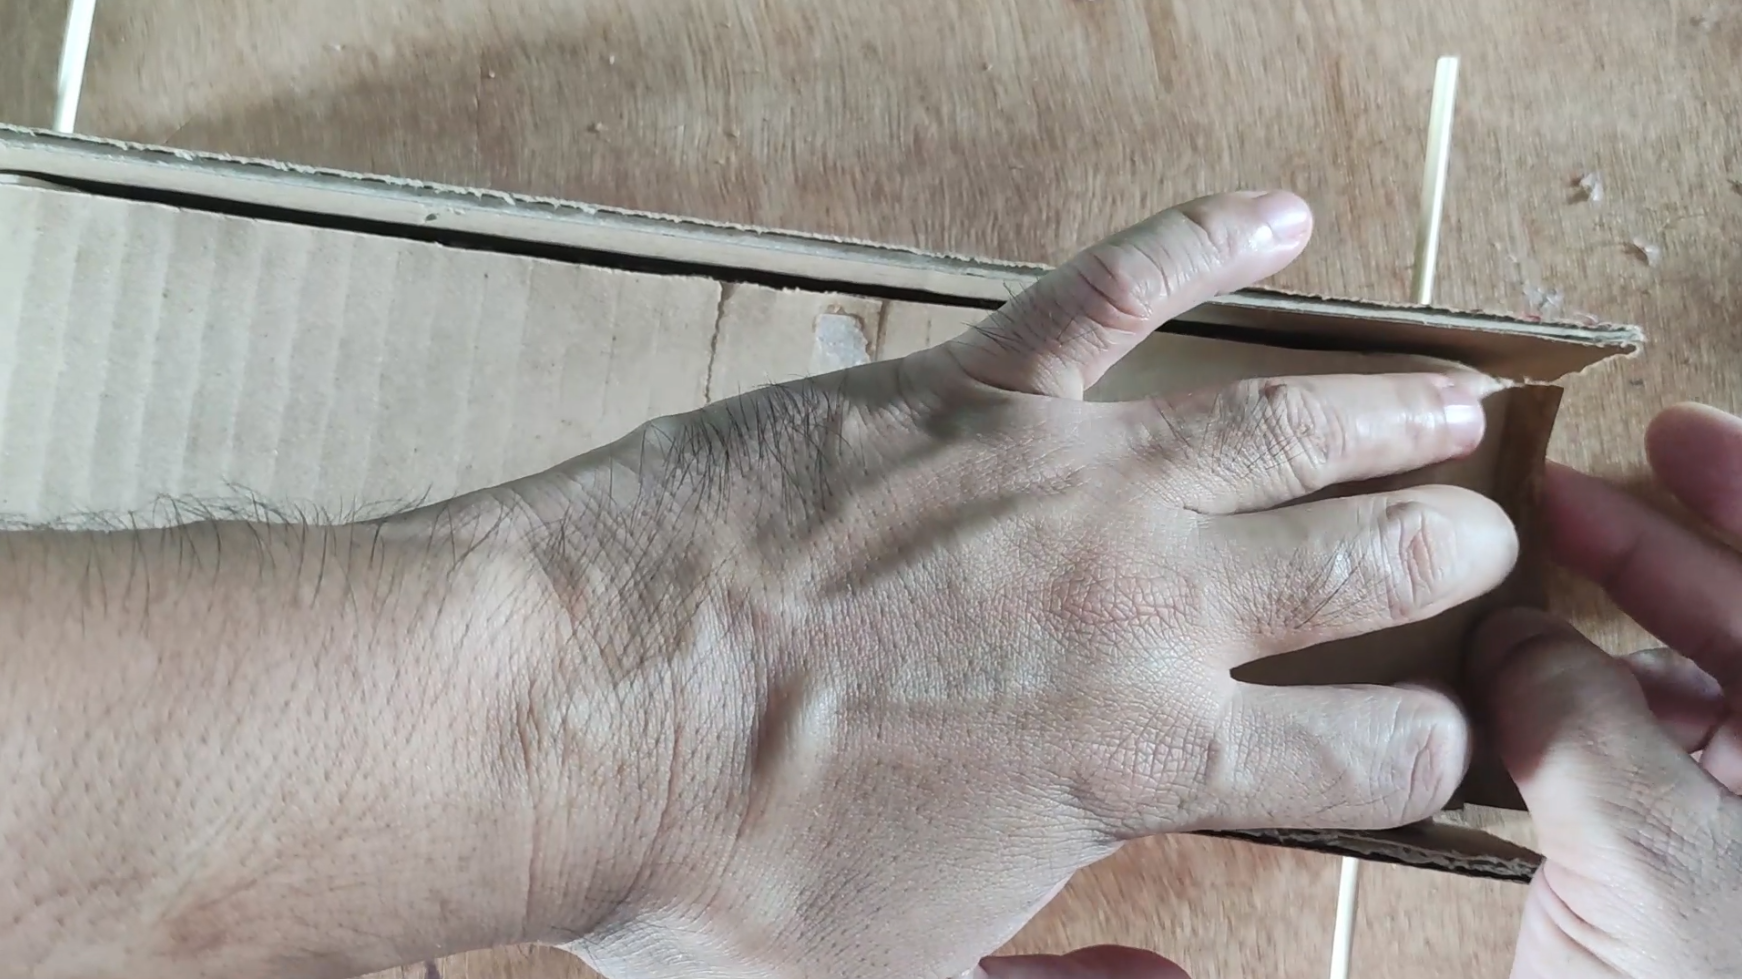
- Measure the length of your conveyor at both ends and using the cardboard, remove the topmost cover of the cardboard. This will serve as our belt. The length of the belt should be equal to the size of our conveyor. If I have 10 inches sidings then probably 20 inches is okay. We will adjust and cut the size later.
- Insert our belt inside our conveyor at both ends of our roller and make sure that it is fitted. If not then adjust accordingly by cutting the edges. Once fit, connect both ends using quick dry glue.
- Check if the conveyor is rolling okay.
- Cut the excess bbq sticks from our roller and place your conveyor on a hard surface. I have used an MDF board but another extra cardboard is fine if you can’t find an MDF board
- Place your Gear Motor on one side in alignment with one of our rollers and using a plastic tube, connect both ends. Use masking tape if your plastic tube does not fit well with your bbq sticks.

- Place your battery pack and connect it to your motor. Check if everything is working okay.
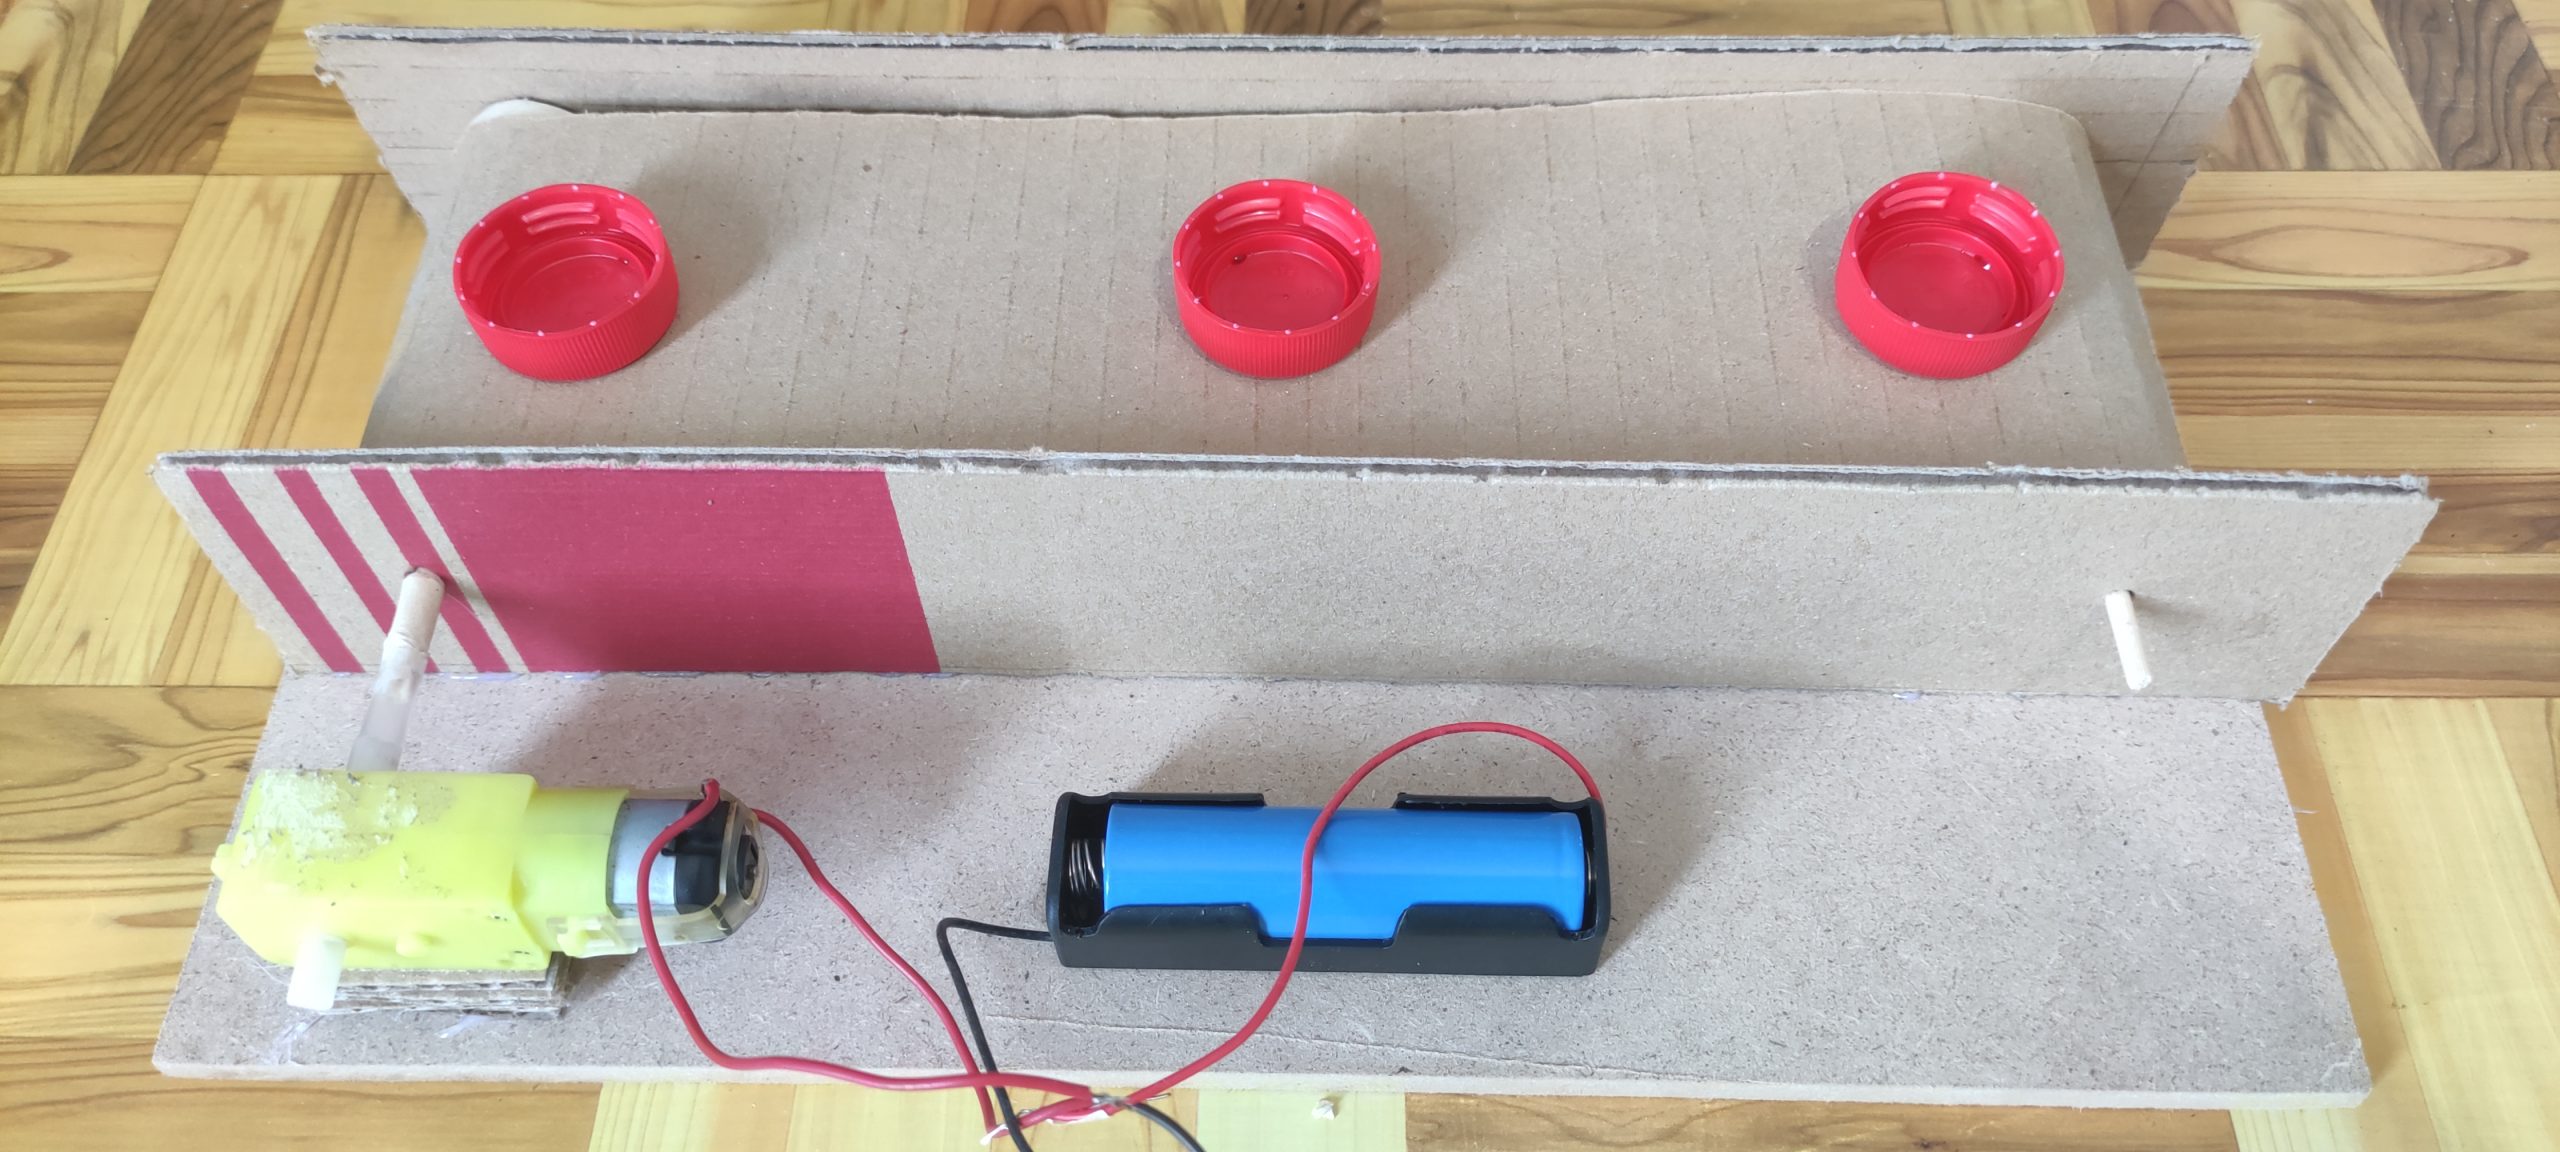
We now have our DIY Cardboard Conveyor Belt. Congratulations!
Wrap Up
I have given you all the materials needed to follow along in creating your DIY Cardboard Conveyor belt. Just follow the steps above for your reference or watch my video if you like.
That’s it. Happy Exploring!
Leave a Reply