
Introduction
This post will discuss how to upload FileSystem Image in your PlatformIO IDE. If your Internet of Things (IOT) project has some custom files that need to be uploaded to your Microcontroller Flash memory then continue reading on.
Why do you need to upload it?
If you are programming a Web Server in either your ESP8266/ESP32 Microcontroller then chances are you have coded HTML (HyperText Markup Language), CSS (Cascading Style Sheets), or Javascript in your projects. This file would then need to be transferred to the Microcontroller Flash Memory thru SPIFFS or LittleFS and loaded later on in your program like the code below.
  server.on("/", HTTP_GET, [](AsyncWebServerRequest *request)
            { request->send(SPIFFS, "/index.html", "text/html", false); });
How to upload files into your Microcontroller FileSystem?
- To upload files in the Microcontroller FileSystem then create a data folder at the root of your project and create the necessary files that you need there.
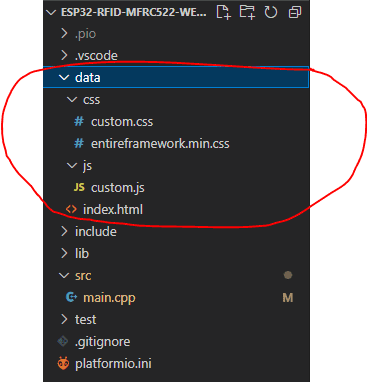
You can arrange your files according to your liking but I highly suggest that you arranged them on a per-file type basis for better maintenance. In my case, I created a separate directory for CSS files and Javascript Files. If you have images or configuration files then you can create them in this folder also.
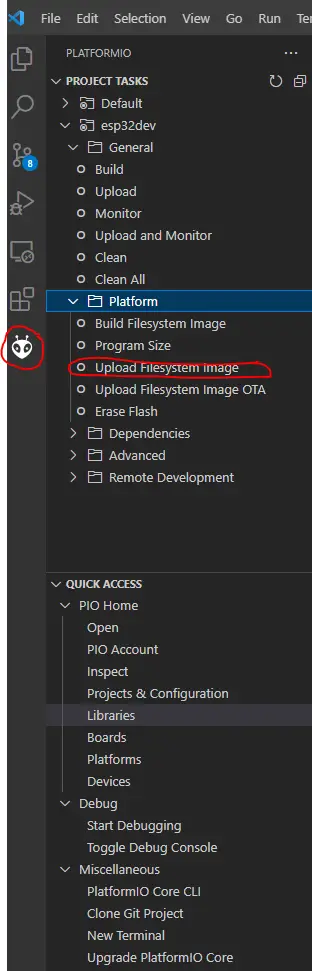
- If you are okay with your folder hierarchy then click the PlatformIO icon and in the project tasks section, select Upload FileSystem Image.
This will open up a terminal and will upload your files into the MicroController Flash Memory Chip. If everything goes well then you should see the following Success Message displayed on the terminal. Congratulations, you now have successfully uploaded your files into the MicroController FileSystem!

- If you are okay with your FileSystem Image Upload then you can now begin uploading your sketch by clicking Upload and Monitor in the Project Tasks section.
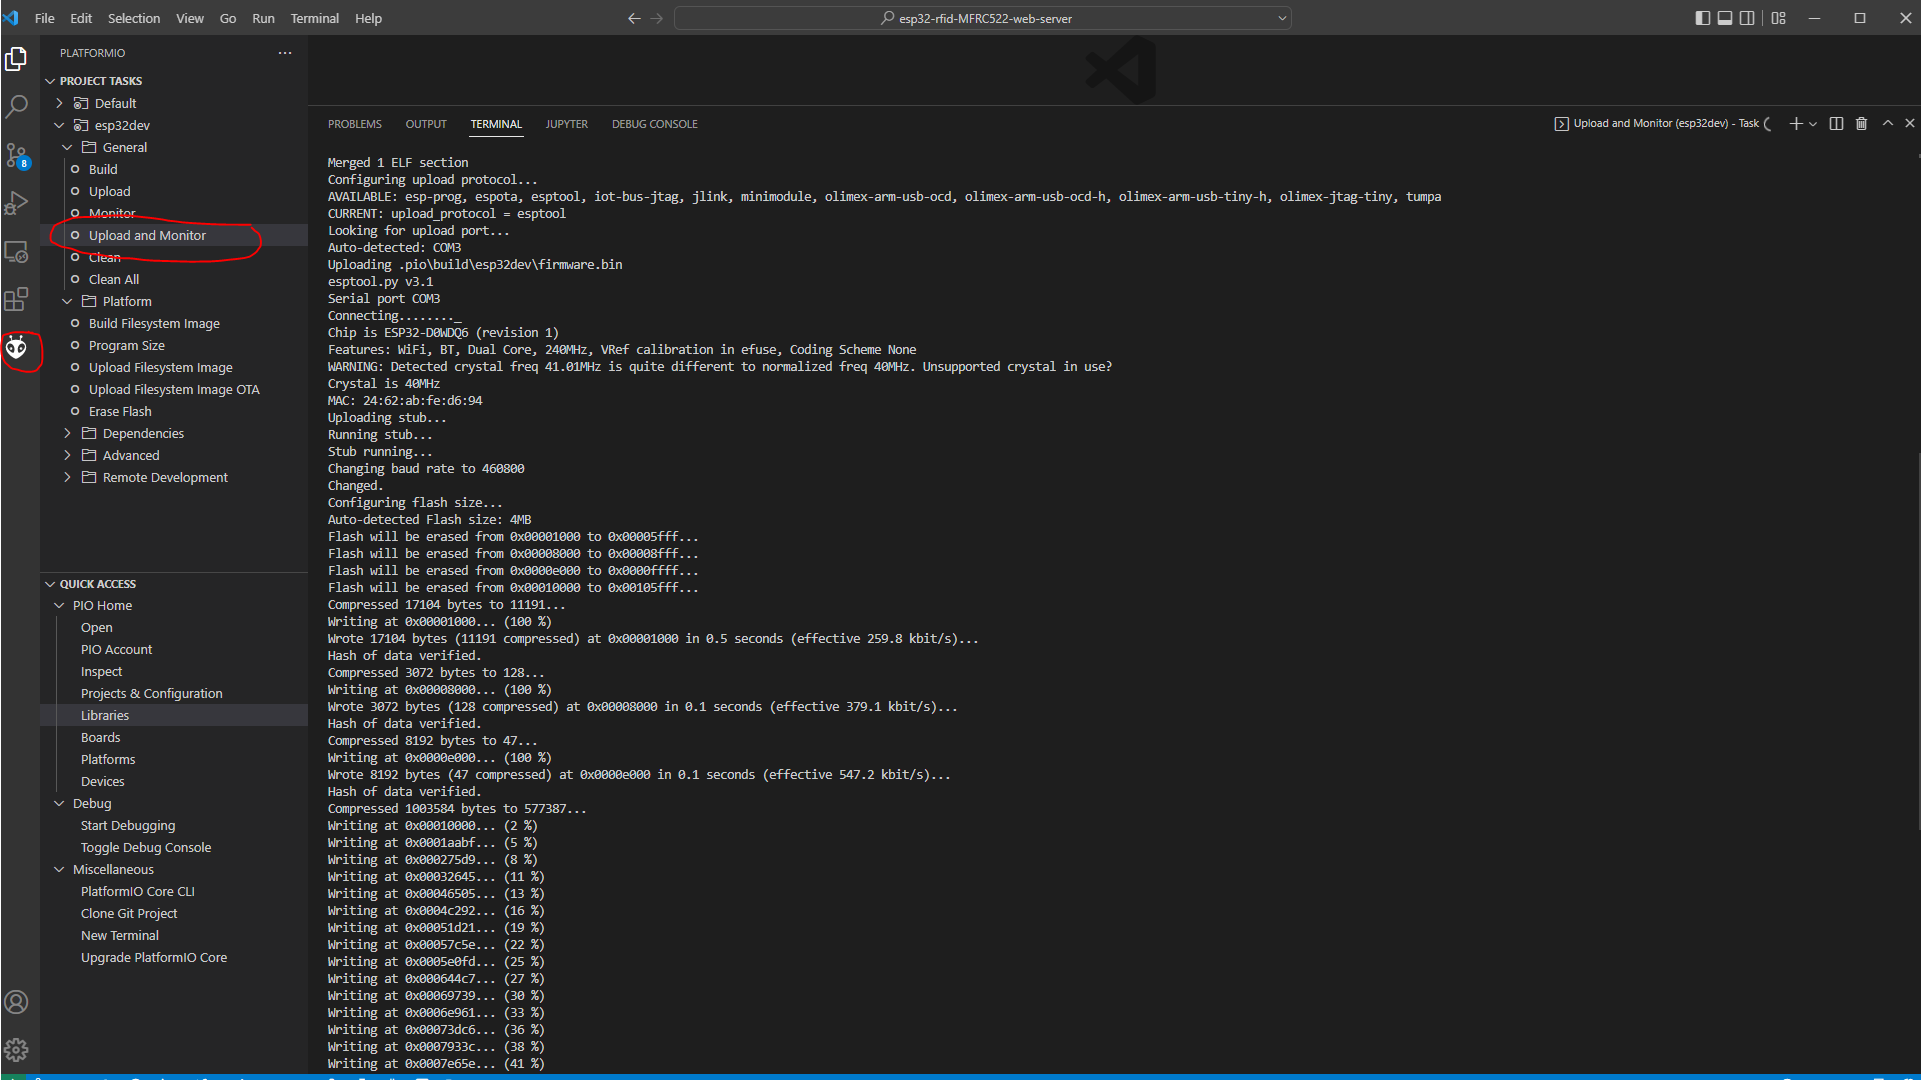
This will now open another terminal and wait for your Upload to be successful. It will then open a Serial Monitor afterward.
We are done with the PlatformIO Upload FileSystem Image steps!
Issues
If you encounter an error during uploading like “Timed out waiting for packet header” then please take a look at the solution in A fatal error occurred: Failed to connect to ESP32: Timed out waiting for packet header.
Wrap up
We have discussed the steps on how to upload your custom files in your microcontroller using PlatformIO in this post. I hope you are going to build something wonderful!
Happy Exploring!
Leave a Reply