Introduction
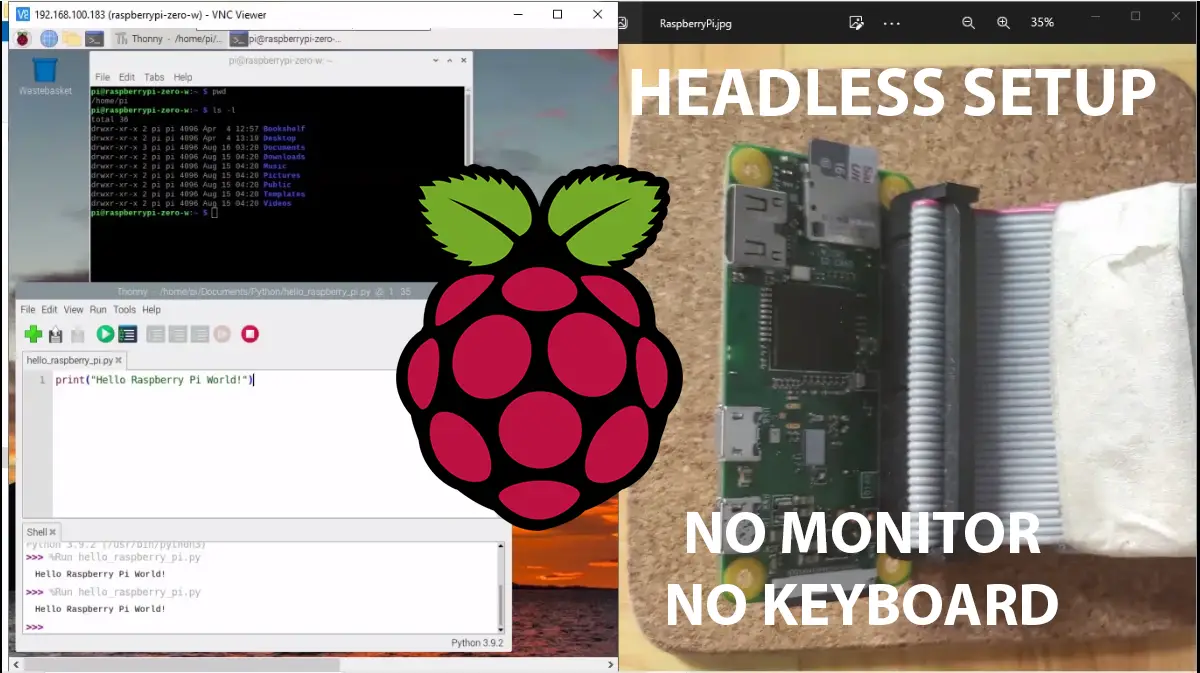
In this post, we are going to setup the Raspberry Pi in Headless Mode wherein you won’t need any external monitor or keyboard needed to attach to it. In headless setup mode, our computing device which in this case is the raspberry pi does not have any peripheral attached. We are going to connect to it remotely and set the required configurations.
We are going to install the latest Raspberry Pi OS( formerly Raspbian) in it and be able to connect thru it remotely thru SSH and using VNC Viewer.
If you like to follow along with video then I got you covered also.
Prerequisites
Before we start the setup of our Raspberry Pi in headless mode then we need to prepare some supplies to follow along with this post.
I am using Windows here as my workstation but you can use a Linux or Mac as well to follow along with this exercise. The following are the supplies needed in this post.
- Raspberry Pi (I used Raspberry Pi Zero W)
- SD Card ( prefereably 32 GB, I used 16 GB in my case)
- Card Reader
- Power for your Raspberry Pi (Official or Mobile phone charger for Raspberry Pi Zero)
- Your workstation or laptop where we will remotely connect with your raspberry pi
Once everything is set then we could proceed with the setup procedure.
Using the Raspberry Pi Imager
Insert your SD card in your card reader and attached it to your workstation or laptop.
Head over to the official raspberry pi software site and download the Raspberry Pi Imager according to your workstation OS.
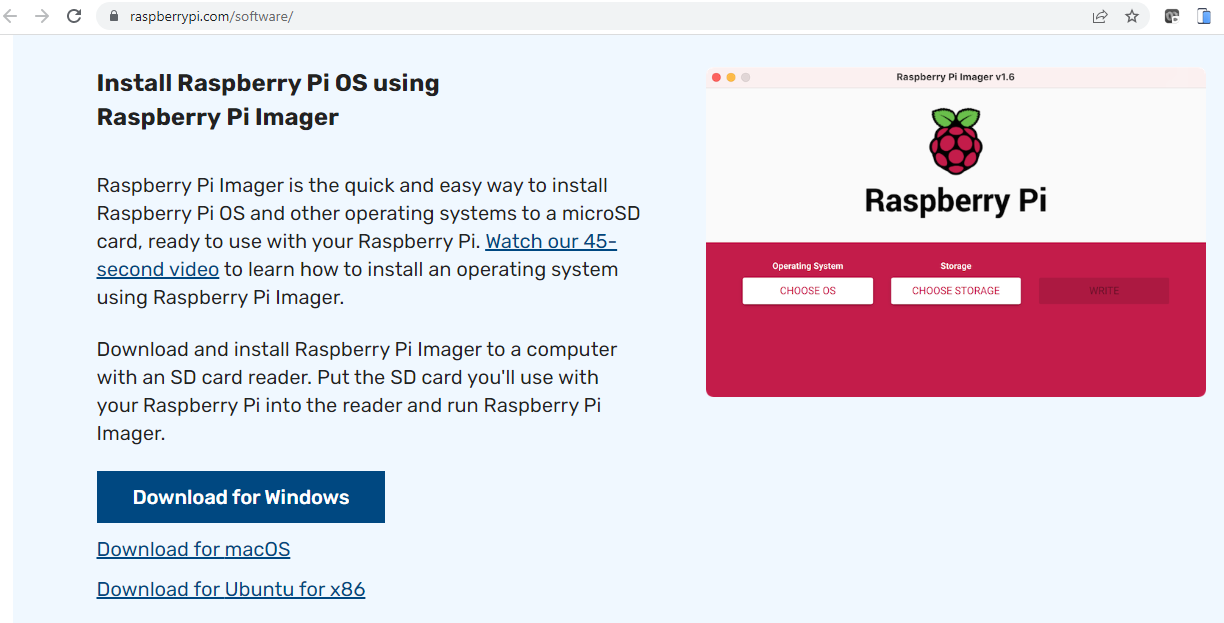
Note we can manually install operating system image in that link also by scrolling down but that is beyond the scope of this post.
Once downloaded install it and run the application. On the initial screen, select the Operating System. Mine is just the default value. Select also your Storage by clicking the choose storage button and point it to your SD Card.
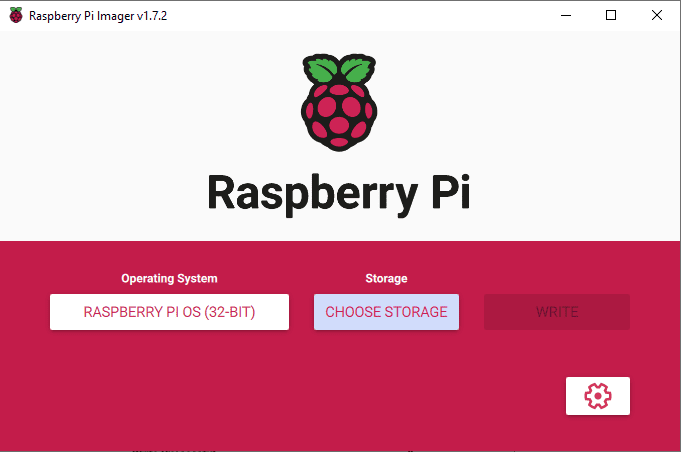
Click the gear Icon at the lower right side of the screen. We will manually configure several setup so that it would minimize further our setup time.
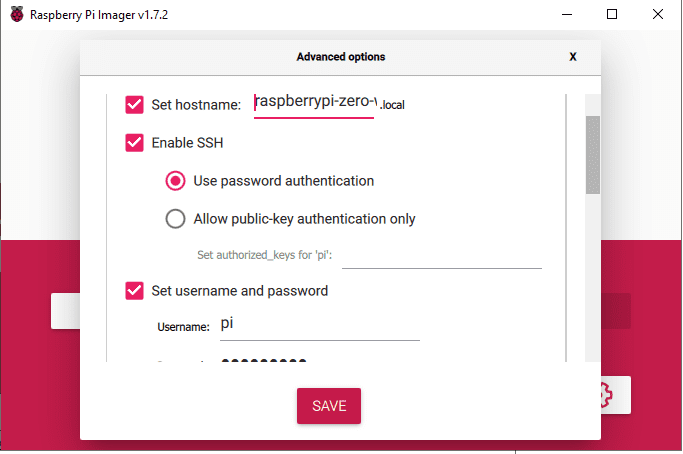
The following are the setup that I did.
- Set hostname – (Mine is raspberrypi-zero-w)
- Enable SSH – Check
- Use Password Authentication
- Set Username and Password – Check
- Username = “pi” and Password is according to you
- Configure Wireless Lan and set the Wifi Password
- Set your Locale if you want
Note: Don’t set your Wifi into any 5G as I had problems connecting to it.
Click the Write button once everything is OK with you. This might take some time so let it finished accordingly. If everything is okay then we would see the following popup screen.
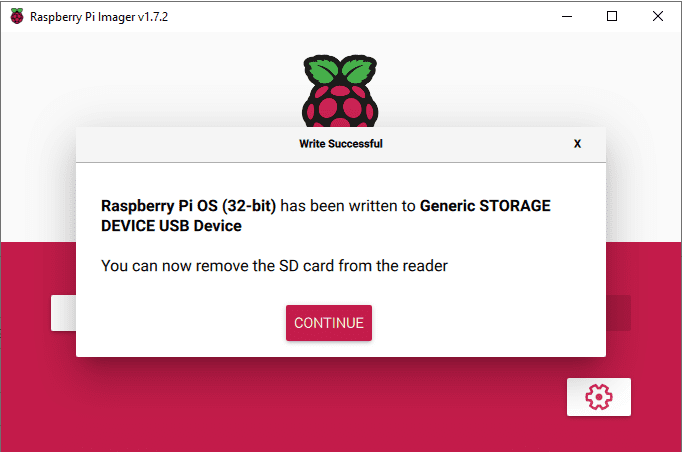
Eject your SD Card and transfer it to your Raspberry Pi SD Card slot.
Powering Raspberry Pi
I am using Raspberry Pi Zero W in this post so I am using an external mobile phone charger with constant current. Avoid connecting it thru your laptop as the current might not be enough to support it and you might encounter some issues with it.
If you are using other version of Raspberry Pi then power it with the recommended power plug.
Get Raspberry Pi IP Address
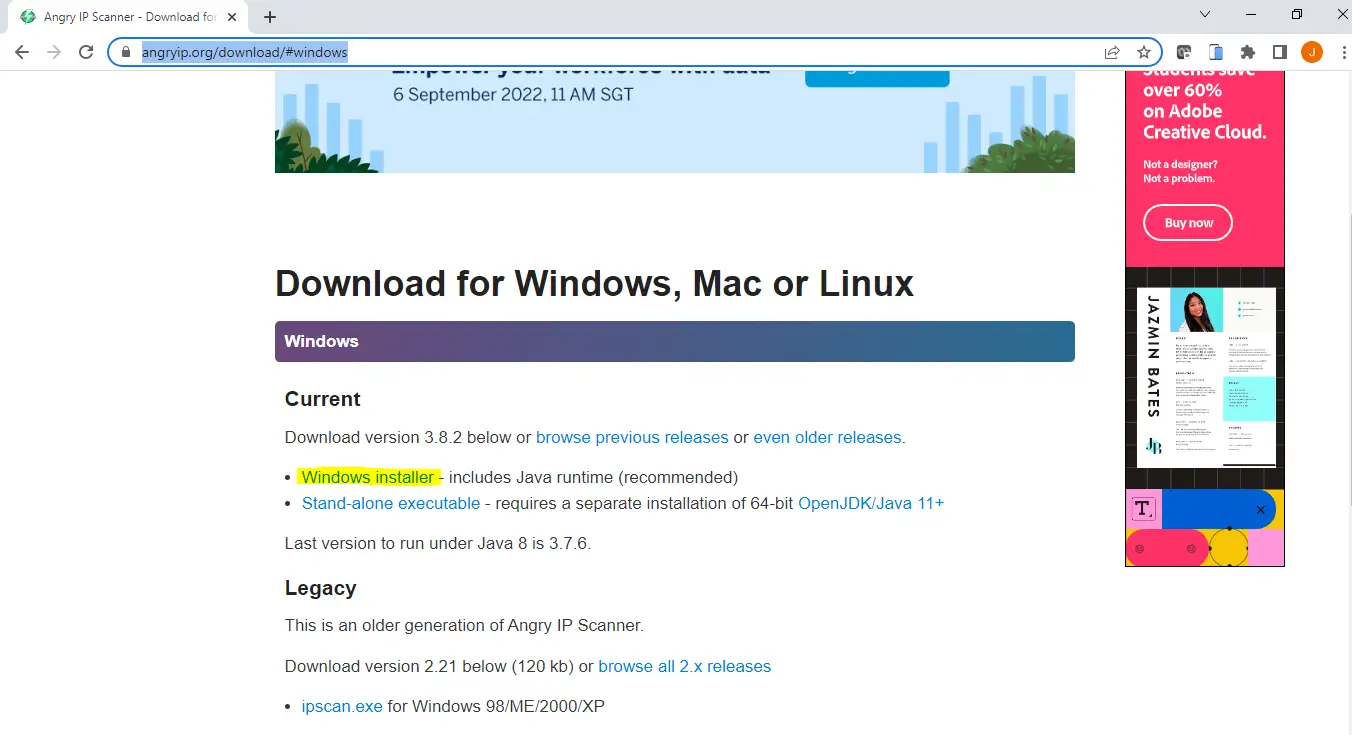
Once you have powered up your raspberry pi then we need to figure out the IP Address that will be assigned by your network to it. To do this we will need a network scanner tool like the AngryIP. Download the executable depending on your operating system and then install it by following the recommended setup.
Once installed, run the executable. Note that you need to be in the same wifi address as your raspberry pi for you to find it. Let it finished the scanning process and then click the hostname column and sort it. You should be able to find it as this is the hostname that we have setup in our raspberry pi imager. Yay!
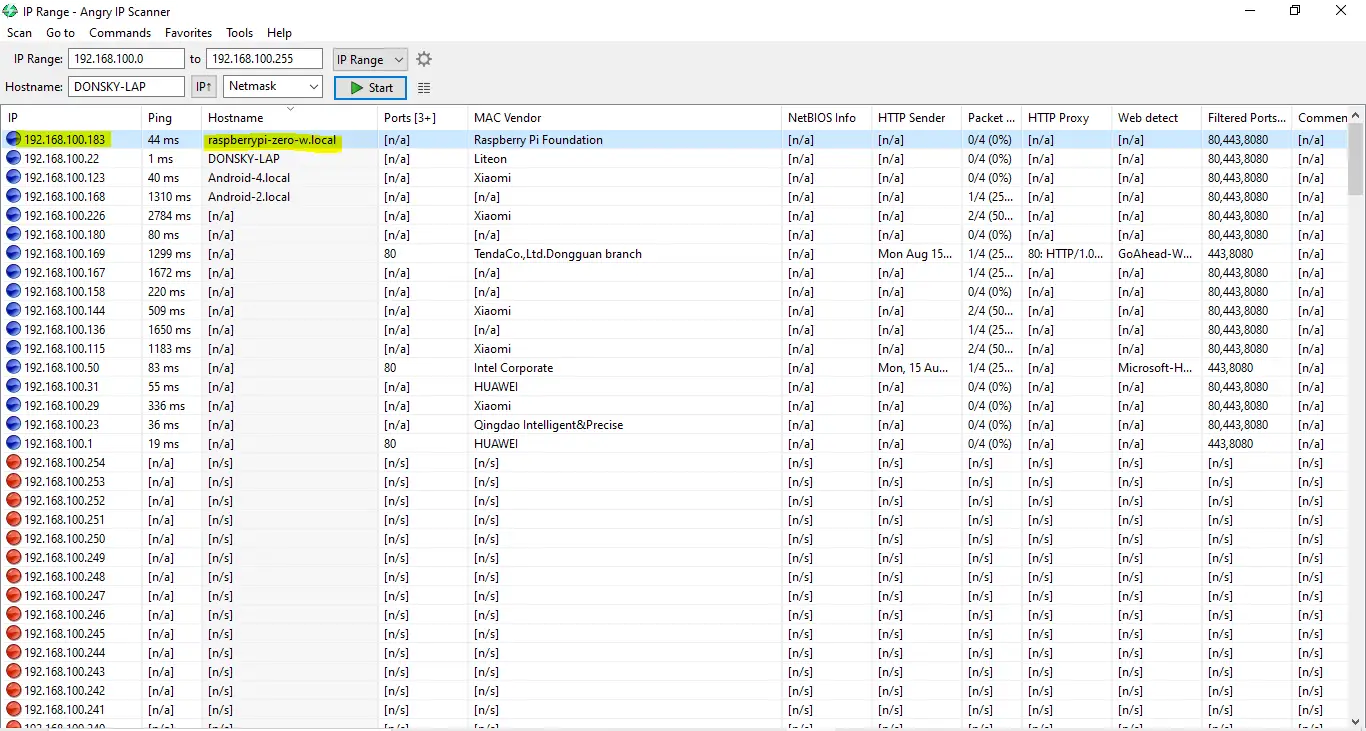
Take note of this IP address as we will be needing it in the next steps.
Connect using SSH – What makes this “headless”
SSH or Secure Shell or Secure Socket Shell is a network protocol that will allow users to communicate over unsecured network. We will be utilizing SSH in connecting to our raspberry pi. As such we will need ssh client that will allow us to communicate with our Raspberry Pi.
SSH allows us to remotely connect to our Raspberry Pi and setup the necessary configurations without the need for keyboard or monitor. This connection what makes our headless setup possi
We can use the following two clients in connecting with our Raspberry Pi
- Putty
- Command Prompt or Terminal
Connect by Putty
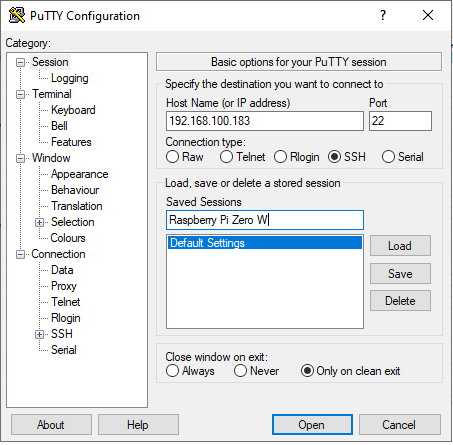
Download putty from this link. Once downloaded, then just set the following information.
- HostName or IP Address
- Saved Sessions
Click the save button then select the session name in this case “Raspberry Pi Zero W” then click the open button.
Input your username such as “pi” and your password that you set during the setup of the Raspberry Pi OS.
Once you see the image above then it means that you have successfully connected with your Raspberry Pi. Congratulations!
Connect by Terminal or Command Prompt
Another option that you can use is by using the terminal or command prompt when using windows. In later release of Windows, the SSH command is included by default so there is no need to install any other software.
The command is simply
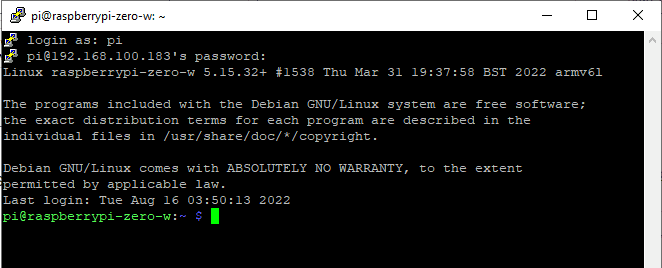
ssh pi@192.168.100.183Then you input your password. If all goes well then you should be able to see that you were login successfully in your raspberry pi.
A sample of ssh login using command prompt is like the image below.
C:\Users\DONSKY>ssh pi@192.168.100.183
pi@192.168.100.183's password:
Linux raspberrypi-zero-w 5.15.32+ #1538 Thu Mar 31 19:37:58 BST 2022 armv6l

The programs included with the Debian GNU/Linux system are free software;
the exact distribution terms for each program are described in the
individual files in /usr/share/doc/*/copyright.

Debian GNU/Linux comes with ABSOLUTELY NO WARRANTY, to the extent
permitted by applicable law.
Last login: Mon Aug 15 12:59:10 2022 from 192.168.100.22
pi@raspberrypi-zero-w:~ $ pwd
Connect Using VNCViewer
In this step, we are going to connect to our Raspberry Pi remotely thru VNC Viewer. But before we do that let us enable the VNC Viewer in our raspberry pi first.
Enable VNC Viewer First
Connect with your raspberry pi first either thru putty or command prompt. Type in the following command.
sudo raspi-configSelect Interface Option
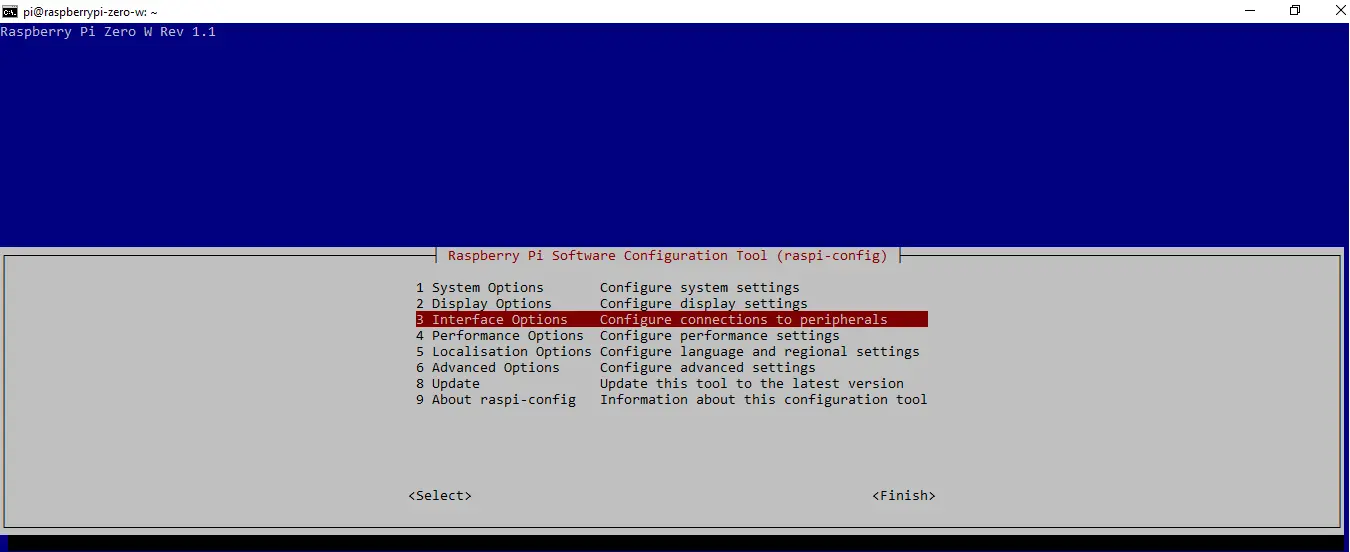
Select VNC and Click enter

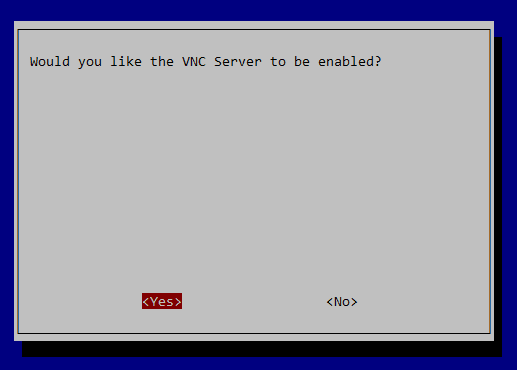
When the prompt opens up, select Yes.
A popup message will display that the VNC server is now enabled in our Raspberry Pi.
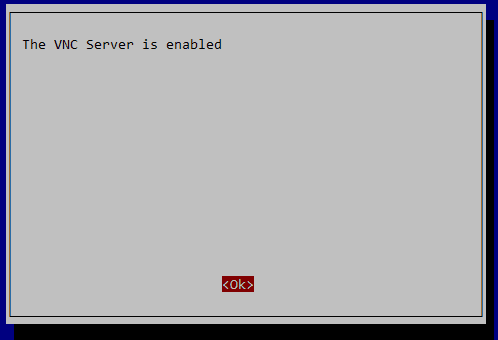
Select Finish then reboot our raspberry pi. Wait for your raspberry Pi to boot up properly by connecting to it before you proceed with the next steps.
sudo rebootConnect using VNCViewer
Download VNC Viewer from here. Select the appropriate installer depending on your workstation OS. Once downloaded, install it with the default values and then launch the App.
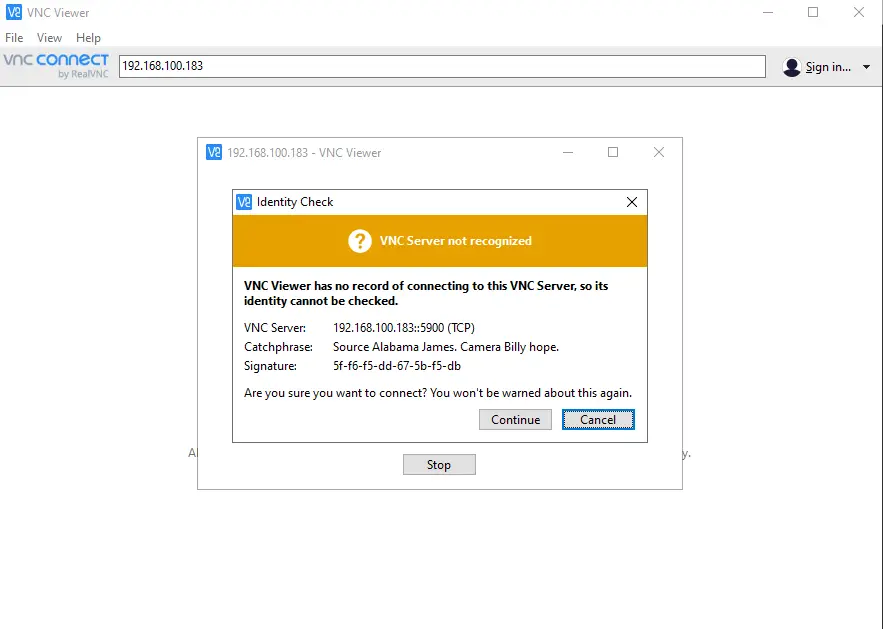
Type in the IP Address of your raspberry pi then click Sign in. If this is the first time that you are connecting with it then a prompt like below would show, just accept it and click Continue.
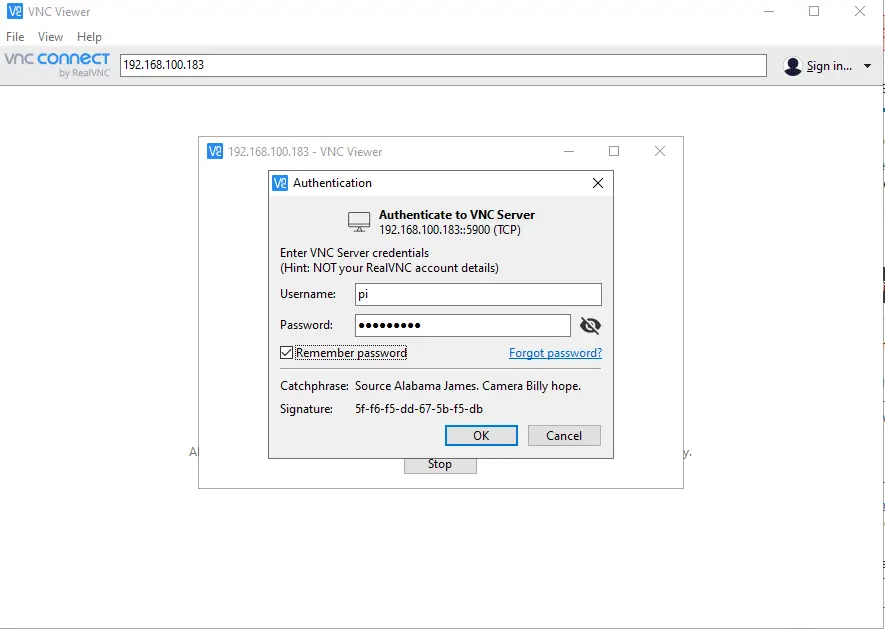
Enter your Username and Password that we setup in the Raspberry Pi Imager and click the Remember Password option. Click OK next.
If everything goes well then we should be able to see the Raspberry Pi desktop load in our VNC Viewer.
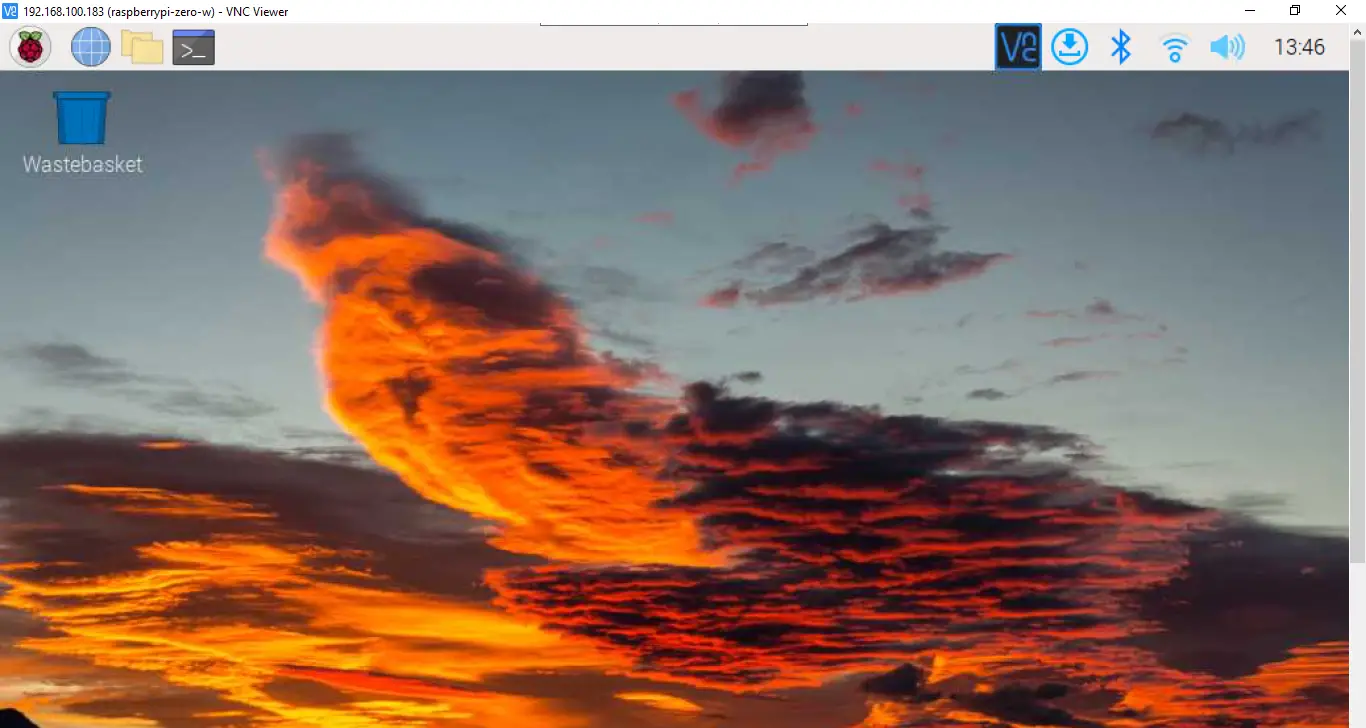
Once you made it here then congratulate yourself as you have been successful in setting up your raspberry pi. 🙂
Further Steps
You can further do some additional setup like setting up your resolution et. al. but that is beyond the scope of this post.
Wrap Up
In this post we have successfully setup your Raspberry Pi in headless mode without the need to attach external keyboard or monitor to it. We used VNC Viewer to connect remotely to it .
Now we are ready to start developing cool Internet Of Things (IOT) project with this awesome single board computer.
Happy Exploring!
Leave a Reply