Introduction
Using Visual Studio Code or VSCode Integrated Development Environment (IDE) in web development really speeds up your project development. What is more awesome about this IDE aside from its built-in code assist feature is the presence of a multitude of extensions that would even help you in your task. This post will talk about using the Live Server extension and how to get started using it.
If you want to see this project in a video format then please see below. You can also watch this on my YouTube channel.
Why use Live Server?
Testing changes done on your HTML/CSS/Javascript is a very cumbersome task, especially for web developers. Luckily, Live Server is a cool VSCode extension that will allow you to see your changes in your browser in an almost real-time fashion as you do your changes.
The Live Server extension sort of creates a local web server for you where it would host your web files such as HTML/CSS/Javascript
Prerequisites
You only be needing your laptop or desktop workstation in order to follow along with this post with sufficient memory. Basic knowledge of HTML/CSS/Javascript as I won’t be discussing these web technologies here.
You also should have basic knowledge of how to use VSCode and
I am using a Windows PC as my workstation but the following steps are applicable to a Linux or Mac. I have installed Chrome as my default browser as well.
Steps on how to install Live Server
First, download the Visual Studio Code or VSCode from this link. Select the appropriate installer for your operating system and install it accordingly.
Related Content:
Install Visual Studio Code or VSCode on Windows
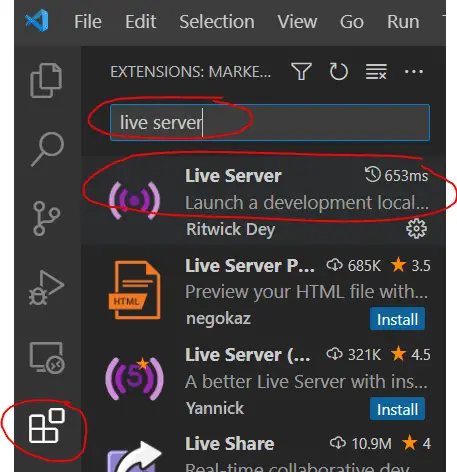
Once the VSCode is installed then click the Extensions tab and search for Live Server then click the Install button.
How to use Live Server in VS code?
Select a folder that will serve as the root of our application and open it in your Visual Studio Code IDE.
Testing HTML files in Live Server
In the file explorer, create a new file called index.html and place the following code. This is just a basic HTML starter template code with a title and a message called “Hello Live Server“
<!DOCTYPE html>
<html lang="en">
  <head>
    <meta charset="UTF-8">
    <meta name="viewport" content="width=device-width, initial-scale=1.0">
    <meta http-equiv="X-UA-Compatible" content="ie=edge">
    <title>Live Server Starter Guide</title>
  </head>
  <body>
    <h1>Hello Live Server</h1>
  </body>
</html>
To see how our web page will look in our browser then just click the “Go Live” button at the status bar of VSCode. You can find this in the lower right-hand corner of your IDE.

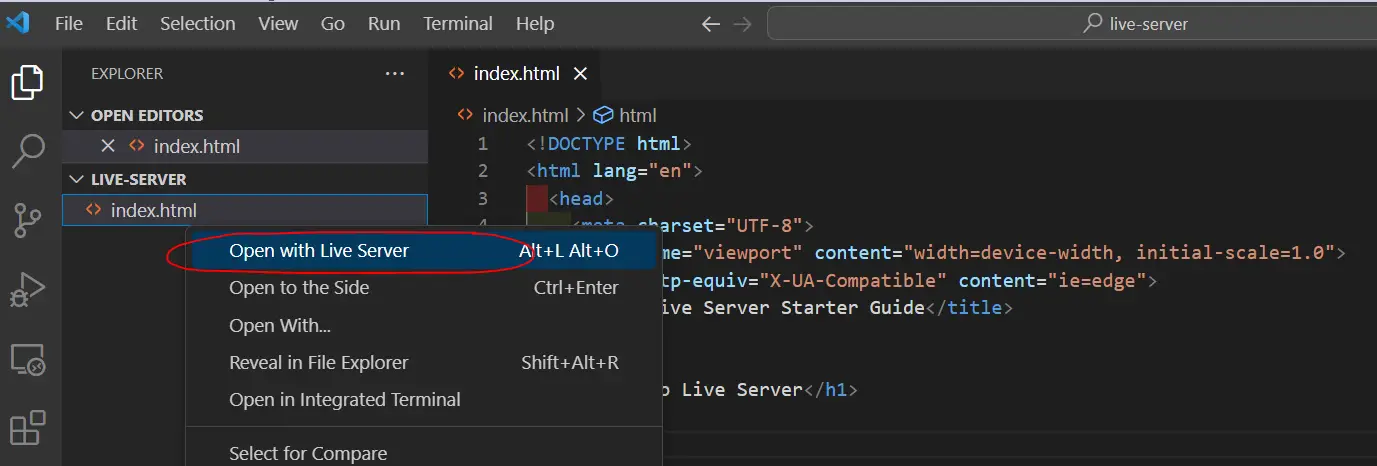
Another option is to right-click the file and “Open with Live Server“
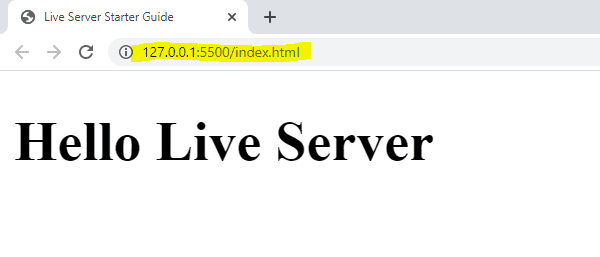
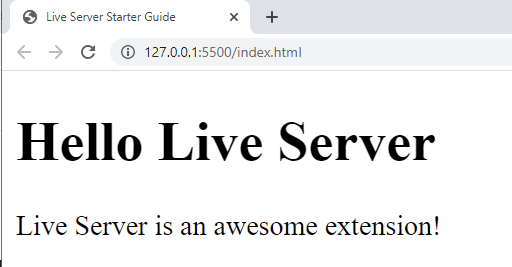
If everything goes well then you should be able to see the following message displayed on your browser. Don’t close this browser while you are doing this post as this browser user interface would get updated automatically as we do more coding.
To see how powerful this VSCode Live Server extension is then let us try adding a new paragraph to our HTML starter page and see what will happen.
Open your index.html file again and add a new paragraph below our H1 tag. Your code should look like below.
<!DOCTYPE html>
<html lang="en">
  <head>
    <meta charset="UTF-8">
    <meta name="viewport" content="width=device-width, initial-scale=1.0">
    <meta http-equiv="X-UA-Compatible" content="ie=edge">
    <title>Live Server Starter Guide</title>
  </head>
  <body>
    <h1>Hello Live Server</h1>
    <p>Live Server is an awesome extension!</p>
  </body>
</html>
If we now take a look at our initial browser then you would see that our web page is now updated.
If you can put your VSCode and the browser side by side then you would notice the magic of Live Server.
Testing CSS with Live Server
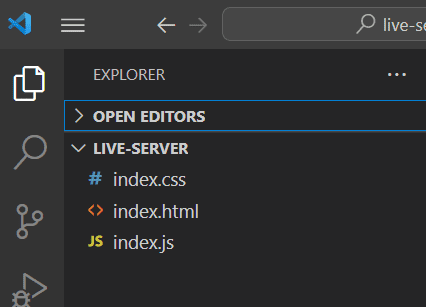
Next, we will try adding CSS (Cascading Style Sheet) and Javascript code in our index.html file. To do that, create new files called index.css and index.js in your VSCode File Explorer. We will see how helpful Live Server is when we are trying to stylize our page through CSS or add additional logic with Javascript.
Edit your index.html page and add a hyperlink to our index.css and index.js files. Your index.html page should now look like the one below.
<!DOCTYPE html>
<html lang="en">
<head>
<meta charset="UTF-8">
<meta name="viewport" content="width=device-width, initial-scale=1.0">
<meta http-equiv="X-UA-Compatible" content="ie=edge">
<title>Live Server Starter Guide</title>
<link rel="stylesheet" href="index.css">
</head>
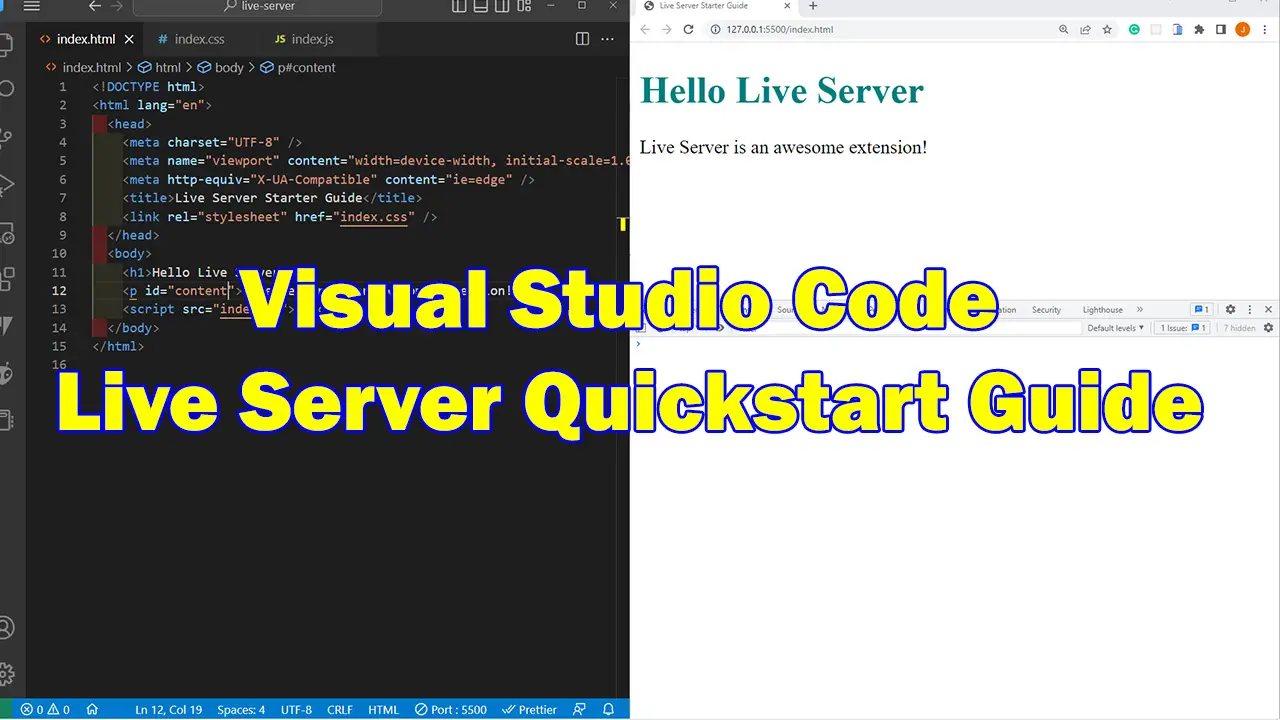
<body>
<h1>Hello Live Server</h1>
<p id="content">Live Server is an awesome extension!</p>
<script src="index.js"></script>
</body>
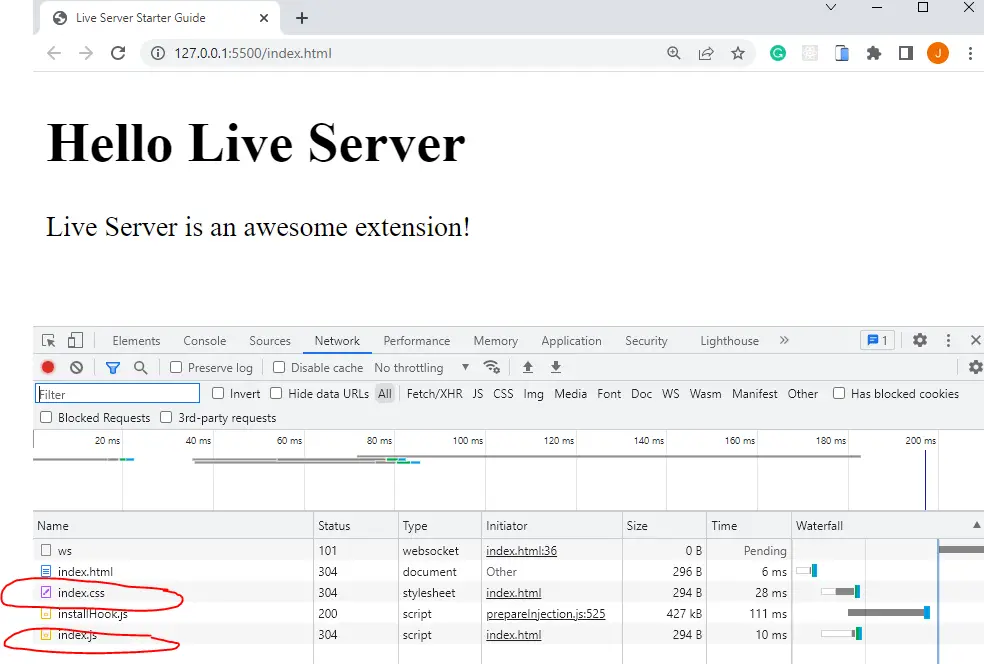
</html>If you check your browser developer tool now then you will notice that the two files were automatically downloaded. Cool isn’t it?
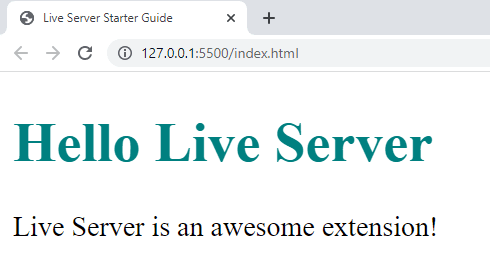
Add the following code to your index.css file and we will change the color of our H1 tag element.
h1{
    color: teal;
}
This would automatically change the color of our H1 tag element.
To see this in action then please see the small video below.
Testing Javascript with Live Server
Open your index.js file and we are going to change the content of our paragraph. What we are doing here is adding an event to the “load” event of our page and changing the content of the paragraph inside the callback function.
window.addEventListener("load", (event) => {
console.log("Onload event!");
document.getElementById("content").innerHTML =
"Yes, Live Server is really awesome!!!";
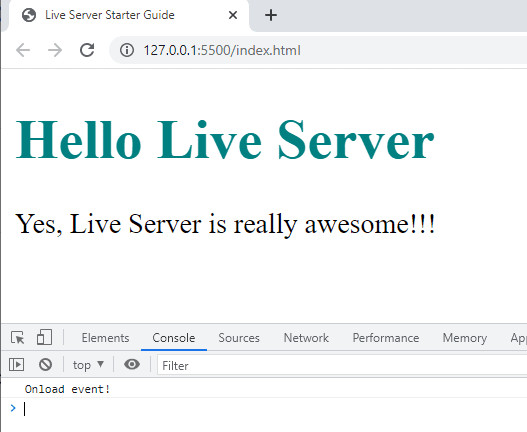
});Your webpage should now look like this when it reloads.
To see this in action please look below.
How to close Live Server in VS Code?
If you are done with your editing and you want to close the Live Server then just click the icon with the message “port: 5500” at your status bar.

How to run multiple HTML files in Live Server VSCode?
If you have multiple files that you would like to run then just right-click on the file and click the “Open with Live Server” link. This will open a new browser that will load your new page.
Issues
My Live Server browser is not showing my web page
If your browser does not open up and show your web pages then try to close your browser and retry stopping and starting your Live Server.
Wrap Up
Live Server extension is an excellent tool that you can use to test out your web development changes on the fly. It will allow you to see how the changes in your HTML structure, CSS styling classes, and Javascript HTML DOM Manipulation affect your overall page. This would surely speed up your project development together with the code assist features of Visual Studio Code.
Happy Exploring!
Support Me!
I love sharing what I know and hopefully, I was able to help you. Writing helpful content takes so much time and research. If you think you like my work and I have managed to help you then please consider supporting my channel. I would be very grateful and would boost my confidence that what I am doing is making a big change in the world. (No Pun Intended!) 😉
Become a Patron!
Leave a Reply