
Introduction
This post will discuss installing MicroPython in an ESP32 MicroController Unit (MCU) and the steps to download the appropriate firmware. The steps outlined here are applicable as well in ESP8266 devices.
If you want to see the steps in a video format then please take a look below or watch it on my YouTube channel.
Prerequisite
I am using the following components and tools in this post.
- ESP32 ( I used Generic ESP32s) – Amazon | AliExpress | Bangood
- Breadboard – Amazon | AliExpress | Bangood
I am using Windows PC for my personal setup.
Steps in flashing the MicroPython firmware in your ESP32
Plugin your ESP32 module into your laptop or workstation. If your laptop or workstation was able to detect the device then it means that the USB driver was installed already. If not then proceed to download the USB driver for it in the next section.
Note: If you are using Windows PC then you can check the Device Manager and the Ports list and verify the COM port assignment of your ESP32.
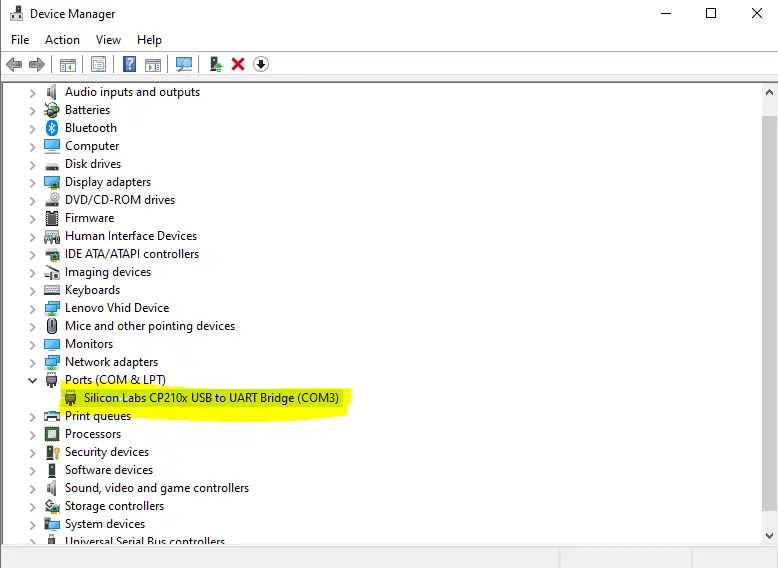
What COM Port is my ESP32 MicroController using? Using the image above then it is COM3. We will be using this in a later step so take note of it.
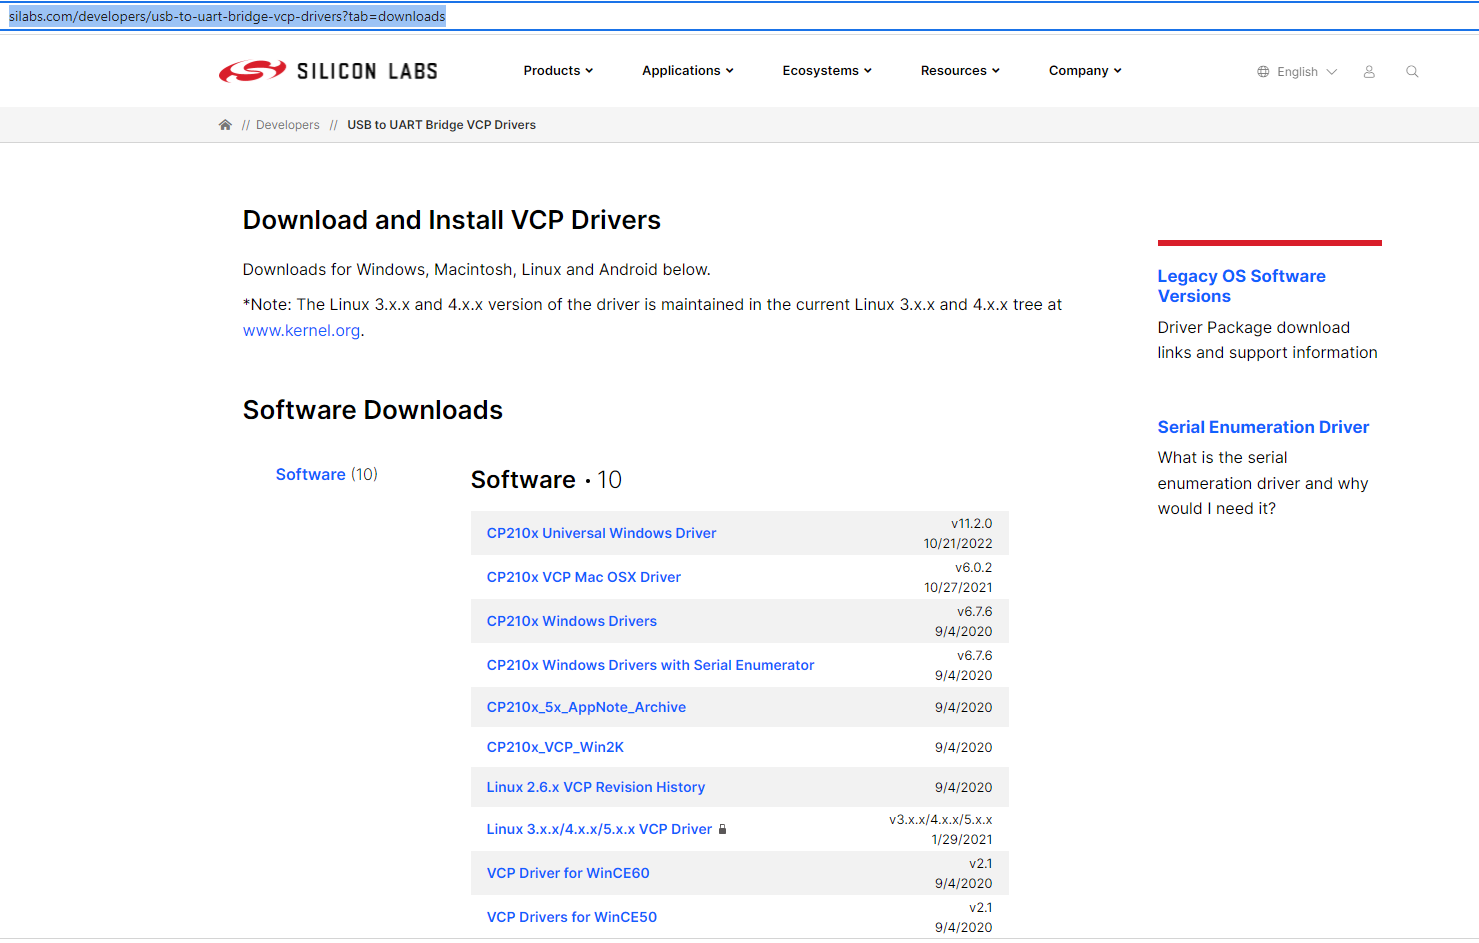
Download the USB Driver for your ESP32
Most ESP32 MCU USB driver is powered by the CP210x from Silicon Labs. You can go to this link and download the latest driver for your Operating System.
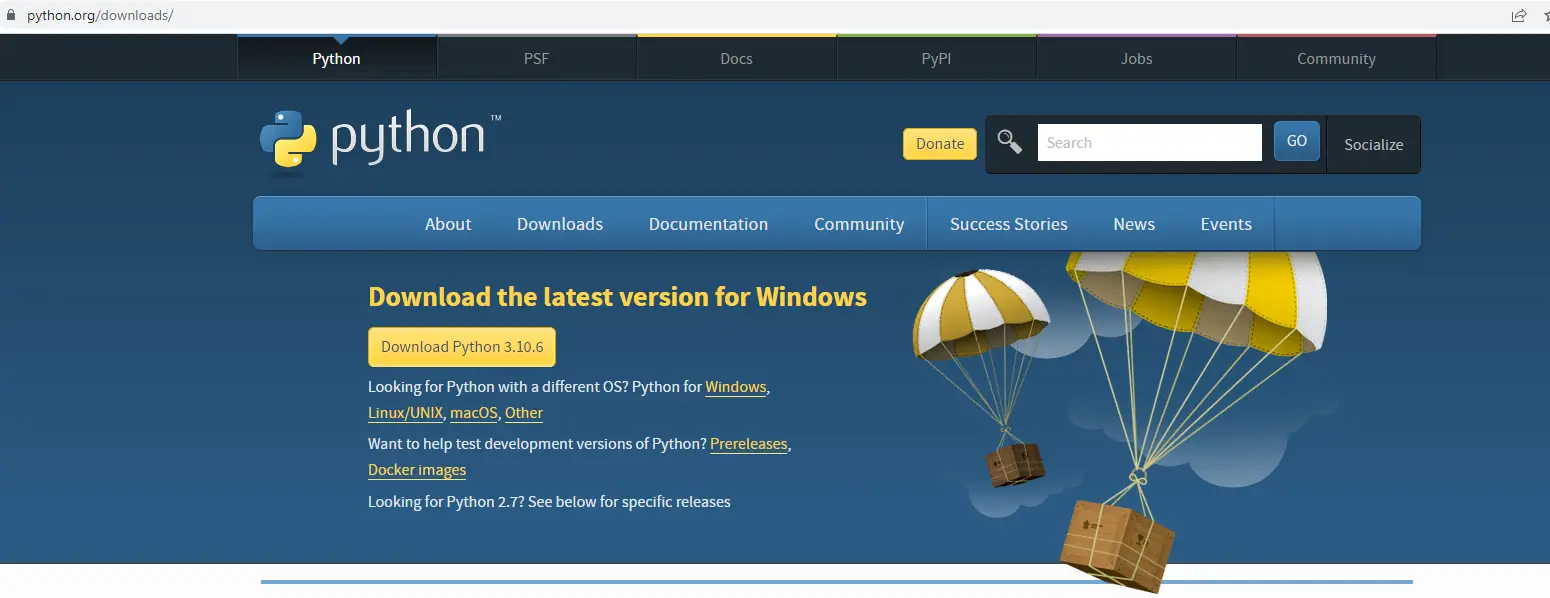
Download Python
We need to install Python on our laptops or workstation to download certain packages. Go to this link and select the Python distribution that is appropriate for your OS.
Related Content:
How to install Python on Windows
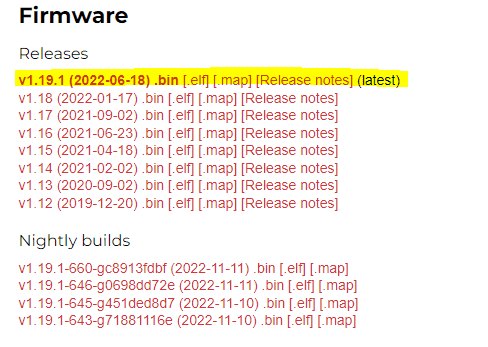
Download the MicroPython firmware for ESP32
Download the ESP32 MicroPython firmware from https://micropython.org/download/esp32/. Choose the stable latest build. At the time of this post, I downloaded the following.
Install MicroPython firmware
The official steps from the MicroPython team on how to download the firmware to your ESP32 can be found in this link.
Open a command prompt in Windows or a terminal in Mac/Linux
- Locate a folder where we could install the firmware. I used ‘C:\micropython“
C:\Users\DONSKY>cd c:\micropython
c:\micropython>- Create a Python virtual environment where we would install the required tooling for the firmware installation. This is so that we will not be touching our base Python package installations.
Creating Python virtual environment is a good step to avoid version collision of the packages that you are installing. Say you need to work on an older version of a package then virtual environment will separate that older version from overriding the version that is in the default Python packages installation.
donsky
Note: If you don’t want to create the virtual environment and just would like to install all packages in your default Python packages directory then go directly to Step 4 and skip steps 2 and 3.
Execute the below code and wait for it to finish. The .venv is the name of our virtual environment.
py -m venv .venvor if you are in Linux/Mac. If you have multiple Python installations (like Python 2) then replaced python with python3
python -m venv .venv- Activate the virtual environment.
c:\micropython>.venv\Scripts\activateor if you are using Linux or Max
source .venv/bin/activateYou would see your command prompt looking like this which means that you are now in a Python virtual environment.

- Install the esptool needed for the firmware installation. Wait for it to finish.
pip install esptoolAt this point, your folder should contain the esp32 firmware bin file and the .venv virtual environment.

- Erase the flash memory of your ESP32
esptool.py --chip esp32 --port COM3 erase_flashor when in Linux/mac
esptool.py --port /dev/ttyUSB0 erase_flashIf an error has occurred, retry the command and click the boot button momentarily on your ESP32 for it to be in Boot Mode.
You should see the following message in your command prompt or terminal
(.venv) c:\micropython>esptool.py --chip esp32 --port COM3 erase_flash
esptool.py v4.3
Serial port COM3
Connecting..................................
Chip is ESP32-D0WDQ6 (revision v1.0)
Features: WiFi, BT, Dual Core, 240MHz, VRef calibration in efuse, Coding Scheme None
Crystal is 40MHz
MAC: 24:62:ab:fe:d6:94
Uploading stub...
Running stub...
Stub running...
Erasing flash (this may take a while)...
Chip erase completed successfully in 6.8s
Hard resetting via RTS pin...- Install the MicroPython firmware for your MCU.
esptool.py --chip esp32 --port COM3 --baud 460800 write_flash -z 0x1000 esp32-20220618-v1.19.1.binor when in Linux or Mac
esptool.py --chip esp32 --port /dev/ttyUSB0 --baud 460800 write_flash -z 0x1000 esp32-20220618-v1.19.1.binYou should be able to see the following message displayed in your command prompt or terminal.
If an error has occurred, retry the command and click the boot button momentarily on your ESP32 for it to be in Boot Mode.
(.venv) c:\micropython>esptool.py --chip esp32 --port COM3 --baud 460800 write_flash -z 0x1000 esp32-20220618-v1.19.1.bin
esptool.py v4.3
Serial port COM3
Connecting.........
Chip is ESP32-D0WDQ6 (revision v1.0)
Features: WiFi, BT, Dual Core, 240MHz, VRef calibration in efuse, Coding Scheme None
Crystal is 40MHz
MAC: 24:62:ab:fe:d6:94
Uploading stub...
Running stub...
Stub running...
Changing baud rate to 460800
Changed.
Configuring flash size...
Flash will be erased from 0x00001000 to 0x0017efff...
Compressed 1560976 bytes to 1029132...
Wrote 1560976 bytes (1029132 compressed) at 0x00001000 in 24.2 seconds (effective 515.6 kbit/s)...
Hash of data verified.

Leaving...
Hard resetting via RTS pin...
If you see the following messages displayed then you have successfully installed MicroPython firmware on your ESP32 device.
- Deactivate your virtual environment and closed your command prompt or terminal.
deactivateHow to test our MicroPython firmware installation?
In order to test our ESP32 MicroPython installation and verify the firmware version that we have downloaded then we can do the following steps.
- Download Putty.
- Set the following options and click Open

Then we should be able to access the Python interpreter or what they call the REPL(Read-Evaluate-Print-Loop).
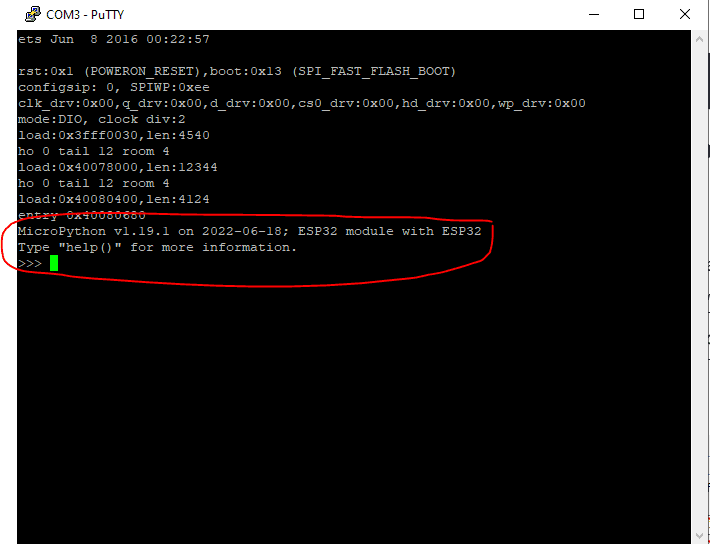
Issues:
A fatal error occurred: Could not open /dev/ttyUSB0, the port doesn’t exist
Check to see if you have connected your ESP32 USB connection properly or if it is assigned to that port correctly.
Wrap up
We have installed MicroPython on our ESP32 MCU by downloading the appropriate firmware for it in this post. I have shown you my personal steps on how I am installing Python packages by creating a virtual environment to avoid version collision of different package versions.
I hope you learned something! Happy Exploring!
Related Content:
Arduino officially supports MicroPython
Leave a Reply