
Introduction
Node-Red is a great tool, especially for beginners with minimal knowledge about software programming. With its browser-based editing features, you can develop interesting features in a matter of minutes. It runs on different platforms locally and even in cloud environments such as Microsoft Azure or Amazon Web Services (AWS). In this post, I will show you how to install Node-Red (often called Node-Red) on your Windows environment.
If you want to see this post in a video format then please see below or watch it on my YouTube channel.
Prerequisites
You need a laptop (or desktop) with sufficient memory, hard disk, and CPU to be able to install this software. I am using a Lenovo Windows 11 environment with 16GB RAM and a Ryzen 7 as my laptop device.
If you are in the hunt for a laptop workstation then may I suggest the following.
- 15.6″ IdeaPad 1 Laptop, 20GB Memory, 1TB SSD Storage, Intel Pentium Processor (4-cores, 3.3GHz), 15.6″ Anti-glare Display, Wi-Fi 6 and Bluetooth, HDMI, Type-C, 1 Year Office 365,Windows 11 Home
- Lenovo V15 Laptop, 15.6″ FHD Display, AMD Ryzen 5 5500U Hexa-core Processor (Beat Intel i7-1065G7), 16GB RAM, 512GB SSD, HDMI, RJ45, Numeric Keypad, Wi-Fi, Windows 11 Pro, Black
Disclosure: These are affiliate links and I will earn small commissions to support my site when you buy through these links.
Installation steps on how to install Node-Red on a Windows environment
- Download and install Node.js. Click the following link and download the Node.js Windows installer applicable to your setup.
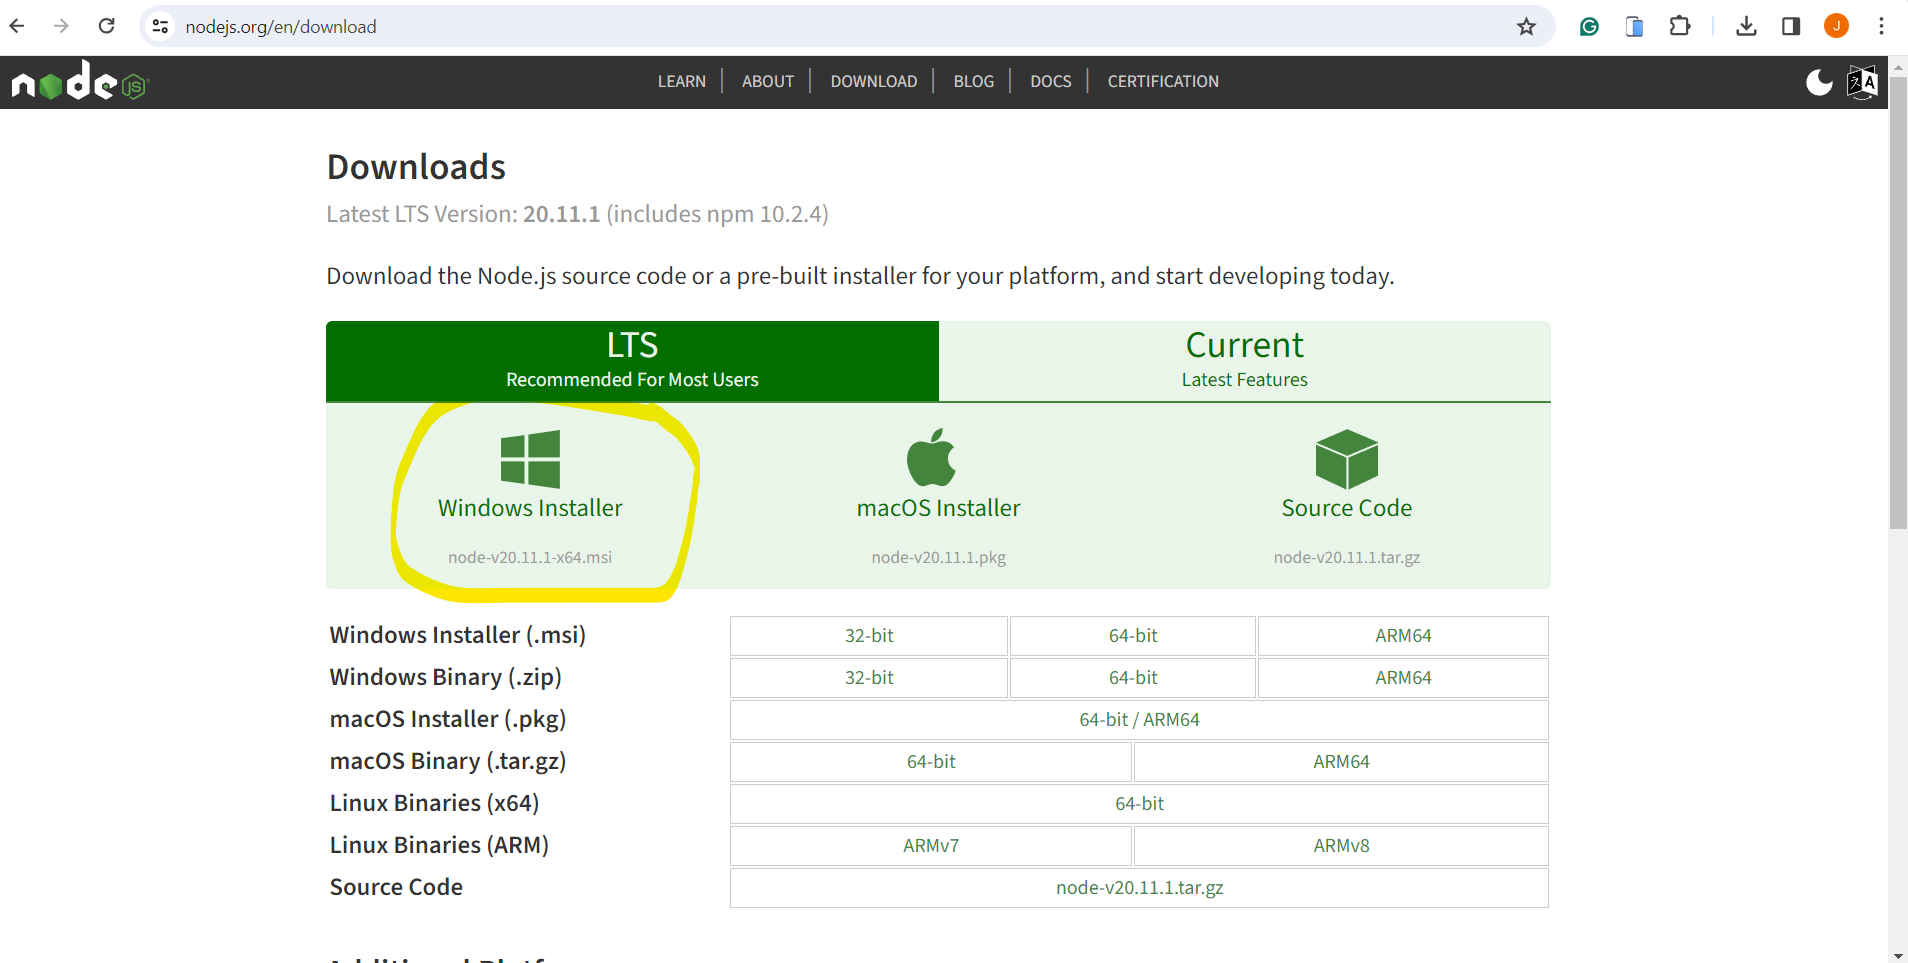
Just click the installer and accept all default setups. After which, verify your Node.js installation by executing the below command on your command prompt.
C:\Users\donsky>node -v
v20.11.1
What is the Node.js runtime supported by Node-Red? According to the official documentation from here, the recommended version is 20.x. Be sure to check this page regularly if you are doing a new Node-Red installation.
- Install the Node-Red package by executing the below command.
npm install -g -- unsafe-perm node-redThis will install the Node-Red tool on your global Node.js runtime.
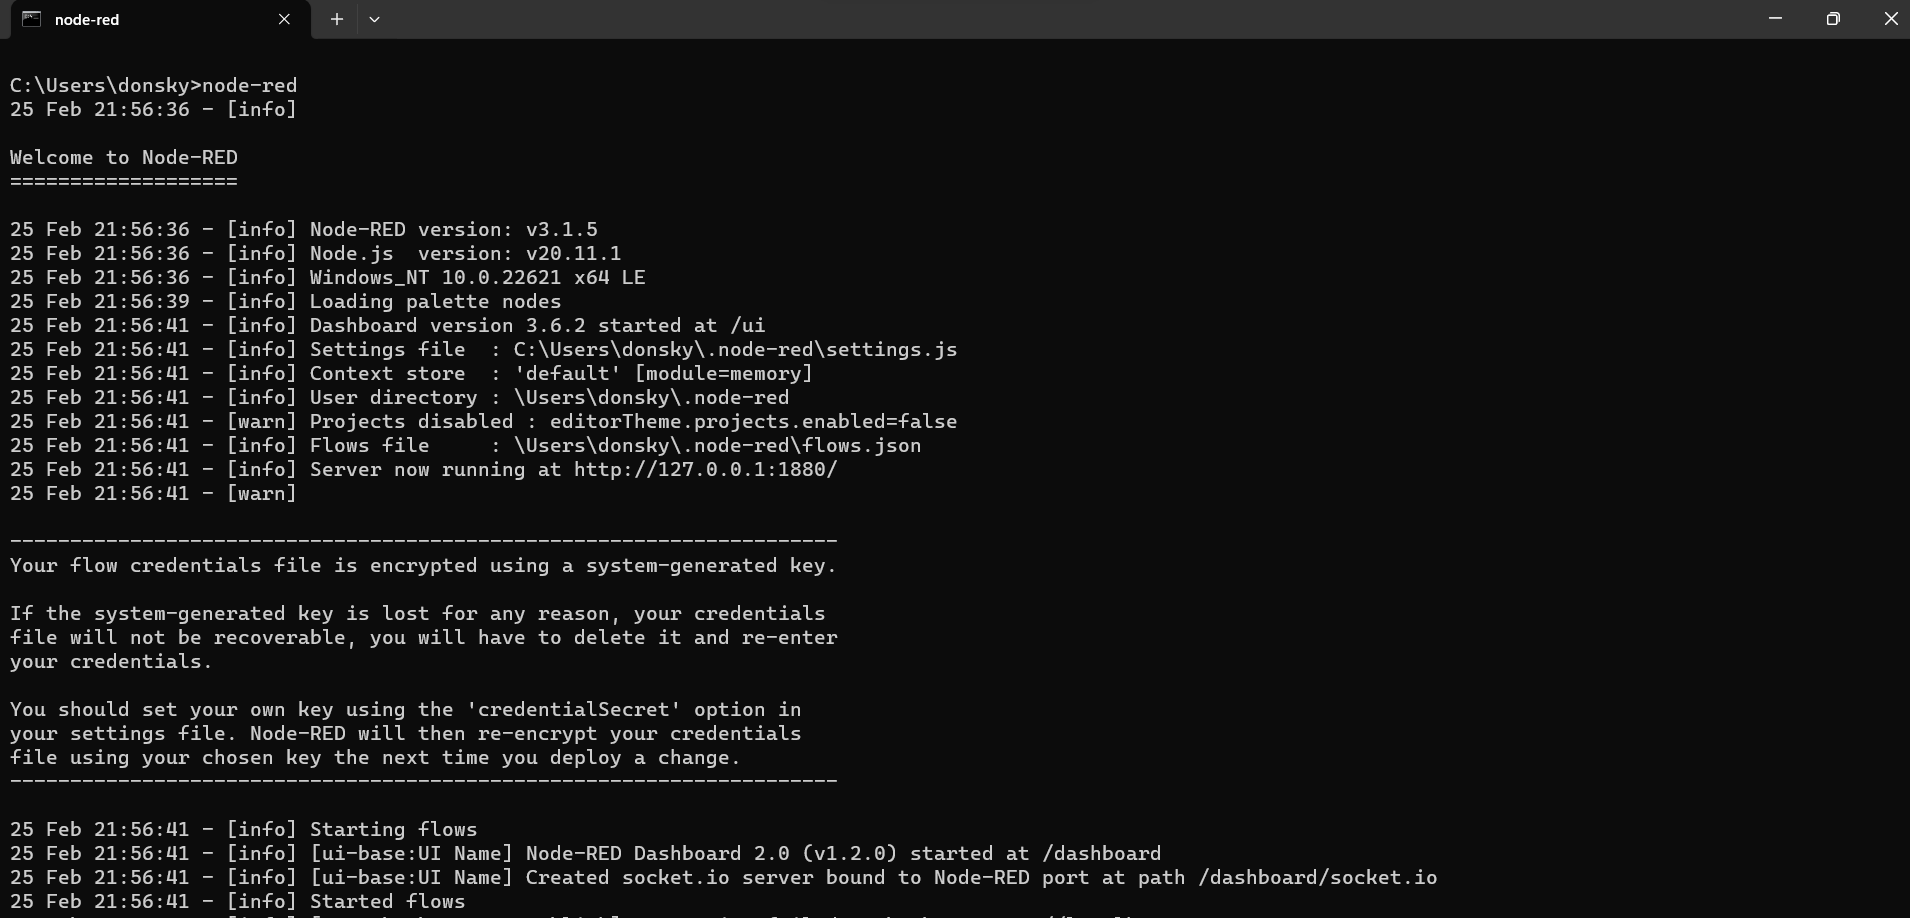
- Once the installation is finished then run your Node-Red tool by executing the below command.
node-redYou should be able to see the following messages displayed on your command prompt if there is no error during the installation.
- Access your Node-Red software running on your Windows environment by opening the following on your browser.
http://127.0.0.1:1880/The default TCP port used by your Node-Red installation is 1880.
If everything works as expected then you should be able to see the following displayed on your browser.
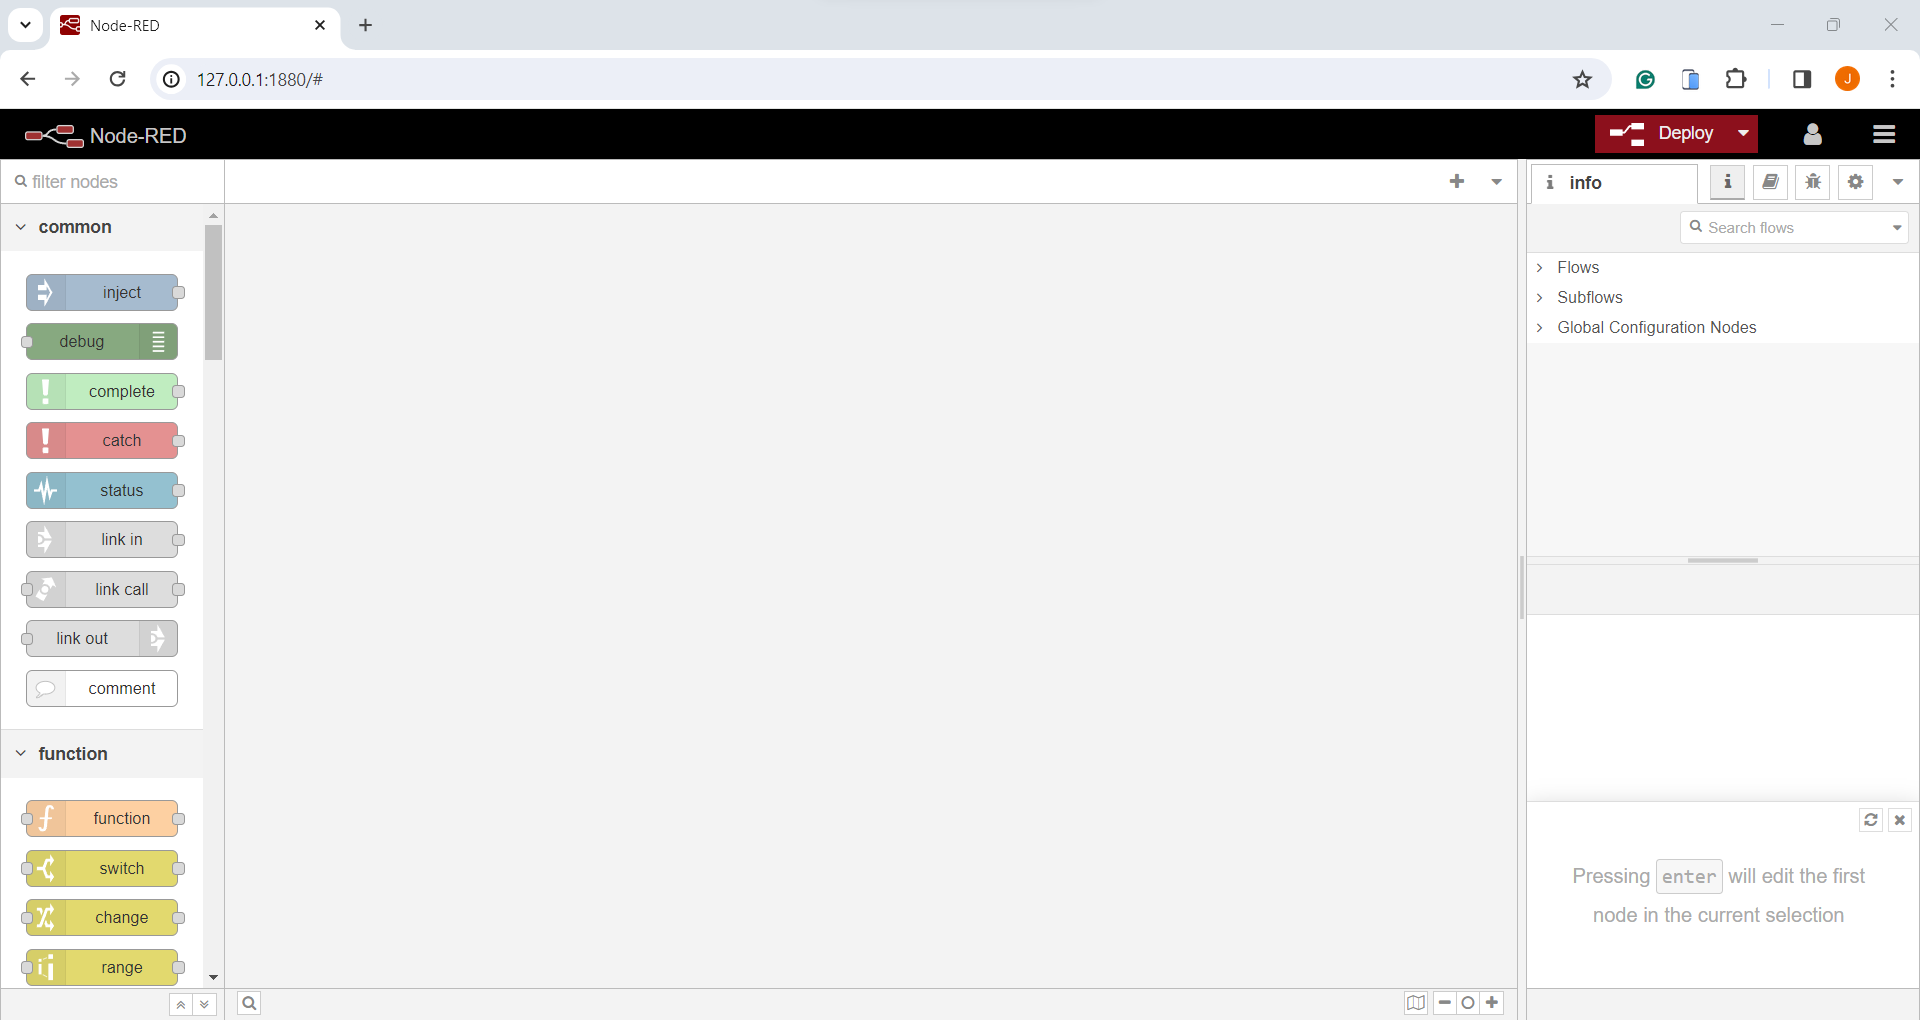
Congratulations! You now have a running instance of Node-Red on your Windows environment!
How to secure your Node-Red with a username and password?
Currently, you are able to access your Node-Red user interface without providing any username or password. The simplest way of doing this is by adding a username and password in a file used by your Node-Red environment.
Refer to the following steps on how to do this.
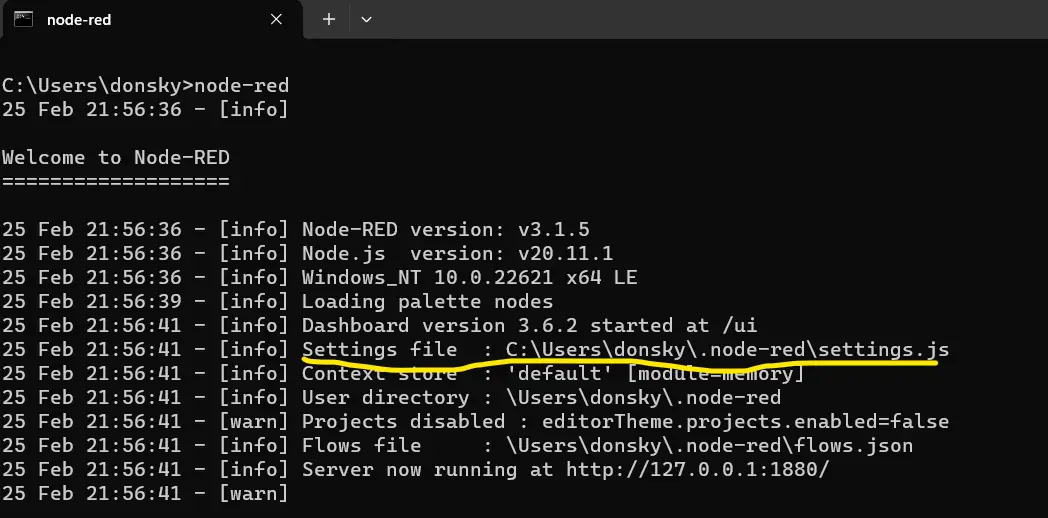
- Locate the settings.js file being used by your Node-Red installation. You can quickly find this by looking at the command prompt when your Node-Red software is starting.
- Open this file in your text editor and uncomment the following lines.
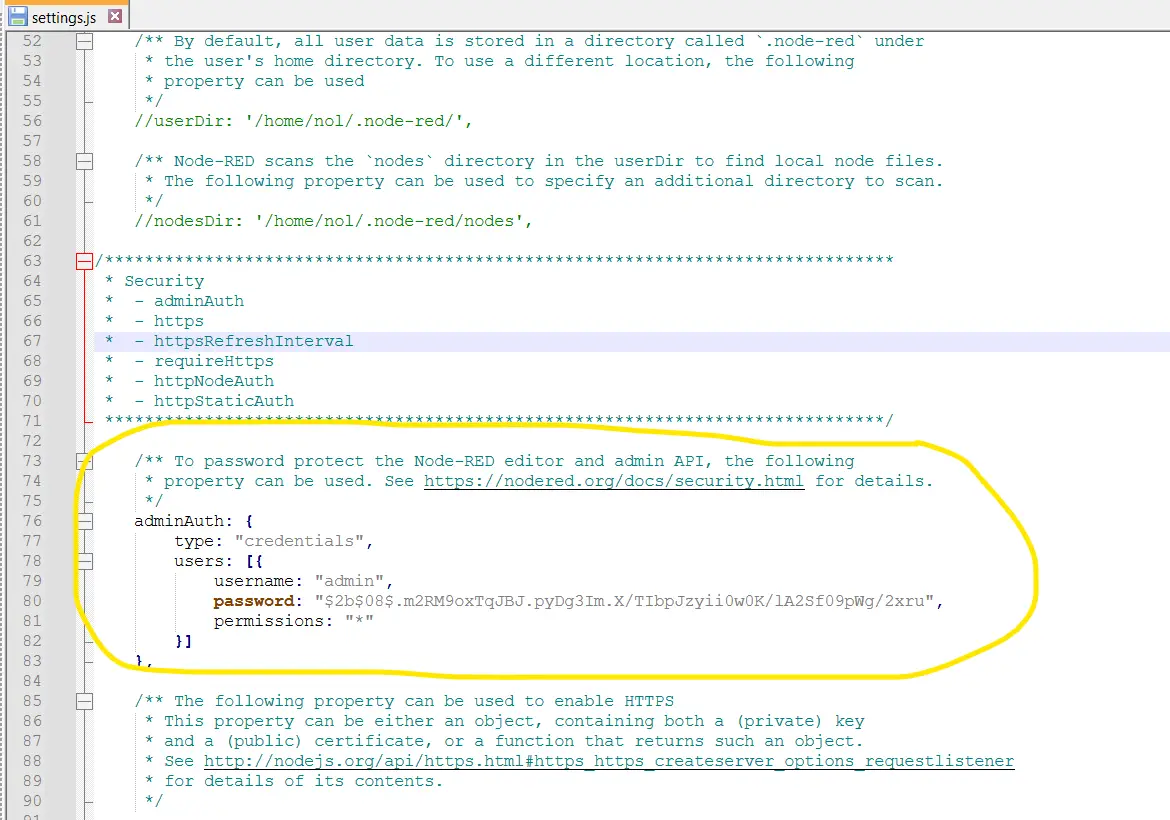
- The default username is “admin” and you can change the password by opening a new terminal and executing the below command to hash your password.
C:\Users\donsky>node-red admin hash-pw
Password:
$2b$08$IVO.4gNuWQyMN7fz7CNUg.adFkGswI/QG6wHPC7fWQEyxAPZs4FKu
Replace the password field in your settings.js with your newly hashed password and restart your Node-Red software.
Access again your Node-Red URL and verify that a username and password login form is shown. Enter the username and password that you have created in the previous step.
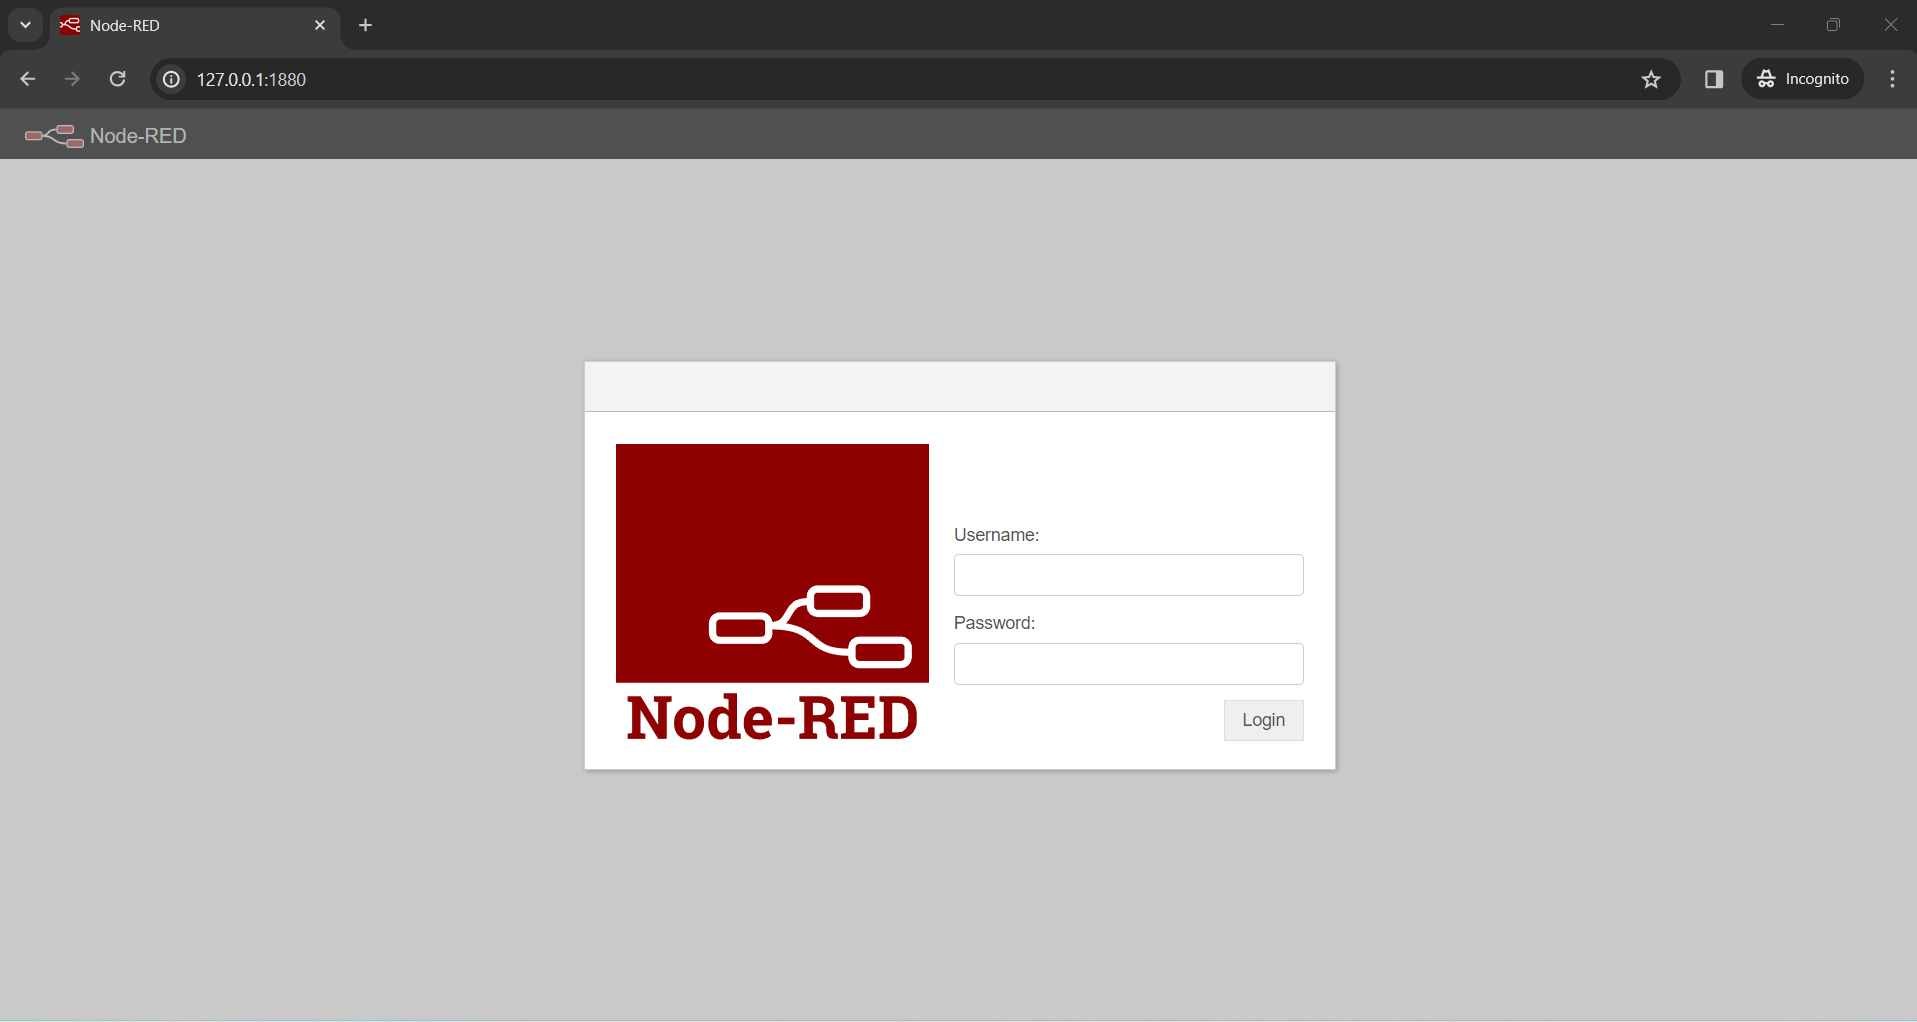
Congratulations again! You have secured your Node-Red software running on your Windows environment with a password.
Wrap Up
You have successfully installed a working Node-Red software on your Windows environment on this post. You can now begin developing your next Internet of Things(IoT) project.
I hope you learned something. Happy exploring!
Read Next:
Pico W -MicroPython MQTT – BMP/BME 280 Weather Station
Control DS18B20 using MicroPython with a Weather Station Project
Leave a Reply