- What is PlatformIO?
- Why you should be using PlatformIO?
- Prerequisites for following this PlatformIO Tutorial
- How to start using PlatformIO?
- Blink the built-in LED of your ESP8266
- Printing to your Serial Monitor in PlatformIO
- Adding a library or dependency to your projects in PlatformIO
- Cleaning and Rebuilding Projects in PlatformIO
- Uploading files to the Microcontroller Flash Memory in PlatformIO
- Wrap up
Like everybody else, I used Arduino IDE (Integrated Development Environment) when I started exploring the exciting world of embedded development and Microcontroller programming. I learned the process but encountered some difficulties along the way while using the Arduino IDE. That is when I stumbled upon this PlatformIO IDE extension in Visual Studio Code and started using it and I never looked back. In this post, I will share with you my PlatformIO tutorial and how it would help turbocharge your Arduino project development.
The goal of this post is to help you get started in using PlatformIO IDE. I am hoping that once you finish following this tutorial you now know 80% of what is needed to use PlatformIO in your Internet of Things (IoT) projects.
This PlatformIO tutorial is quite long but I hope that you will persevere as I know how powerful this IDE is and knowing how to use it would surely help you in your development.
What is PlatformIO?
PlatformIO is a cross-platform, cross-architecture, multiple framework, professional tool for embedded systems engineers and for software developers who write applications for embedded products.
PlatformIO
In short, you can use this tool in programming anything related to Microcontroller and choose the framework of your choice either using ESP-IDF or the Arduino framework. We will be focusing on Arduino framework development in this post.
Also, we will be using the PlatformIO IDE extension in Visual Studio code in developing the project in this post. Visual Studio Code is an open-source Integrated Development Environment (IDE) text editor released by Microsoft. It is a popular text editor with built-in code assist features making it suitable for development.
Why you should be using PlatformIO?
The following are the excellent features that will make you fall in love with PlatformIO. In this tutorial, I am listing the following important features but more features are still available.
Library/Dependency Management
Adding dependencies is very simple in PlatformIO IDE. You just need to select the library and add it to your project from the PlatformIO repository. If the library that you needed is not present then you can add it manually. All dependent libraries are downloaded automatically for you.
Code Syntax Highlighting
It is easy to code when you know what part you are editing. The code syntax highlighting feature is a welcome sight while you are developing your program.
Intellisense
The IntelliSense feature helps you in your development as it will automatically complete the functions/methods for you while you are programming.
Code Assist
The quick code assist features allow you to complete all the code by just typing the shortcut code.
Debugging
When things go wrong then it is easy to check what is wrong as it is highlighted for you. Also, you can drill down into what causes the problem so it will be easy for you to figure out what causes the problem.
Support For Other Languages
Nowadays, it is not only C/C++ or Arduino code that you are developing in your projects. As such, the PlatformIO IDE helps in this regard as support for multiple languages is available to other languages as well such as Javascript or HTML.

Prerequisites for following this PlatformIO Tutorial
You need the following components and tools to follow along with this post.
- Microcontroller (I used NodeMCU ESP8266 12E) – Amazon | AliExpress | Bangood
- Breadboard – Amazon | AliExpress | Bangood
- Connecting Wires – Amazon | AliExpress | Bangood
- Laptop with administrative privilege.
Disclosure: These are affiliate links and I will earn small commissions to support my site when you buy through these links.
How to start using PlatformIO?
Now after giving you several reasons above I hope I have convinced you to start using PlatformIO in your next IoT projects. 🙂
We now go to the steps on how to start using PlatformIO.
Install Git
We need to install a Git client so that we can download the appropriate library for your projects. Go to this link and download the client for your operating system.
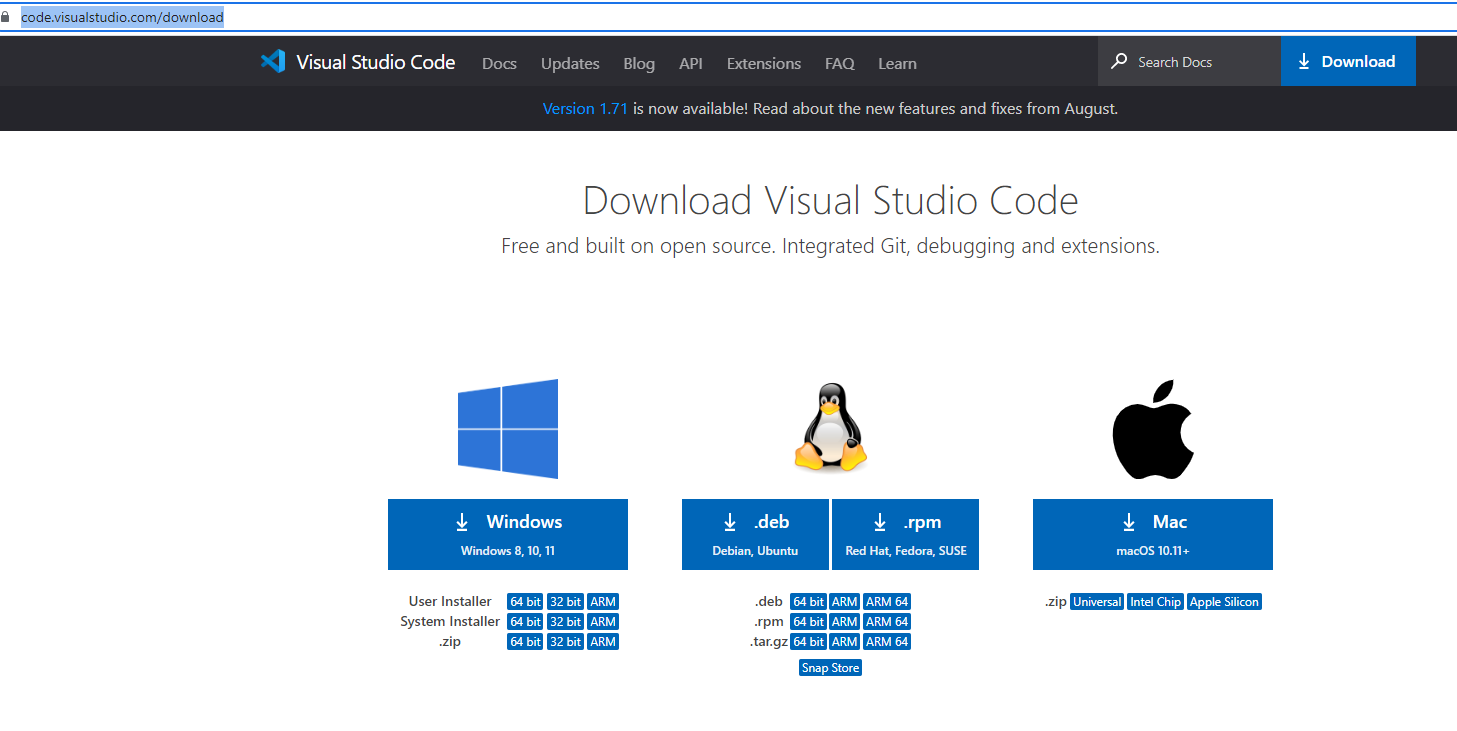
Download Visual Studio Code
Go to this link and download the installer for your operating system. It supports Windows, Linux, and Mac OS.
If you are in Windows then you can check out my post Install Visual Studio Code or VSCode in Windows for added reference.
Install PlatformIO IDE Extension
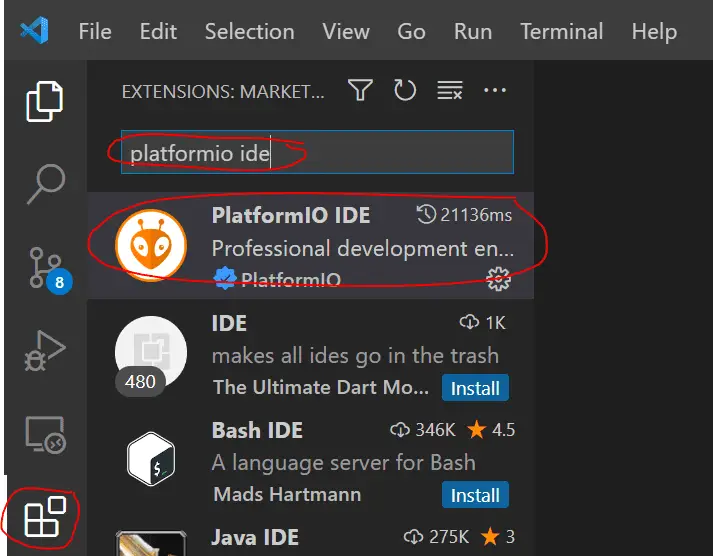
Once Visual Studio Code is installed then open it and we will install the PlatformIO IDE extension.
On the left side of your Visual Studio Code screen, select the Extensions tab then type in “platformio ide“. Click the PlatformIO IDE install button to install the extension. This will take some time depending on your network connection speed.
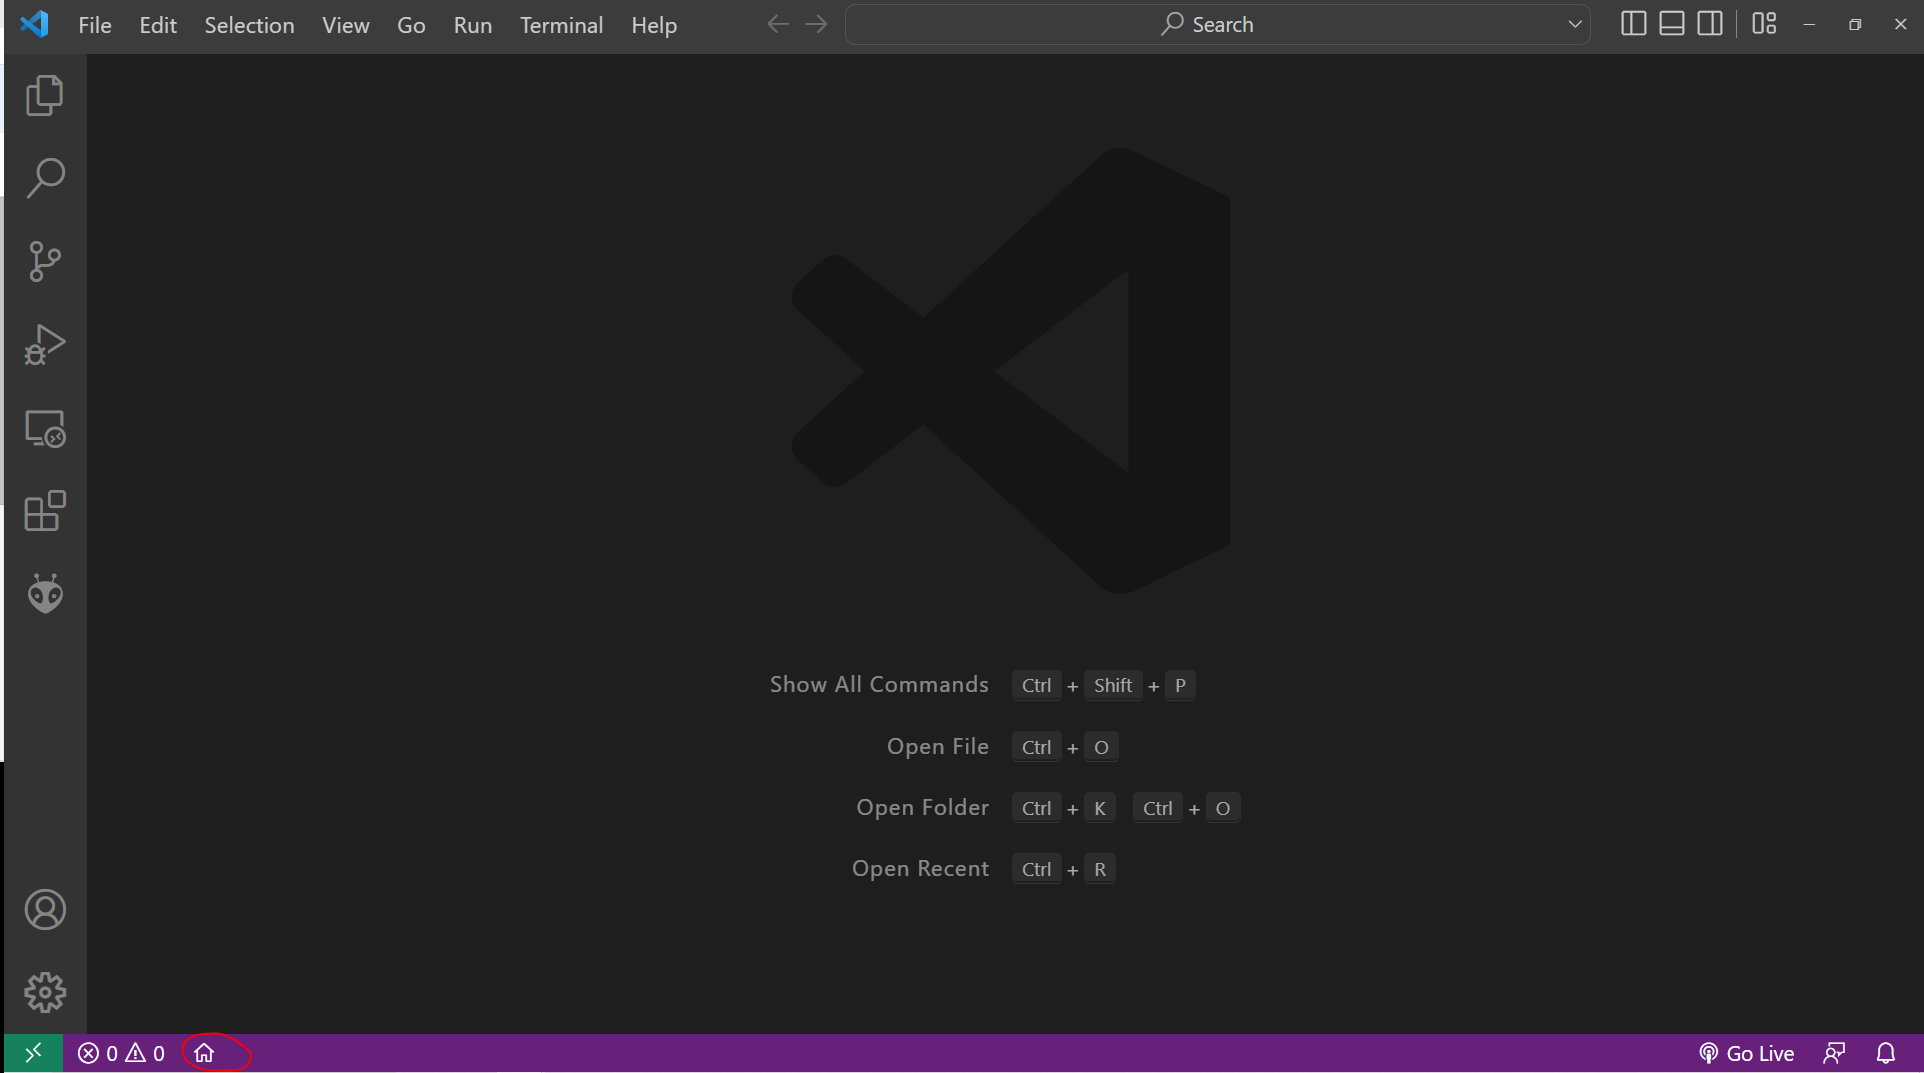
Now that we have installed the PlatformIO IDE we can begin creating our test project. If the installation went fine then you should be able to see the PlatformIO icon at the side of your screen.
What are we building?
We are going to build two projects in this PlatformIO tutorial.
First, we create the popular Blink project in Arduino IDE which would make you experience how easy it is to do it also in PlatformIO IDE.
Next, we improved it and used a Web Server to control the built-in LED (Light Emitting Diode) of your Microcontroller Unit (MCU).
Create the Project
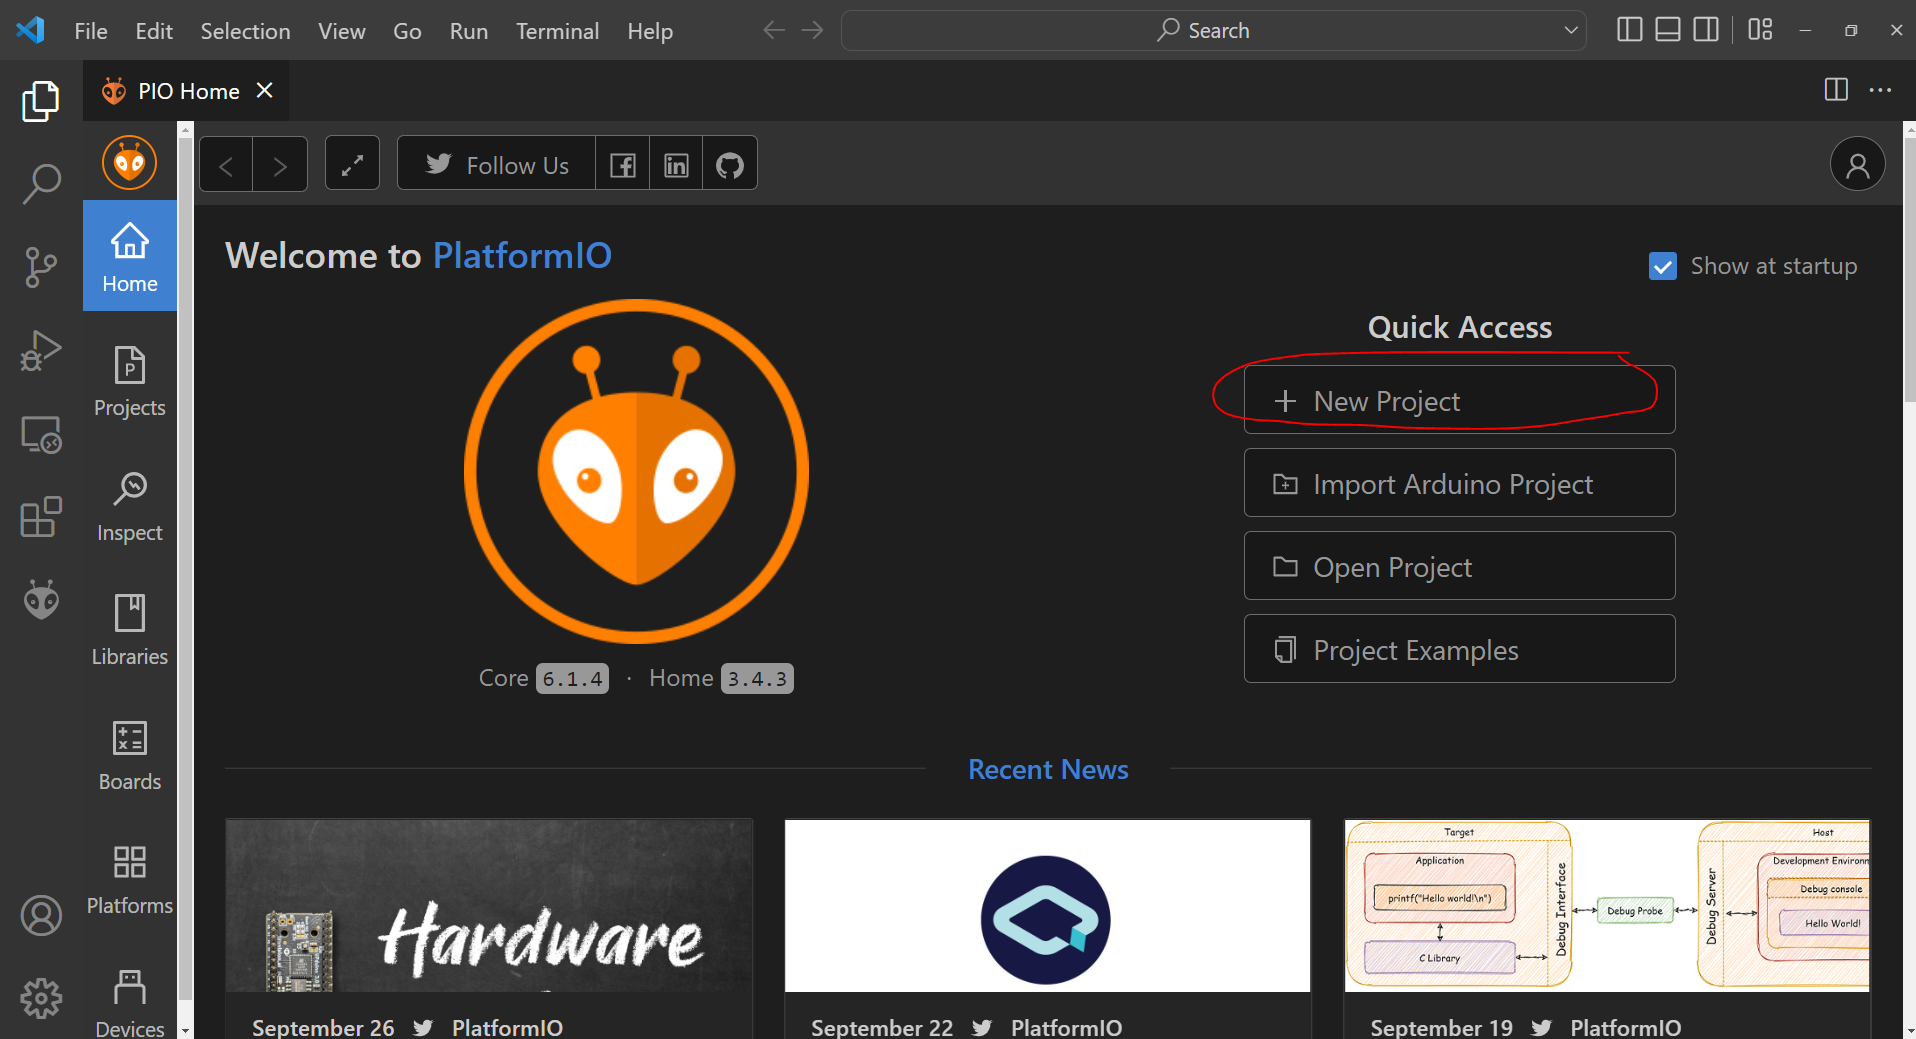
Click the PlatformIO Home at the bottom of your screen.
Click New Project
In the Project Wizard Screen, enter the following details
- Name – hello-platformio-ide
- Board – NodeMCU 1.0 (ESP-12 E Module) ( Select your MCU here accordingly)
- Framework – Arduino
- Location – Uncheck this if you want to store it in a different location.
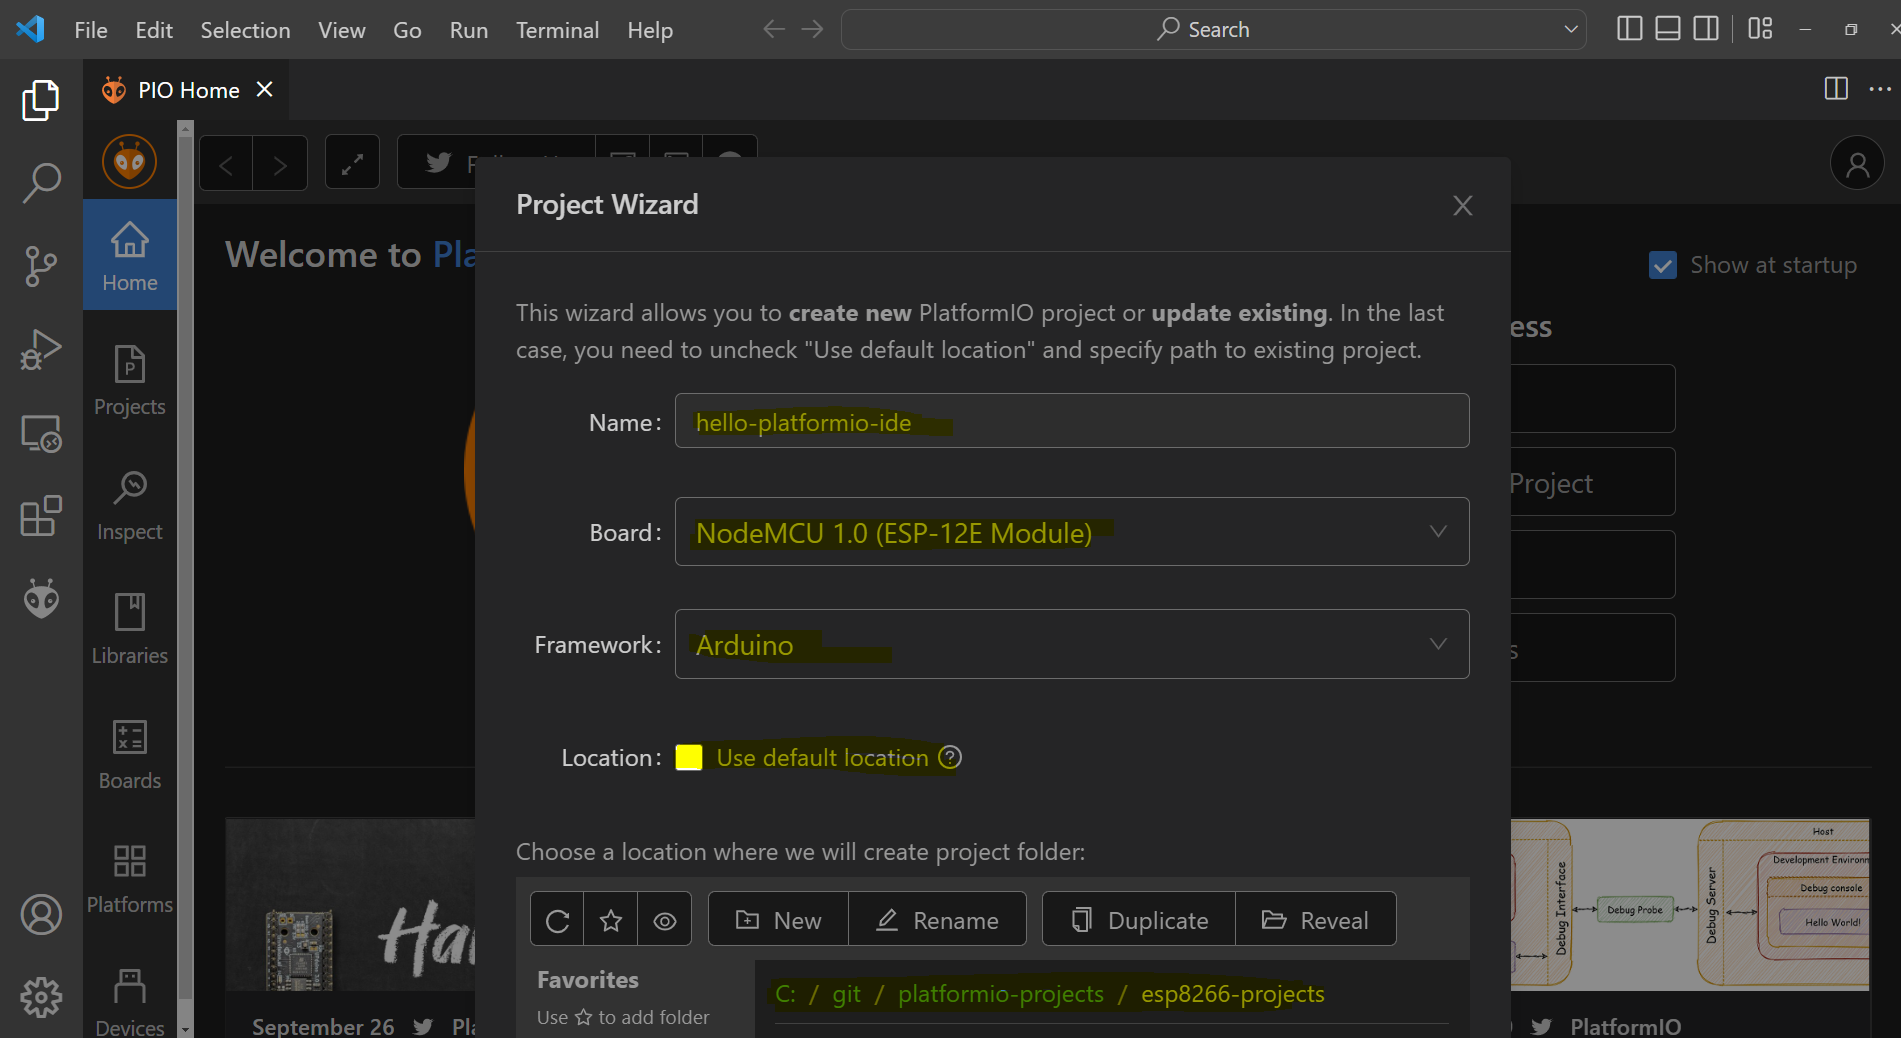
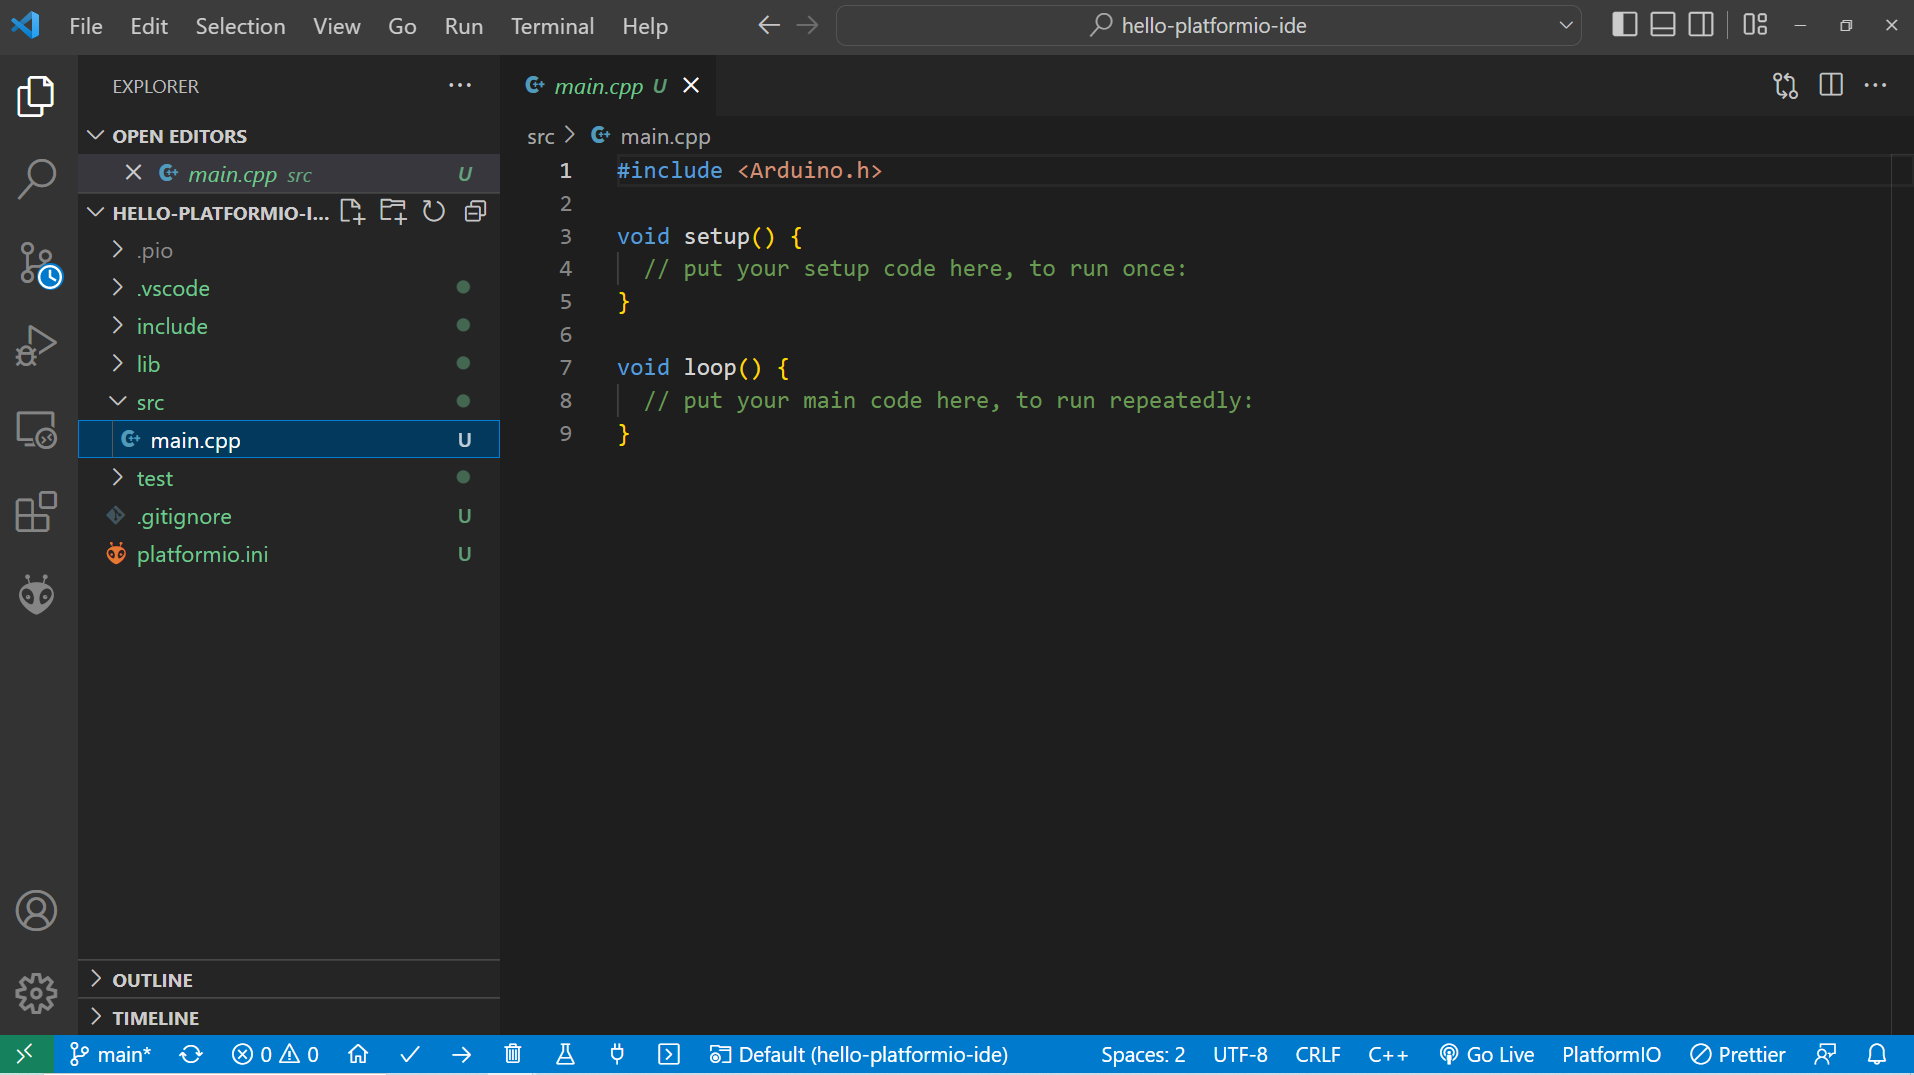
Click Finish and wait for some time until the initialization is finished. You should see the following project created. Open the src/main.cpp file. This is the entry point of our project.
Blink the built-in LED of your ESP8266
Let us start by blinking the built-in LED connected to our ESP8266 microcontroller unit. Connect your microcontroller through the USB port.
Enter the following code in the “main.cpp“.
#include <Arduino.h>

const int ledPin = LED_BUILTIN;

void setup()
{
  // setup LED_BUILTIN AS output
  pinMode(ledPin, OUTPUT);
}

void loop()
{
  digitalWrite(ledPin, HIGH);
  delay(500);
  digitalWrite(ledPin, LOW);
  delay(500);
}
The code will just blink the LED.
Next, we upload our sketch to our NodeMCU ESP8266 MCU, and to do that click the PlatformIO icon at the side and look for Upload and Monitor.
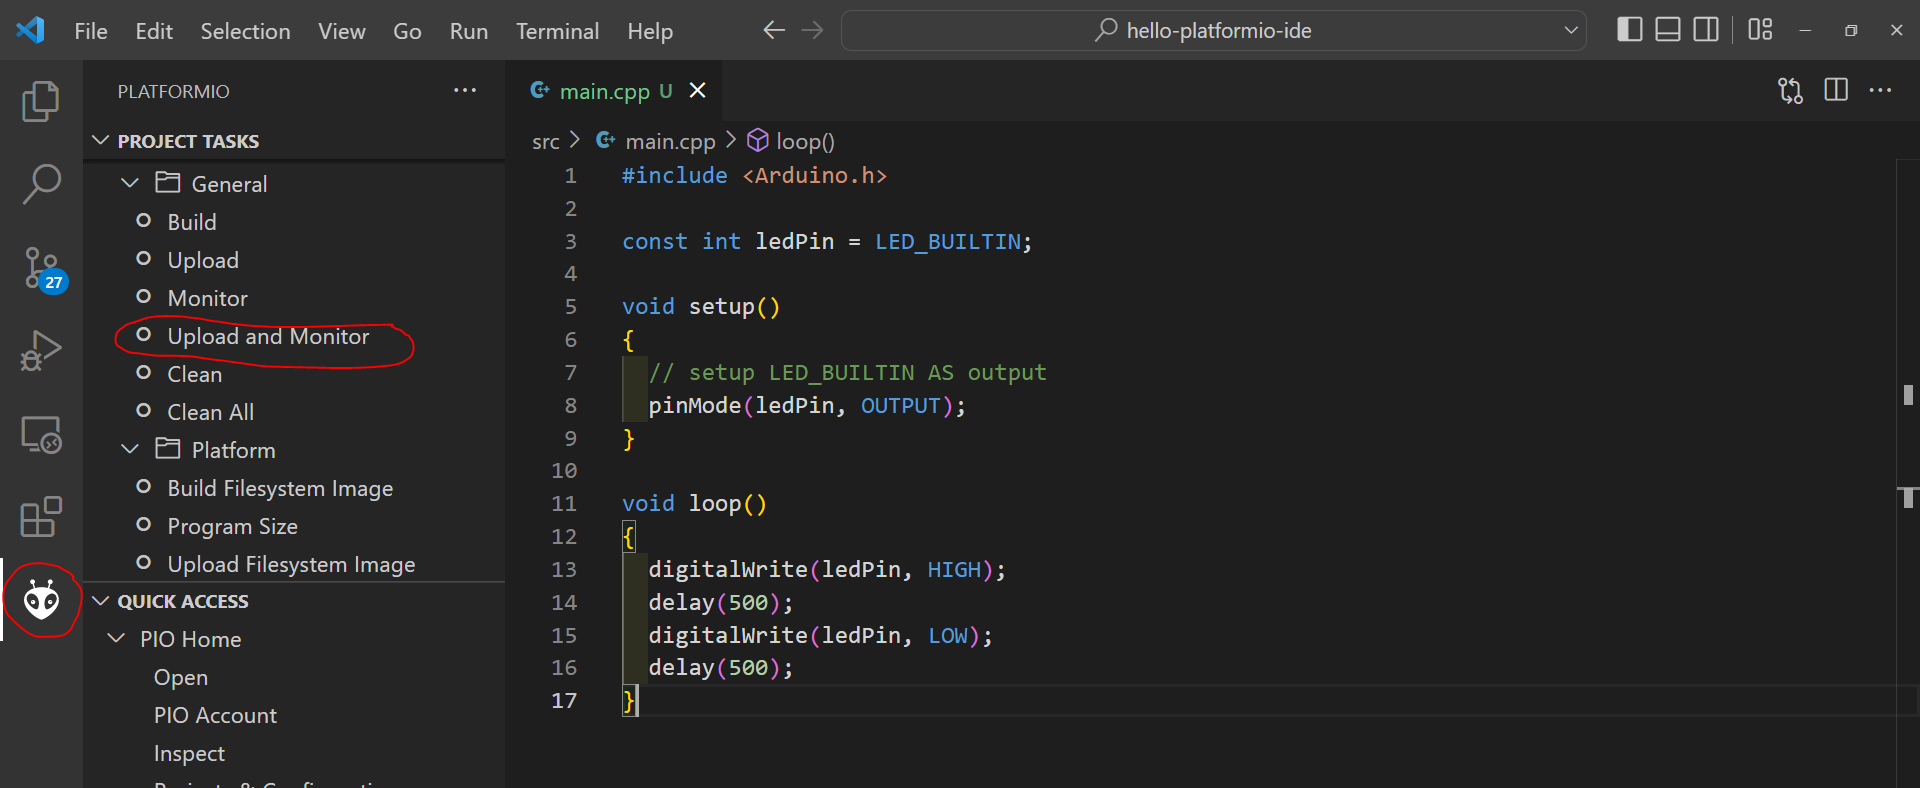
This will open up a new terminal and begin compiling your project. You should see the success message shown below.
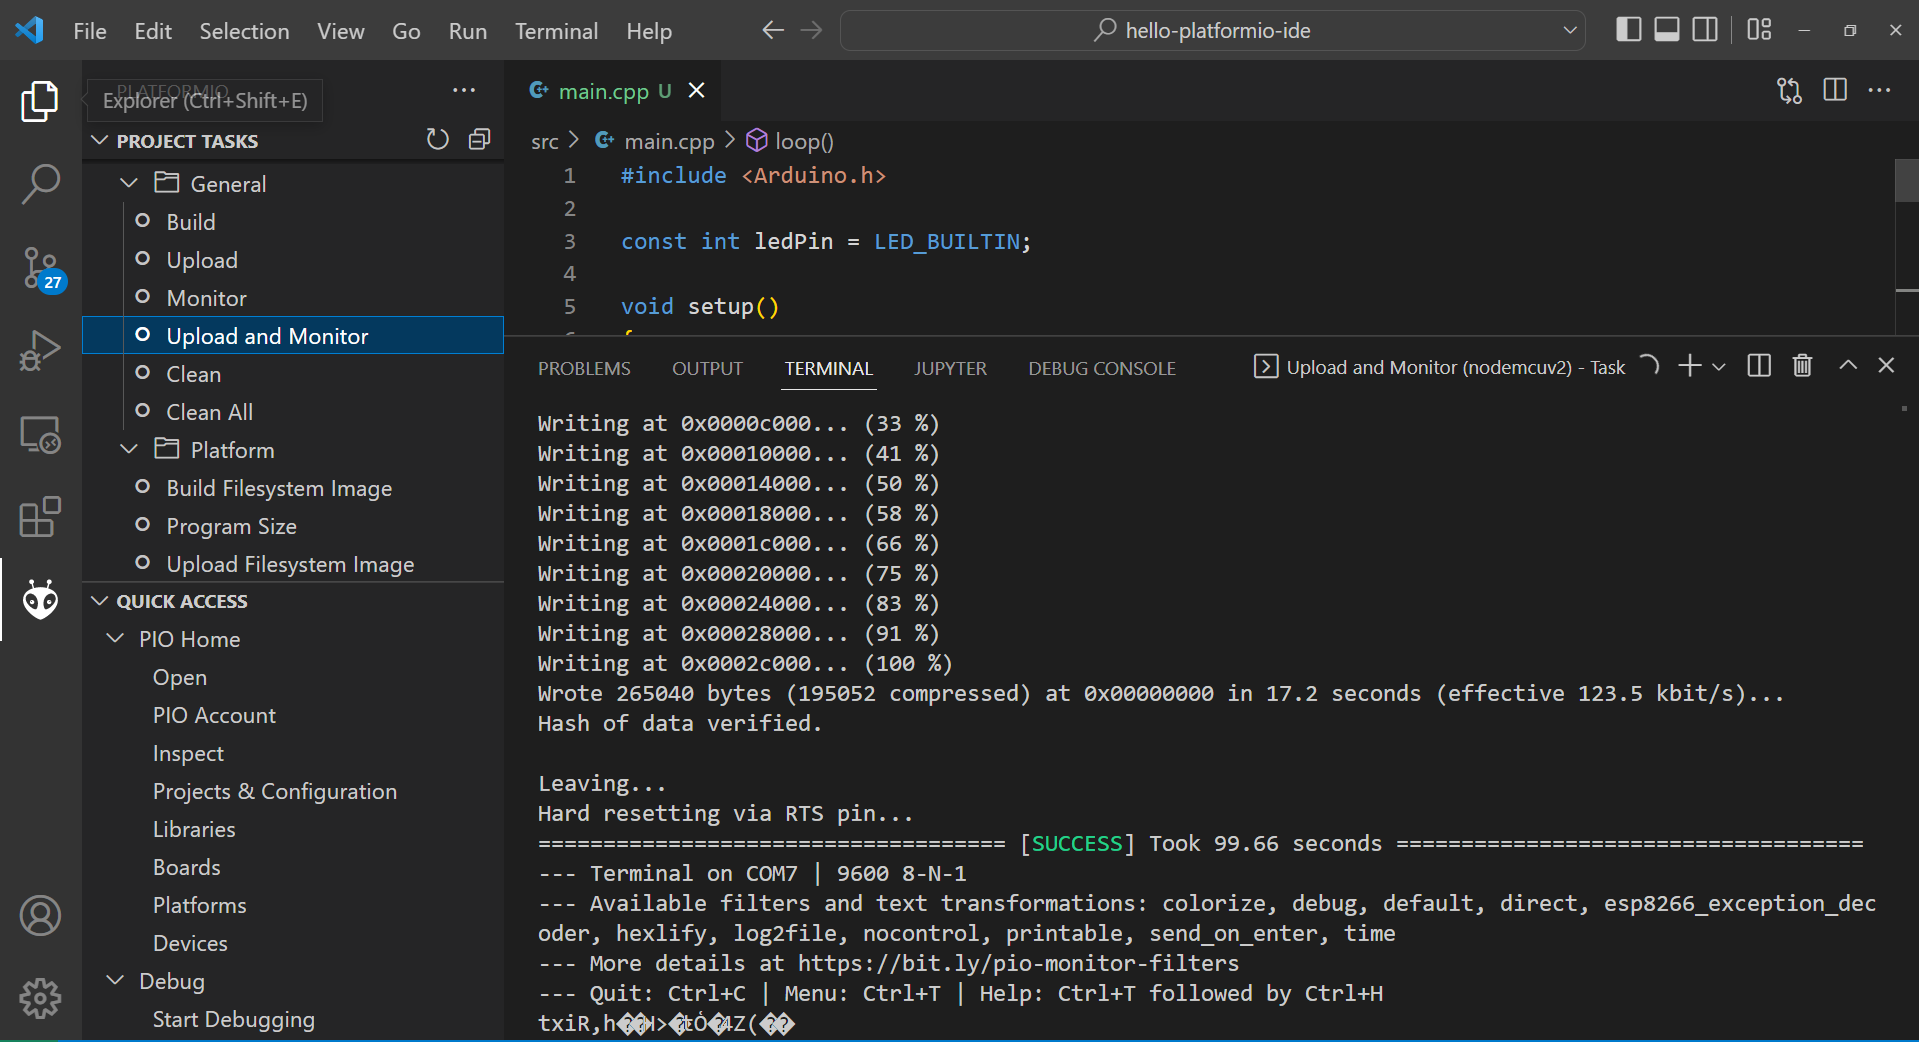
Check your NodeMCU ESP8266 microcontroller and you should see it blinking like below.
Congratulations! You now have uploaded your first sketch using PlatformIO IDE.
Printing to your Serial Monitor in PlatformIO
The PlatformIO IDE contains an integrated Serial Monitor. Open the platform.ini file in your project to configure the baud rate. This is the configuration file of your project and it contains other functionality which is outlined here. You can also place the library that you want to use in your project here but we will cover that one in the next section.
For now, we will just set the baud rate of the serial monitor by putting the following value. The monitor_speed should match the baud rate you set in the code garbage values will be printed.
[env:nodemcuv2]
platform = espressif8266
board = nodemcuv2
framework = arduino

; Serial Monitor options
monitor_speed = 115200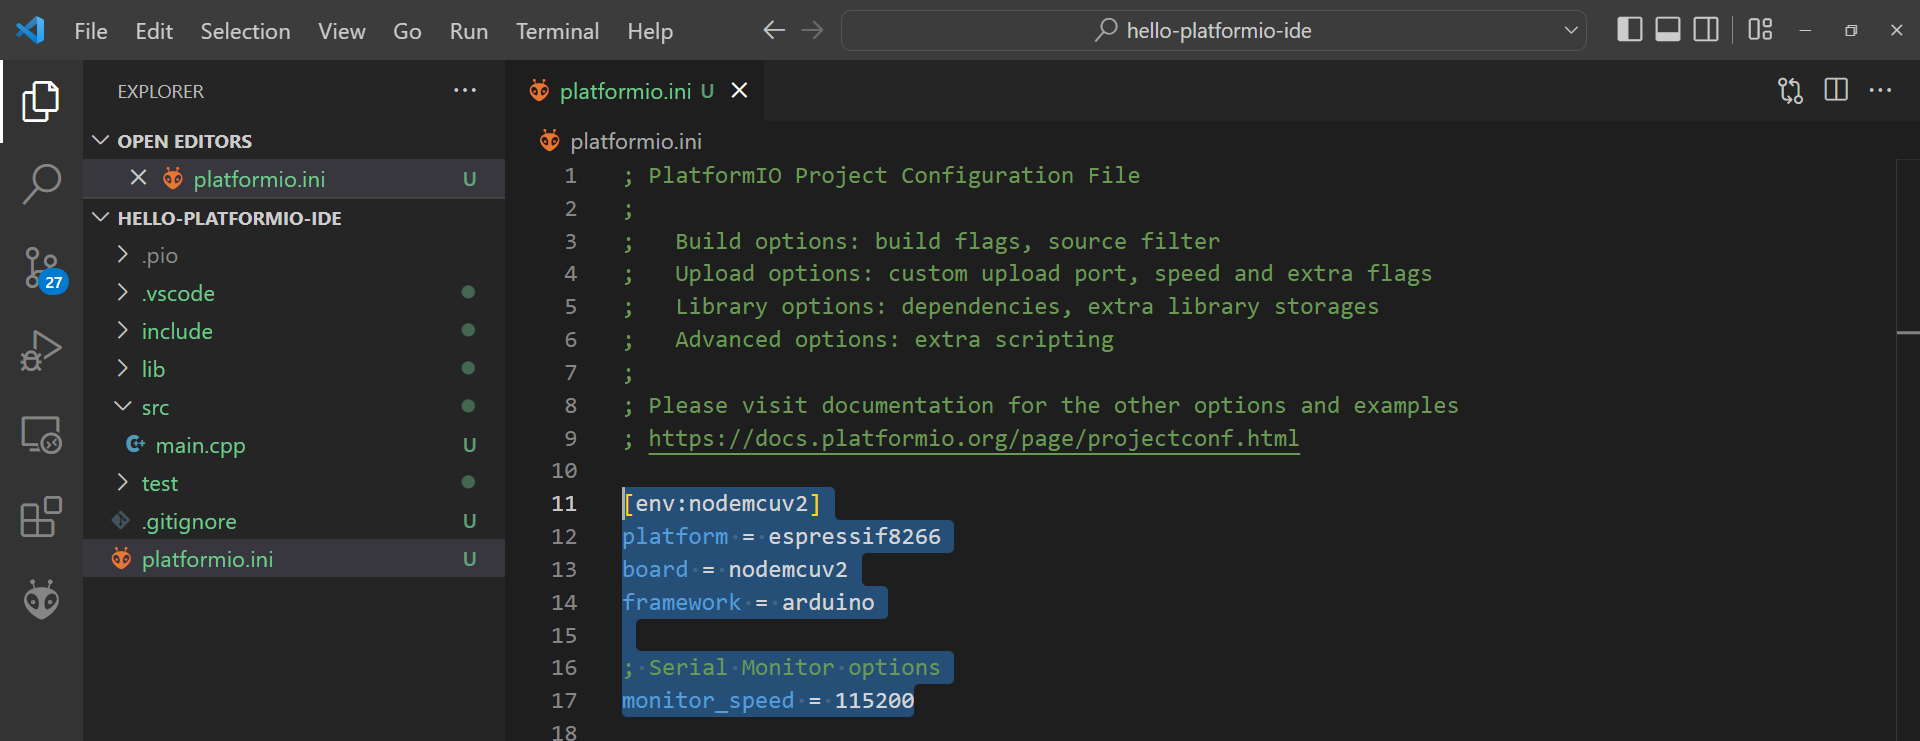
Edit your code and add the following lines.
#include <Arduino.h>

const int ledPin = LED_BUILTIN;

void setup()
{
  // Set the Serial Monitor baud Rate
  Serial.begin(115200);

  // setup LED_BUILTIN AS output
  pinMode(ledPin, OUTPUT);

  // Print start of the project
  Serial.println("\nBlink sketch starting...");
}

void loop()
{
  digitalWrite(ledPin, HIGH);
  delay(500);
  digitalWrite(ledPin, LOW);
  delay(500);
}
This should print the following messages in your terminal.
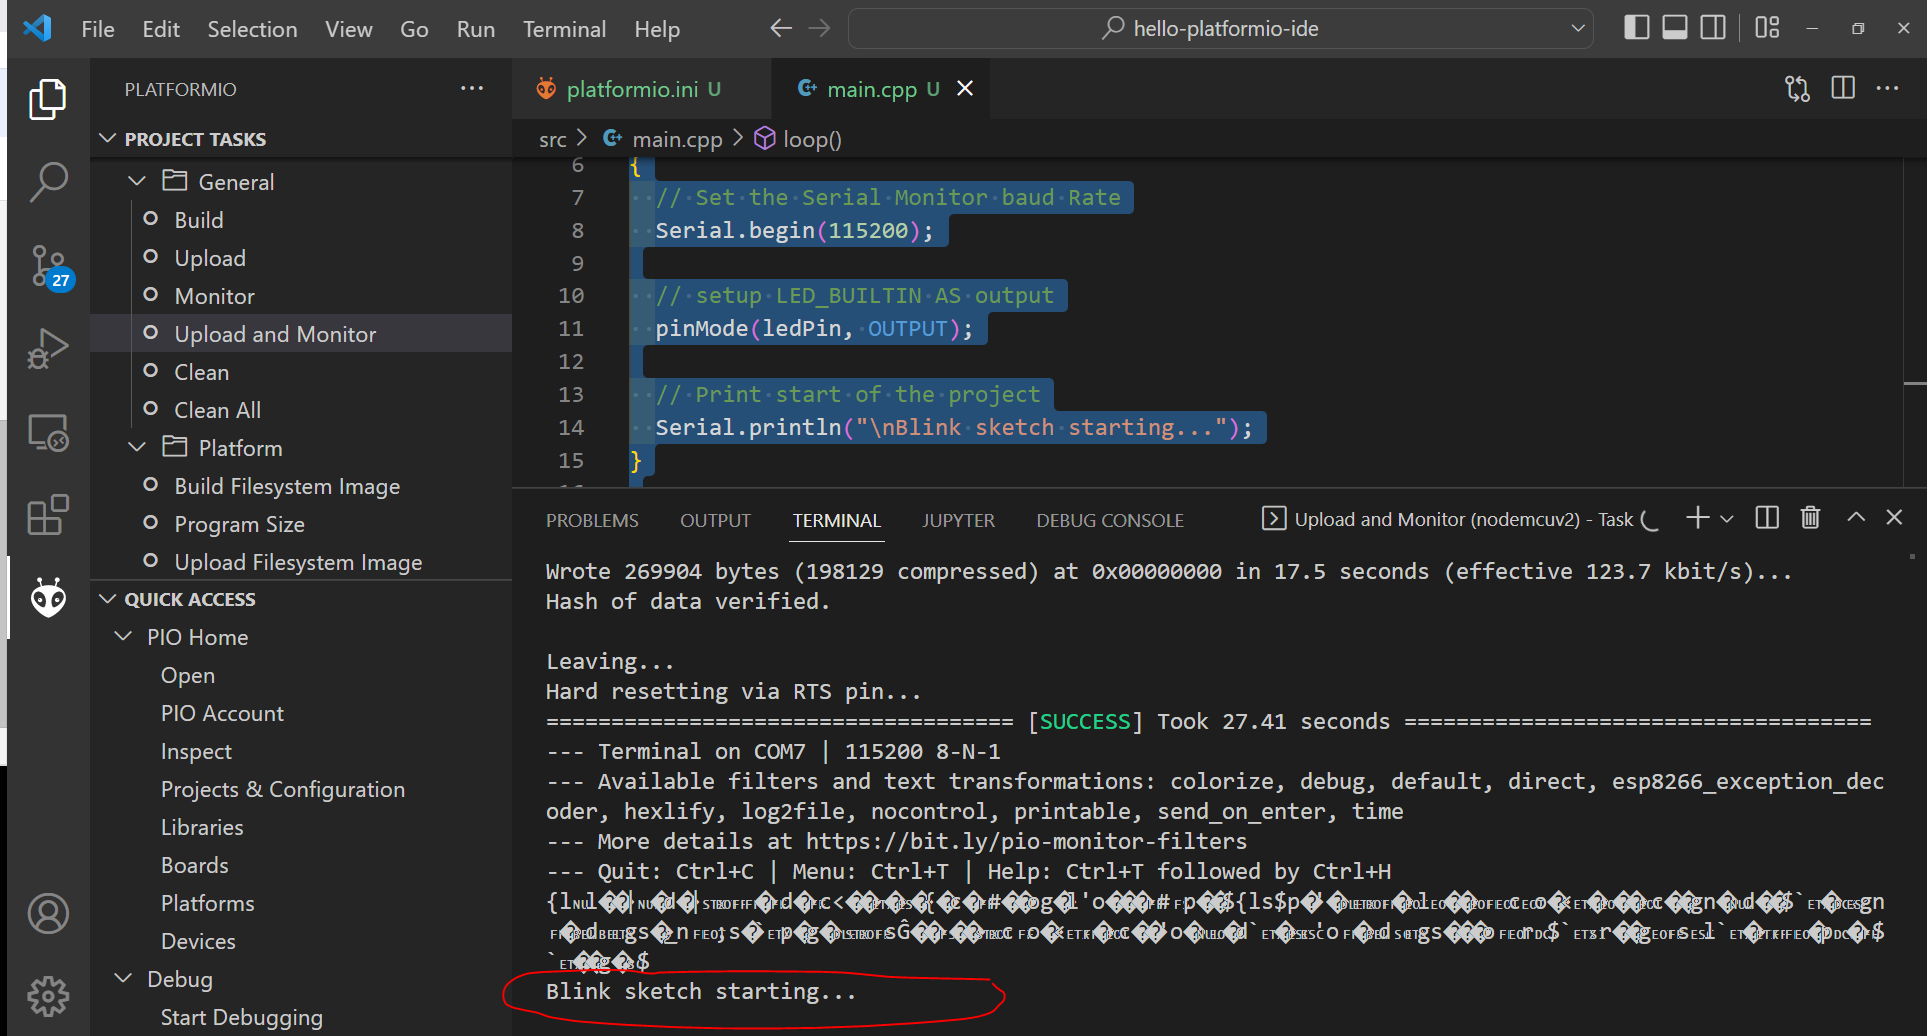
If you have seen the following messages displayed then it means that your Serial Monitor setup is good! Yay! 🙂
You now have finished the first project in this PlatformIO tutorial. Take a break if needed before proceeding to the next project.
Adding a library or dependency to your projects in PlatformIO
The succeeding steps that we are going to do is based on my ESP8266 Webserver Using LittleFS. It is perfectly okay if you don’t understand how it works because the goal of this post is about PlatformIO IDE. You can just copy and paste the code for now and read more about the article later.
donsky
Our blink sketch is now awesome but we can improve it further by having to control the blinking of the built-in LED through your mobile phone isn’t it? That is what we are going to do in this section.
First, let’s add the awesome library ESPAsyncWebServer to our project. This will allow us to create a web server using our microcontroller where we can program the control of the turning on or off of the built-in LED.
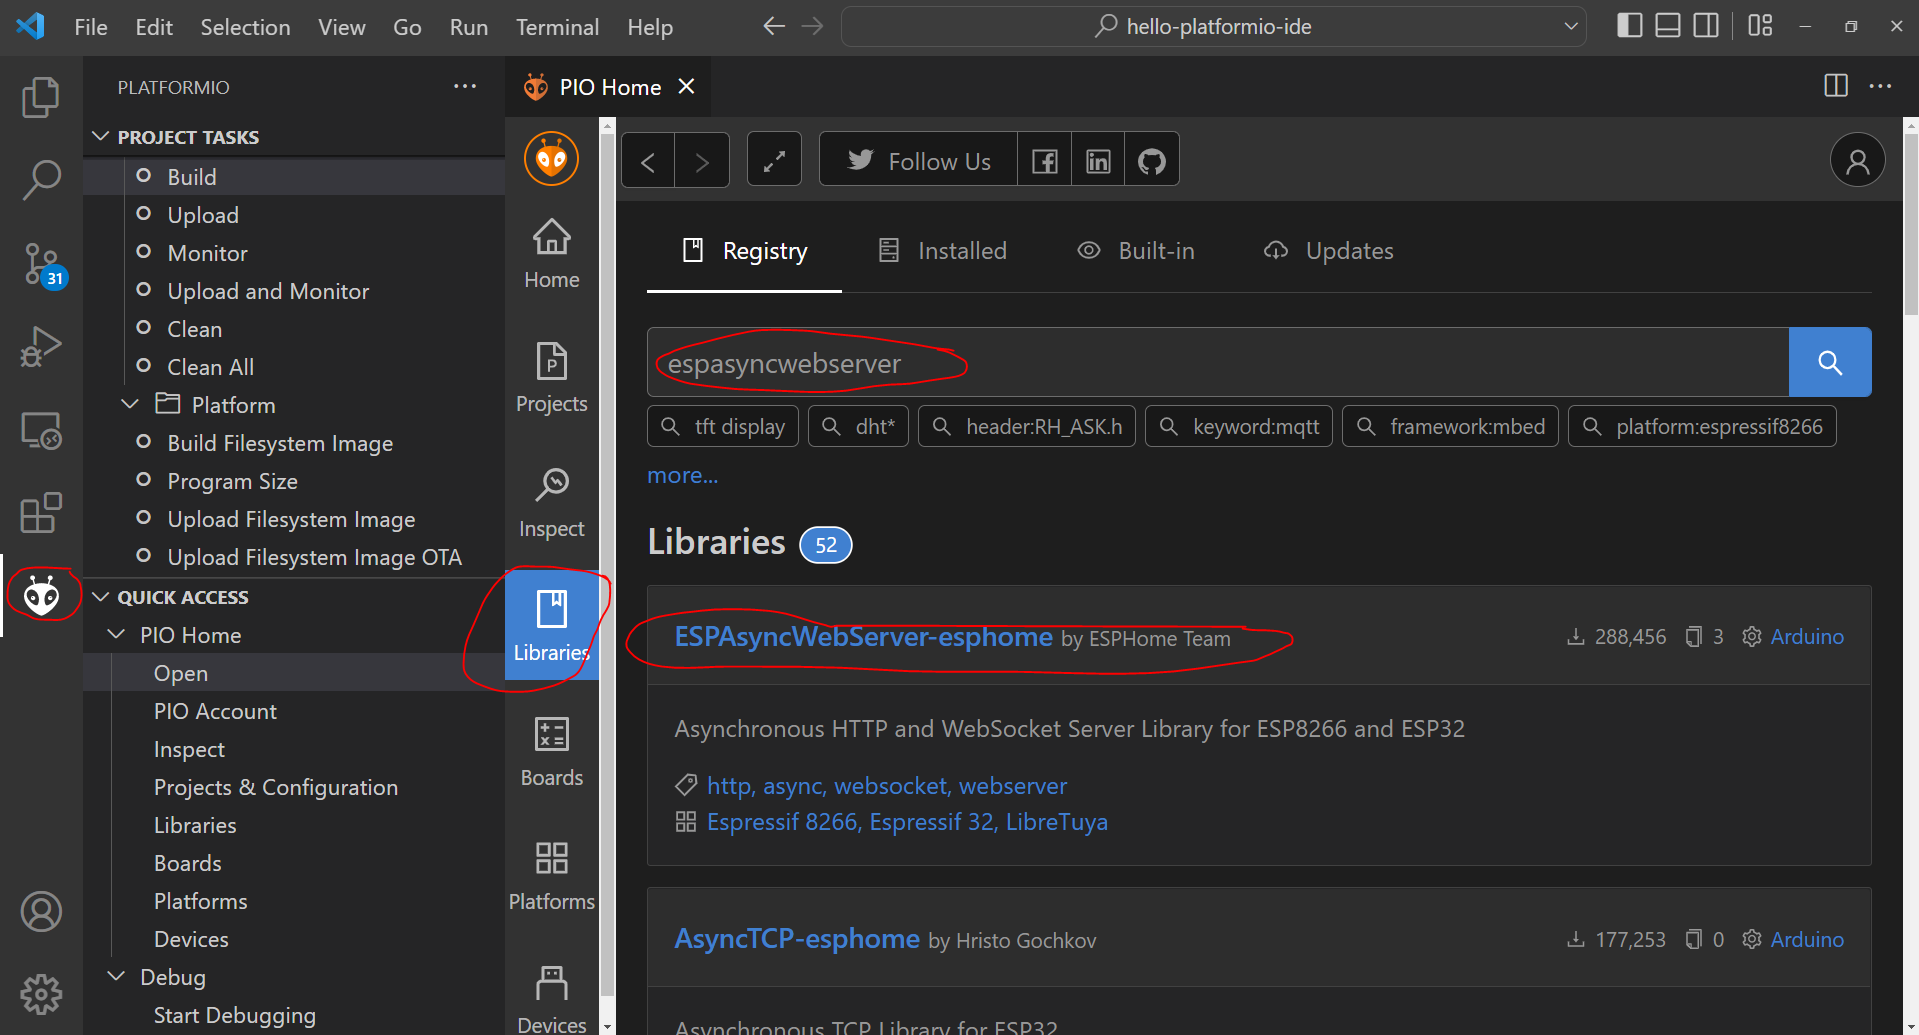
Go back to your PlatformIO Home and type in “espasyncwebserver“.
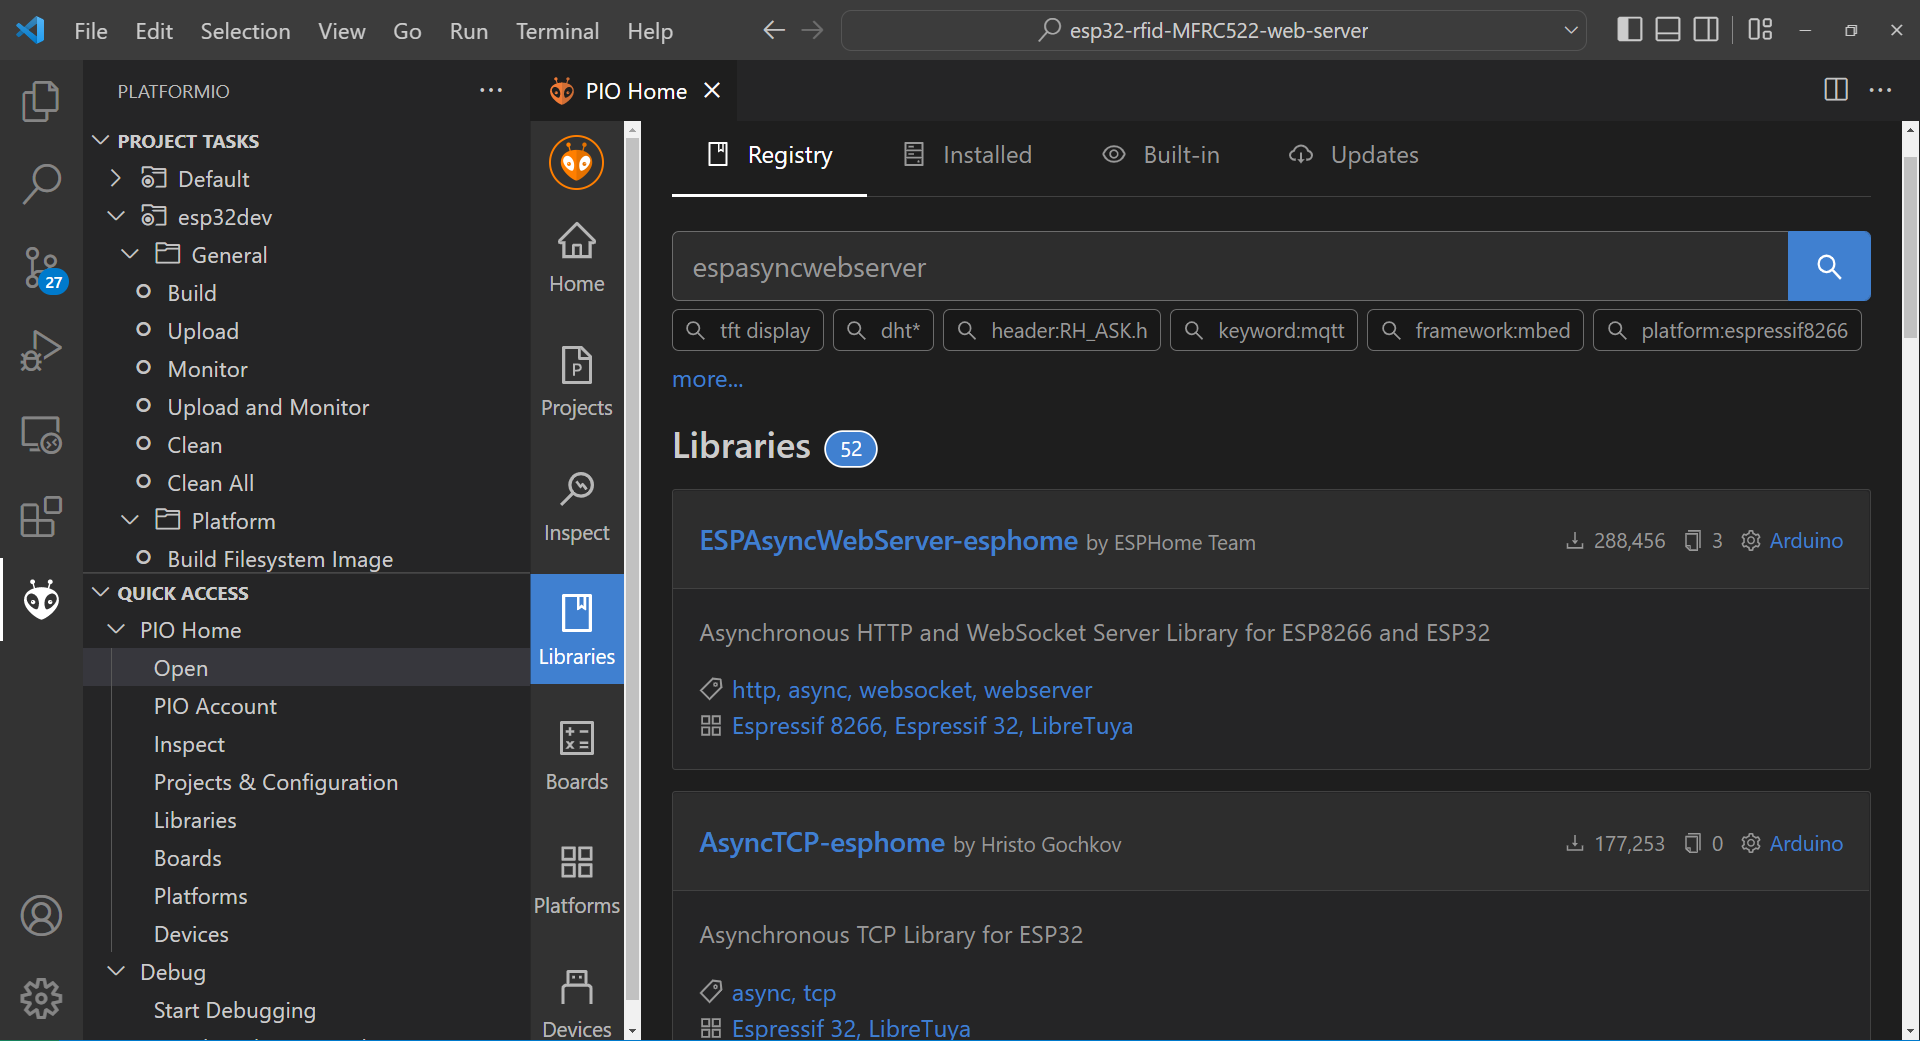
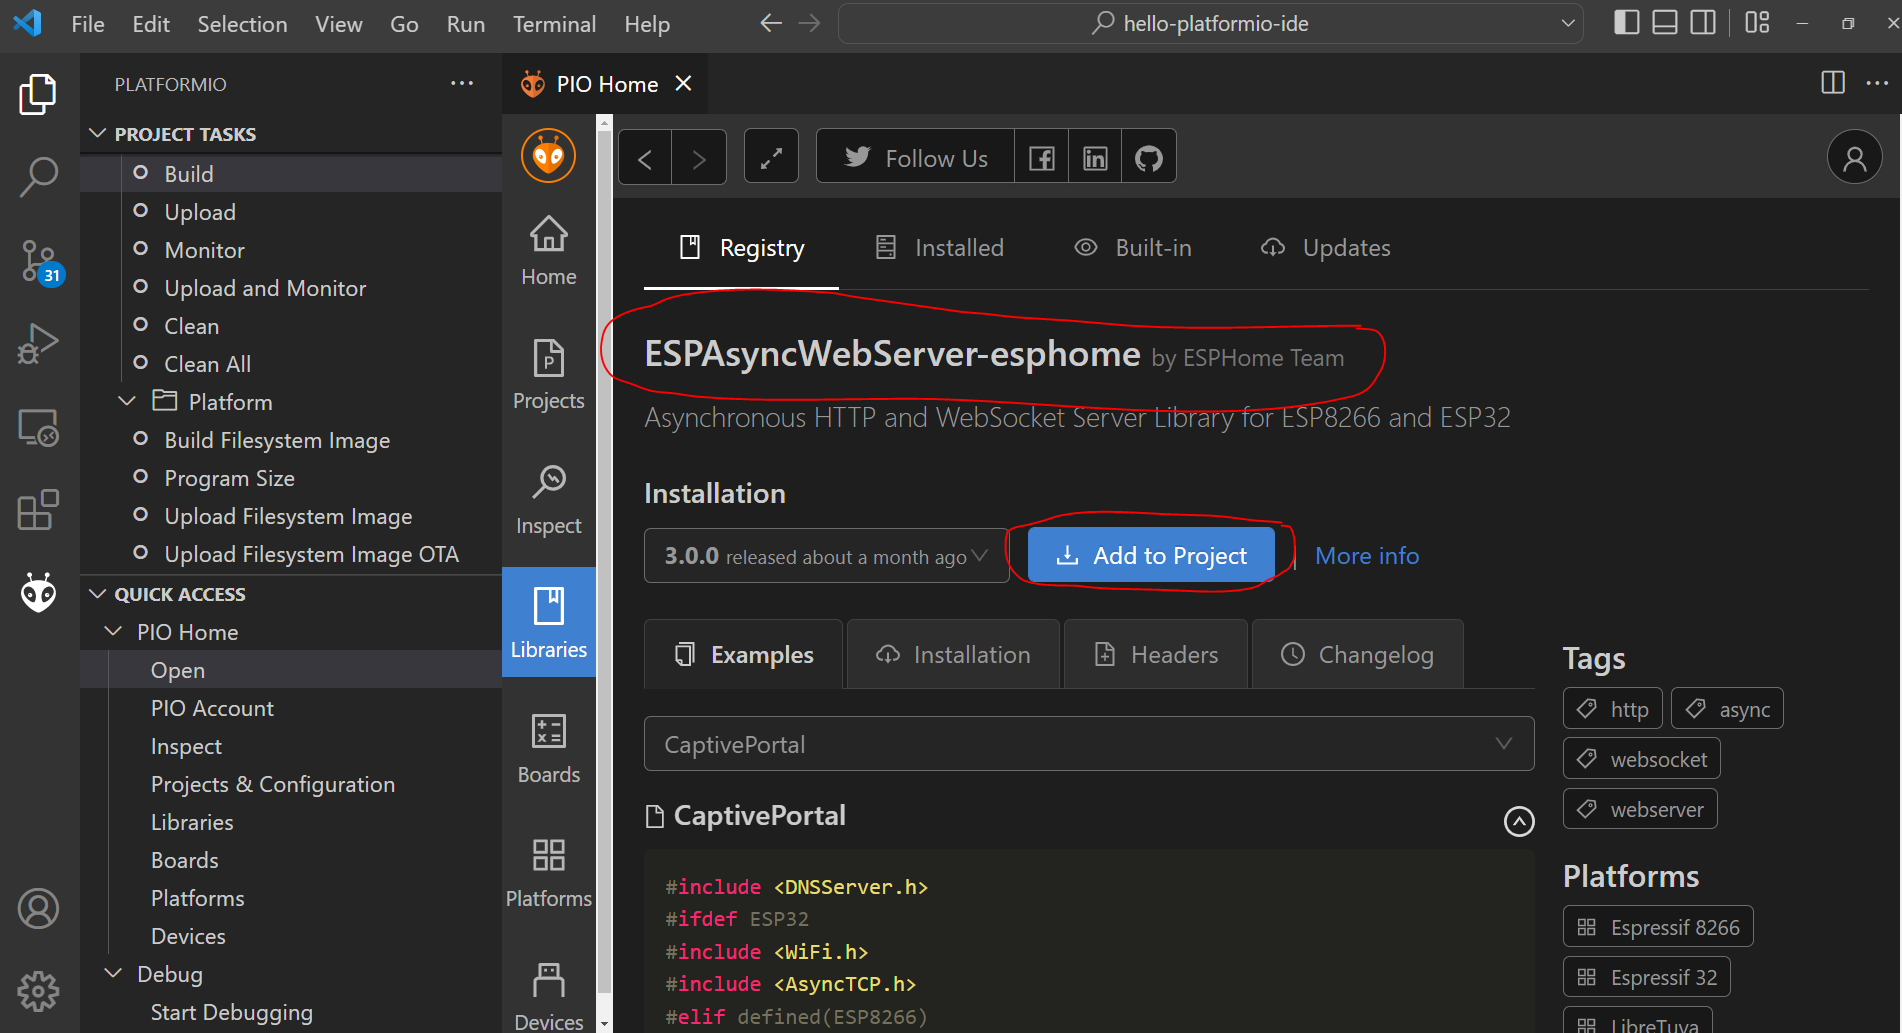
Select the library by ESPHome Team then click the Add to Project button.
Select our project “hello-platform-ide” in the dropdown.
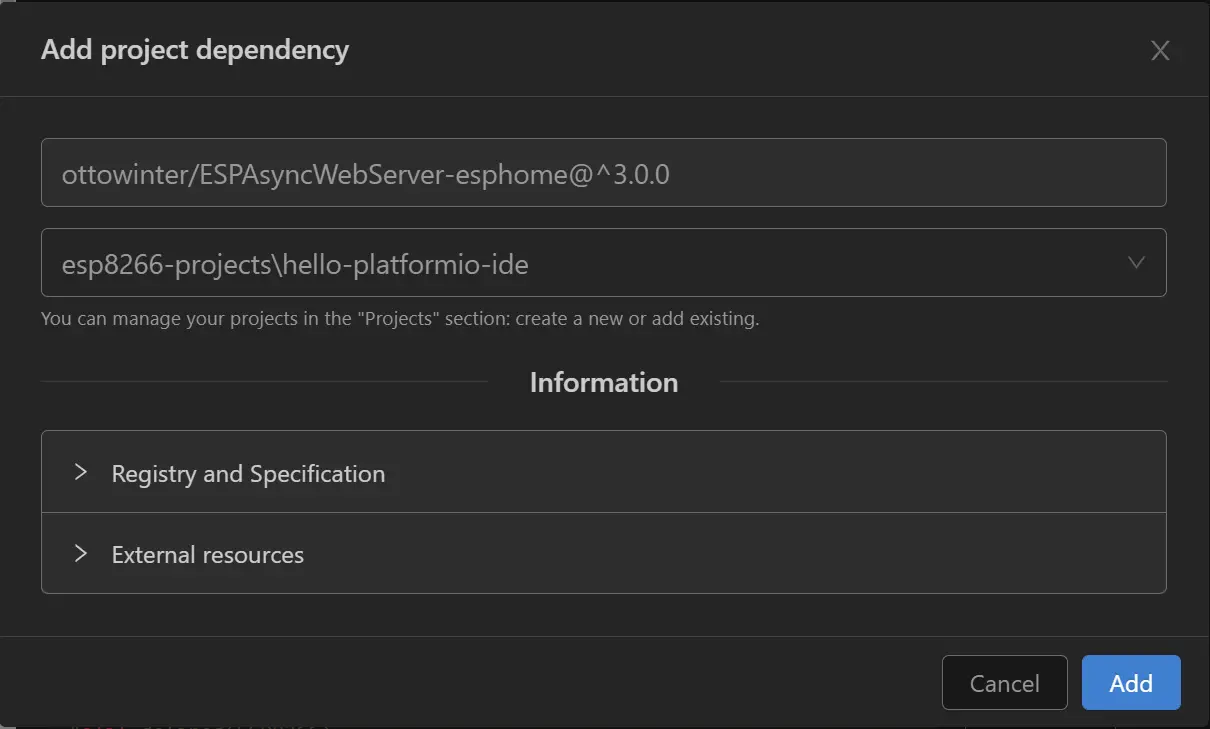
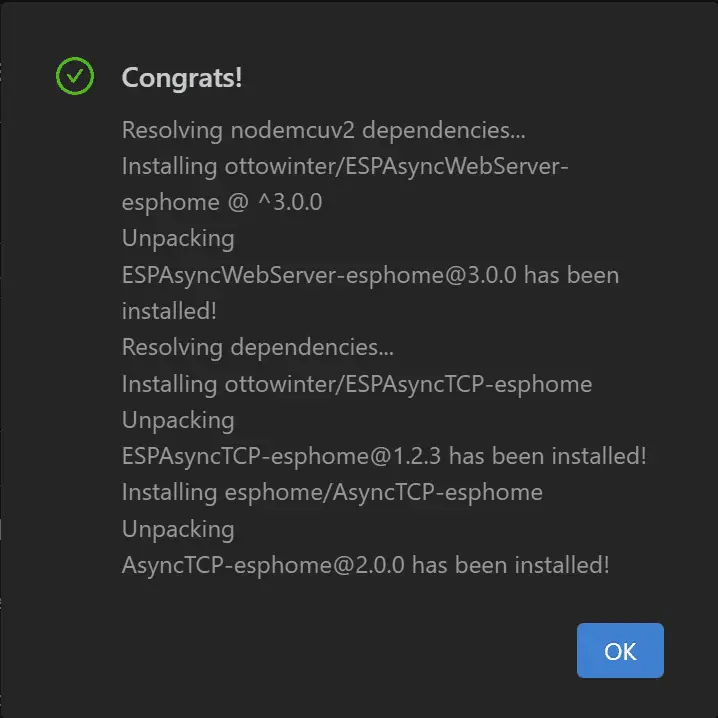
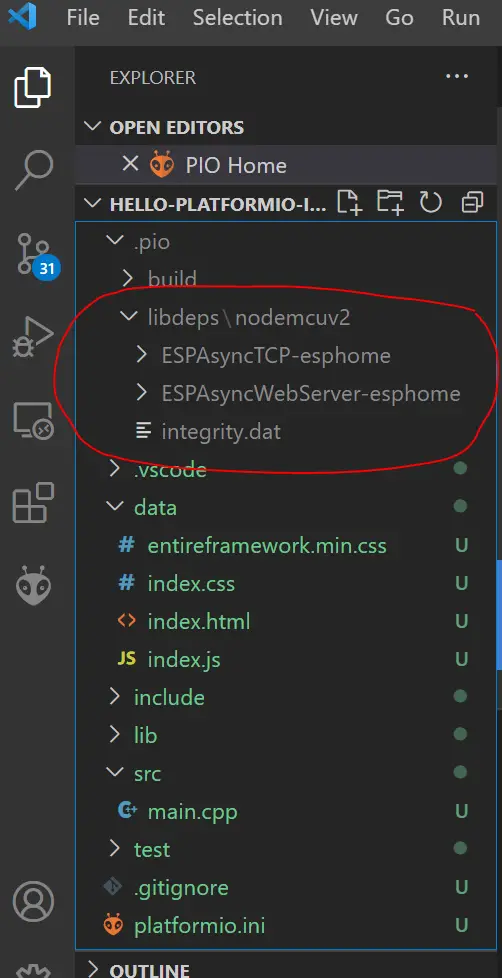
What this will do is download that library and all the dependencies automatically for you. It will be placed in the .pio folder of your file explorer tab like the image below.
Isn’t this amazing? Everything was taken care of by the PlatformIO IDE. If you now check your platform.ini file then it will look something like this.
[env:nodemcuv2]
platform = espressif8266
board = nodemcuv2
framework = arduino
monitor_speed = 115200
board_build.filesystem = littlefs
lib_deps = ottowinter/ESPAsyncWebServer-esphome@^3.0.0
Note: I have added the line board_build.filesystem = littlefs as we will be using LittleFS FileSystem here. If you want to know how this works then please check this ESP8266 Webserver Using LittleFS. You can skip this particular detail for now as this is not the focus of this post.
Cleaning and Rebuilding Projects in PlatformIO
Whenever you do something on your platform.ini file then it is always a good idea to clean and rebuild your project. This will allow everything to be rebuilt from scratch and remove errors in your project.
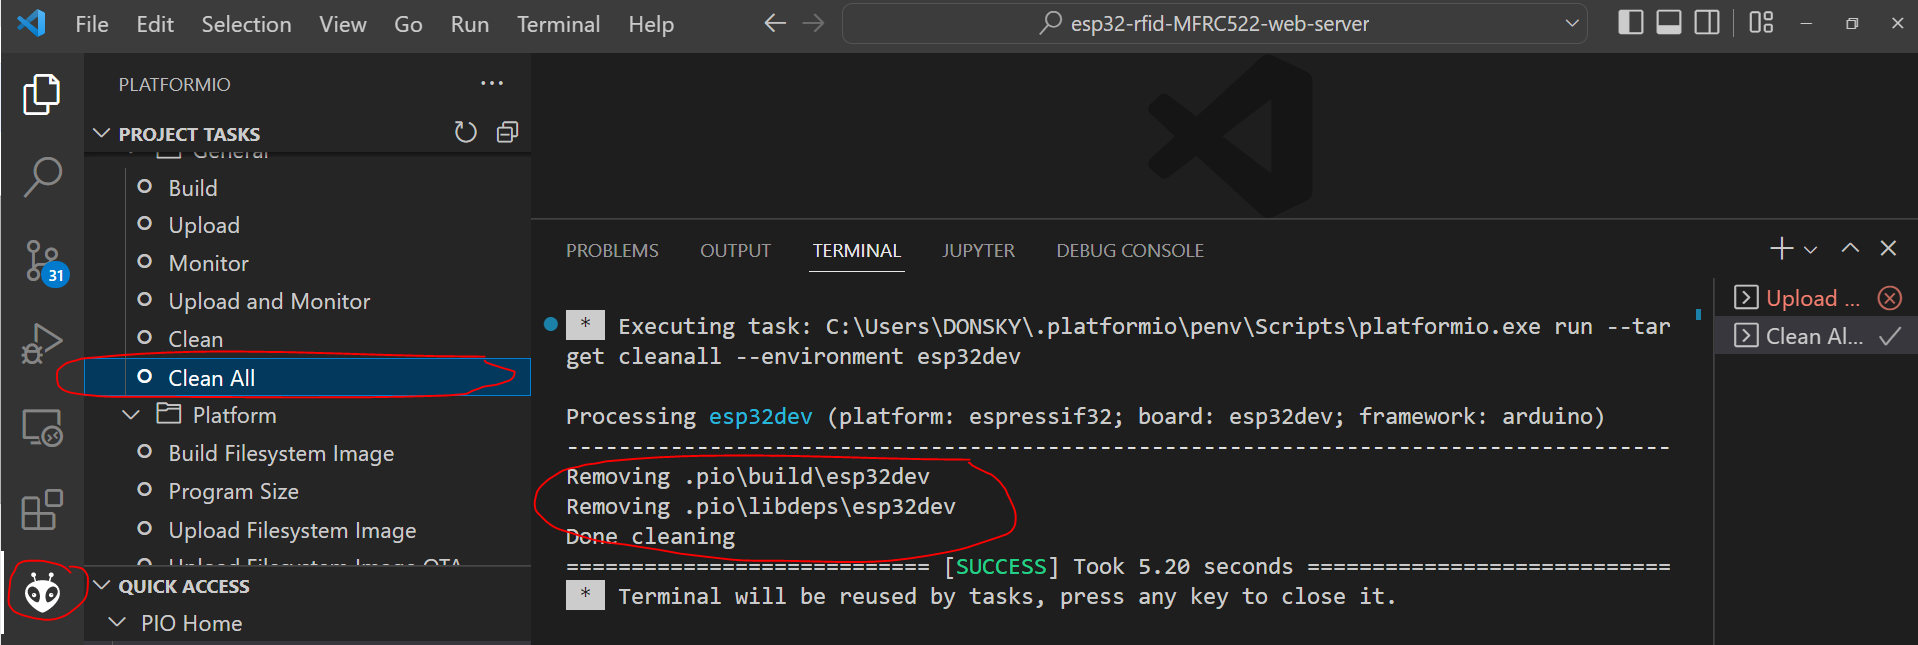
To do this, open the tasks section and click the Clean All task. This will delete all the downloaded dependencies including the configurations that were set.
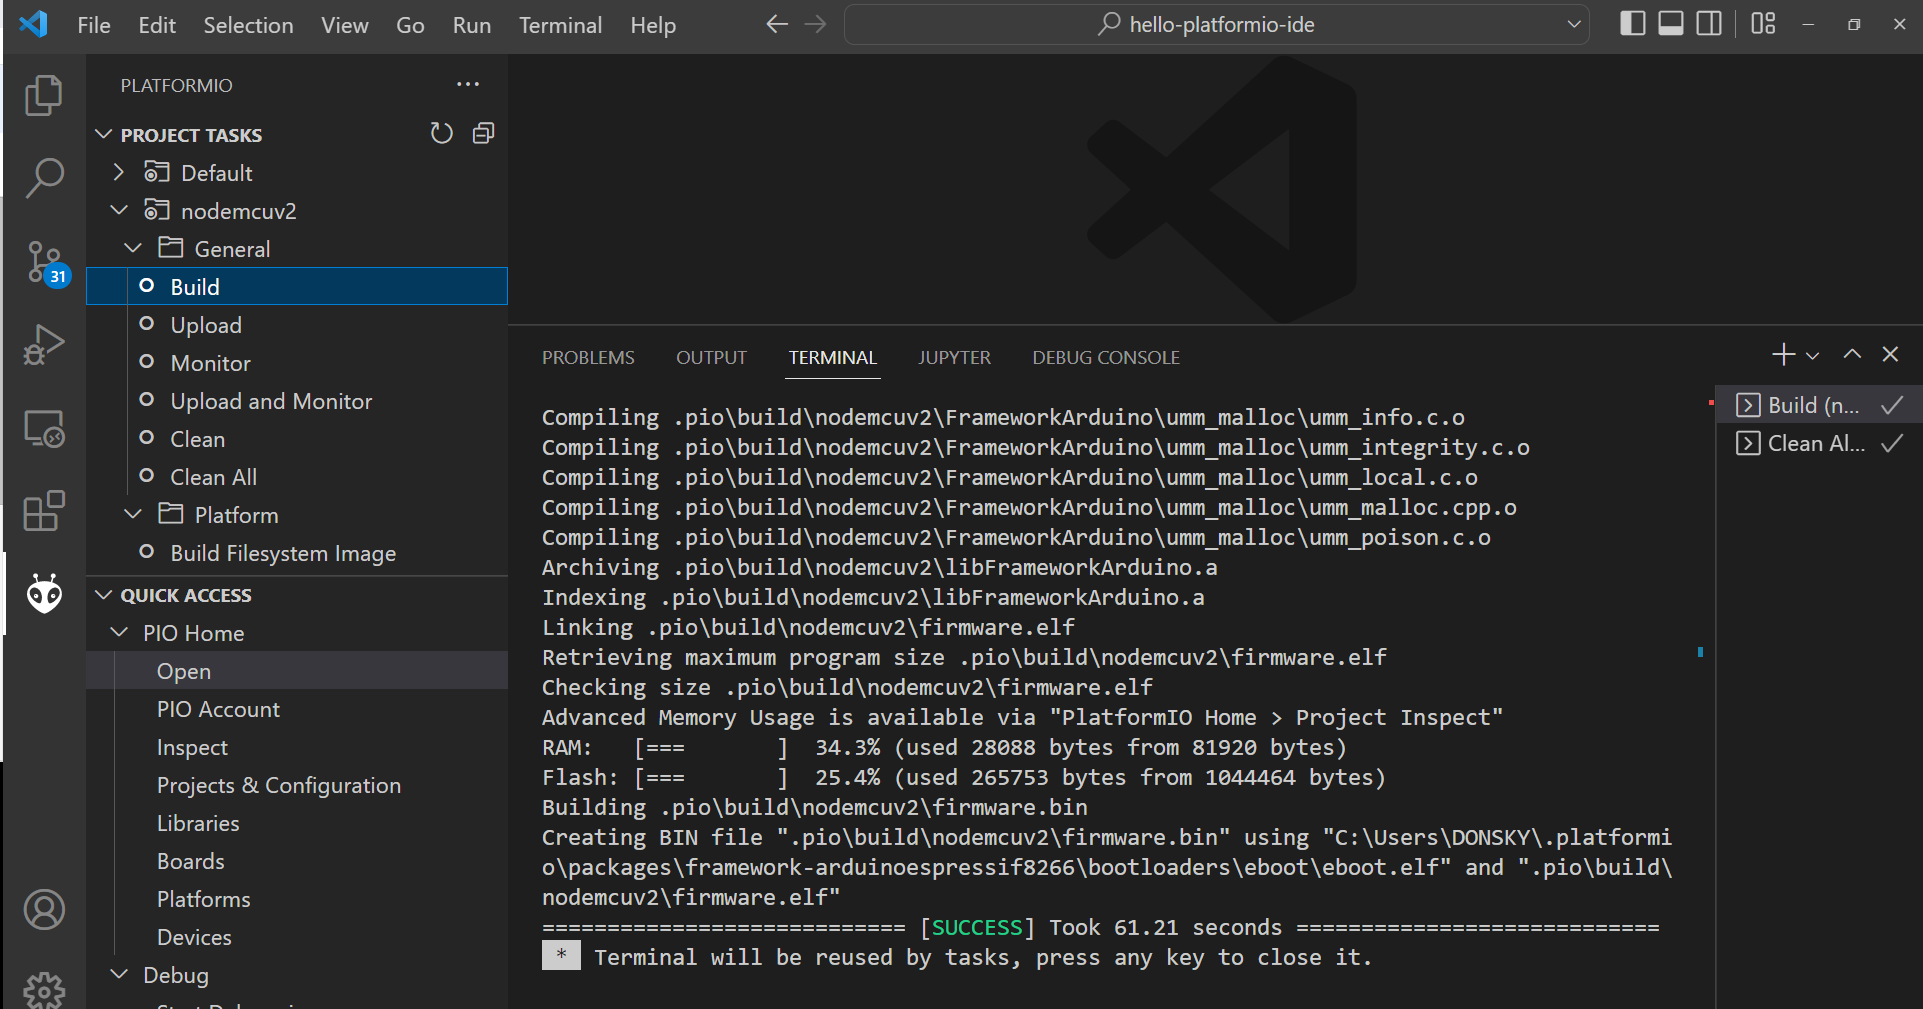
When the clean task is finished then clean the Build task. This will rebuild everything and download all the dependencies again. This might take some time so be patient and let it finish.
Uploading files to the Microcontroller Flash Memory in PlatformIO
Now that we have added our libraries we now start coding the next part of our project. We need a user interface (an HTML page to be exact) to display to our users.
To do that go to this link and copy the data folder there and place it in your project.
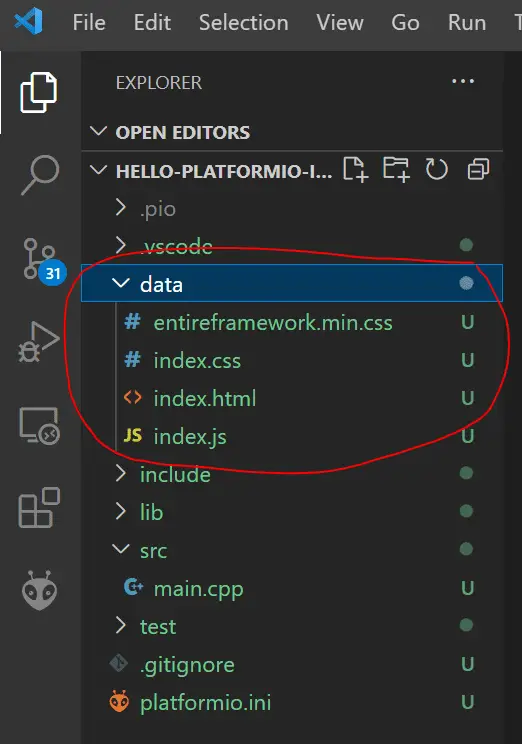
If you need to upload files into the flash memory of your MCU either through SPIFFS or LittleFS then you should create a folder named “data” at the root of your project.
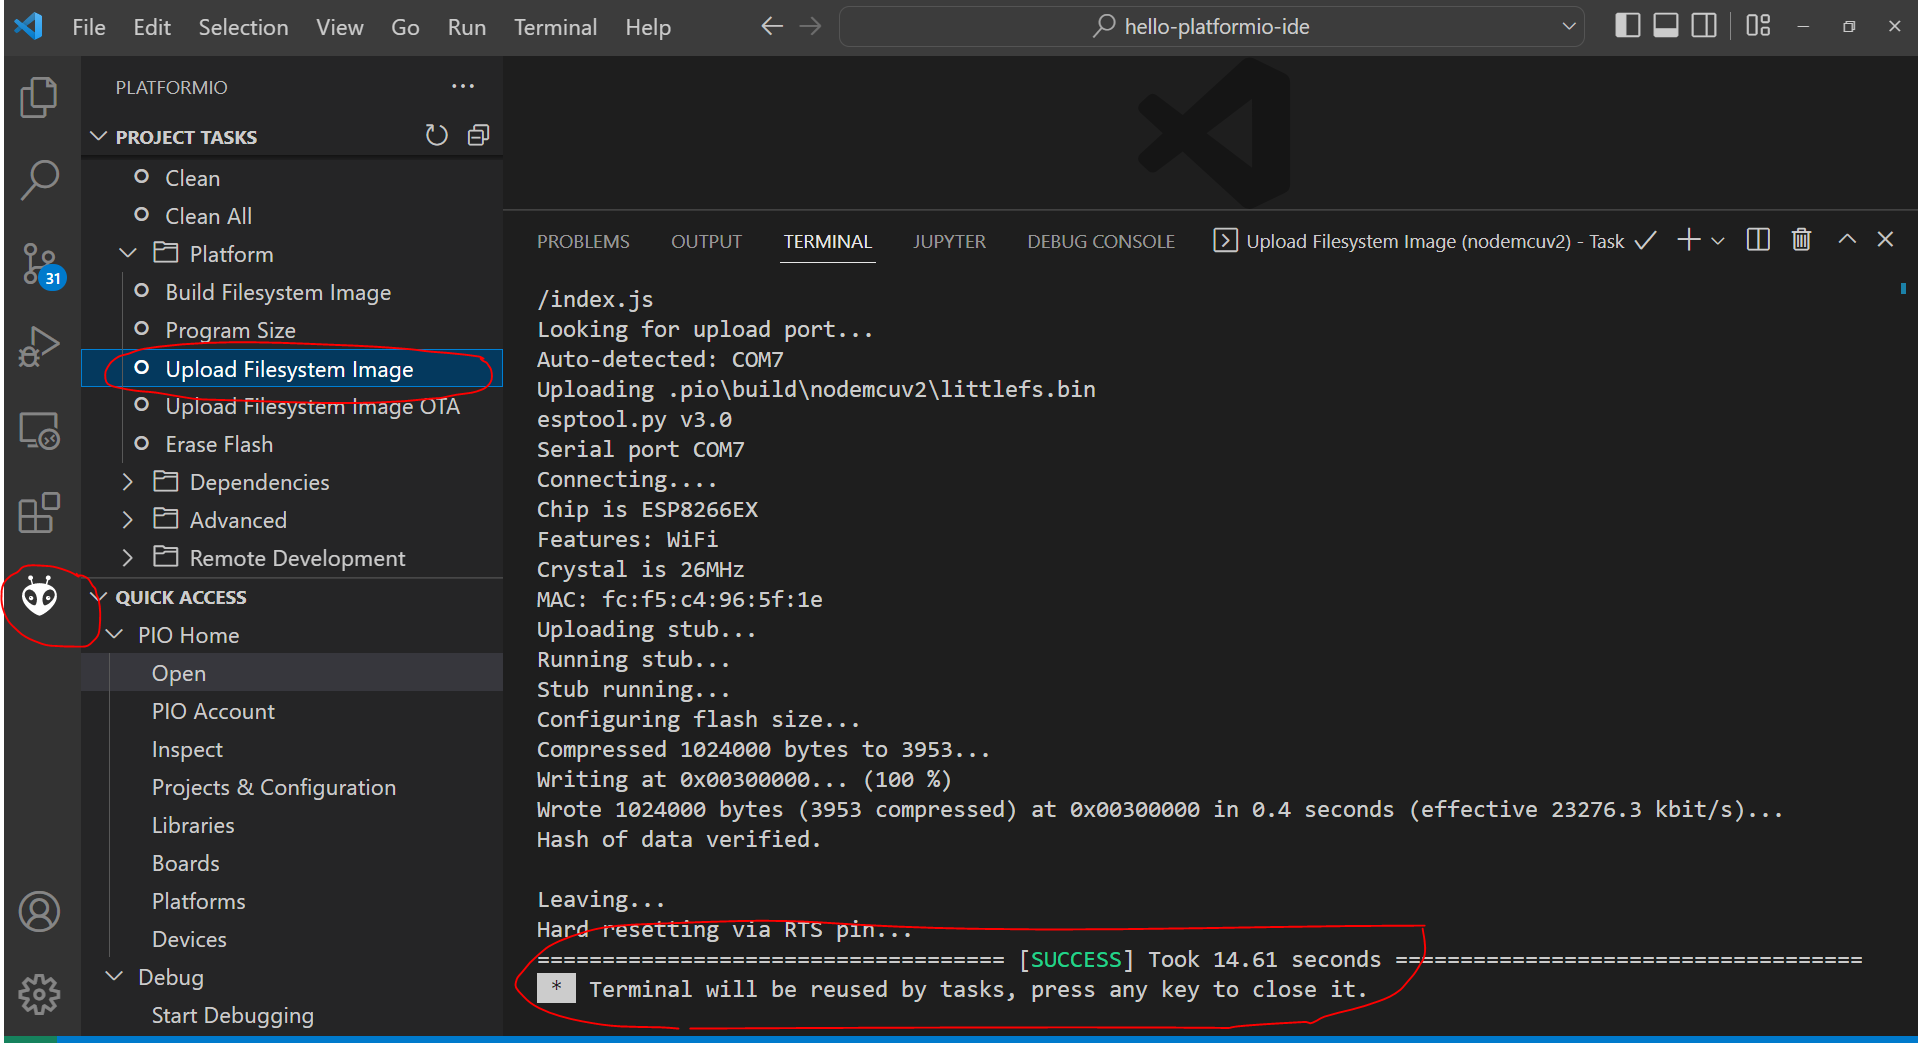
Next, we will upload it to the Flash memory of our MCU by clicking the Upload FileSystem Image in the tasks list. You should see the Success message and if so then you have succeeded in uploading it to the Flash memory of your MCU.
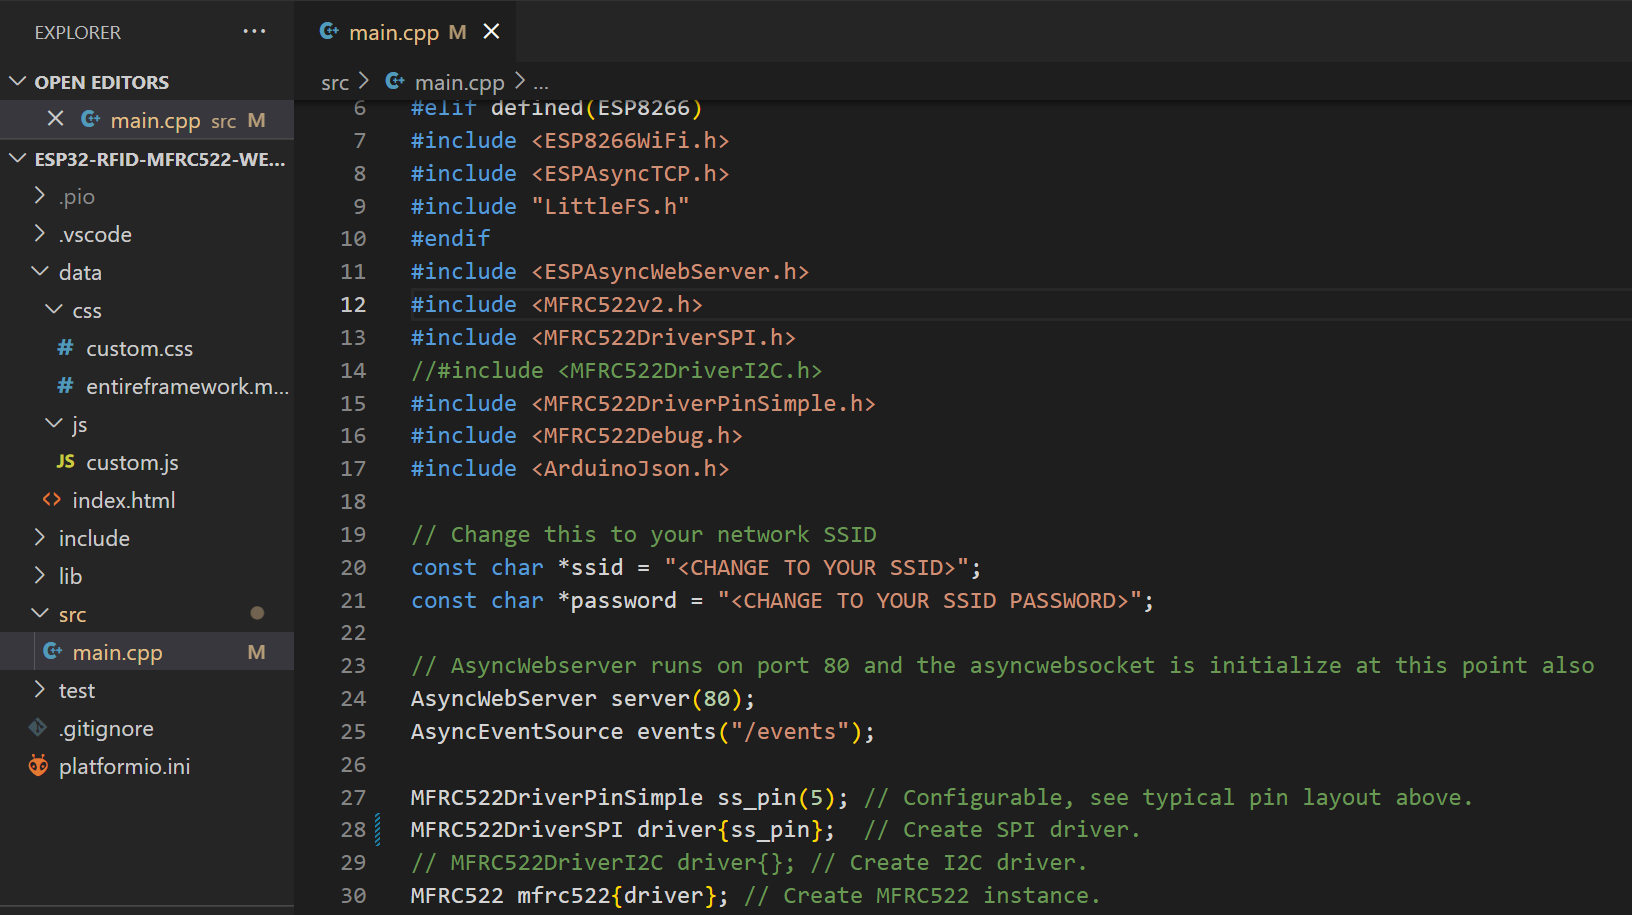
Next, we need to edit the main.cpp file so that it would read the files that we have added to the FileSystem of our MCU. To do that, copy the contents of this file in my repository and replace your main.cpp.
Also, change this line to match the SSID and password of your wifi.
/*
  Replace the SSID and Password according to your wifi
*/
const char *ssid = "<REPLACE_WITH_YOUR_WIFI_SSID>";
const char *password = "<REPLACE_WITH_YOUR_WIFI_PASSWORD>";
Once done, execute another Clean and Build task by following the section above.
If everything goes well then we upload our sketch by executing the Upload and Monitor task. If you see the IP address displayed then it means that you have successfully uploaded the project to the microcontroller.
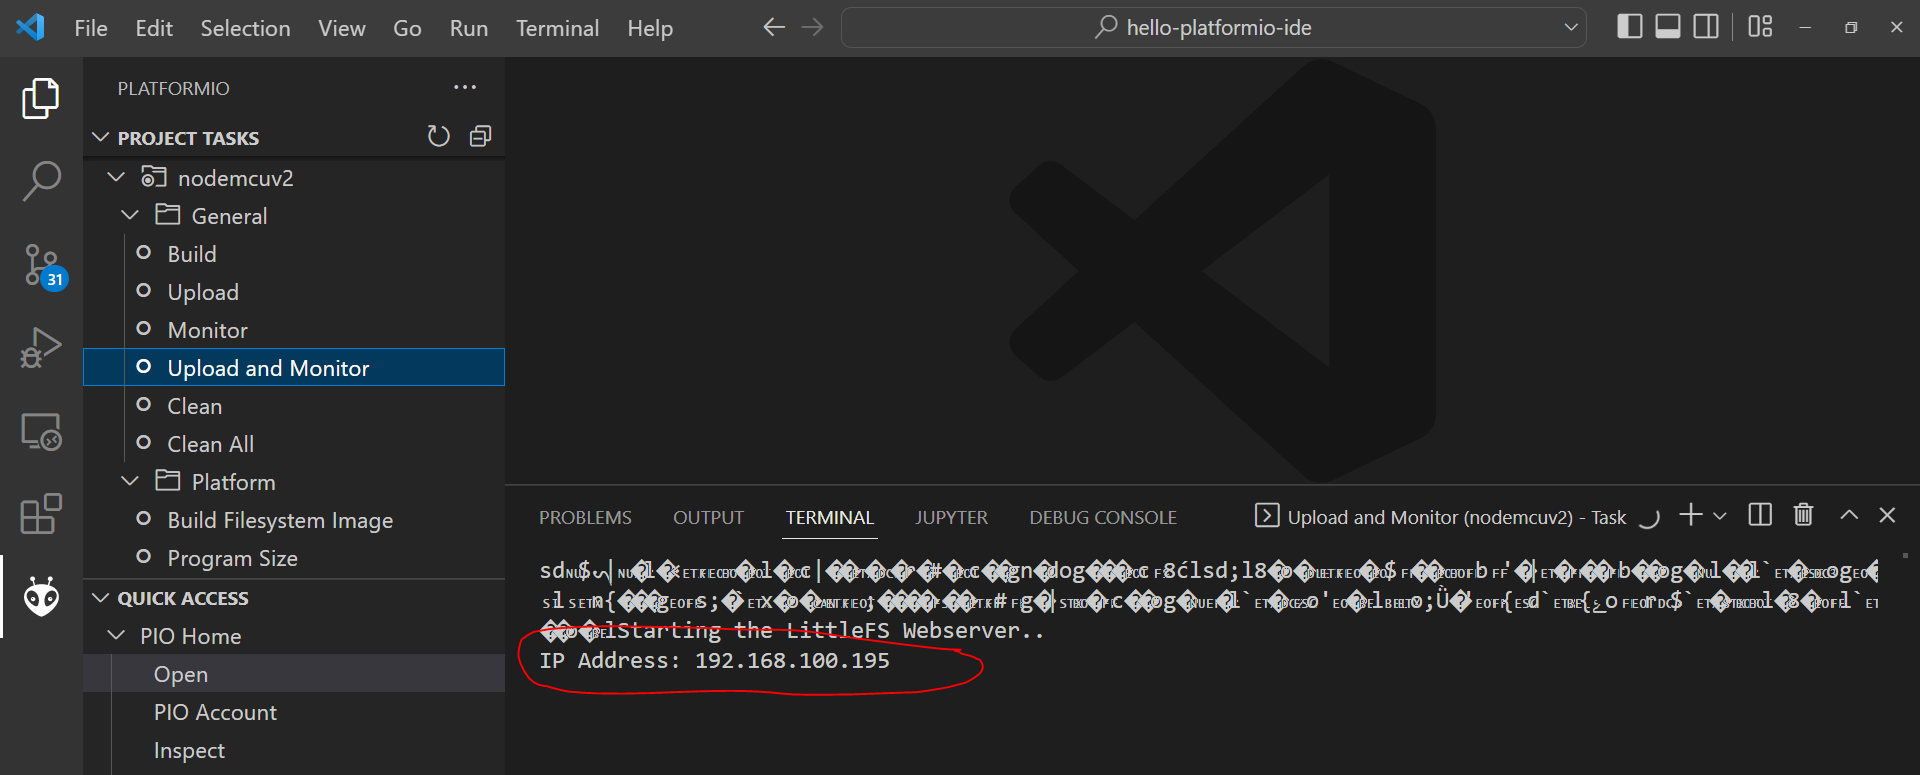
Get your mobile phone and open your browser and type in the IP Address shown in the Serial Monitor.
You should be able to control the built-in LED in your Microcontroller using your mobile phone and the toggle switch that we have on the HTML page.
If you have reached here and followed everything then Congratulations! You now know your way around using PlatformIO IDE.
Wrap up
We have gone through the steps on how to get started with PlatformIO IDE in this PlatformIO tutorial. We started with the reason why this PlatformIO IDE is an excellent tool with its numerous features and use in creating simple to semi-complex projects.
I hope you learned something! Happy Exploring!
Support Me!
I love sharing what I know and hopefully, I was able to help you. Writing helpful content takes so much time and research. If you think you like my work and I have managed to help you then please consider supporting my channel. I would be very grateful and would boost my confidence that what I am doing is making a big change in the world. (No Pun Intended!) 😉
Become a Patron!
Leave a Reply