Introduction
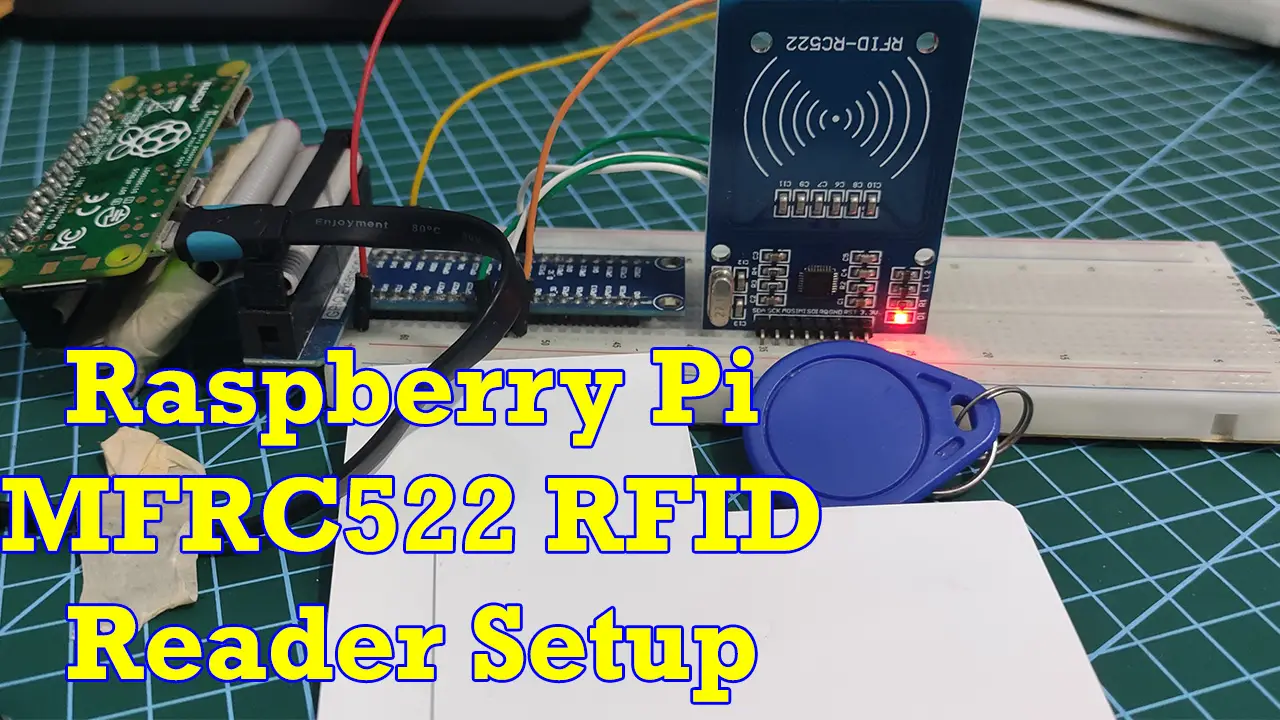
This post will show you how to configure your Raspberry Pi to read information coming from the MFRC522 RFID reader. RFID modules are excellent components for use in cases where you need to authenticate something or somebody to any system. They are cheap, easy to program, and used in any tracking, security, or tollgate system.
If you want to see this in video format then please see below or watch it on my YouTube channel.
Prerequisites
You need the following components to follow along with this project.
- Raspberry Pi (I used Raspberry Pi Zero W) – Amazon | AliExpress
- RFID Reader (MFRC522 RFID READER) – Amazon | AliExpress | Bangood
- RFID Tags – Amazon | AliExpress
- Breadboard – Amazon | AliExpress | Bangood
- Connecting Wires – Amazon | AliExpress | Bangood
Disclosure: These are affiliate links and I will earn small commissions to support my site when you buy through these links.
I installed a headless installation of Raspberry Pi OS
Related Content:
Setup Raspberry Pi Headless No Monitor
For a video demo presentation of this project then please look down below.
How RFID works with Raspberry Pi?
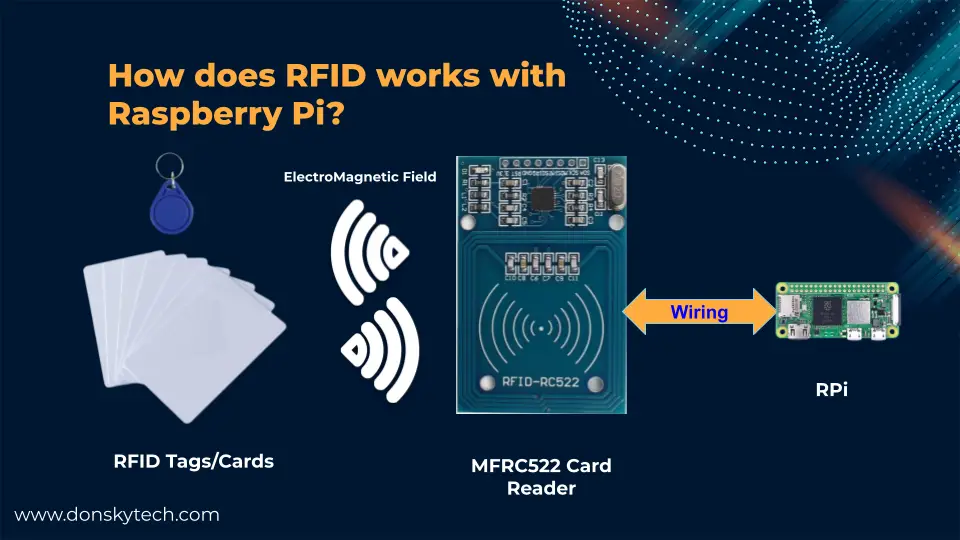
The image above shows how the RFID system works and how our project is going to function. The Raspberry Pi MCU is powering the RFID MFRC522 card reader.
The reader has an RF module and antenna module that generates an electromagnetic field around it. The RFID tags/cards can be either called active or passive. Active RFID tags/cards contain a battery while passive does not. The difference between the two is the range at which the card reader could read it with the active tags/cards having a greater range.
When the RFID tags/cards get in the range of the MFRC522 then the microchip gets activated sending its content and information in the form of a radio signal back to the reader.
The Raspberry Pi communicates with the RFID MFRC522 card reader to gather the tags/card information.
Wiring/Schematic
Below is the wiring and schematic on how we are going to connect our Raspberry Pi to our MFRC522 RFID Card Reader. Take note that the pin assignments are Physical pin numbering and not the BCM numbering system.

Programming the MFRC522 RFID Reader
The MFRC522 RFID Card Reader can be configured to work on I2C or SPI interface. In this post, we will be focussing on using the SPI in communicating with this module.
We need first to enable the SPI in the Raspberry Pi before we start communicating with the MFRC522 RFID reader.
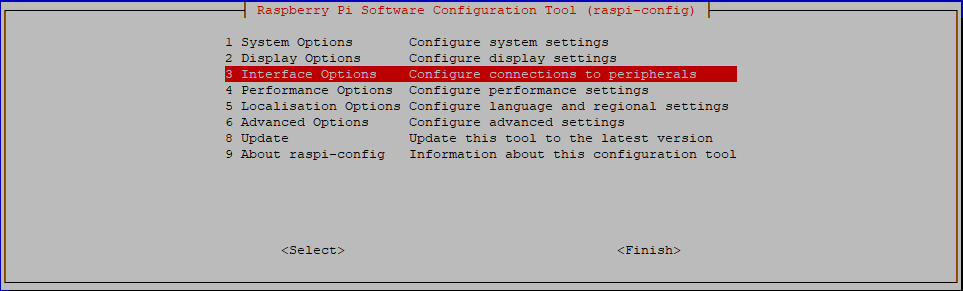
Enable SPI
- Using SSH, connect to your Raspberry Pi either through Putty or a command prompt. Enter your credentials to authenticate.
- It is a good idea to always update your Raspberry Pi to the latest version and to do that, execute the below command
sudo apt update
sudo apt full-upgrade- Next, we execute the below command to configure the SPI
sudo raspi-config- Select the Interface Options
- Select SPI and when it prompts “Would you like the SPI interface to be enabled?” click Yes
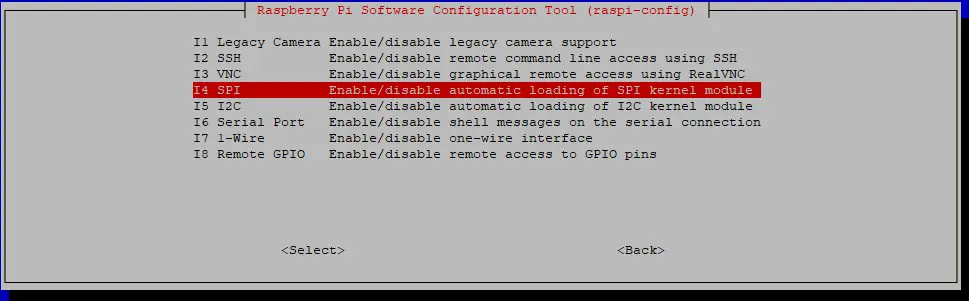
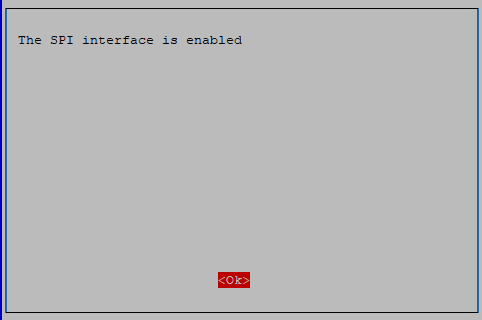
- You should be able to see the following message if everything is ok.
- Reboot your Raspberry Pi by executing the below command.
sudo rebootHow to validate if SPI is enabled properly? Execute the below command:
lsmod | grep spiYou should be seeing the following output
spidev                 20480  0
spi_bcm2835            20480  0
RFID Reader Library
I was looking for a library that is Python 3 compatible as we are going to program this using Python. I saw the following MFRC522 library in the PyPi repository and this looks good when I tried it although it is a bit dated.
Install this library by executing the below command.
pip install mfrc522Writing to the RFID Tags
The complete code for this project is in my GitHub repository if you would like to take a look.
The following is the code to write information to the RFID tag.
import RPi.GPIO as GPIO
from mfrc522 import SimpleMFRC522

reader = SimpleMFRC522()

try:
        text = input('Input badge number:')
        print("Place your RFID card near the reader...")
        reader.write(text)
        print(f'{text} written to RFID Card')
finally:
        GPIO.cleanup()
To run this file then execute the below command.
python3 write_mfrc522.py Type in a sample badge number like the below entries. In our case here, we are writing an RFID Badge Number assignment for our RFID card. The format could be like this “AA BB CC DD” which is a sequence of 8 letters divided into four columns with spaces. You can add different information yourself. Then place your RFID tag near the MFRC522 reader then it should write the information to that card.
Input badge number:QQ TT RR SS
Place your RFID card near the reader...
QQ TT RR SS written to RFID Card
Let’s go over what each line of the code does.
import RPi.GPIO as GPIO
from mfrc522 import SimpleMFRC522

reader = SimpleMFRC522()
Import the necessary package, especially the SimpleMFRC522 class. Create an instance of the SimpleMFRC522 and assign it to the reader variable.
try:
        text = input('Input badge number:')
        print("Place your RFID card near the reader...")
        reader.write(text)
        print(f'{text} written to RFID Card')
finally:
        GPIO.cleanup()
Prompt the user for information that we want to write to the RFID card tag.
Wait for the RFID MFRC522 RFID reader to detect the tag and if it was detected then write the information to the console that writing was successful. Cleanup the GPIO once an error occurred or the user clicks Ctrl + C or the exit command.
Reading or Scanning for RFID tags
In this section, we will write code that will read the information in our RFID tags. The code to do this is written below.
import RPi.GPIO as GPIO
from mfrc522 import SimpleMFRC522
import signal
import sys

reader = SimpleMFRC522()
is_reading = True

GPIO.setwarnings(False)

# Capture SIGINT for cleanup
def end_read(signal, frame):
    global is_reading
    print('Ctrl+C captured, exiting')
    is_reading = False
    sys.exit()

# Hook the SIGINT
signal.signal(signal.SIGINT, end_read)

while is_reading:
    try:
        id, text = reader.read()
        print(f'ID :: {id}')
        print(f'Badge Number :: {text}')
    finally:
        GPIO.cleanup()
To run this file then enter the below code.
python3 read_mfrc522.pyPlace the RFID tag that we have written above then you should be able to see the following message.
ID :: 983037651635
Badge Number :: QQ TT RR SS
Let us discuss what each line of code does.
import RPi.GPIO as GPIO
from mfrc522 import SimpleMFRC522
import signal
import sys
Import the necessary packages needed for this project.
reader = SimpleMFRC522()
is_reading = True

GPIO.setwarnings(False)
Initialize our reader class and the is_reading variable that will serve as a flag if we are going to continuously scan for RFID tags. We set the Rpi.GPIO warning to false so that unnecessary messages are not displayed.
# Capture SIGINT for cleanup
def end_read(signal, frame):
    global is_reading
    print('Ctrl+C captured, exiting')
    is_reading = False
    sys.exit()

# Hook the SIGINT
signal.signal(signal.SIGINT, end_read)
Capture cases where the user exits our program either by pressing Ctrl+C or killing our running python process. We set the is_reading variable to false so that our infinite loop will exit.
while is_reading:
    try:
        id, text = reader.read()
        print(f'ID :: {id}')
        print(f'Badge Number :: {text}')
    finally:
        GPIO.cleanup()
We continuously scan for RFID tags and print the Id and the Information that we have written on our RFID tag.
That is all for the code on how we could set up our Raspberry Pi to read information captured by the MFRC522 RFID Reader.
Wrap up
We have discussed how the Raspberry Pi can be used to capture information being read by the MFRC522 card reader in this post. We will use the information in this post in a later project.
Until then. Happy Exploring!
Leave a Reply