Introduction
Thonny IDE is a very simple Integrated Development Environment (IDE) to develop your Python or MicroPython projects. I have used this IDE more often on many of my MicroPython projects such as my Pico W Weather Station or WiFi Robot Car. However, I came across a project where I needed to run this application with multiple instances or windows so I could work on several projects simultaneously. I will share with you the simple trick on how to achieve this in this post.
If you want to see a video demo presentation of this project then please see below or watch it on my YouTube channel.
Why do you want to run multiple instances or windows of Thonny IDE?
Maybe you wanted to run two simultaneous projects at the same time so that is why you wanted to have multiple instances. I have to admit that the default option of this application is to run only one instance. I was expecting the same behavior as my Visual Studio Code where I could work on multiple projects at the same time.
So I was exploring ESP-NOW implementation in MicroPython so I needed to work on my two ESP32 microcontrollers below.
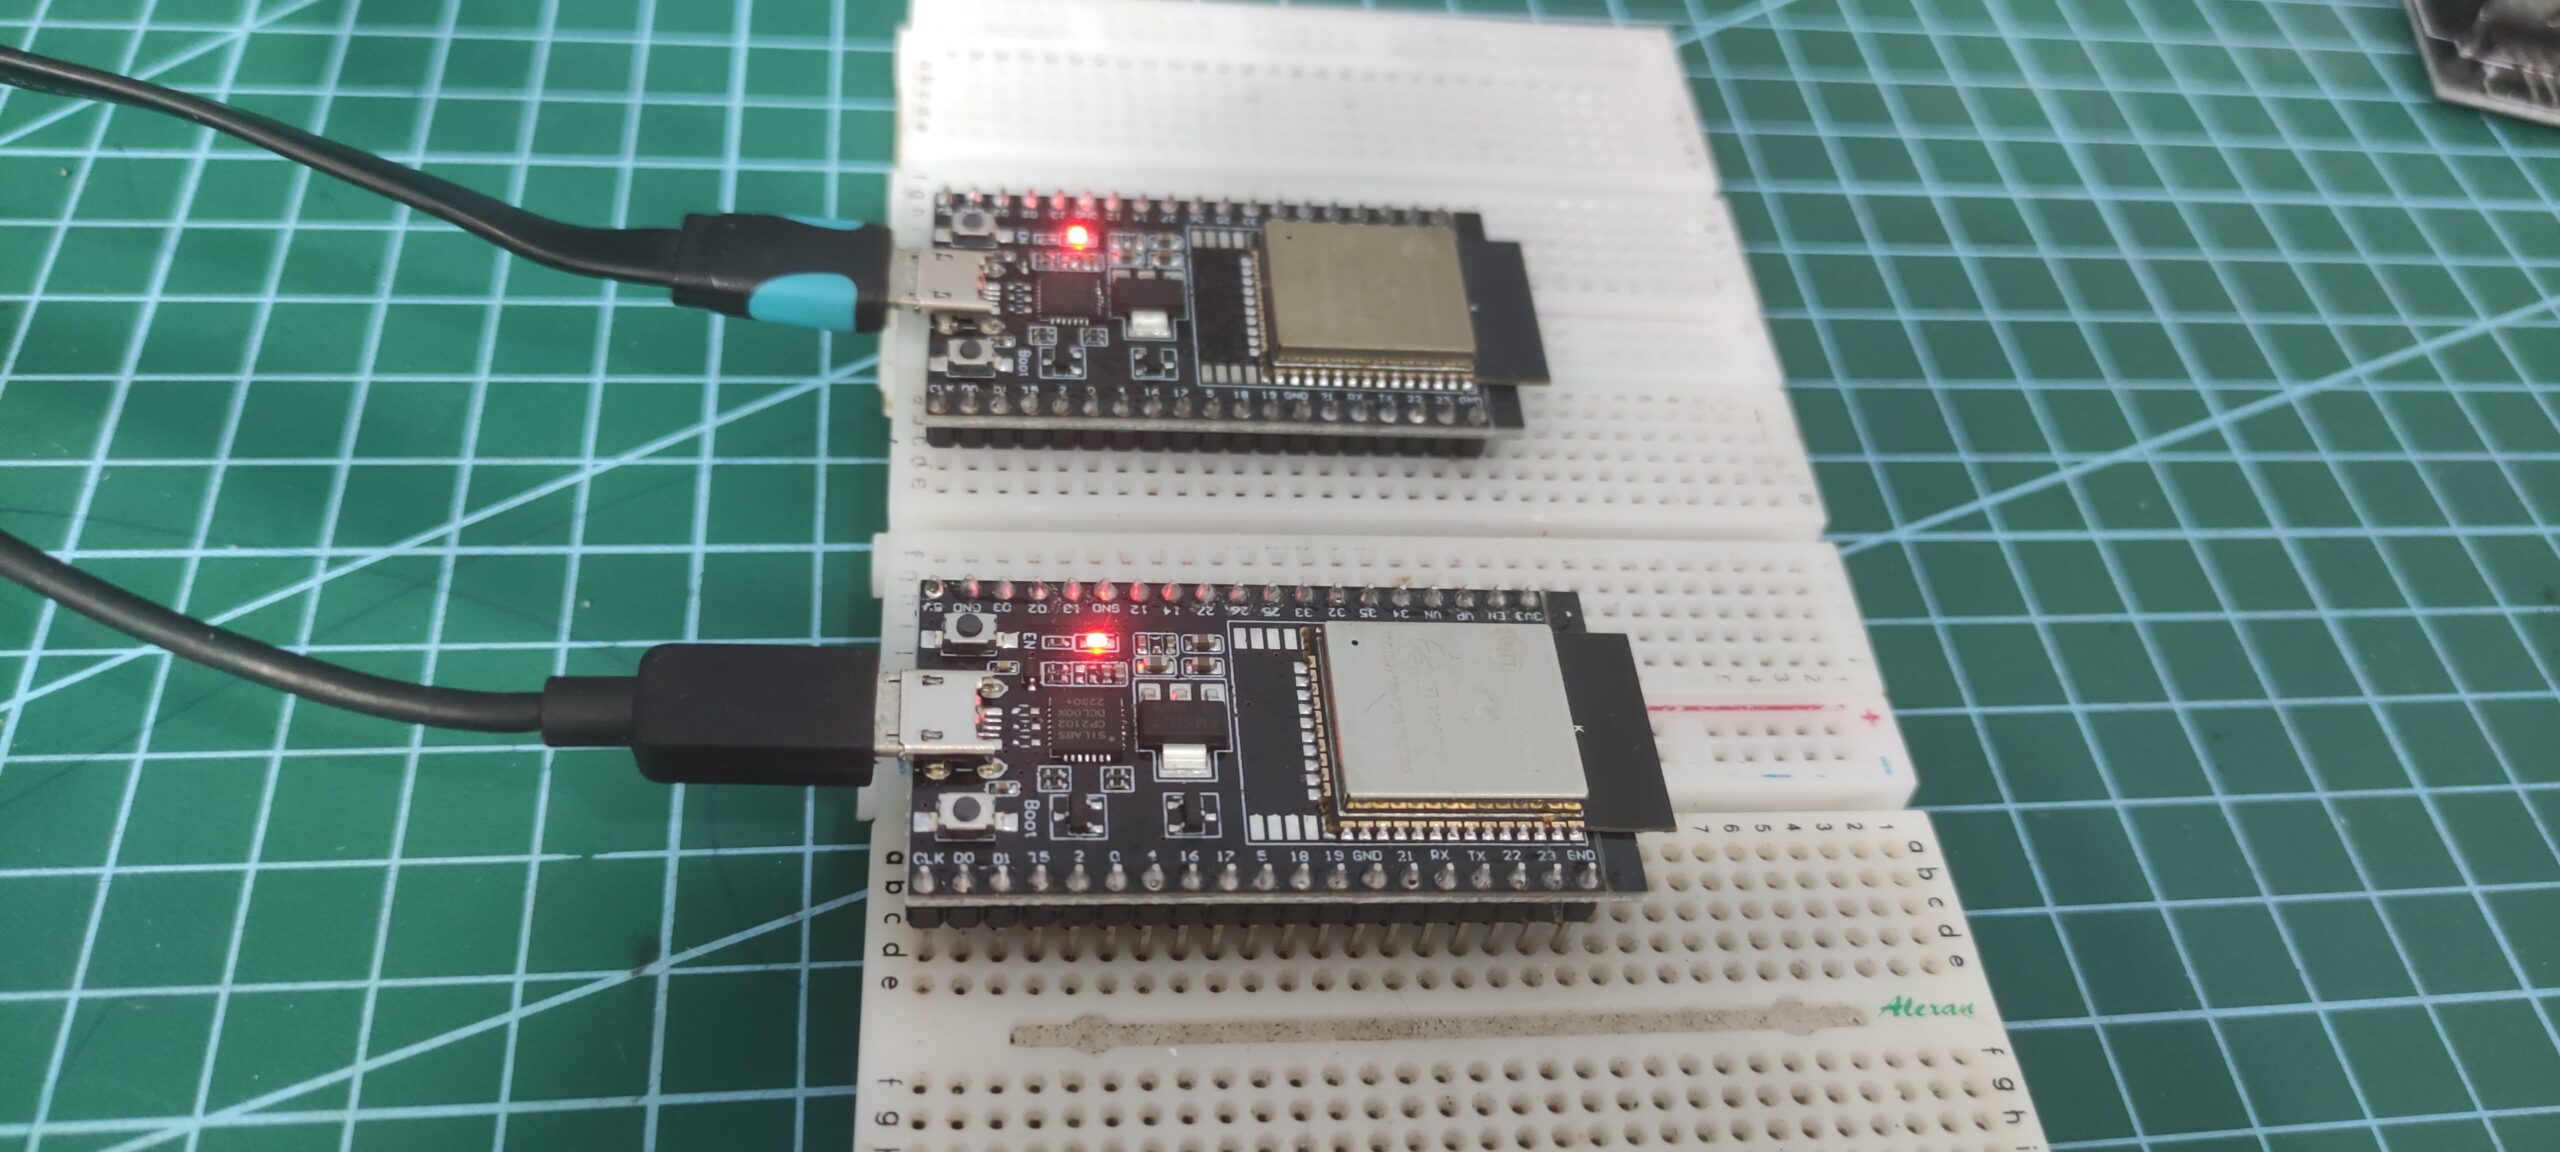
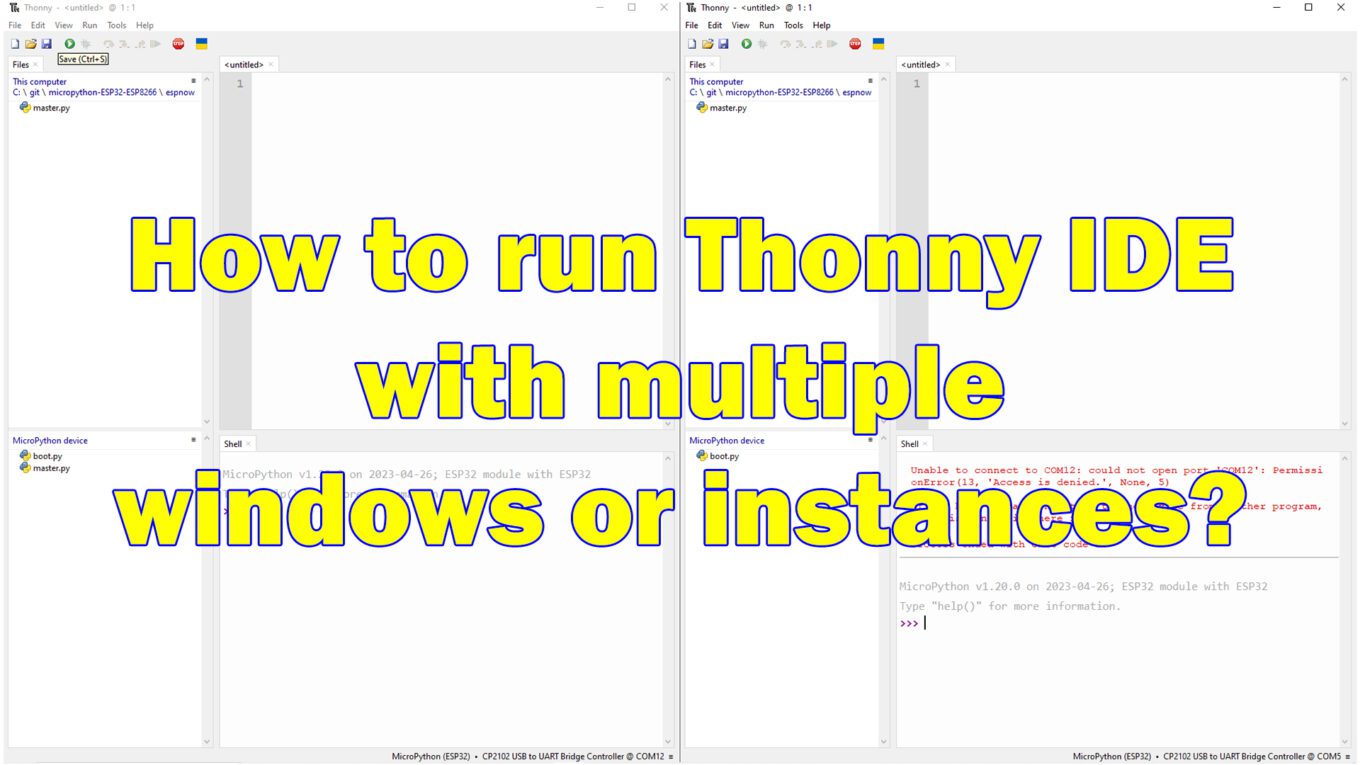
I tried opening two windows of my IDE so that I could access my MicroPython REPL for both microcontrollers only to find out that it won’t open at the same time.
How do you open two multiple windows or instances of your Thonny IDE?
By default, the Thonny IDE is configured to run only one instance. So if you want to run multiple instances then do the following:
- Go to Tools then Options
- In the General Tab uncheck the option “Allow only Single Thonny Instance“
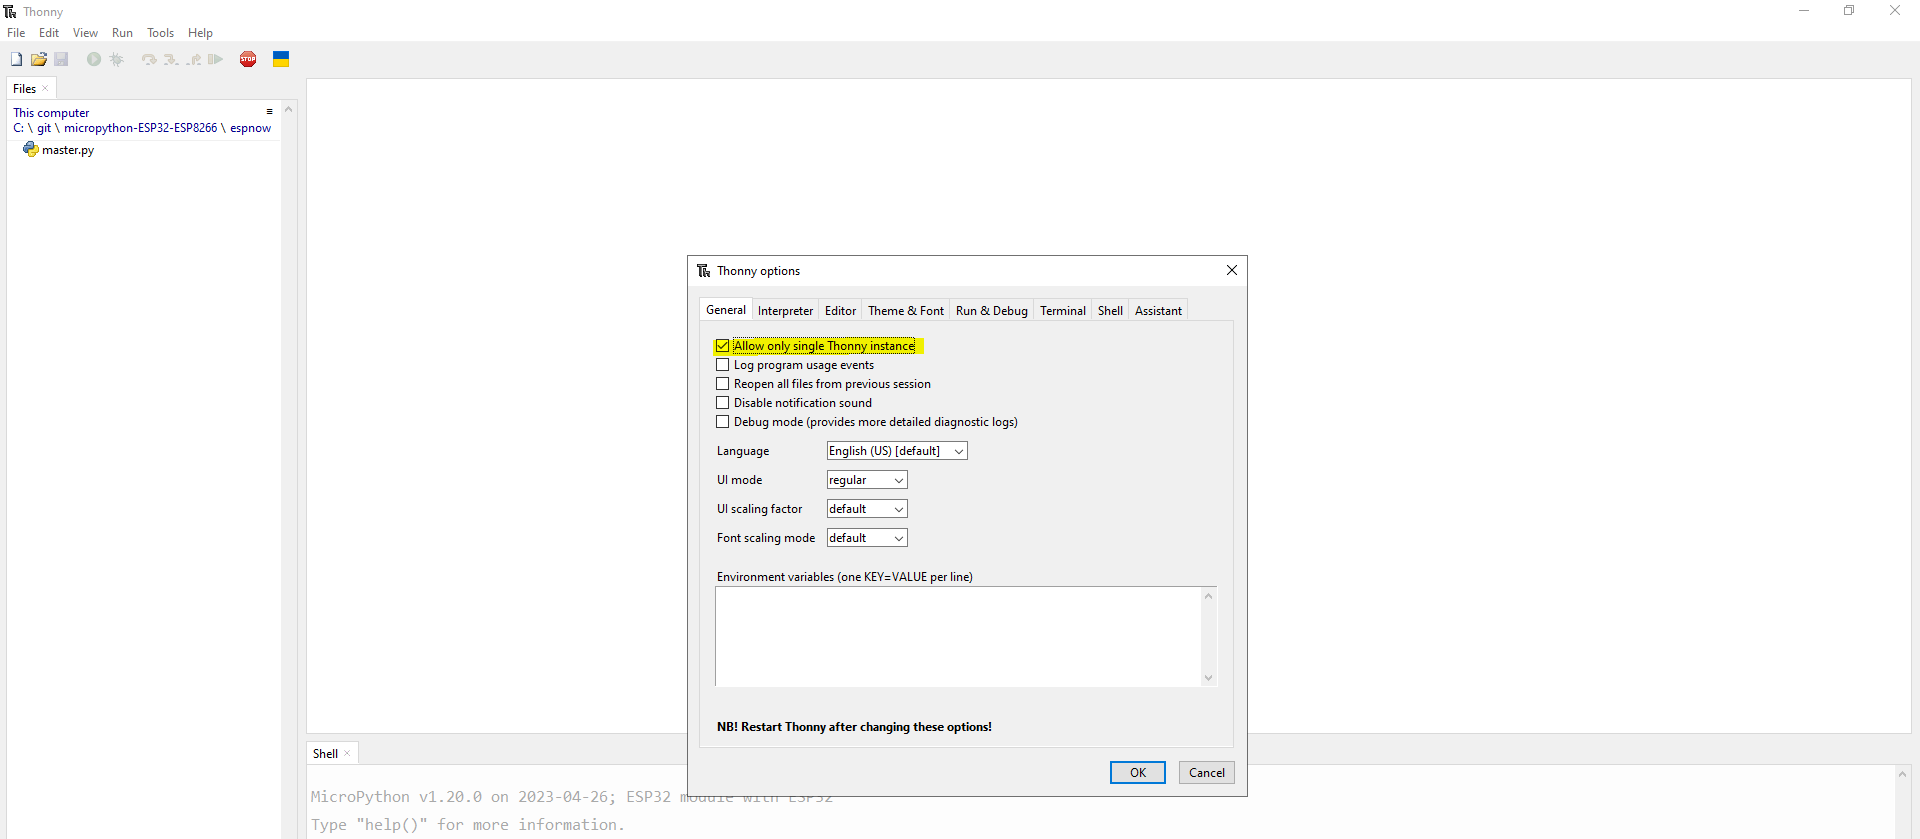
- Click OK and then you need to close the application and restart it.
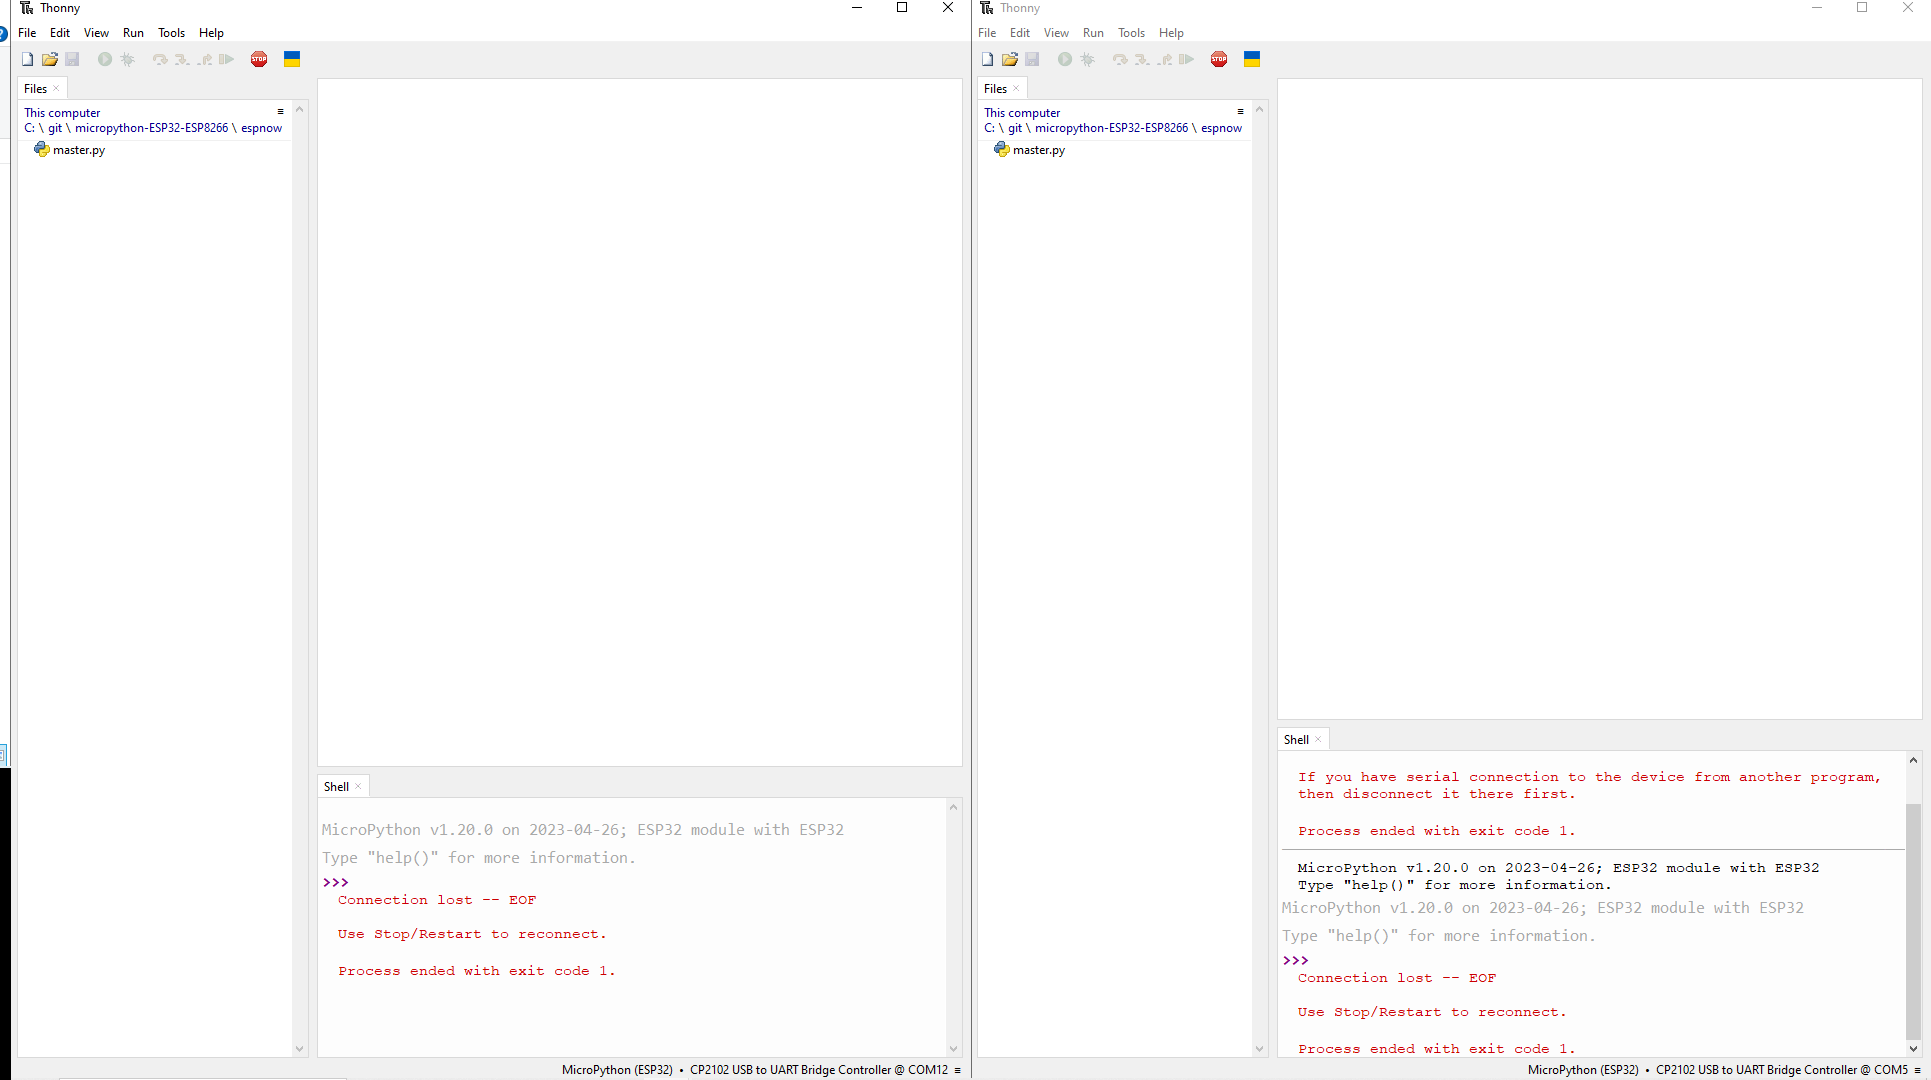
- Verify that you now can have two instances of Thonny IDE or multiple windows of it running side by side.
Wrap Up
In this post, we were able to configure the Thonny IDE to run multiple instances or windows. You can now begin working on your next exciting MicroPython projects.
Until then, Happy Exploring!
Support Me!
I love sharing what I know and hopefully, I was able to help you. Writing helpful content takes so much time and research. If you think you like my work and I have managed to help you then please consider supporting my channel. I would be very grateful and would boost my confidence that what I am doing is making a big change in the world. (No Pun Intended!) 😉
Become a Patron!
Leave a Reply