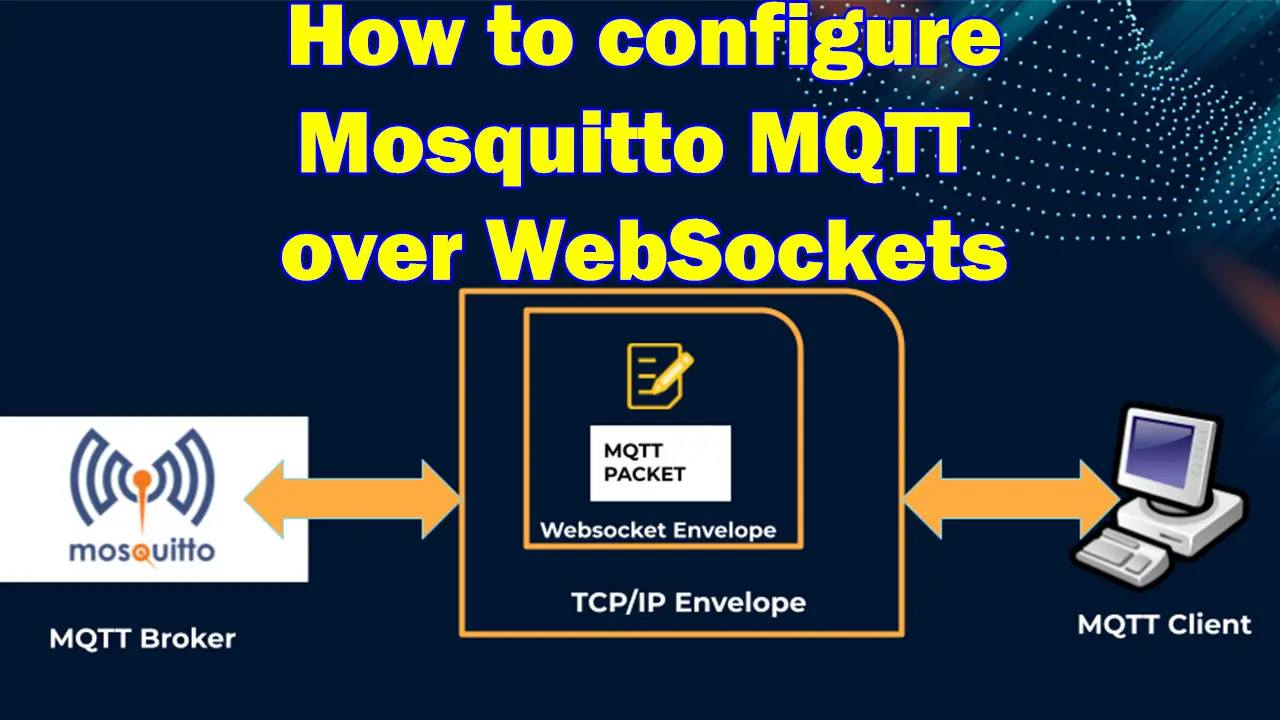
Introduction
This post will show you how to enable MQTT(MQ Telemetry Transport) over WebSockets in your Mosquitto broker.
If you want to see this project in a video format then please see below. You can also watch this on my YouTube channel.
What are WebSockets?
WebSocket is a client-server communication protocol running on top of your TCP (Transmission Control Protocol). It supports bi-directional full-duplex message exchanges between a client (usually a web browser) and a web server with little overhead compared to HTTP(Hypertext Transfer Protocol). This makes it an ideal protocol for applications that requires “real-time” message exchange and asynchronous updates.
Read More:
Using WebSocket in the Internet of Things (IoT) projects
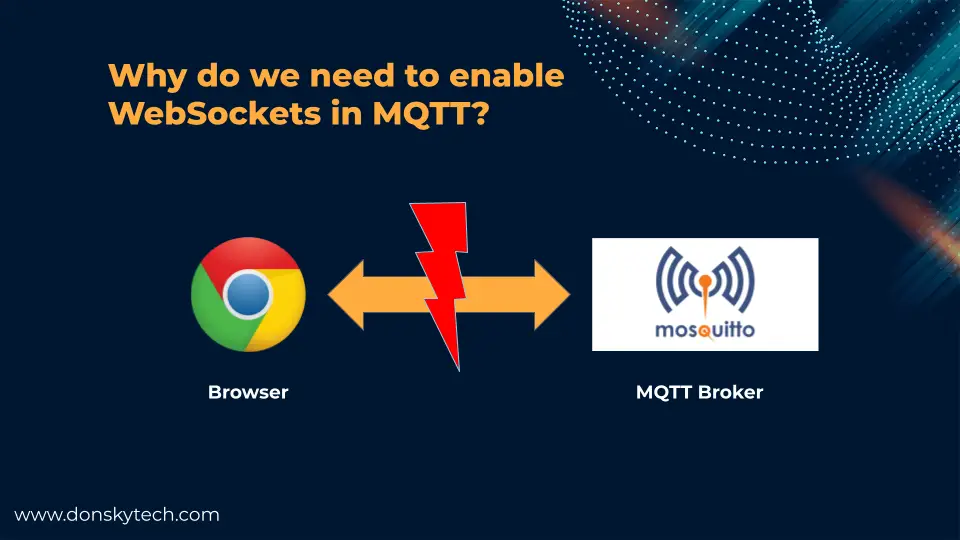
Why use MQTT over WebSockets?
The MQTT protocol by default does not operate on your web browsers so the solution is to send MQTT messages wrapped in a WebSockets envelope. The majority of the latest browsers support WebSockets so this is a viable option.
Using this approach we can create applications that take advantage of MQTT message exchanges. We then can use Javascript clients to communicate with our MQTT broker.
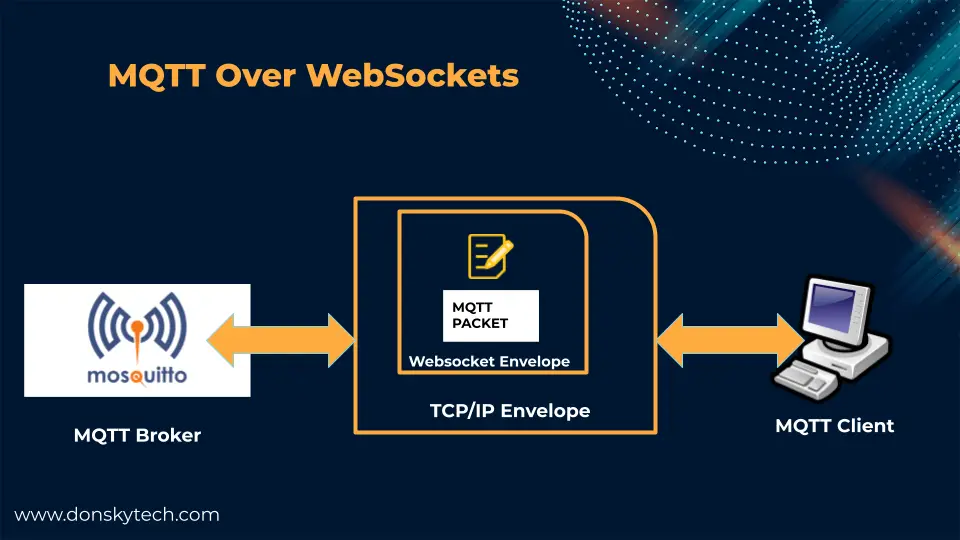
The image above shows how the messages are exchanged with the MQTT packet placed inside the WebSocket envelope which in turn is sent thru the TCP/IP envelope. The receiver unpacks each envelope until it sees the MQTT packet.
With the image above then, you can envision that it will be easier to create applications in the browser that uses MQTT communication protocol thru WebSockets.
How to enable MQTT over WebSockets in Mosquitto?
I am using a Windows PC for my Mosquitto MQTT broker installation but the steps here may apply to Linux and Mac.
Download and setup Mosquitto MQTT broker
If you haven’t done so, install the Mosquitto MQTT broker in your workstation.
Related Content:
Install Mosquitto MQTT Windows
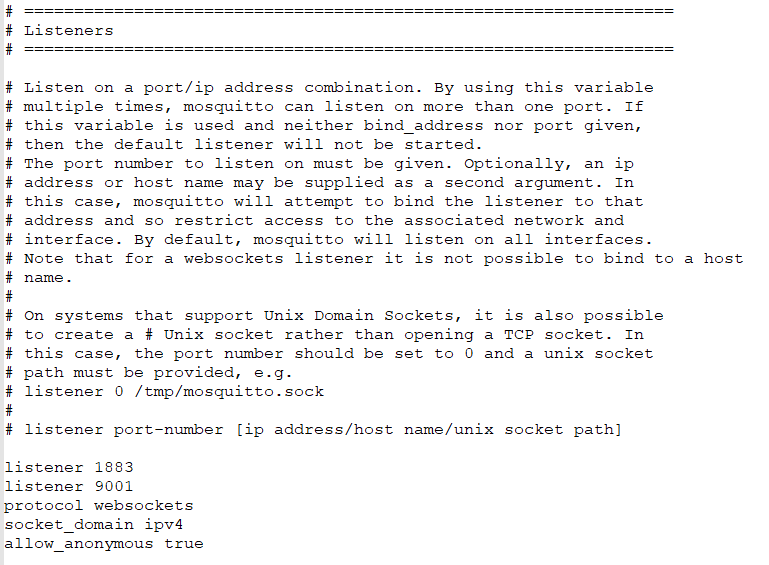
Edit mosquitto.conf to set WebSockets
Open and edit your mosquitto.conf and place the following entries. This will open up TCP port 1883 for MQTT and 9001 for WebSockets.
listener 1883
listener 9001
protocol websockets
socket_domain ipv4
allow_anonymous true
Note that there we have not configured security on our Mosquitto broker and we are allowing anyone to connect thru it as this is not the point of this post.
If you are on Windows then you can open the text file where you installed Mosquitto with a text editor. The below directory is where it is installed by default.
C:\Program Files\mosquittoWhen using Linux OS then you can edit this file with either nano or vim.
sudo nano /etc/mosquitto/mosquitto.conf Or when using Mac then
open -a textedit /opt/homebrew/etc/mosquitto/mosquitto.conf Your mosquitto.conf should look like this.
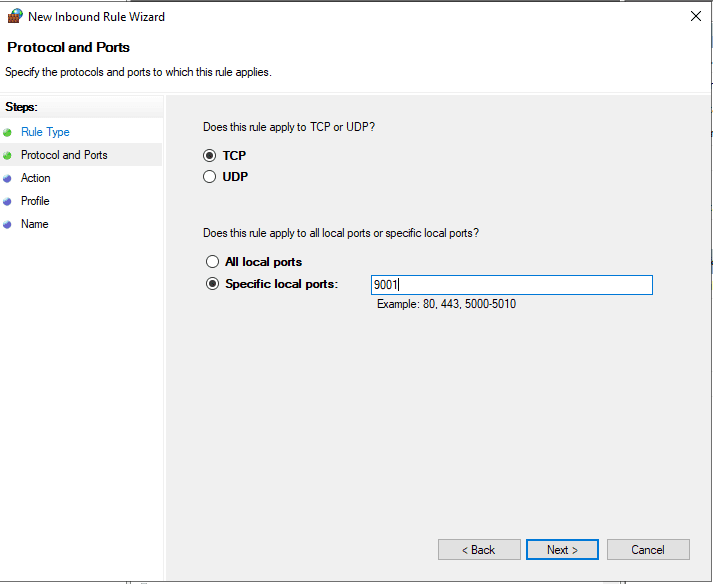
For Windows users, open the two ports 1883 and 9001 in your firewall.
Type in Window + R, then the firewall.cpl and click Enter.
Open Advanced Settings, then Inbound Rule, and finally New Rule. Select Port and TCP port 9001 or 1883. Continue by clicking the Next button and accept the default and allow the connection. Name it as MQTT WebSockets Port/MQTT Default Port or the like.
Start the Mosquitto Service
You can now test your Mosquitto service by executing the below command. In a Windows machine, you could type in the following command
mosquitto -c mosquitto.conf -vor in Linux or Mac
# Linux
mosquitto -c /etc/mosquitto/mosquitto.conf
# Mac
mosquitto -c /opt/homebrew/etc/mosquitto/mosquitto.conf
If everything works correctly then you should be able to see the following message at your terminal.
c:\Program Files\mosquitto>mosquitto -c mosquitto.conf -v
1672453553: mosquitto version 2.0.15 starting
1672453553: Config loaded from mosquitto.conf.
1672453553: Opening ipv6 listen socket on port 1883.
1672453553: Opening ipv4 listen socket on port 1883.
1672453553: Opening websockets listen socket on port 9001.
1672453553: mosquitto version 2.0.15 running
How to test MQTT over WebSockets?
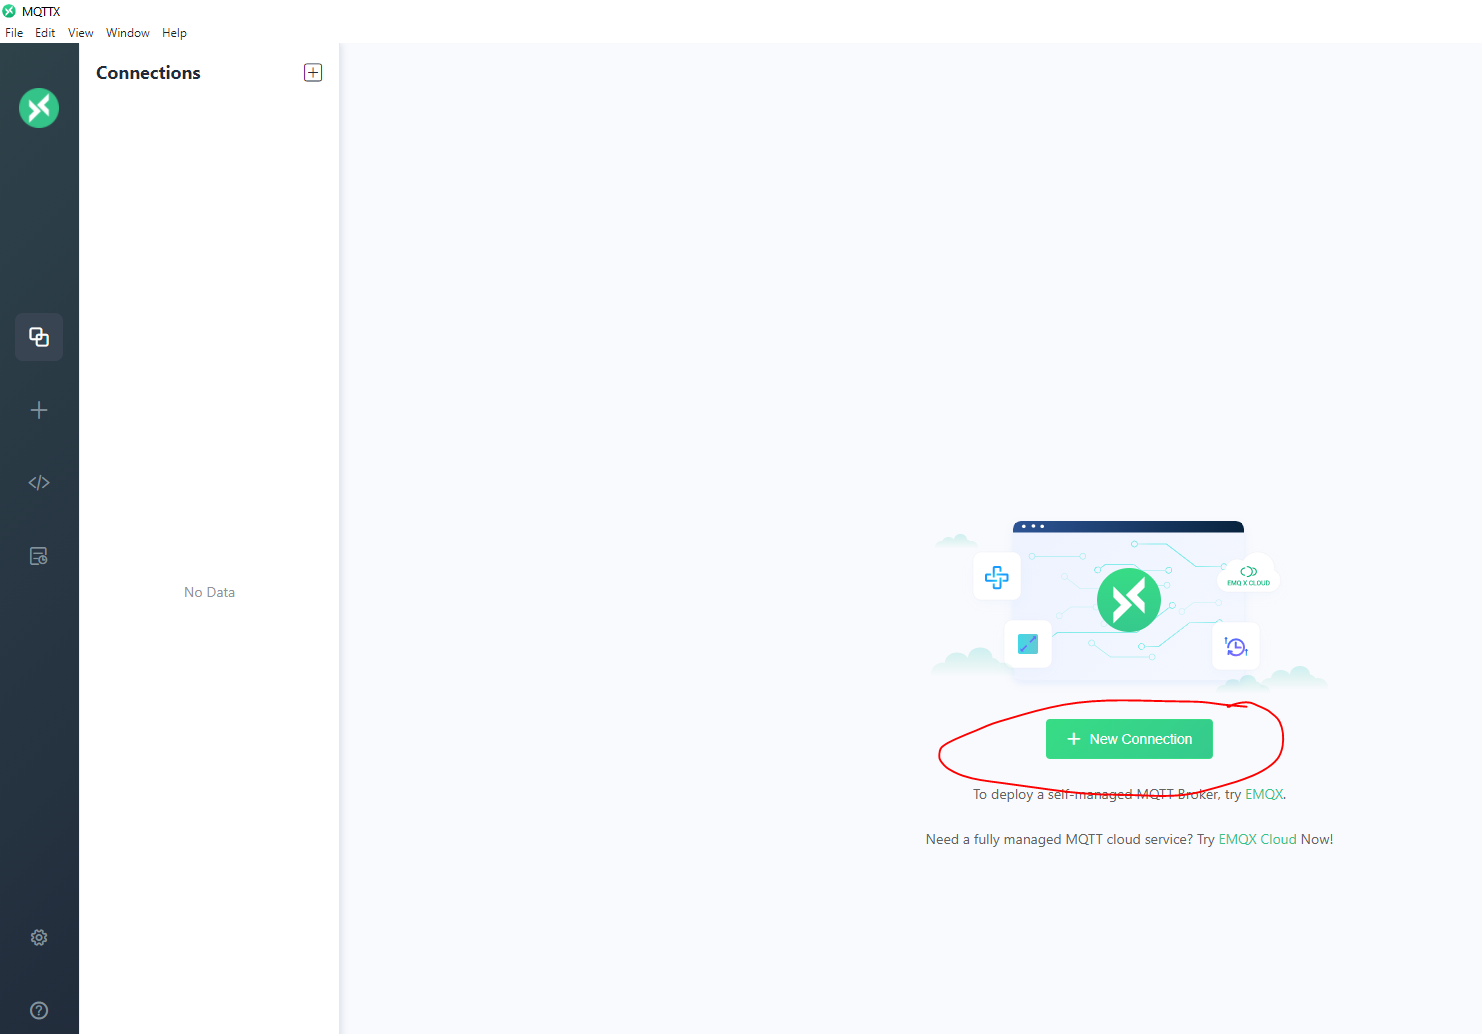
I am using the tool MQTT X in testing our MQTT over WebSockets connections so download the appropriate installer for your OS and install it.
Open the tool and click New Connection.
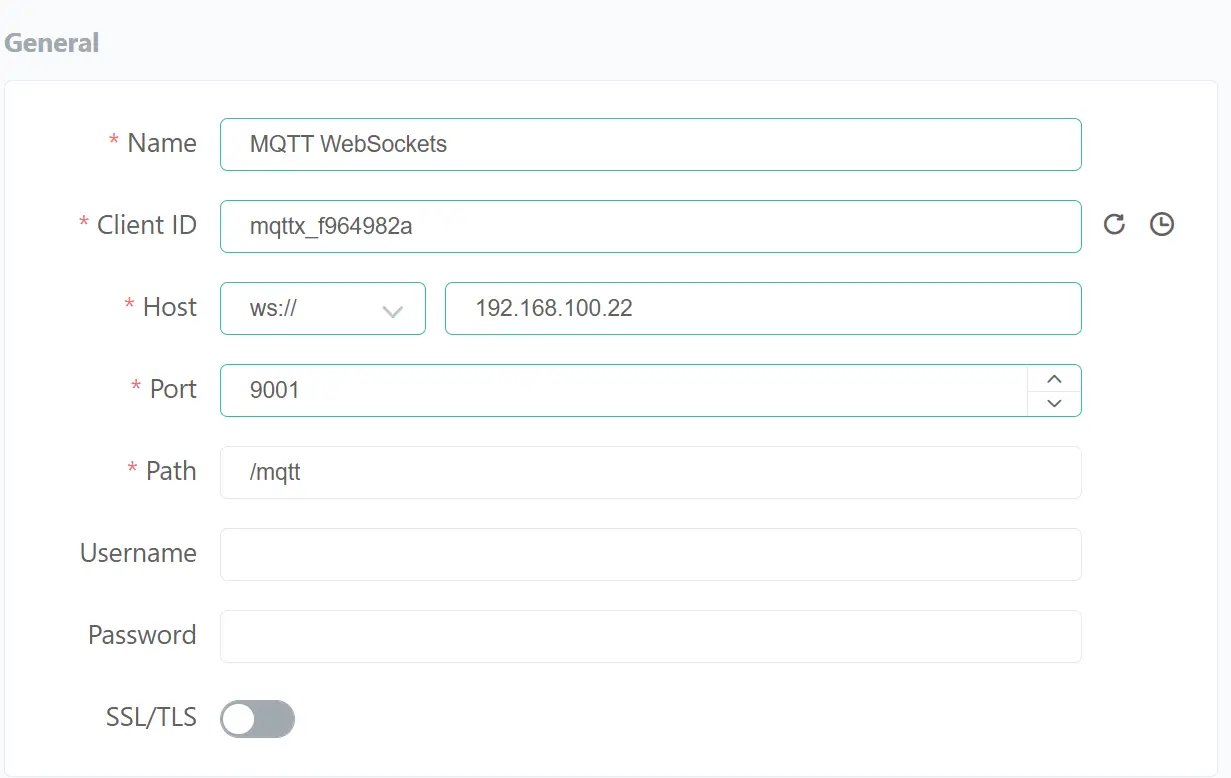
In the Connection section, enter the following details. The Host Name is the IP Address where you installed the Mosquitto broker.
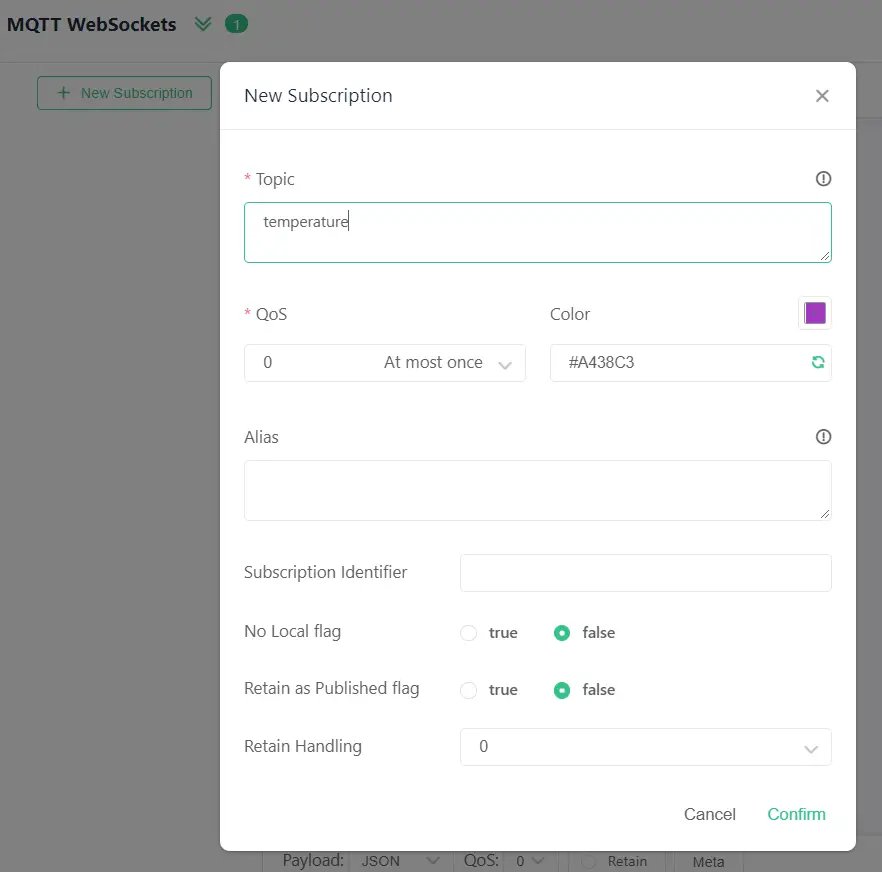
Click the New Subscription button at the left-hand side of the screen and enter the following topic “temperature“
Open a new terminal and try publishing on the same topic by following the command below.
mosquitto_pub -V mqttv311 -t temperature -m "10 f" -dYou should see the following message displayed in your terminal.
c:\Program Files\mosquitto>mosquitto_pub -V mqttv311 -t temperature -m  "10 f" -d
Client null sending CONNECT
Client null received CONNACK (0)
Client null sending PUBLISH (d0, q0, r0, m1, 'temperature', ... (4 bytes))
Client null sending DISCONNECT
And in your MQTT X Tool, the following message should be displayed.

If you have reached this point then Congratulations! You now have a Mosquitto broker with MQTT configured over WebSockets.
Issues/Questions?
Why use Mosquitto Port 9001 for WebSockets?
This is not a hard fast rule but many have assigned this port for MQTT WebSockets and you are welcome to change this depending on your server setup.
Can we add security over Mosquitto broker MQTT over WebSockets?
Yes, we can add TLS security in your message exchange but that is not the topic of this post. I will write a new tutorial on how this is done later.
Wrap Up
We have successfully configured our Mosquitto broker to use MQTT over WebSockets in this post. Also, we tested the message exchange using the MQTT X tool.
Watch out for new projects that I will be creating that will leverage this setup. You can now also start exploring your own awesome IoT MQTT projects.
Until then! Happy Exploring!
Related Next:
Building a MicroPython Wifi Robot Car
Using Arduino with BME280 plus a weather station project
Leave a Reply