Introduction
This post will show you how to install and use the MQTTX application in communicating with our MQTT (MQ Telemetry Transport) broker. We will explore how to connect, publish, and subscribe to MQTT topics using this application.
If you want to see this project in a video format then please see below. You can also watch this on my YouTube channel.
Prerequisites
You need access to a running MQTT broker that will allow you to connect, publish, and subscribe to MQTT messages. There are lots of publicly hosted MQTT cloud brokers that you can use or you can set up your own local installation.
I am using the Mosquitto MQTT broker in this post and you can read the below post if you want to know how to install a local installation of your own. Make sure that your Mosquitto broker is running before proceeding further in this post.
Related Content:
Install Mosquitto MQTT Windows
How to enable Websockets in Mosquitto MQTT broker?
How to use MQTTX?
Setup and Install
You can download MQTTX from this link and locate the appropriate installer for your operating system. This app is available for download on Windows, Mac, and Linux workstations.
Open a connection
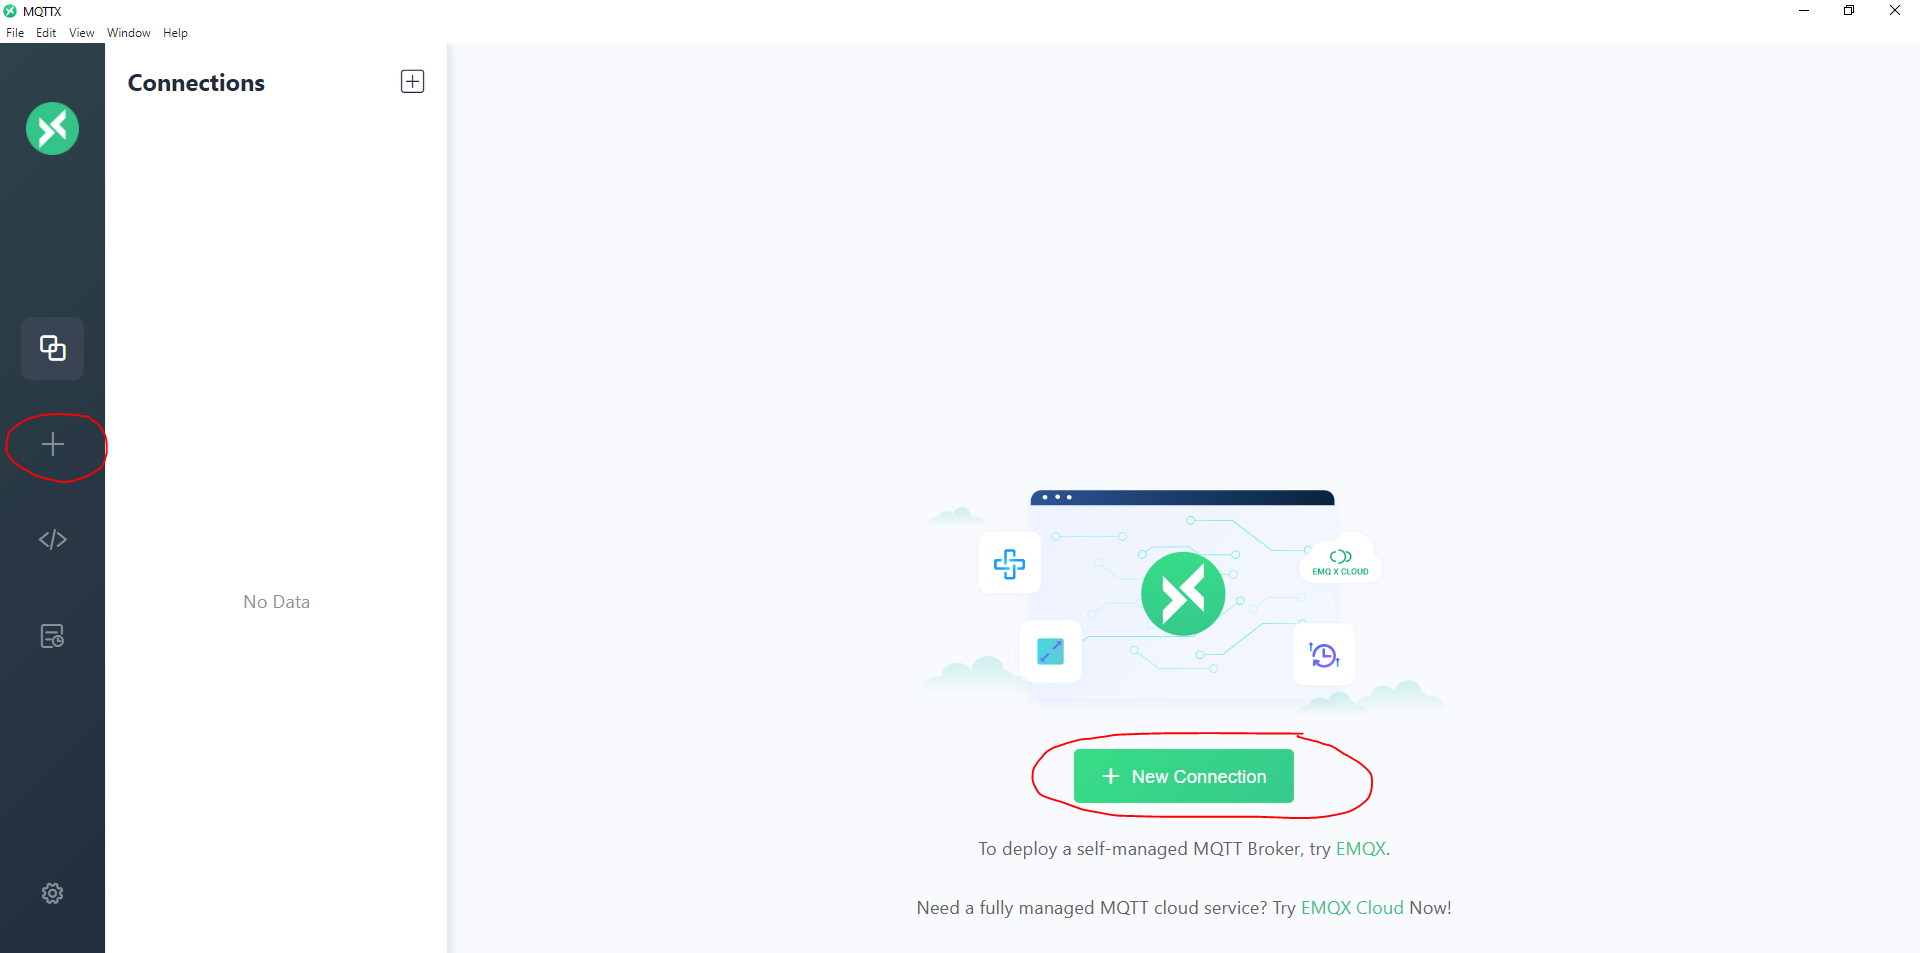
Once you have installed the MQTTX application then open it. Click the New Connection button or the Plus sign icon at the left-hand tabs.
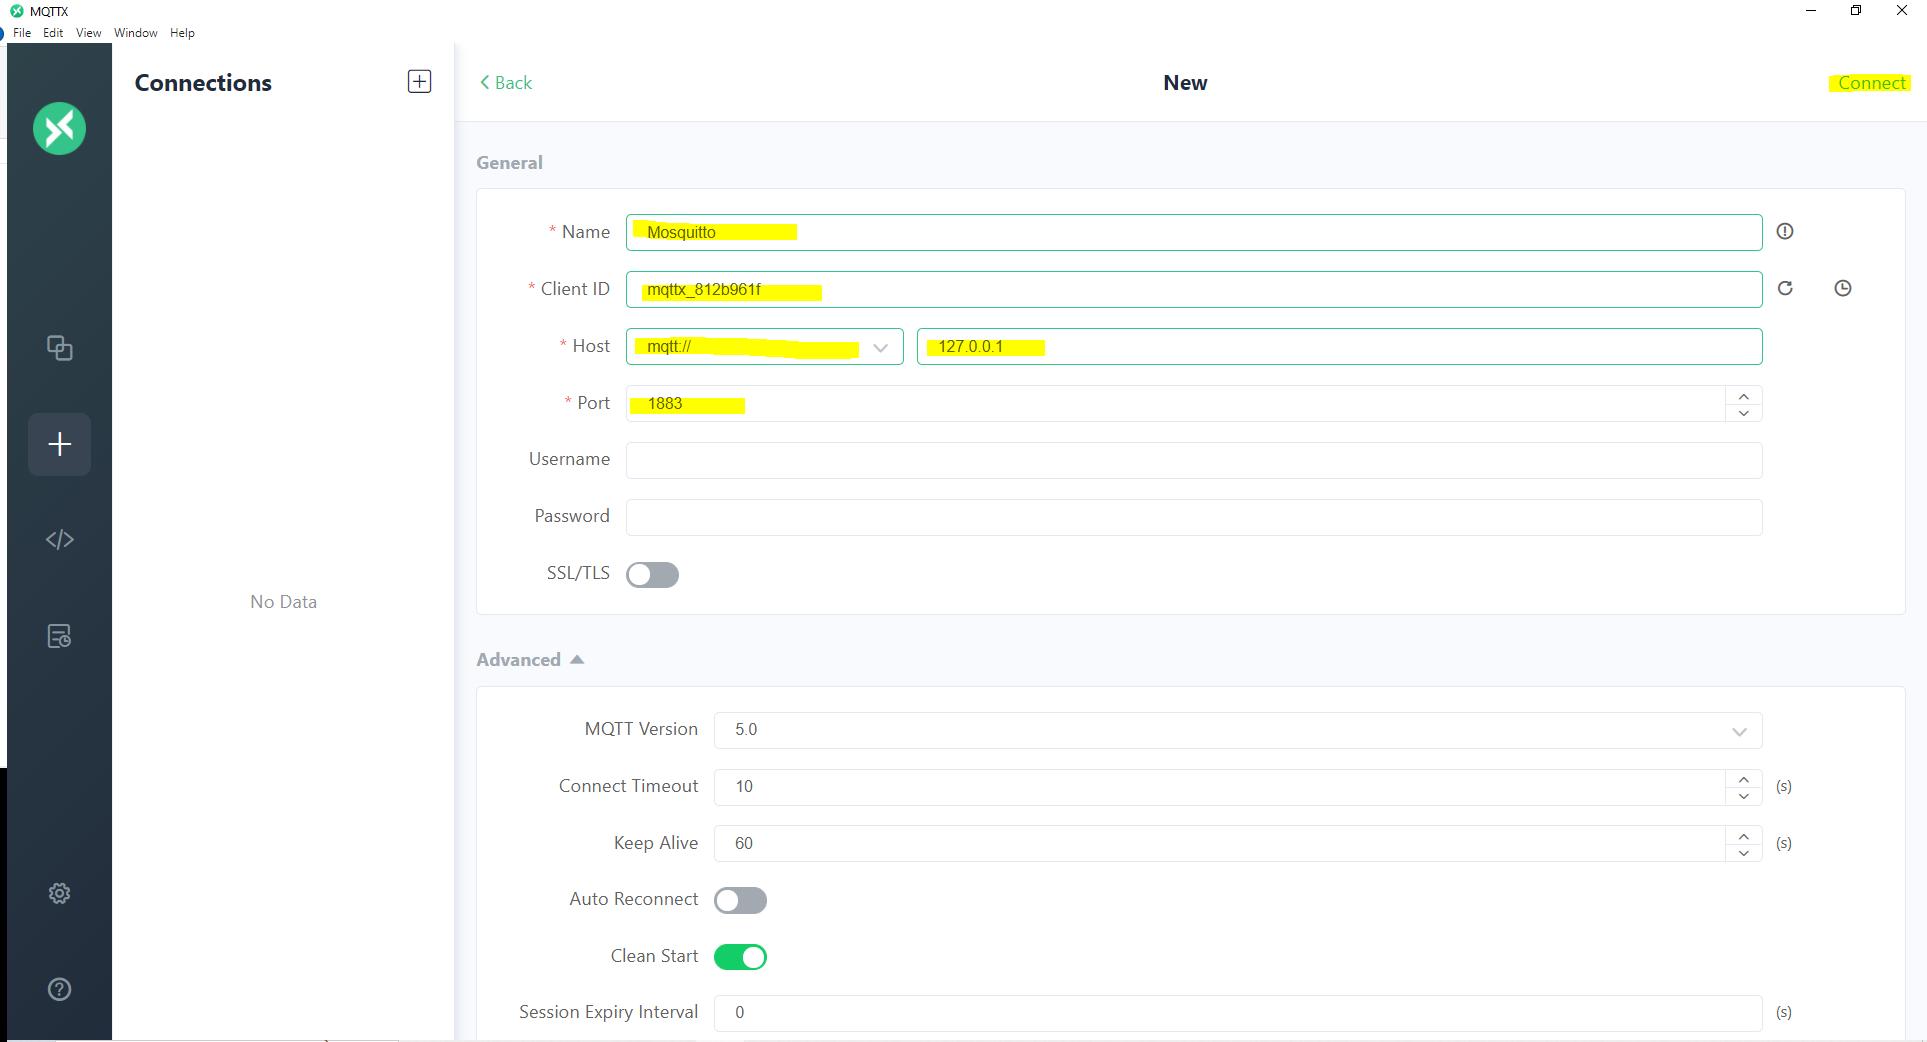
Type in the connection details for your MQTT broker and set the following required inputs
- Name – the name of your connection
- Client ID – the client id when you connect to the broker. Just accept the default value
- Host – you can either use “mqtt“, “mqtts“, “ws“, or “wss“. The “ws” stands for WebSocket
- Port – the port where your MQTT service is listening to.
If you have set up your MQTT broker securely like a username/password or using certificate files then you can set it here also. I will be connecting to my local MQTT broker in an insecure manner so I am setting the host to “mqtt” and the IP address to “127.0.0.1”. Click connect afterward. If everything goes well then you should see the “connected” message displayed.
How to subscribe to MQTT?
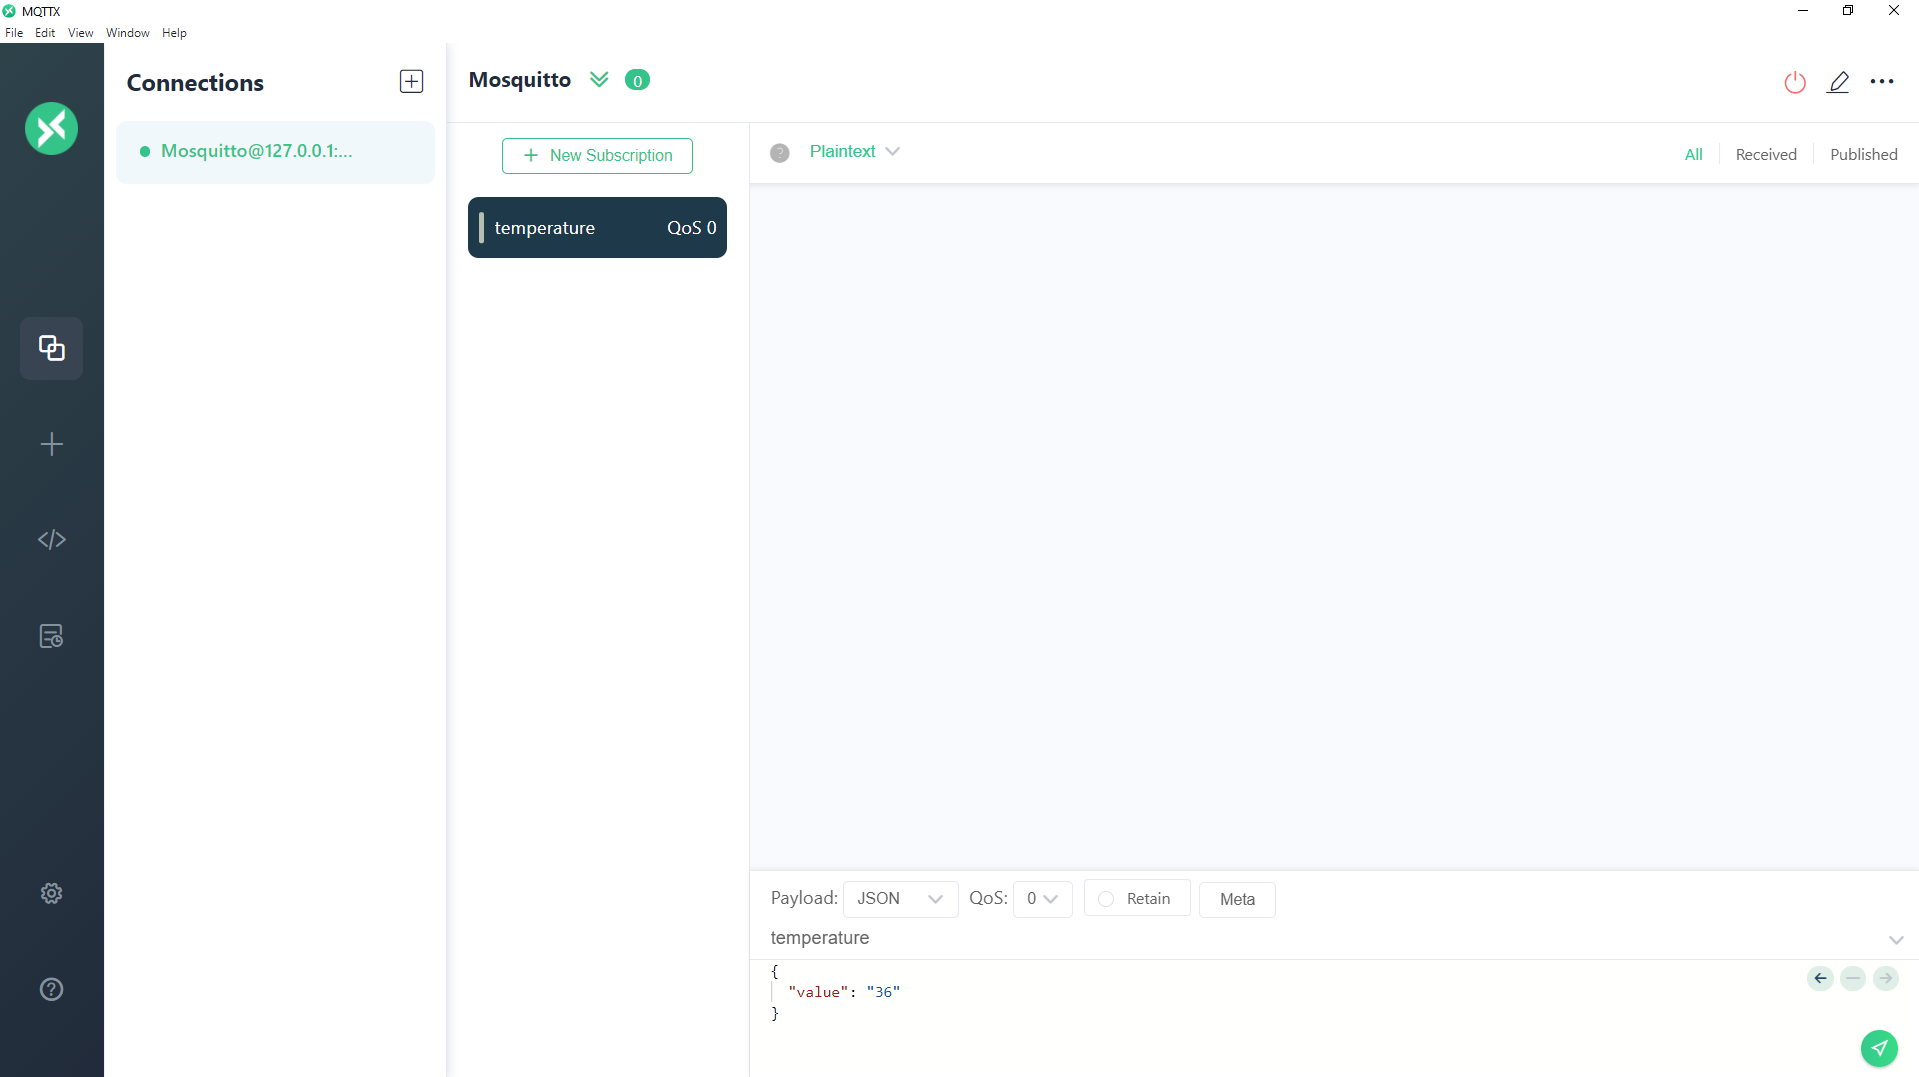
If you want to subscribe to topics then click the New Subscription button and type in the following inputs like the topic name and the QoS level then click Confirm button. I am going to subscribe to the temperature topic.

If there is no error in the subscription then you should see the following screen displayed.
If we take a look at our Mosquitto terminal then you would see the following message displayed.
1673671694: Received SUBSCRIBE from mqttx_812b961f
1673671694: temperature (QoS 0)
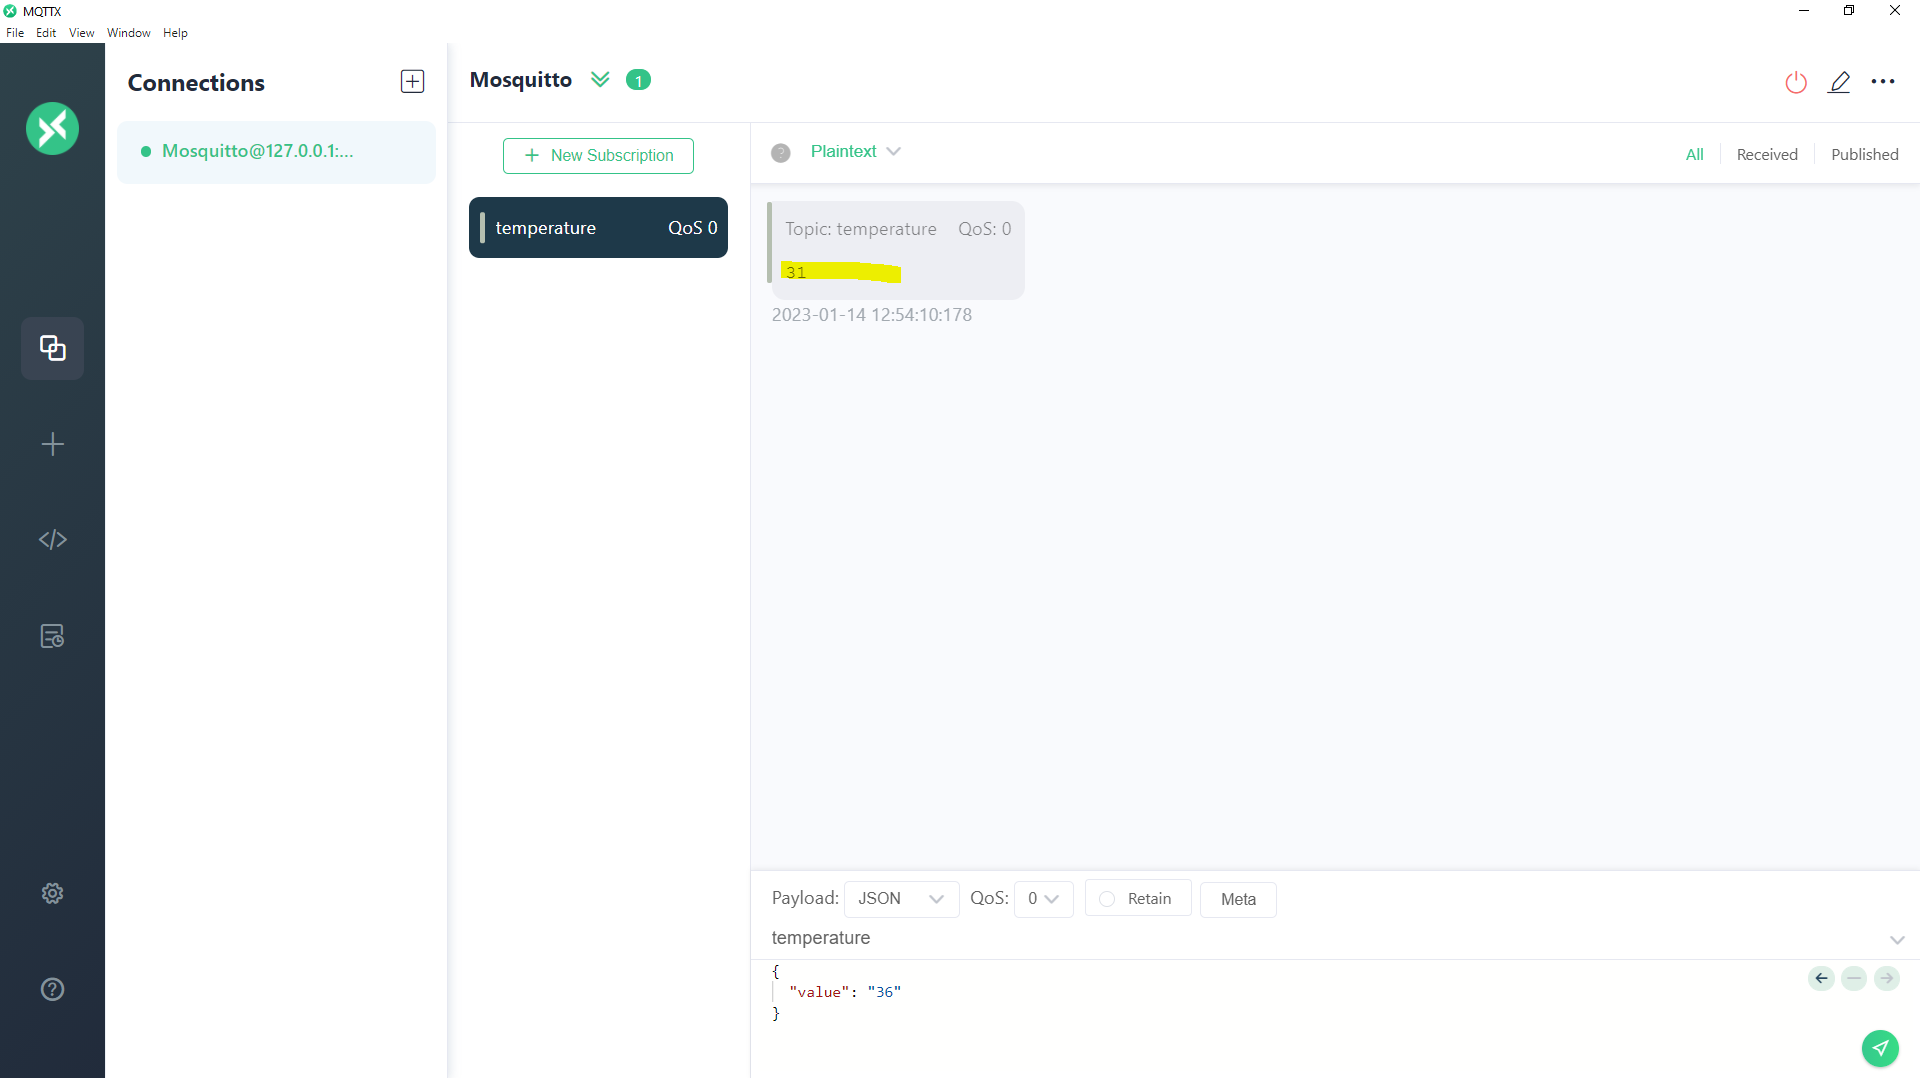
1673671694: mqttx_812b961f 0 temperatureTo test if our MQTTX app can receive MQTT messages from our MQTT broker then open a new terminal in your workstation and type in the following command. We are using the built-in Mosquitto mosquitto_pub executable to publish to our MQTT broker on the same topic which is temperature and the message value is “31” with a QoS level of 0.
mosquitto_pub -h localhost -t temperature -m 31 -q 0
If everything is okay then you should see the following message displayed on our MQTTX application which means that it was able to receive the message from our Mosquitto MQTT broker.
How to publish MQTT?
If you want to publish from your MQTTX application then open a new terminal and enter the below command. We are using the built-in Mosquitto executable mosquitto_sub to subscribe to the topic temperature with a QoS level of 0 also. This application will wait for any MQTT messages coming from the MQTT broker.
mosquitto_sub -h localhost -t temperature -q 0Go back to your MQTTX application and in the lower right-hand corner type in the following details the topic name, QoS, and the message value is “36”. I have set the payload to JSON format. Click the Send button if everything is okay with you.
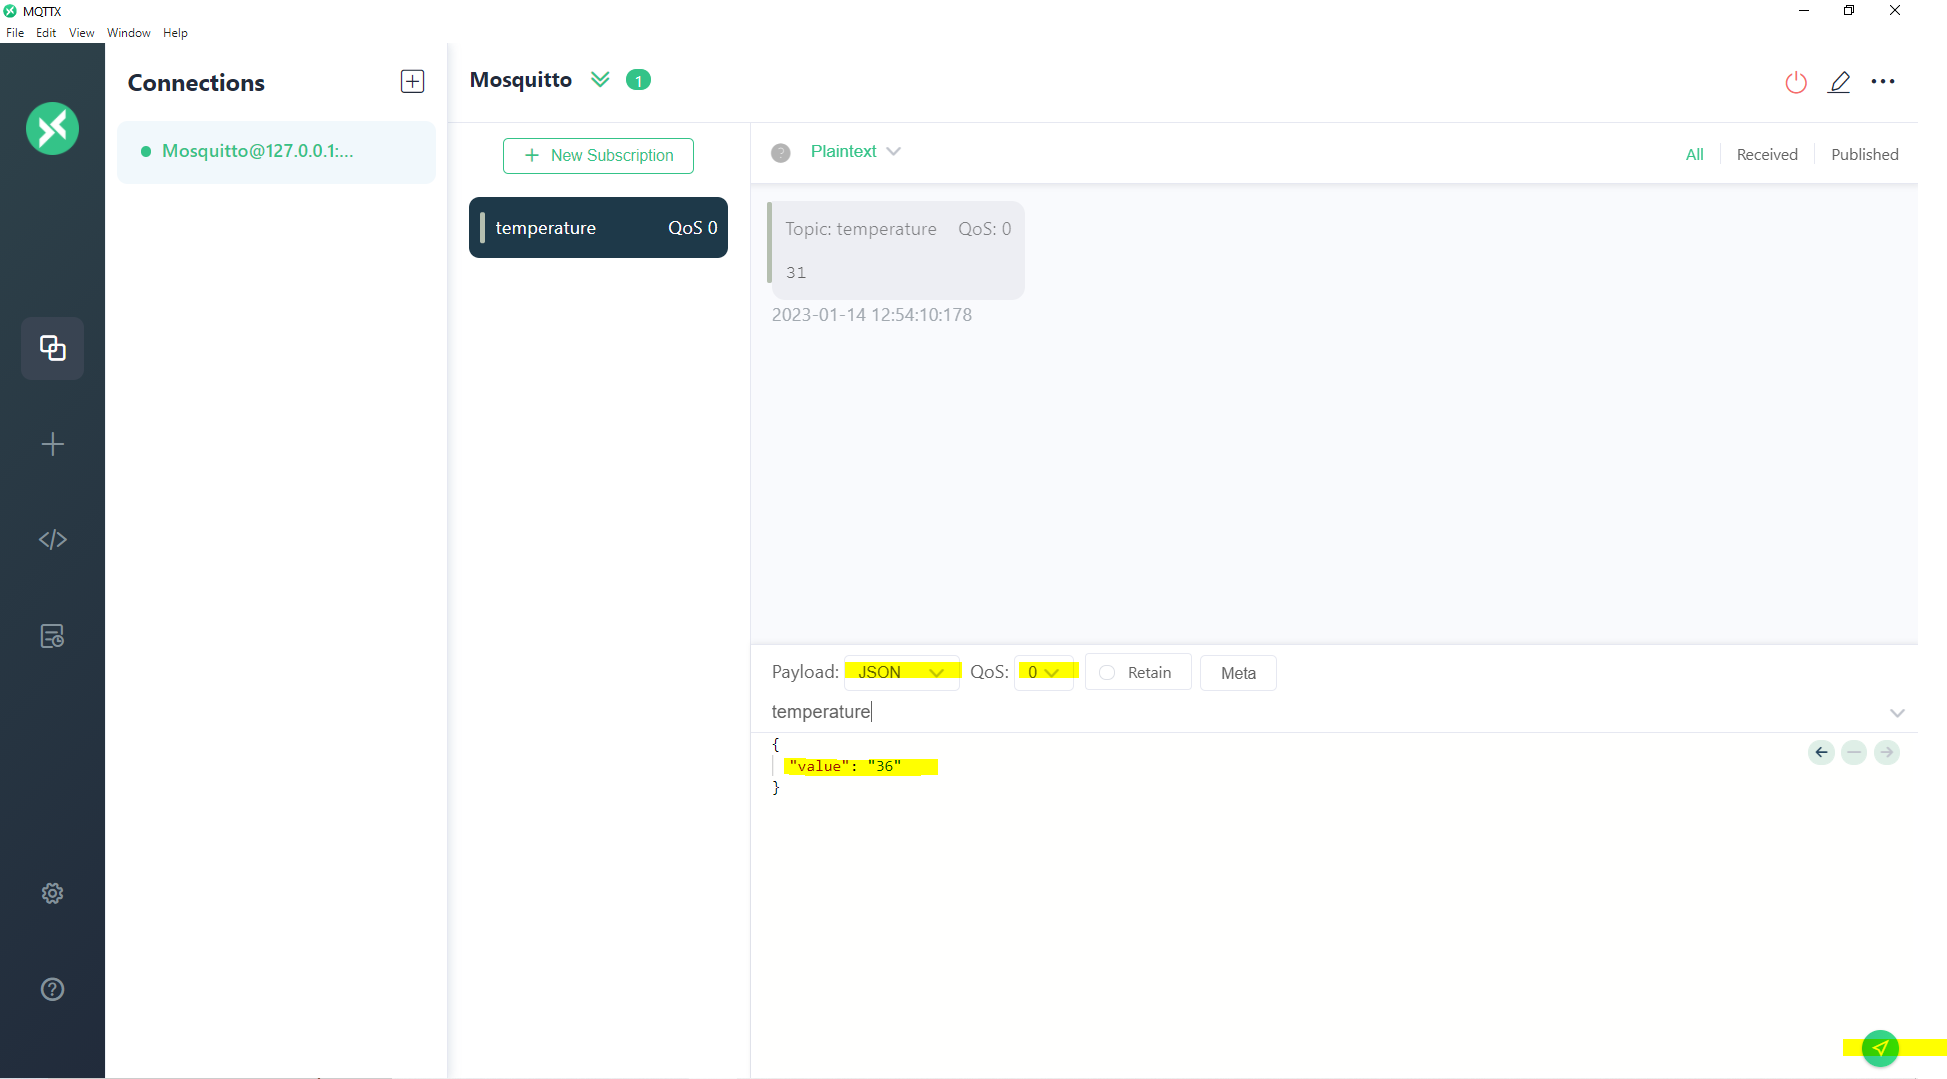
If no error is encountered then the following message should be displayed in the terminal where we run the mosquitto_sub command which means that the MQTTX application was able to publish the MQTT message successfully.

Wrap up
We have successfully installed and initiated transactions with our MQTT broker in this post using the MQTTX application. This application is very useful especially if you are prototyping your Internet of Things (IoT) applications.
I hope you learn something! Happy Exploring!
Leave a Reply