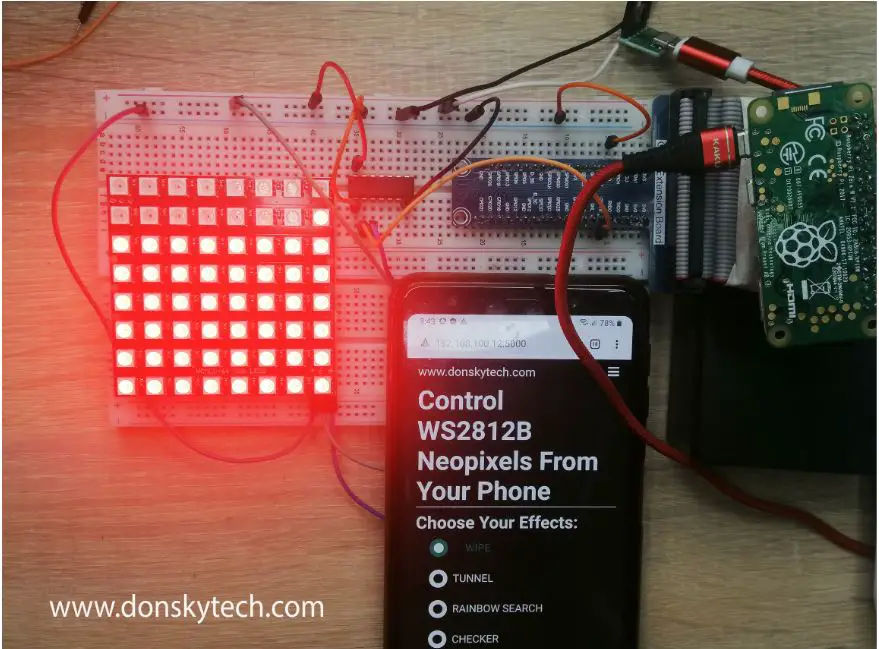
This is the last part of our tutorial series on how you can control the effects of your WS2812B Neopixels using your mobile phone and Raspberry Pi. In the previous posts, we have discussed the general design of how you can recreate this project including the wiring schematic diagrams. In addition, we have introduced the Flask framework in creating our web user interface.
Please refer to the following sections if you have not done the pre-requisite installation steps. We will not be discussing the setup steps and the wiring here anymore therefore you should have done all that by reading the earlier posts.
- Part 1: Introduction and Design Walkthrough
- Part 2: Wiring Diagram and Control Using Luma.LED_Matrix
- Part 3: Creating the User Interface Using Flask
- Part 4: Putting it all together
For a video demonstration of the final output of this project please refer to the following video below.
Code Setup
Please check my github code repository on how we can control your WS2812B Neopixels using your mobile phones and Raspberry Pi. All you need to do is to clone or download that repository. Refer to my two previous posts on how you can do this if you are not familiar with the process.
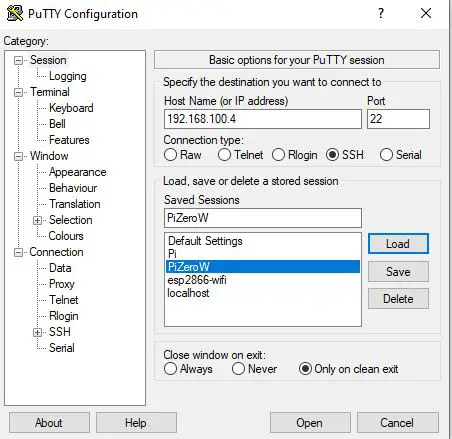
Step 1: Login to your Raspberry Pi
Connect to your Raspberry Pi W Zero using putty. I have set up my Raspberry Pi W zero in “headless” mode so we will just use putty to connect to it.
Step 2: Change into the directory where you have cloned my project.
The full code for this project can be found in my github repository. It contains all the necessary code to follow along with my setup. You can clone this project into your Raspberry Pi Zero W or download it as a zip file.
I have cloned my project into this directory /home/pi/git/raspberrypi-projects
pi@raspberrypi:~ $ cd git/raspberrypi-projects
pi@raspberrypi:~/git/raspberrypi-projects $ ls -l
total 32
-rw-r--r-- 1 pi pi    0 Dec 21 10:07 init.py
-rw-r--r-- 1 pi pi 1468 Dec 21 10:07 max7219-matrix.py
-rw-r--r-- 1 pi pi  558 Dec 21 10:07 neopixel_main_demo.py
-rw-r--r-- 1 pi pi  127 Dec 21 10:07 readme.txt
-rwxr-xr-x 1 pi pi  347 Dec 23 05:27 run_ws2812b_neopixel_flask_app.sh
-rw-r--r-- 1 pi pi 1292 Dec 21 10:07 sample_gui_guizero.py
drwxr-xr-x 5 pi pi 4096 Dec 31 05:27 ws2812b_neopixel_flask
drwxr-xr-x 5 pi pi 4096 Dec 21 10:09 ws2812b_neopixel_flask_final
drwxr-xr-x 3 pi pi 4096 Dec 21 10:10 ws2812b_neopixel_luma_led_matrix
Now all we need is to set the permission to the run_ws2812b_neopixel_flask_app.sh and to do this execute the following command. After which, run it by executing the following command “sudo ./run_ws2812b_neopixel_flask_app.sh“
chmod a+x run_ws2812b_neopixel_flask_app.sh
pi@raspberrypi:~/git/raspberrypi-projects $ sudo ./run_ws2812b_neopixel_flask_app.sh
Starting WS2812B Neopixel Flask Application...
You should see the following message shown and this shows that our Flask Web Application is up and running. To access the web application, open your web browser or your mobile phone and then type in the following URL http://<raspberyypi-ip-address>:5000. In my case, I have typed the following URL in my browser.
http://192.168.100.4:5000/
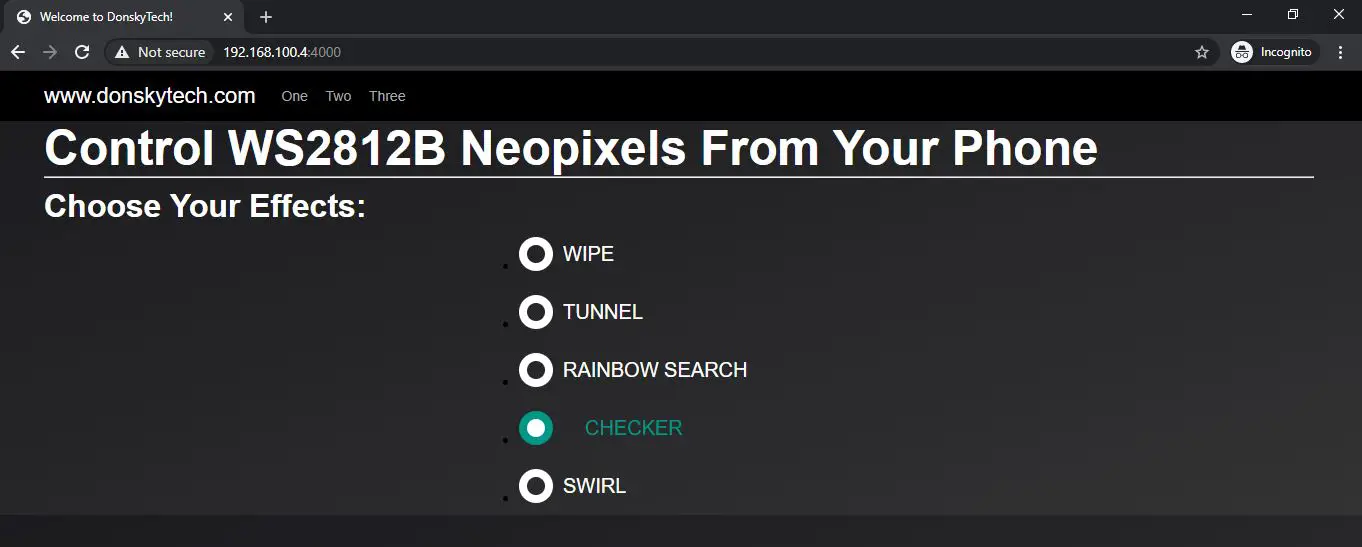
Now in your web browser whether on your laptop or mobile phone, click the “wipe” effect and you should be able to see the following effect shown.
You can play around with other effects and see what happens to our WS2812B Neopixels. You will notice that by just using your mobile phone or laptop, you are able to control its effects.
Code Explanation
Choose Effect WS2812B Neopixels Flask Web Application
The run_ws2812b_neopixel_flask_app.sh code is shown below and is basically running our developed flask web application on a gunicorn HTTP server. This is the basically the script that deploys our Flask Web Application into the gunicorn HTTP server. The same Flask web application is being used to control our ws2812b neo pixels using the Raspberry Pi.
After that, we can now access it using the URL above that I have discussed.
If you are confused about what we are doing then please review the previous post.
#!/bin/bash

export PYTHONPATH="$PWD:"

mkdir -p /var/log/gunicorn/

chmod  777 /var/log/gunicorn/

echo "Starting WS2812B Neopixel Flask Application..."

gunicorn -w 1 -b 0.0.0.0:5000 ws2812b_neopixel_flask_final.app:app --error-logfile /var/log/gunicorn/error.log --access-logfile /var/log/gunicorn/access.log --capture-output --log-level debug
We have to alter our app.py to be able to respond to users clicking a different effect.
from flask import Flask, render_template, jsonify, request
import subprocess
import time

app = Flask(__name__)
process = None


def show_effect(effect):
    global process
    process = subprocess.Popen(["python3", "neopixel_main_demo.py", effect])


@app.route('/')
def index():
    return render_template('index.html')


@app.route('/change')
def change_effect():
    global process
    effect = request.args.get('effect', '')

    if process is not None:
        process.kill()
        while not process.poll():
            time.sleep(0.1)
        del process

    show_effect(effect)

    return jsonify("success : true")
In the previous post about creating a Flask web application, we discussed how we can use Flask in serving HTML Pages. Furthermore, I have said that it can return JSON as well. Look closely into the code above, there are now two route
- “/” -> This maps to the user typing http://192.168.100.4:5000/
- “/change” -> This maps to the user clicking a change in effect.
Let us discuss a little bit about how the code is running. When the user clicks an effect then it will create a new process that calls the neopixel_main_demo.py. We then need to supply the effects that we want to show and if you get confused on how this works then please review the second post in this series.
If for example, the user clicks a new effect then we destroy the process running and restart a new process with the new effect.
The Javascript Code
In order for us to respond to a user clicking a new effect we need to send a request to the Flask Web Application. We used the concept of AJAX by sending an XMLHttpRequest in the background so that the page would not “refresh” or “flicker”. In order for us to do this we need to use javascript. The code for the custom.js is below.
function handleEffectClick() {
    var ele = document.getElementsByName('effect');

    for (i = 0; i < ele.length; i++) {
        if (ele[i].checked) {
            changeEffect(ele[i].value);
            break;
        }
    }
}

function changeEffect(effect) {
    var xhr = new XMLHttpRequest();
    xhr.open('GET', 'change?effect=' + effect);
    xhr.onload = function() {
        if (xhr.status === 200) {
            console.log('Response ' + xhr.responseText);
        } else {
            console.log('Request failed.  Returned status of ' + xhr.status);
        }
    };
    xhr.send();

}
The code above will call the route “change” in the Flask Web Application.
If you look at the index.html page below you will notice that we have added an event handler when the user clicks the effects “slider” button.
<ul class="list">
<li class="list__item">
<input type="radio" class="radio-btn" name="effect" id="a-opt" onclick="handleEffectClick()" value="wipe"/>
<label for="a-opt" class="label">Wipe</label>
</li>
<li class="list__item">
<input type="radio" class="radio-btn" name="effect" id="b-opt" onclick="handleEffectClick()" value="tunnel"/>
<label for="b-opt" class="label">Tunnel</label>
</li>
<li class="list__item">
<input type="radio" class="radio-btn" name="effect" id="c-opt" onclick="handleEffectClick()" value="rainbow"/>
<label for="c-opt" class="label">Rainbow Search</label>
</li>
<li class="list__item">
<input type="radio" class="radio-btn" name="effect" id="d-opt" onclick="handleEffectClick()" value="checker"/>
<label for="d-opt" class="label">Checker</label>
</li>
<li class="list__item">
<input type="radio" class="radio-btn" name="effect" id="e-opt" onclick="handleEffectClick()" value="swirl"/>
<label for="e-opt" class="label">Swirl</label>
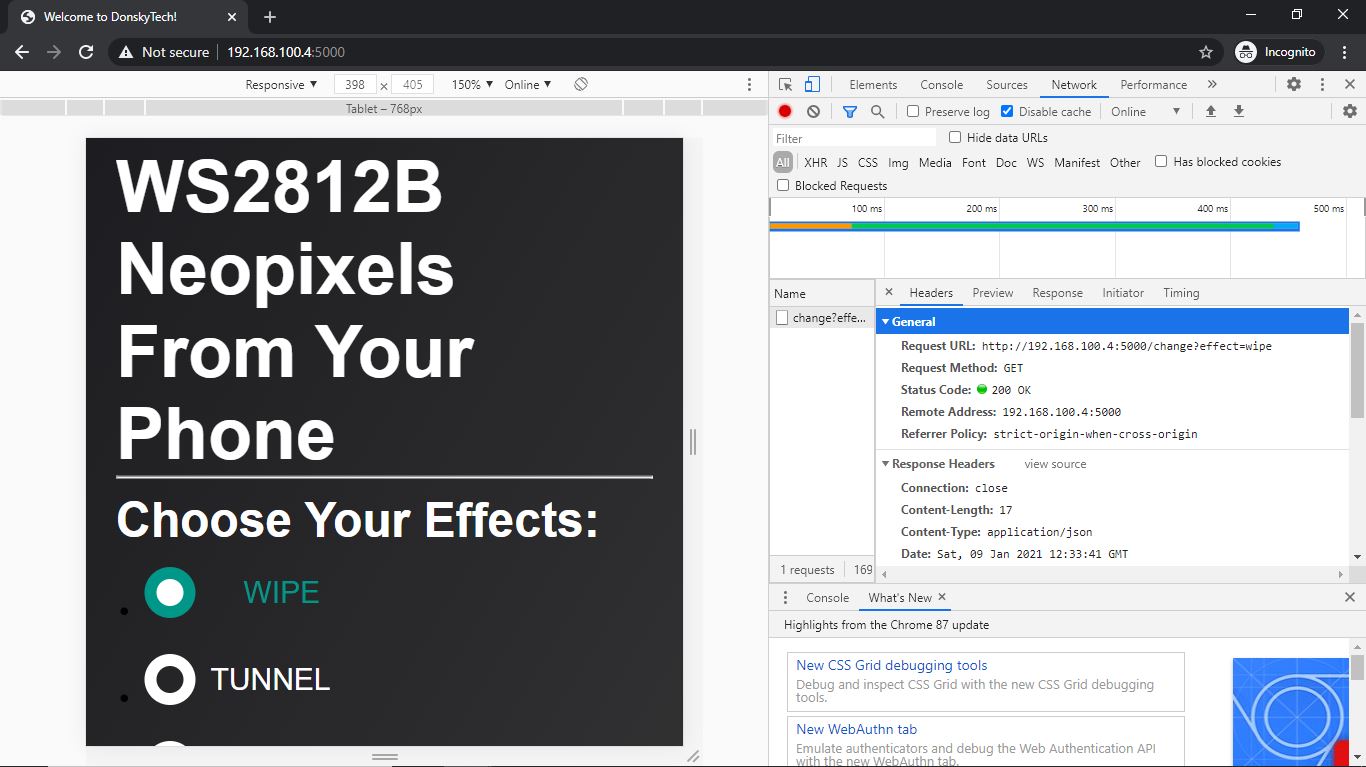
</li>To see this in action, open your page in a web browser like Chrome then click F12 if you are on Windows. After which, locate the Network tab at the right then select the “wipe” effect. You will notice that the following HTTP GET request was called on our Flask Web application.
This is a map to our “/change” route in our app.py. This is how AJAX works so that our page will not need to refresh whenever we select a new effect.
Wrap Up
In this project, I have shown you how you can control your WS2812B Neopixels using your mobile phone and Raspberry Pi. The same concept can be applied to any other Internet of Things project that you would like to try. We have discussed each section in as much detail as possible so I am hoping that you have learned something.
As always, you can ask me a question here or follow my social media channels for more projects.
Thats it!
Happy Exploring!
Support Me!
I love sharing what I know and hopefully, I was able to help you. Writing helpful content takes so much time and research. If you think you like my work and I have managed to help you then please consider supporting my channel. I would be very grateful and would boost my confidence that what I am doing is making a big change in the world. (No Pun Intended!) 😉
Become a Patron!
Leave a Reply