Introduction
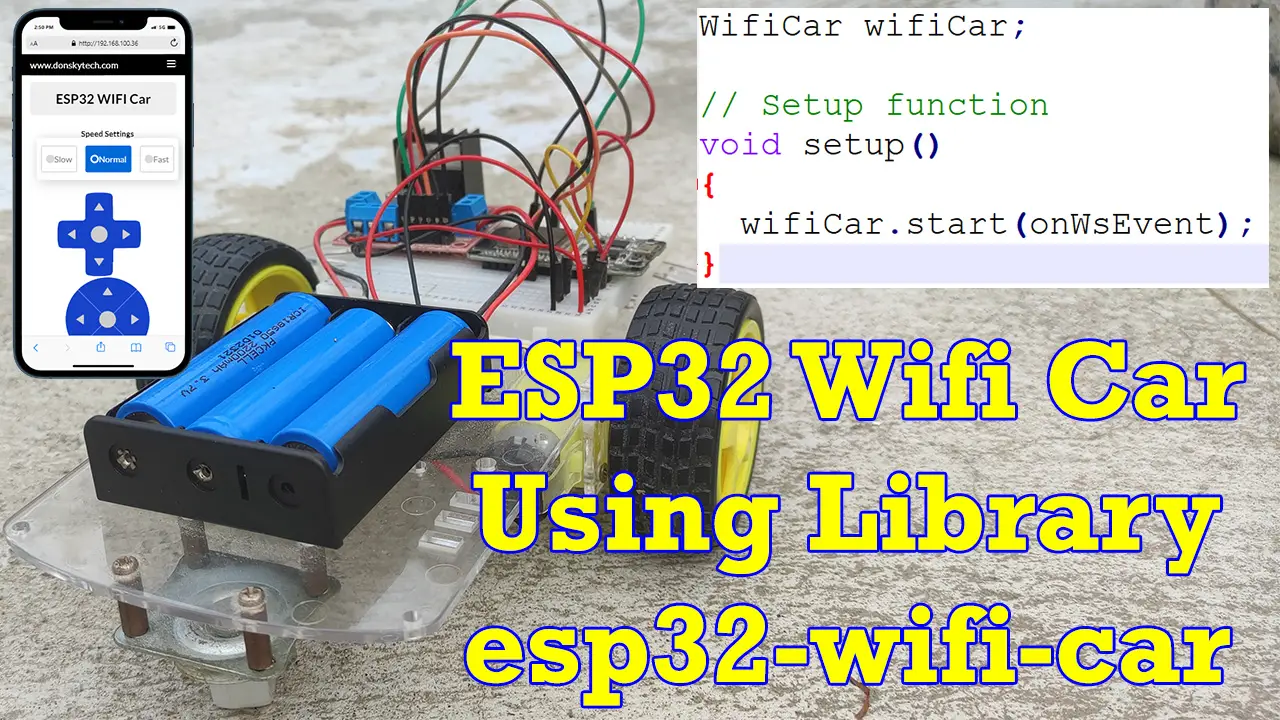
Would you like to create your own ESP32 Wifi car using minimal code? Please follow along with this post as I am sharing with you the library that I have created to help you create your own ESP32 Wifi car.
I created an Arduino library from my earlier post about ESP32 Robot Car Using Websockets. I am sharing this library for you to try and download. All you need is to wire the schematic and add minimal code to your entry code and you will now have your own ESP32 Wifi car. If you want to see this project in action please see the video below or watch it on my YouTube channel.
Code
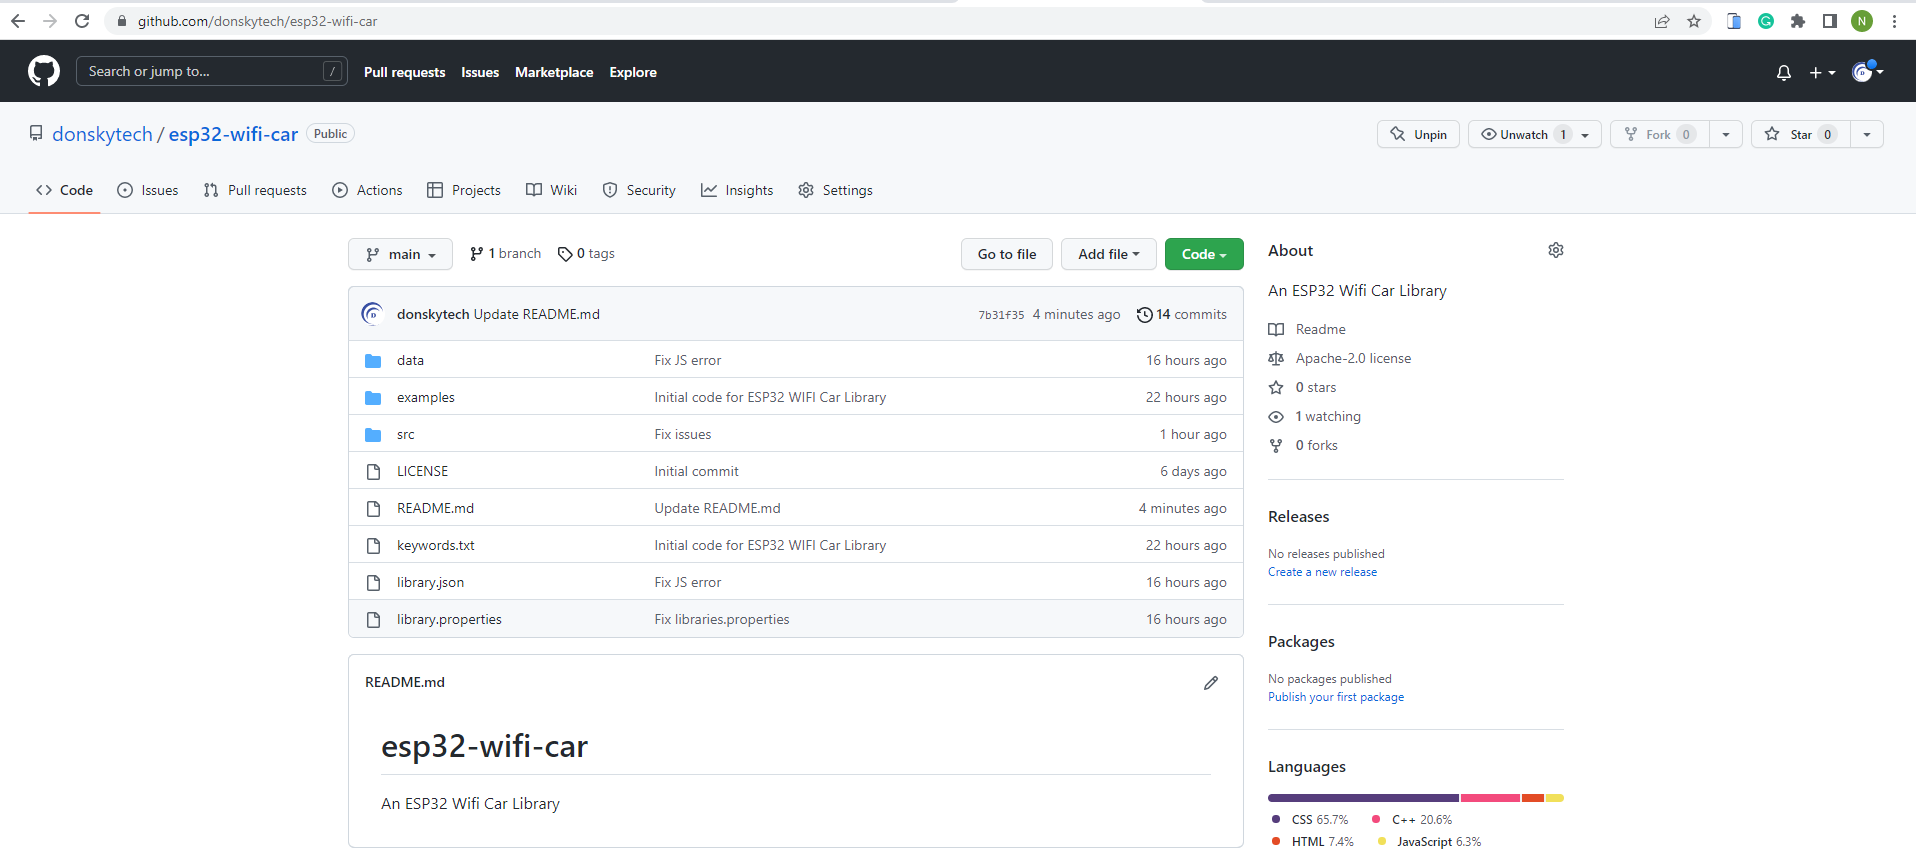
The ESP32 Wifi Car Library can be found in my GitHub repository which you can access from here.
You can take a look at the examples folder on how to use this library. I will keep improving the project and documentation as soon as I can.
Prerequisite
- ESP32 (I used ESP32s) – Amazon | AliExpress | Bangood
- LM298n motor driver module – Amazon | AliExpress | Bangood
- Generic Robot Car – Amazon | AliExpress | Bangood
- Breadboard – Amazon | AliExpress | Bangood
- Connecting Wires – Amazon | AliExpress | Bangood
- Battery pack – Amazon | AliExpress | Bangood
Disclosure: These are affiliate links and I will earn small commissions to support my site when you buy through these links.
I used Visual Studio Code with the PlatformIO extension installed in developing this project. If you are in Windows and have not yet installed Visual Studio Code then you can check my post about how to Install Visual Studio Code or VSCode in Windows. If you are not familiar with PlatformIO then please read this PlatformIO Tutorial for Arduino Development where I detailed how to get started with development using the PlatformIO IDE extension
Wiring/Schematic
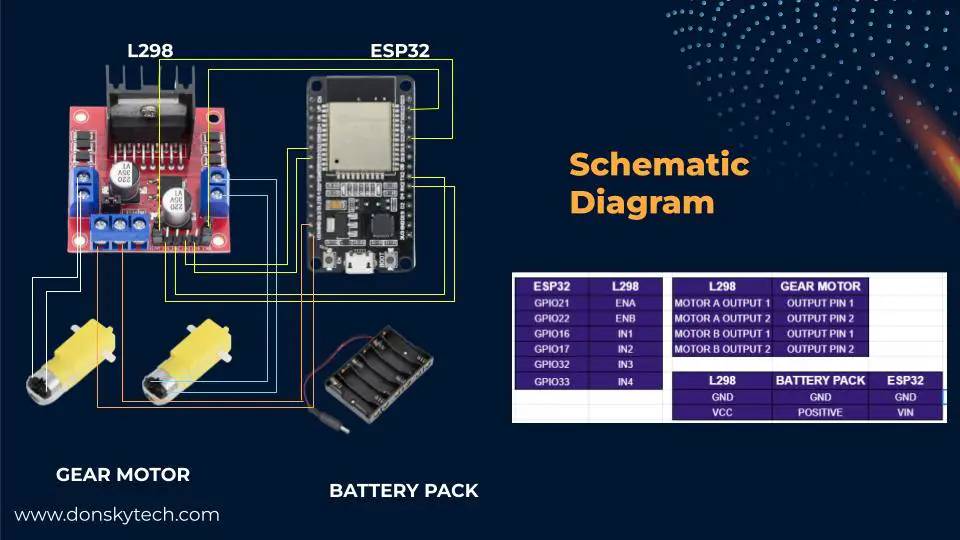
For your reference:
| ESP32 | LM298 |
|---|---|
| GPIO21 | ENA |
| GPIO22 | ENB |
| GPIO16 | IN1 |
| GPIO17 | IN2 |
| GPIO32 | IN3 |
| GPIO33 | IN4 |
| LM298 | GEAR MOTOR |
|---|---|
| MOTOR A OUTPUT 1 | OUTPUT PIN 1 |
| MOTOR A OUTPUT 2 | OUTPUT PIN 2 |
| MOTOR B OUTPUT 1 | OUTPUT PIN 1 |
| MOTOR B OUTPUT 1 | OUTPUT PIN 2 |
| LM298 | BATTERY PACK | ESP32 |
|---|---|---|
| GND | GND | GND |
| VCC | POSITIVE (Pin) | Vin |
Note: Make sure that the battery pack is not connected while we are programming the ESP32 with your workstation and that the USB cable is connected to it. This is to avoid our ESP32 MCU from encountering power issues. Once we are done programming and uploading our program then we can connect your battery pack.
How to use the ESP32 Wifi Car Library?
Using PlatformIO
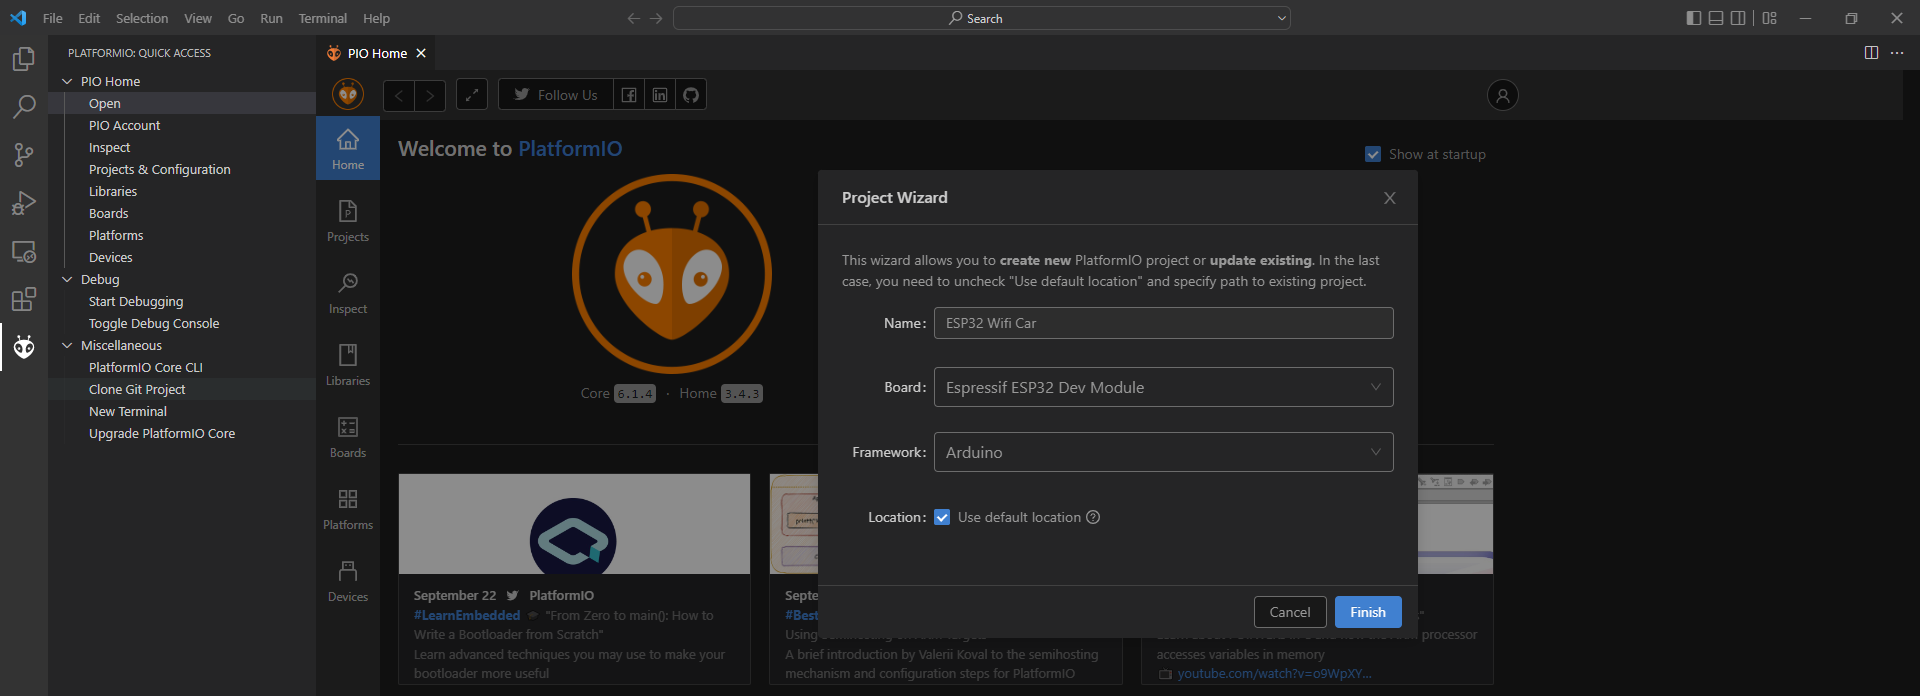
- Create a new project in PlatformIO IDE and select your ESP32 board from the board drop-down. Select Arduino as the Framework. Set the name of your project and the location where you want to save the project. Wait for the initialization to finish.
- Open the platform.ini file and write down the following additional entries. This will set the Serial Monitor Baud Rate and the needed library dependencies.
; Serial Monitor options
monitor_speed = 115200
lib_deps=
https://github.com/donskytech/esp32-wifi-car.git
FS
Wifi
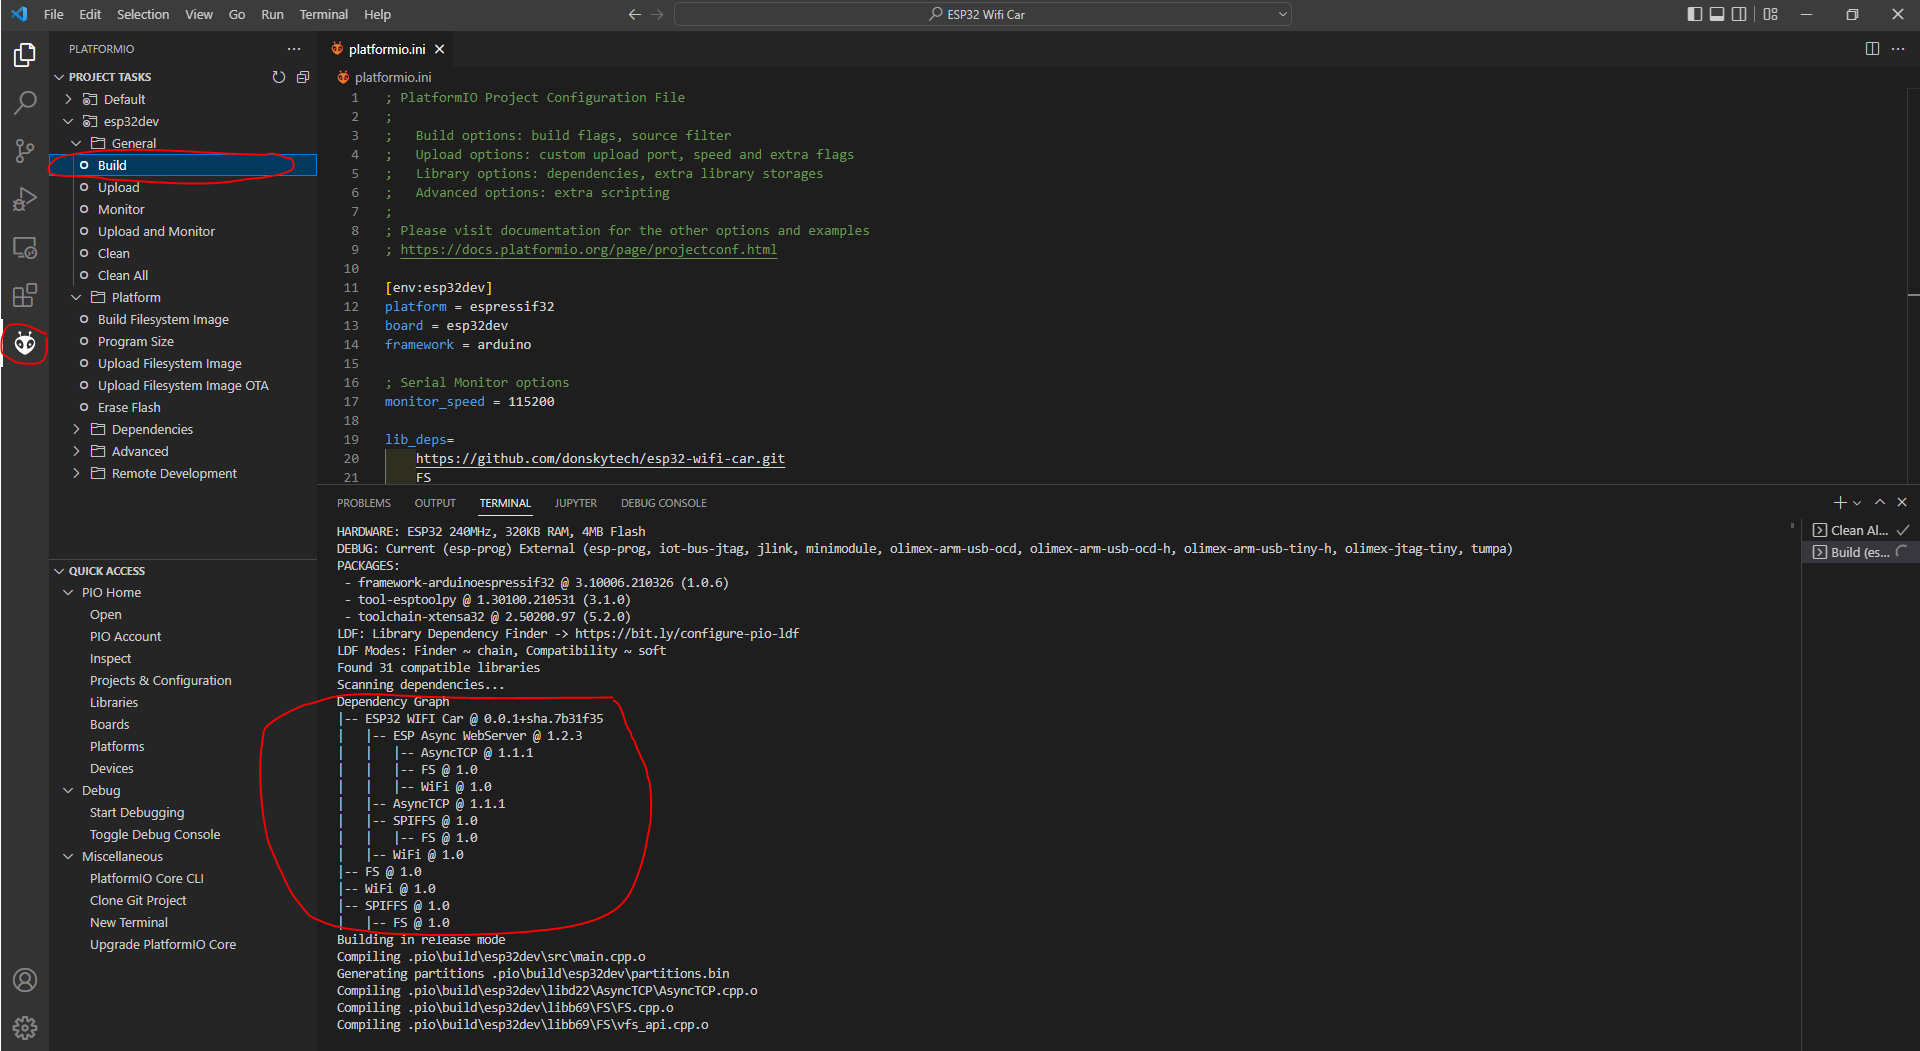
SPIFFSYour platform.ini should now look like the following. These are the libraries needed to make this project run into

- Build the project and check if there are no errors by clicking the PlatformIO icon and clicking the Build task. This should download all the dependencies automatically.
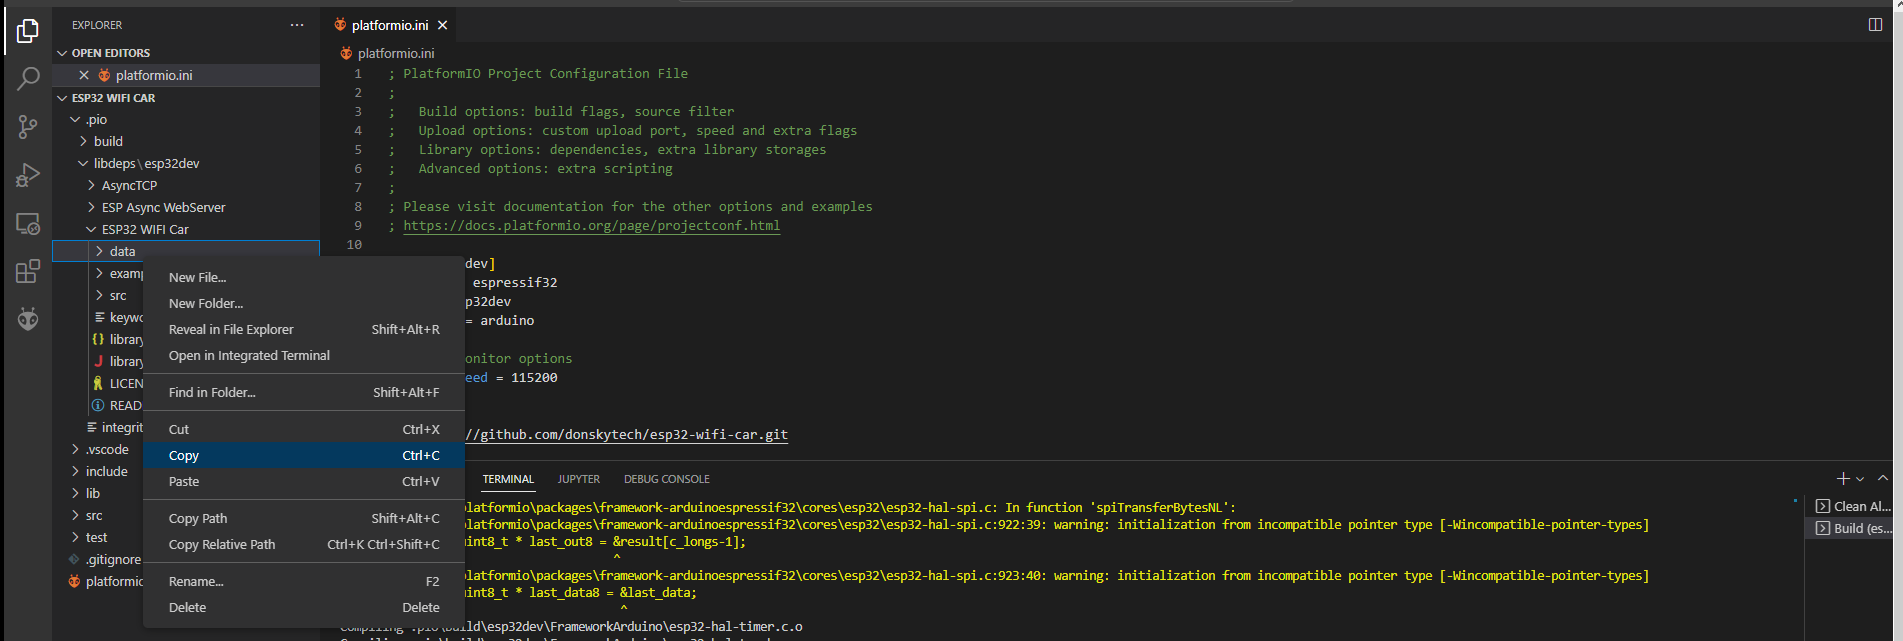
- Go to the explorer and expand the “.pio\lib_deps\ESP32 Wifi Car”. Copy the data folder and paste it into the root of your project.
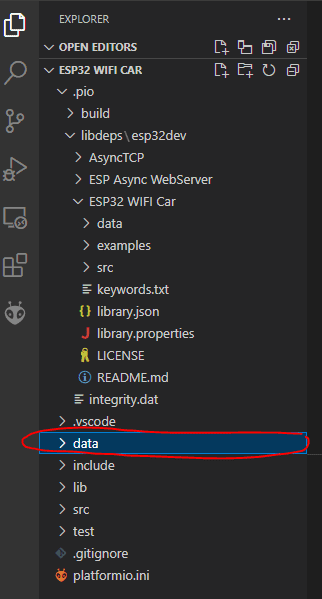
Your explorer should now be like this.
- Upload the FileSystem image into your ESP32 Development board. First, connect your ESP32 MCU to your laptop or workstation. Next, Click the Upload FileSystem Image in the PlatformIO task.
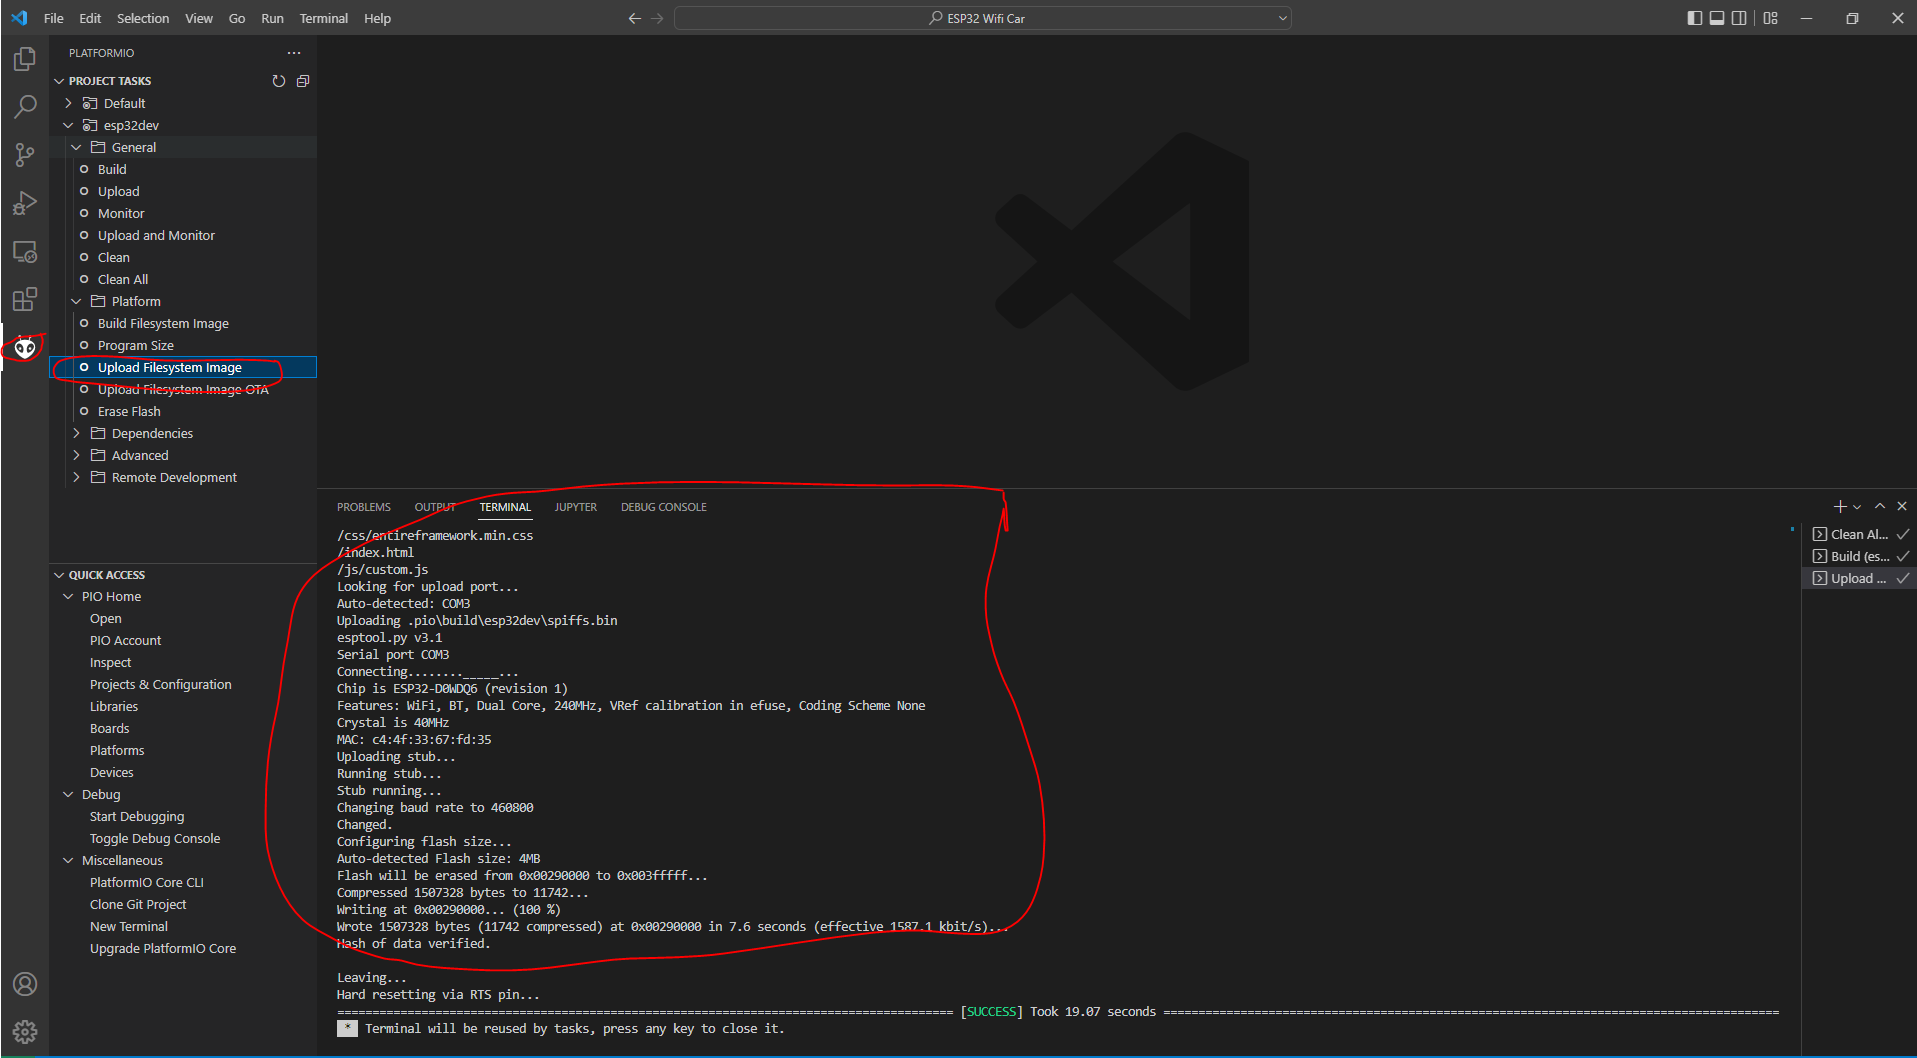
You should see the following console messages displayed.
Note: If you see the console displaying “Connecting……___” message then click the boot button on the ESP32 momentarily.
- Open the main.cpp file and copy the example program from the example file here.
For your reference, the code looks like this.
#include <Arduino.h>
#include "esp32_wifi_car.h"

// Change this to your network SSID
const char *ssid = "<CHANGE_THIS_TO_YOUR_SSID>";
const char *password = "<CHANGE_THIS_TO_YOUR_SSID_PASSWORD>";

WifiCar wifiCar;

// Callback function that receives messages from websocket client
void onWsEvent(AsyncWebSocket *server, AsyncWebSocketClient *client, AwsEventType type,
               void *arg, uint8_t *data, size_t len)
{
  switch (type)
  {
  case WS_EVT_DATA:
  {
    // data packet
    AwsFrameInfo *info = (AwsFrameInfo *)arg;
    if (info->final && info->index == 0 && info->len == len)
    {
      // the whole message is in a single frame and we got all of it's data
      if (info->opcode == WS_TEXT)
      {
        data[len] = 0;
        char *command = (char *)data;
        wifiCar.sendCarCommand(command);
      }
    }
    break;
  }
  default:
    // Serial.println("Received other socket event!");
    break;
  }
}

// Setup function
void setup()
{
  // Initialize the serial monitor baud rate
  Serial.begin(115200);
  Serial.println("Connecting to ");
  Serial.println(ssid);

  // Connect to your wifi
  WiFi.mode(WIFI_STA);
  WiFi.begin(ssid, password);
  if (WiFi.waitForConnectResult() != WL_CONNECTED)
  {
    Serial.printf("WiFi Failed!\n");
    return;
  }

  Serial.print("IP Address: ");
  Serial.println(WiFi.localIP());

  // Initialize SPIFFS
  if (!SPIFFS.begin(true))
  {
    Serial.println("An Error has occurred while mounting SPIFFS");
    return;
  }

  wifiCar.start(onWsEvent);

}

void loop()
{
  // No code in here.  Server is running in asynchronous mode
}
That is the whole code for this project. Let us run through the code.
#include <Arduino.h>
#include "esp32_wifi_car.h"
Import the Arduino and esp32_wifi_car header.
// Change this to your network SSID
const char *ssid = "<CHANGE_THIS_TO_YOUR_SSID>";
const char *password = "<CHANGE_THIS_TO_YOUR_SSID_PASSWORD>";
Change the Wifi SSID and password according to your network.
WifiCar wifiCar;

// Callback function that receives messages from websocket client
void onWsEvent(AsyncWebSocket *server, AsyncWebSocketClient *client, AwsEventType type,
               void *arg, uint8_t *data, size_t len)
{
  switch (type)
  {
  case WS_EVT_DATA:
  {
    // data packet
    AwsFrameInfo *info = (AwsFrameInfo *)arg;
    if (info->final && info->index == 0 && info->len == len)
    {
      // the whole message is in a single frame and we got all of it's data
      if (info->opcode == WS_TEXT)
      {
        data[len] = 0;
        char *command = (char *)data;
        wifiCar.sendCarCommand(command);
      }
    }
    break;
  }
  default:
    // Serial.println("Received other socket event!");
    break;
  }
}
Declare our WifiCar and the onWsEvent callback function needed to send commands to our car.
// Setup function
void setup()
{
  // Initialize the serial monitor baud rate
  Serial.begin(115200);
  Serial.println("Connecting to ");
  Serial.println(ssid);

  // Connect to your wifi
  WiFi.mode(WIFI_STA);
  WiFi.begin(ssid, password);
  if (WiFi.waitForConnectResult() != WL_CONNECTED)
  {
    Serial.printf("WiFi Failed!\n");
    return;
  }

  Serial.print("IP Address: ");
  Serial.println(WiFi.localIP());

  // Initialize SPIFFS
  if (!SPIFFS.begin(true))
  {
    Serial.println("An Error has occurred while mounting SPIFFS");
    return;
  }
We initialize our Serial monitor baud rate, connect to your Wifi, and open the SPIFFS Filesystem.
wifiCar.start(onWsEvent);We start our wifi car. That is it for the code.
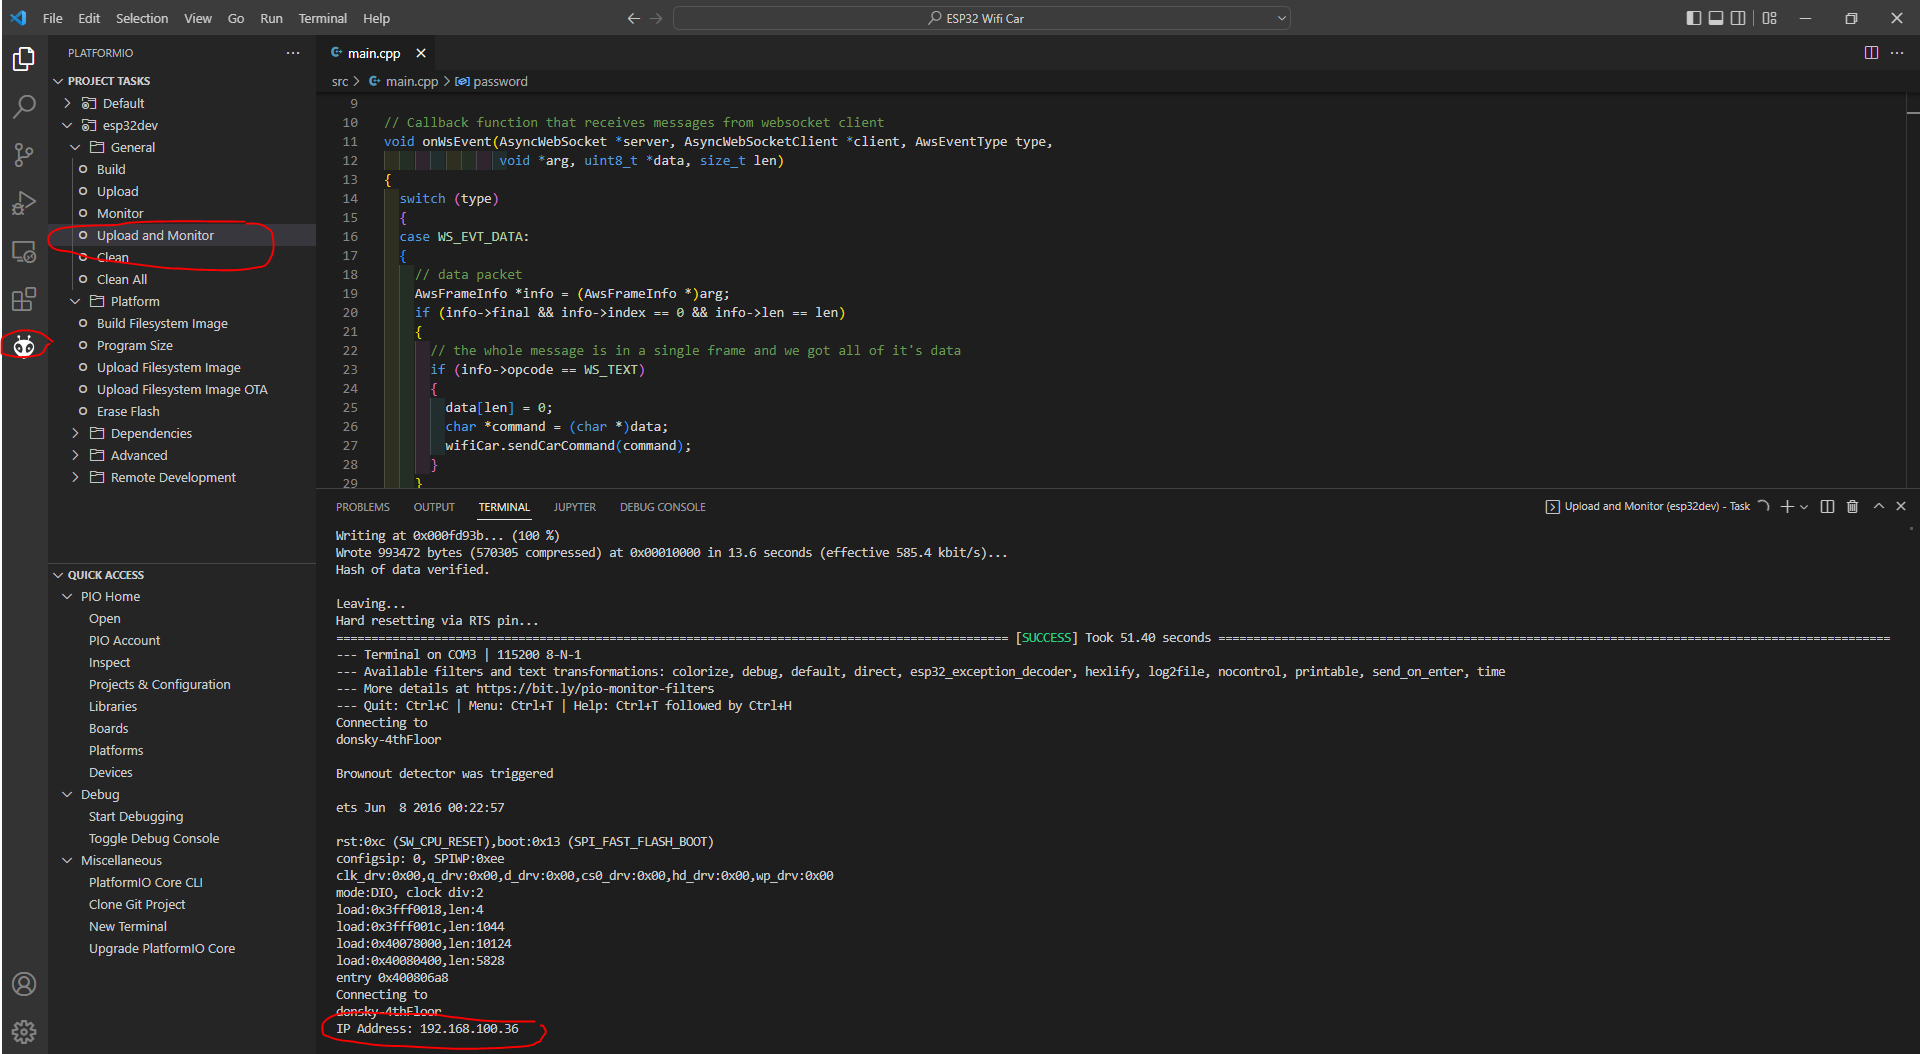
- Upload the project to the ESP32 MCU. Click the Upload and monitor in the tasks section and wait for the Upload to succeed. Take note of the IP Address at the end as we will need this.
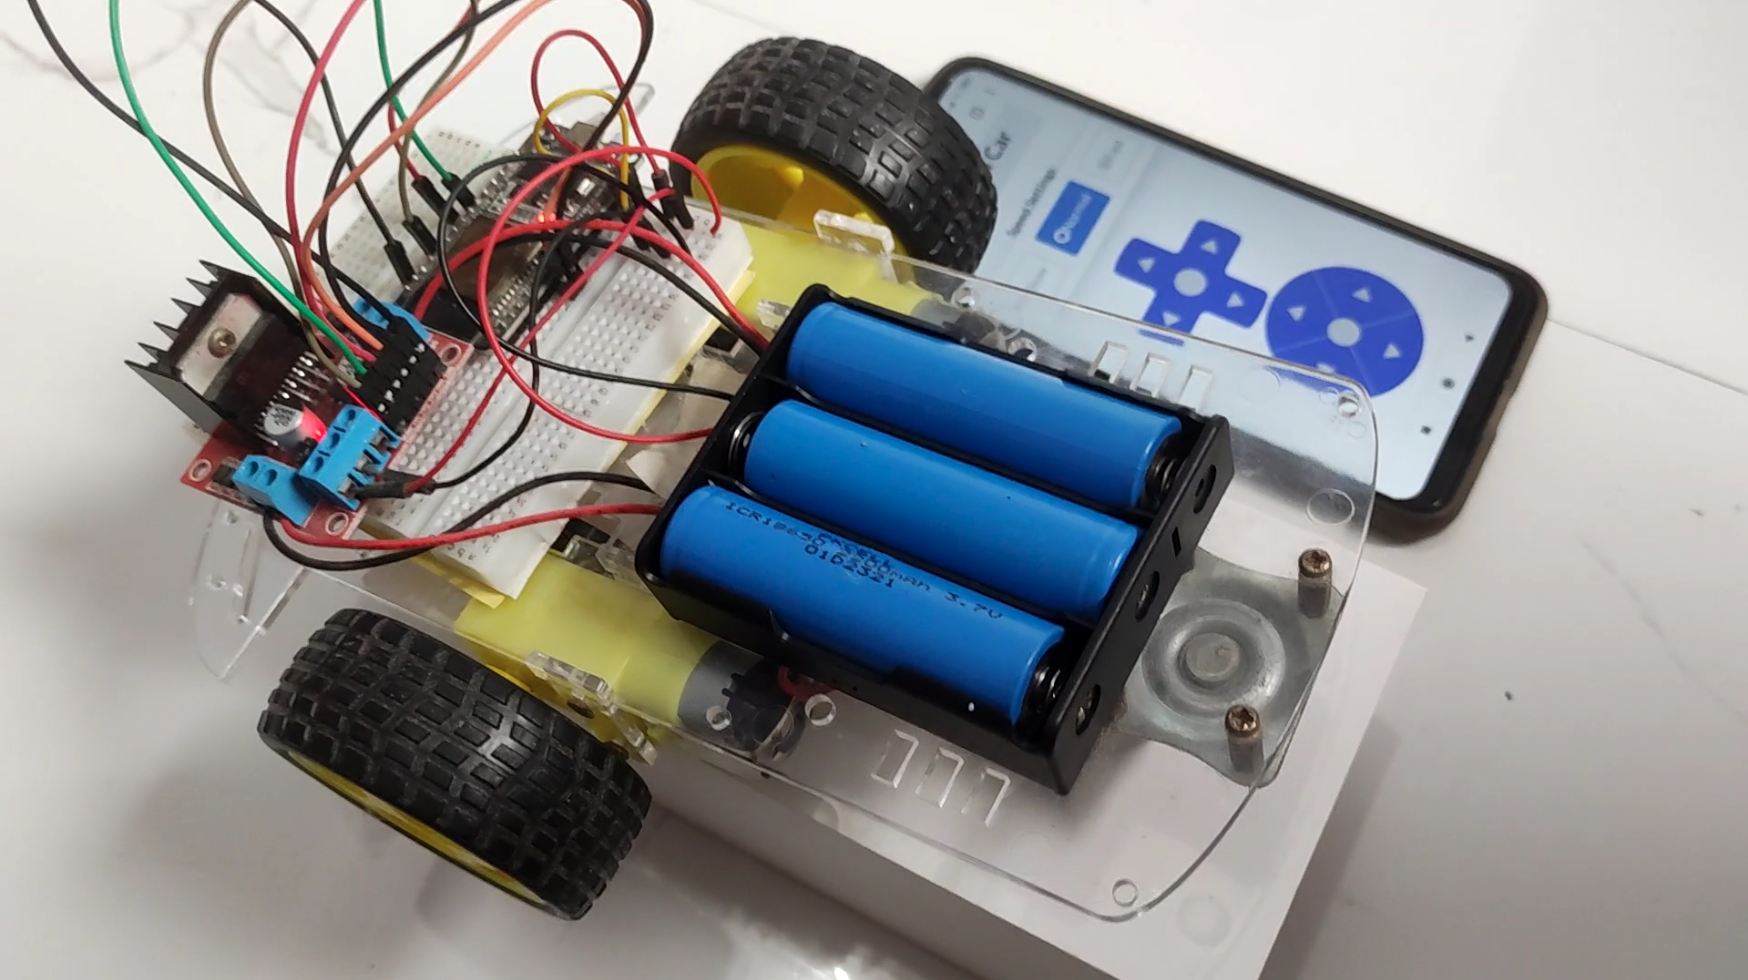
- Disconnect your ESP32 from your Wifi and connect now the battery pack.
- Open your mobile browser from your phone. You should now be seeing the following application displayed in your mobile browser. If there are no issues in your wiring then your car should move correctly.
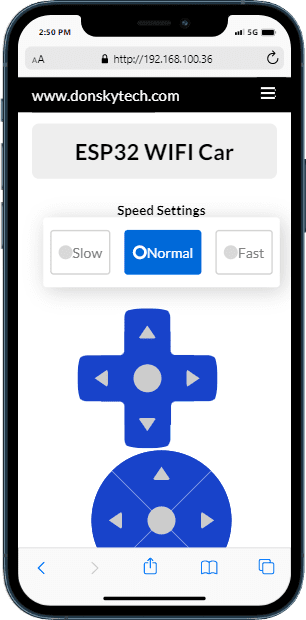
Congratulations you now have created your own ESP32 Wifi Car using the library that I have created!
Issues
Wrap Up
We have gone thru how to use the ESP32 Wifi car library that I have created in this post. This library will help you in creating your own Wifi car with less code. I hope you had fun doing this project!
Happy Exploring!
Read Next:
Building a MicroPython Wifi Robot Car
ESP8266 Webserver Conveyor Counter
Leave a Reply