Introduction
This post will show how to get started developing MicroPython Internet of Things (IoT) Applications using the MicroDot framework. I really like the simplicity of this minimalistic MicroPython framework that will allow us to create applications that need a web server interface.
Please see the video below to see a demo presentation of the basic MicroPython application that we are going to create here using MicroDot. Please refresh your page if the video player is not playing or watch it on my youtube channel.
What is MicroDot?
Microdot is a minimalistic Python web framework inspired by Flask, and designed to run on systems with limited resources such as microcontrollers. It runs on standard Python and on MicroPython.
Miguel Grinberg
I have been using the Flask framework in developing some of my applications running on a Raspberry Pi Single Board Computer (SBC). When I started exploring MicroPython, I looked at some of the options on how to create a Web Server when I did a google search. Many of the examples unfortunately use sockets in developing their own Web Server.
It’s a good thing that the MicroDot framework developed by Miguel Grinberg is applicable to run on the MicroController board. MicroDot runs on both the CPython and MicroPython variants but the focus of this post is how to use it in a MicroPython environment.
Prerequisites
The following are the components needed to follow along with this post.
- MicroPython compatible board (I used ESP32) – Amazon | AliExpress | Bangood
- Breadboard – Amazon | AliExpress | Bangood
- Jumper Wires – Amazon | AliExpress | Bangood
Disclosure: These are affiliate links and I will earn small commissions to support my site when you buy through these links.
Install the latest MicroPython firmware on your MicroController Unit (MCU) and we would be using the Thonny IDE in developing the projects here. I am using a Windows PC as my operating system.
You can now plug your MicroPython MCU board (ESP32 in my case) into the USB port so that it would be detected.
Related Content:
How to install MicroPython on ESP32 and download firmware
MicroPython Development Using Thonny IDE
Once you have done all prerequisites then we can now start developing MicroPython applications by first knowing how to install MicroDot.
How to install MicroDot?
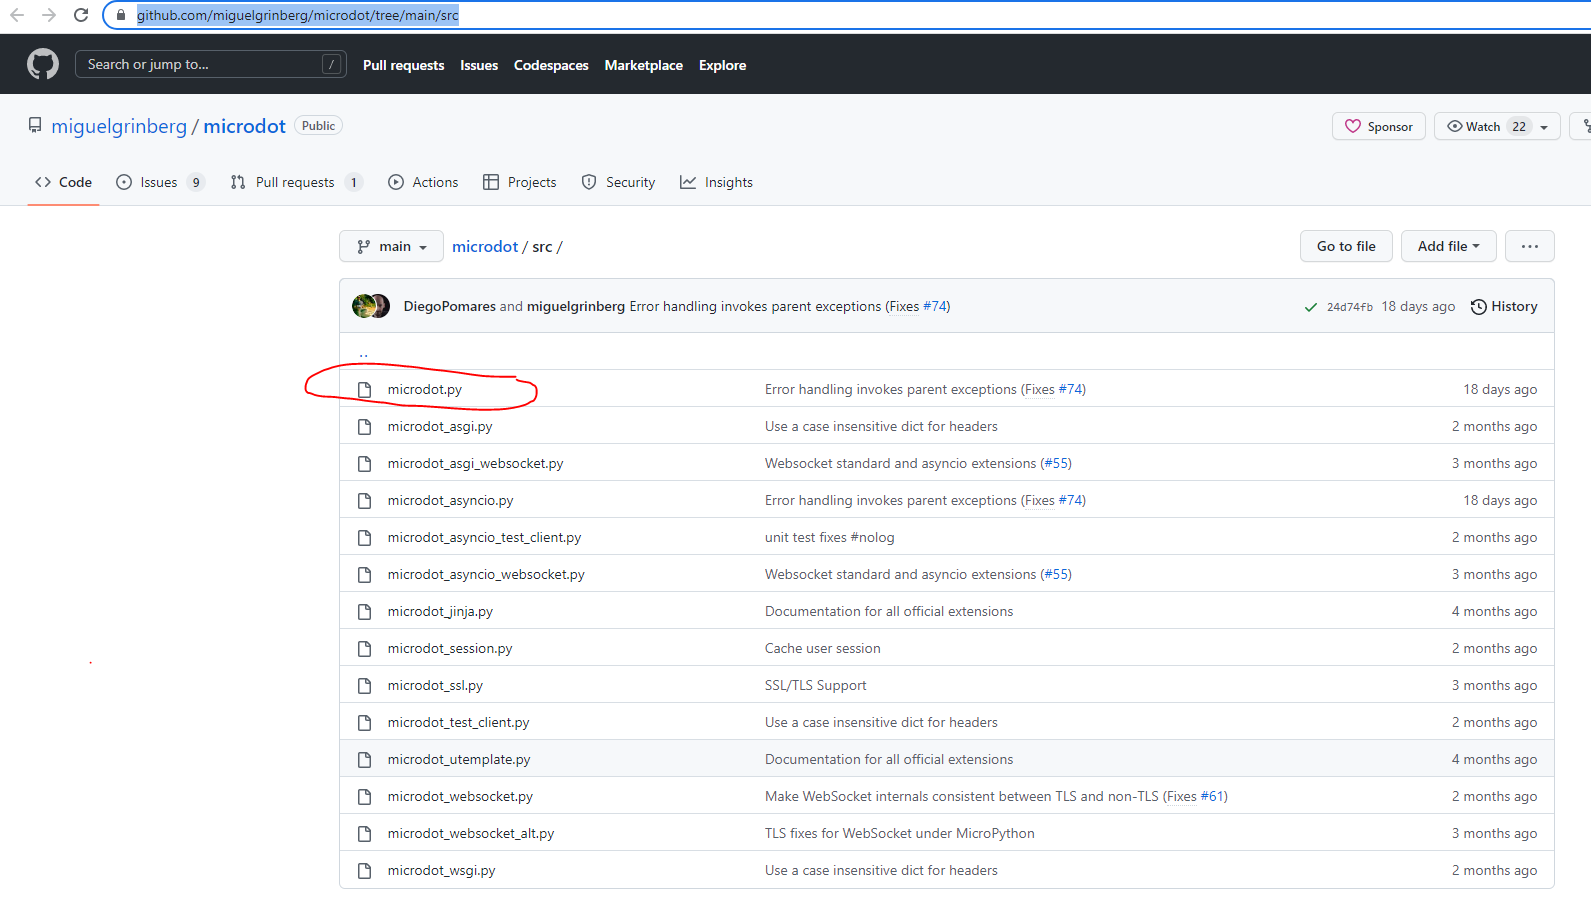
The recommended approach to installing the MicroDot framework as per its documentation is to copy the project files and extensions from its source project hub. So, select a folder where you want to start the development.
C:\Users\DONSKY>cd c:\temp

c:\temp>mkdir simple-microdot-web-server
c:\temp>cd simple-microdot-web-server
After which, let’s copy the basic MicroDot project file from the source folder of the GitHub repository and save it to our root folder. If you take a look at the source directory then you will notice that most of the files start with microdot. Also, there are other files with the file name that has asyncio, WebSockets, wsgi, etc. These are extensions that you can explore later on.
In the meantime, our focus is only on running the basic MicroDot webserver so we will just be downloading the microdot.py and saving it to our root folder.
Create a basic MicroDot project
The complete code for this project is in my GitHub repository.
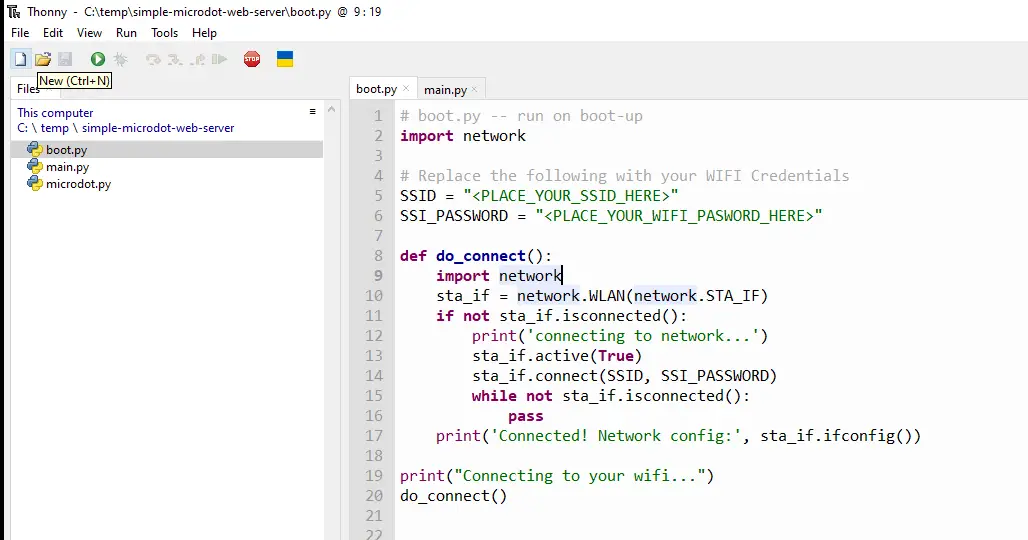
Open your Thonny IDE and locate our root folder in the explorer tab. Create two files inside it named boot.py and main.py. We will upload both files into the file system of our MicroPython MCU.
boot.py
Paste the following code in your boot.py. This will be called whenever our MCU reboots.
# boot.py -- run on boot-up
import network

# Replace the following with your WIFI Credentials
SSID = "<PLACE_YOUR_SSID_HERE>"
SSI_PASSWORD = "<PLACE_YOUR_WIFI_PASWORD_HERE>"

def do_connect():
    import network
    sta_if = network.WLAN(network.STA_IF)
    if not sta_if.isconnected():
        print('connecting to network...')
        sta_if.active(True)
        sta_if.connect(SSID, SSI_PASSWORD)
        while not sta_if.isconnected():
            pass
    print('Connected! Network config:', sta_if.ifconfig())

print("Connecting to your wifi...")
do_connect()
Let us go over what each line of code does.
# Replace the following with your WIFI Credentials
SSID = "<PLACE_YOUR_SSID_HERE>"
SSI_PASSWORD = "<PLACE_YOUR_WIFI_PASWORD_HERE>"
Replace the following variables with your Wifi SSID and password.
def do_connect():
    import network
    sta_if = network.WLAN(network.STA_IF)
    if not sta_if.isconnected():
        print('connecting to network...')
        sta_if.active(True)
        sta_if.connect(SSID, SSI_PASSWORD)
        while not sta_if.isconnected():
            pass
    print('Connected! Network config:', sta_if.ifconfig())

print("Connecting to your wifi...")
do_connect()
In the do_connect method, we are attempting to connect to our wifi network. Once successful then it should print out the IP Address of our MCU.
main.py
Paste the following code in your main.py. This is the main entry point of our program.
from microdot import Microdot

app = Microdot()

@app.route('/')
def index(request):
    return 'Hello, world!'

if __name__ == '__main__':
    app.run(debug=True)
We first initialize the MicroDot class and assign it to the app variable.
We then add a decorator route for our root (“/”) which is called when we access the root of our application. It would return a text with the message “Hello World”
The app will continue to run in a loop.
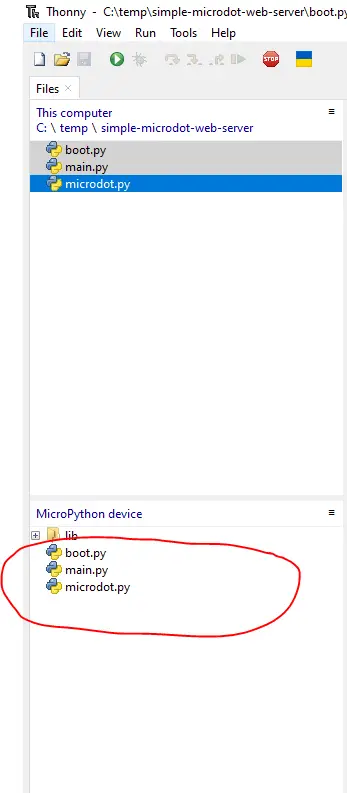
At this point, your root folder should now have the following files in your file explorer.
Upload our project files into the file system of our MCU
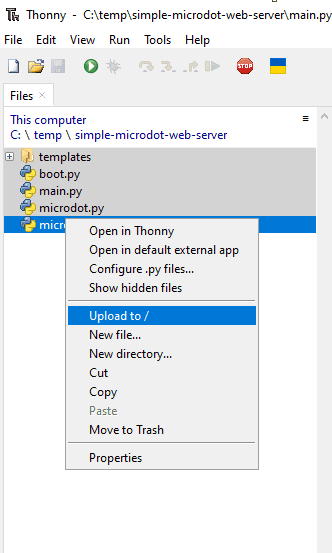
Once you have updated all the files then we can now upload them into the file system of our MCU device. To do that, select all the files in your file explorer then right-click, and then click the “upload to /” button.
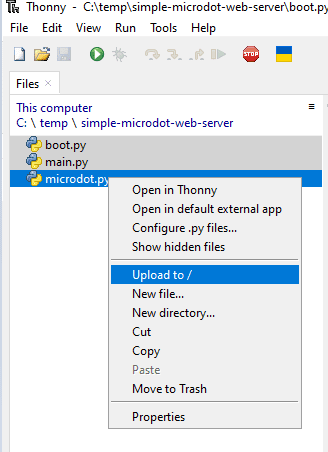
If everything is okay then you should be able to see the three files in the device section.
Let us check if everything is okay by soft rebooting our MCU device

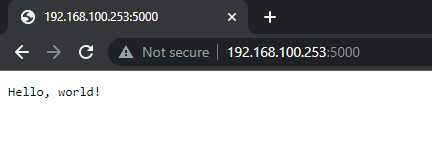
You should be able to see the following messages printed in the shell view of your Thonny IDE. Copy the IP Address shown in your shell terminal.

Open your web browser and paste in the following URL. Our MicroDot web server is listening at port 5000.
http://192.168.100.253:5000/You should be able to see the following message displayed in your browser.
Using Templates
Templates are tools needed by your MicroDot applications to render different sets of information at runtime for each request. A simple example is when you are trying to display the list of orders per user in an eCommerce application.
Install the uTemplate
We first need to install the uTemplate package from the PyPi repository.
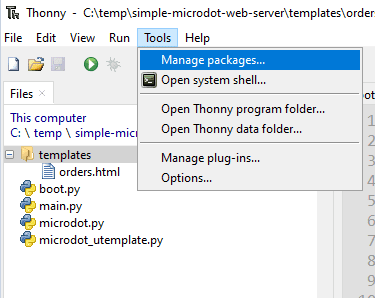
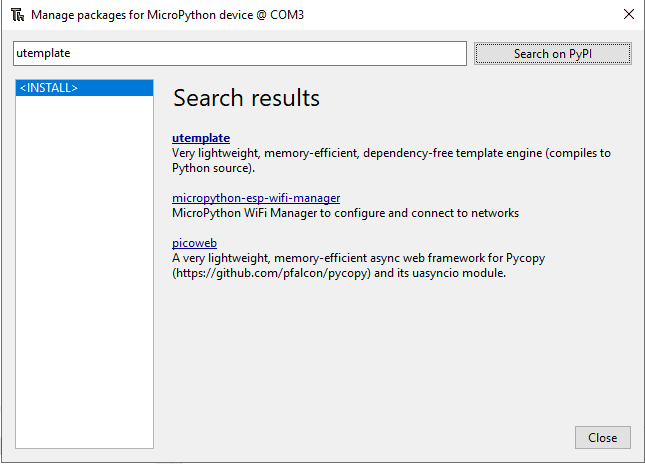
Click Tools and Manage Package
Search for the uTemplate package
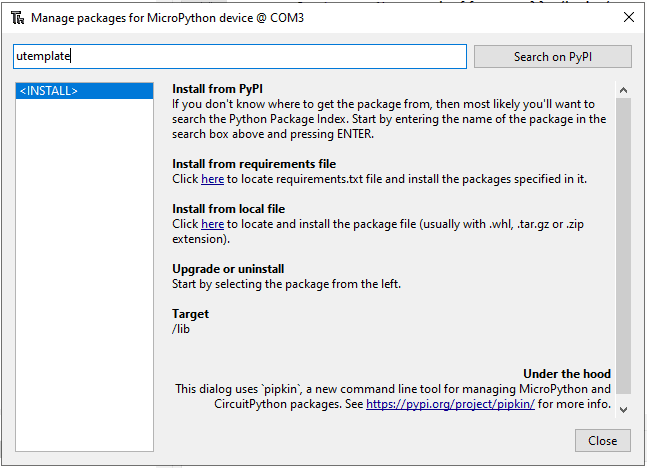
From the Search Result click the uTemplate. Click the Install button. Ignore the message “This doesn’t look like a MicroPython/CircuitPython package” and click Yes.
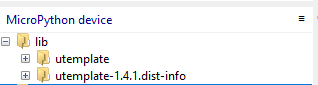
This will install the uTemplate in the library folder of our MicroPython device.
Download the MicroDot uTemplate extension
Download the MicroDot uTemplate extension from the source repository. Save it inside our root project folder.
Prepare our template files
Create a folder called templates in your root folder. Create a file called orders.html and place the following code in that program.
{% args name, orders %}
<!doctype html>
<html>
  <head>
    <title>Microdot + uTemplate example</title>
  </head>
  <body>
    <h1>List of Orders:</h1>
    {% if name %}
    <p>Customer Name: <b>{{ name }}</b>!</p>
    {% endif %}
    <ul>
    {% for order in orders %}
        <li>{{ order }}</li>
    {% endfor %}
    </ul>
  </body>
</html>
This is a sample Template file that will be dynamically rendered by our Web Server. let us go through what each line of the file does.
{% args name, orders %}We define the arguments that are passed into our templates. Usually, these come from our routes and may contain dynamic information that is different from each run.
<html>
  <head>
    <title>Microdot + uTemplate example</title>
  </head>
  <body>
    <h1>List of Orders:</h1>
These are standard HTML tags that should be displayed in our browser.
    {% if name %}
    <p>Customer Name: <b>{{ name }}</b>!</p>
    {% endif %}
    <ul>
    {% for order in orders %}
        <li>{{ order }}</li>
    {% endfor %}
    </ul>
The code above is what makes this a template. As you can see, we can implement conditional rendering, looping, and decision-making in our HTML page. The “{{ arg }}” will display the value of the current variables.
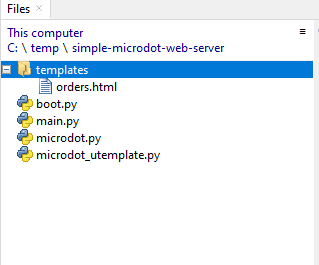
At this point, your files should show something like this.
Render our templates
Edit your main.py and add the following entries.
from microdot import Microdot, Response
from microdot_utemplate import render_template

app = Microdot()
Response.default_content_type = 'text/html'

@app.route('/')
def index(request):
    return 'Hello, world!'

@app.route('/orders', methods=['GET'])
def index(req):
    name = "donsky"
    orders = ["soap", "shampoo", "powder"]

    return render_template('orders.html', name=name, orders=orders)

if __name__ == '__main__':
    app.run(debug=True)
Let’s go through what we have added.
from microdot import Microdot, Response
from microdot_utemplate import render_template
We import the Response object to set the content type and the render_template from the microdot_utemplate extension.
app = Microdot()
Response.default_content_type = 'text/html'
We explicitly set the default type to be in HTML format.
@app.route('/orders', methods=['GET'])
def index(req):
    name = "donsky"
    orders = ["soap", "shampoo", "powder"]

    return render_template('orders.html', name=name, orders=orders)
I have defined a new route that would respond to the “/orders” path and we explicitly set it to an HTTP GET. We then define two sample variables named name and orders which correspond to the current user and a list of their orders.
We call the render_template and passed in the orders.html and our two sample variables (name and orders). Both variables would be dynamically rendered by our orders.html template.
Upload the project
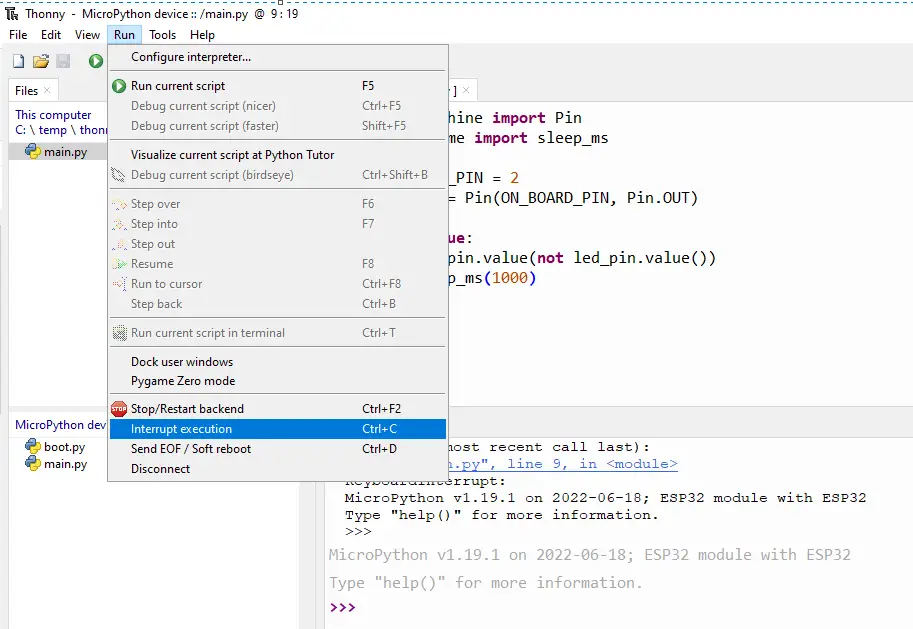
Before uploading click the Interrupt button from the Run menu so that we could stop our ESP32 from executing any program.
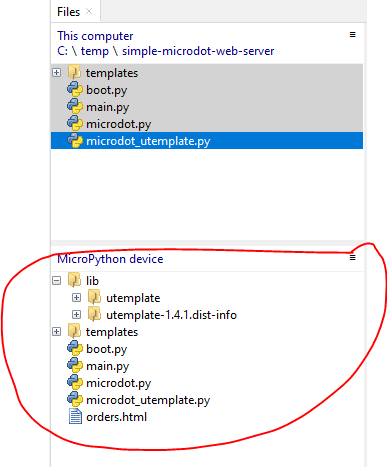
Now we can begin uploading our files to our MicroPython device. To do that you can select all files and folders in our File Explorer and then Right Click then click Upload To button.
You should now be able to see the following files displayed in the Device explorer.
Testing the templates
Click the Run menu and then the Send EOF/Soft Reboot link.
You should now see the following messages displayed in the Shell.
MPY: soft reboot
Connecting to your wifi...
Connected! Network config: ('192.168.100.253', '255.255.255.0', '192.168.100.1', '192.168.100.1')
Starting sync server on 0.0.0.0:5000...
Open your browser and then type in the following URL
http://<Device IP Address>:5000/orders (example: http://192.168.100.253:5000/orders)You should be able to see the following image displayed on your browser.

If you have reached this point then Congratulations! You now have basic knowledge of how to create MicroPython Internet of Things (IoT) applications using MicroDot.
Wrap Up
I honestly think that this MicroDot framework is really an awesome tool to use in my future Internet of Things (IoT) projects. After working with the basics of this project in this post then you can now begin creating your own MicroPython projects using MicroDot.
Let me know if you encounter any issues by commenting here or watching my YouTube channel.
Until the next post! Happy Exploring!
Related Content:
Pico W -MicroPython MQTT – BMP/BME 280 Weather Station
Control DS18B20 using MicroPython with a Weather Station Project
Leave a Reply