Introduction
This is a demo of how we can develop a MicroPython program using Visual Studio Code or VSCode and deploy it to our ESP32/ESP8266 MicroController Unit (MCU). We are going to use the new features of the PyMakr 2 extensions in developing our programs.
I have been developing my projects in Arduino, C/C++, Javascript, and Python extensively on VSCode due to its numerous features so let us find out how good this PyMakr is when it comes to MicroPython development. If you want to see this in an actual video presentation then please take a look below or watch it on my YouTube channel.
Prerequisites
The following are the components needed to follow along with this post.
- ESP32 MCU (I used NodeMCU ESP32s) – Amazon | AliExpress | Bangood
- ESP8266 MCU ( I used NodeMCU ESP8266) – Amazon | AliExpress | Bangood
- Breadboard – Amazon | AliExpress | Bangood
Disclosure: These are affiliate links and I will earn small commissions to support my site when you buy through these links.
I am using a Windows laptop or workstation while executing these steps.
Upload the latest MicroPython firmware for your ESP32/ESP266 MCU.
Related Content:
How to install MicroPython on ESP32 and download firmware
Steps on how to install PyMakr on Visual Studio Code
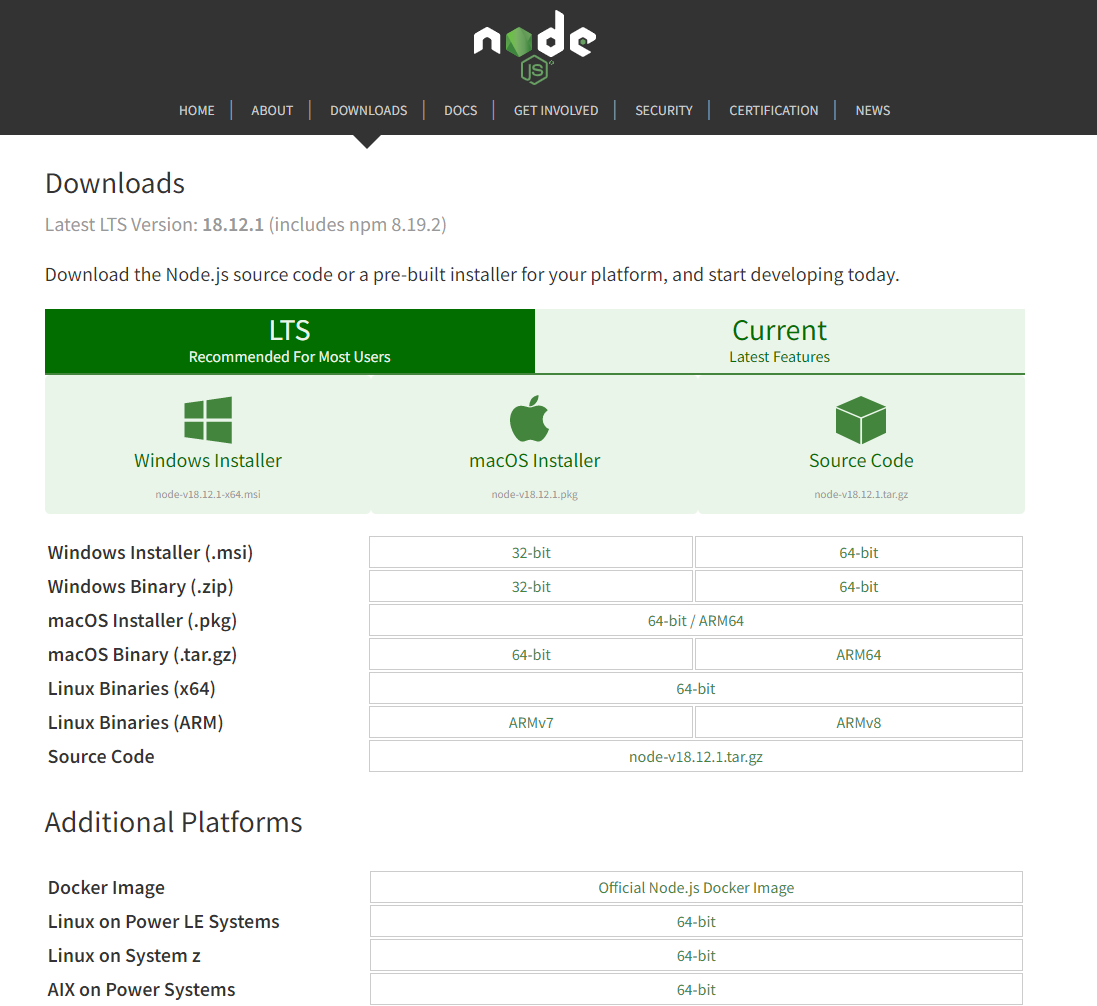
Download Node.js
Go to the Node.js download site and download the latest release of the software that is applicable to your operating system.
Related Content:
Install Node.js on Windows
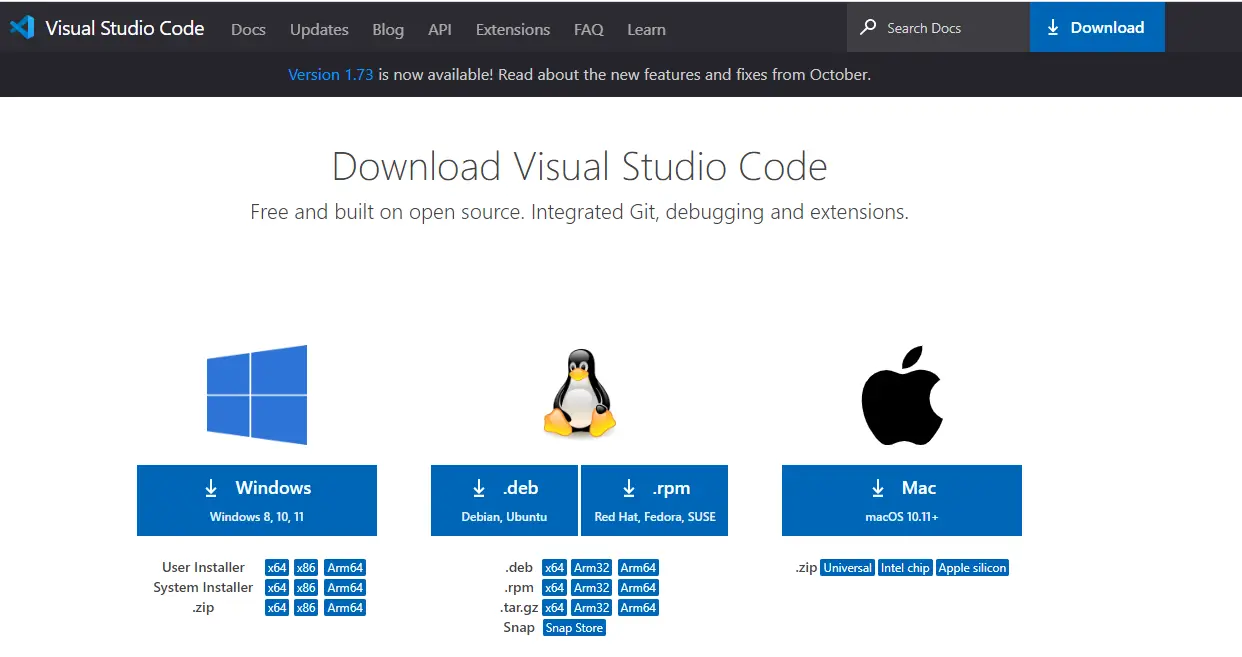
Download Visual Studio Code
Download the latest release of the Visual Studio Code from their download site. Select the appropriate installer for your Operating System (OS).
Related Content:
Install Visual Studio Code or VSCode on Windows
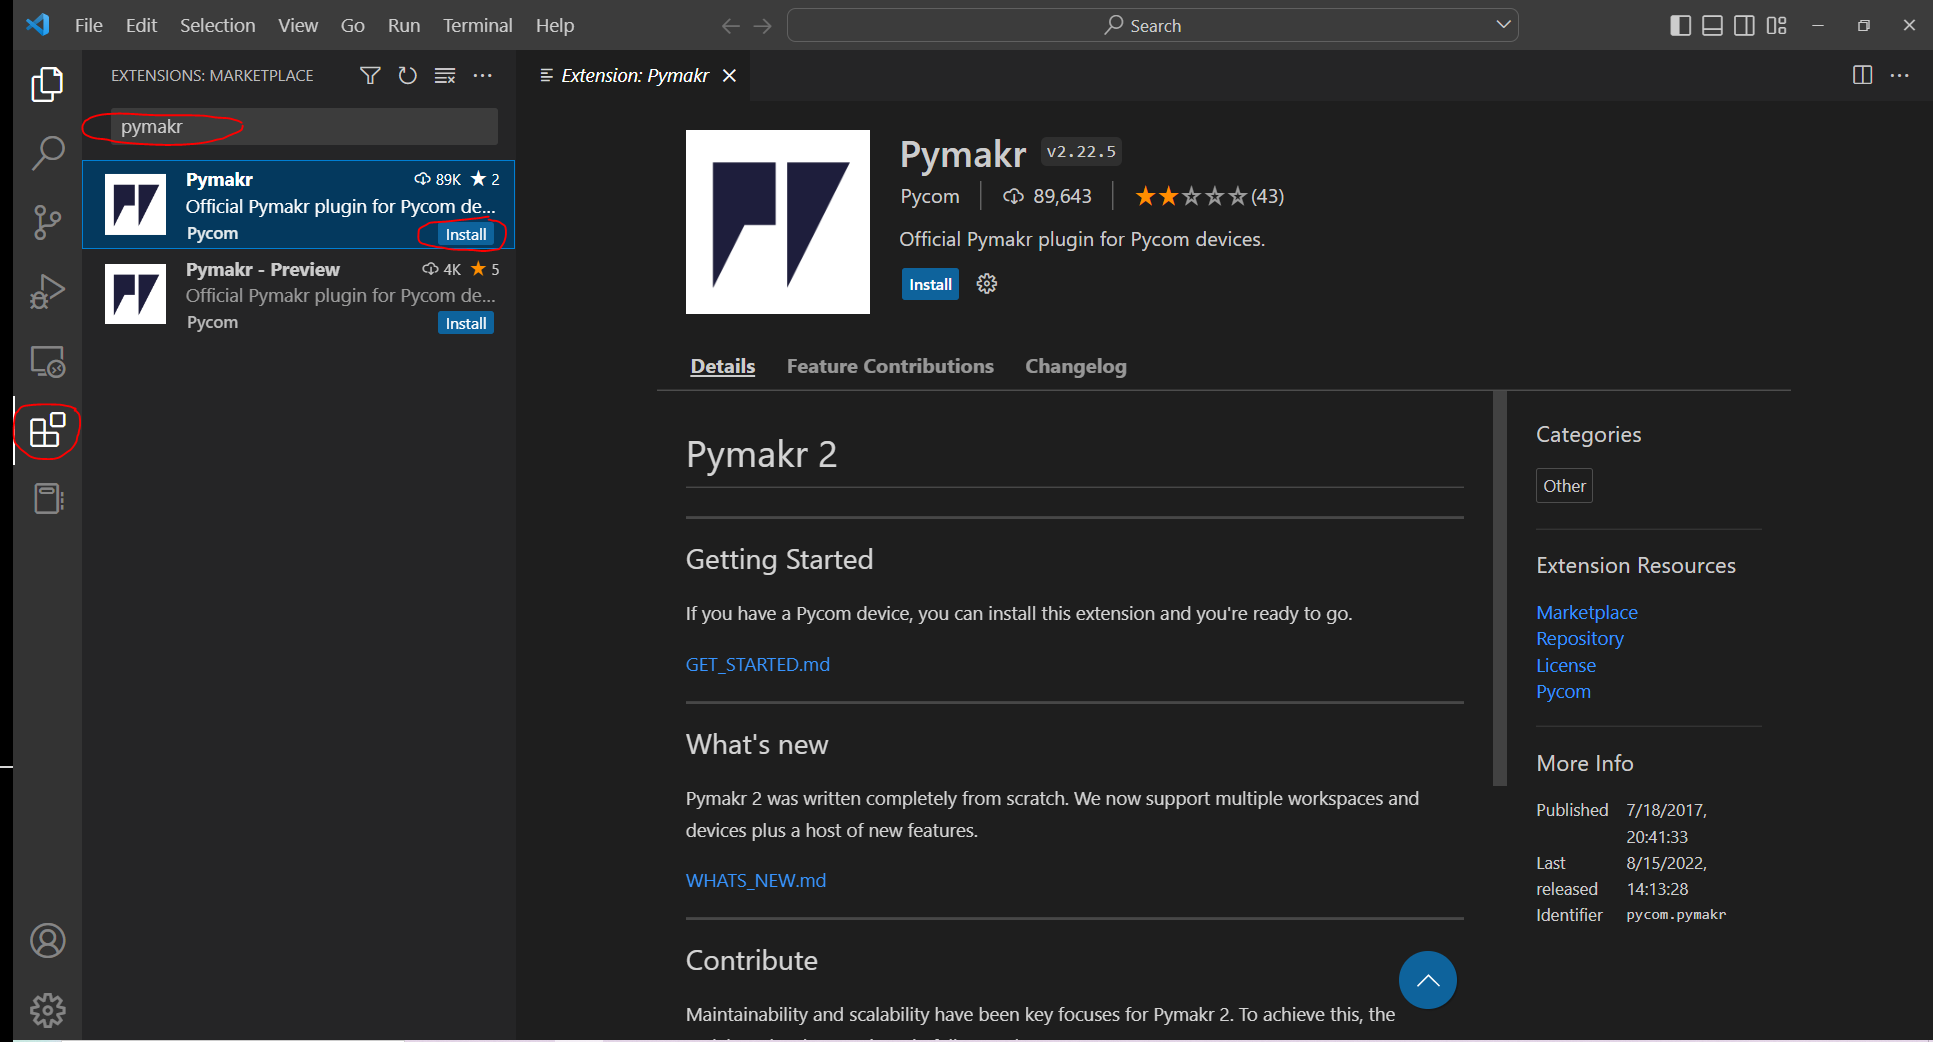
Install the PyMakr extension plugin on Visual Studio Code
Once you have downloaded the Visual Studio Code then we can now install the PyMakr extension plugin. To do that, open the extensions tab on the left-hand side then search for PyMakr. Click the Install button and wait for it to finish the installation process.
What is PyMakr 2?
We are going to use the latest version of PyMakr 2 extension in Visual Studio Code. There are several improvements that were done compared to the original version as documented here.
It now contains its own extension tab that can be seen on the left-hand side of the VSCode window. Other notable feature includes the ability to support multiple projects in one workspace and multiple devices support.
How to create MicroPython projects on VSCode?
Now that we have installed all the required software including the extension PyMakr then we will proceed with developing a MicroPython project.
We are going to build the very basic Arduino blink program wherein we will be turning on and turning off the onboard LED of our ESP32 or ESP8266.
Creating a Project
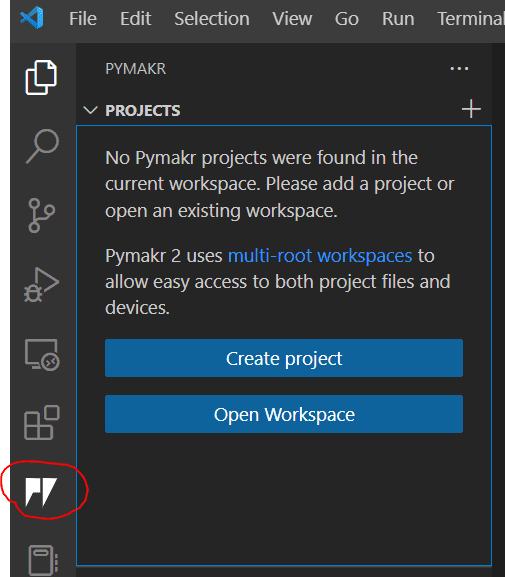
- In a blank new window of VSCode, click the PyMakr extension tab on the left-hand side then click the Create Project button.
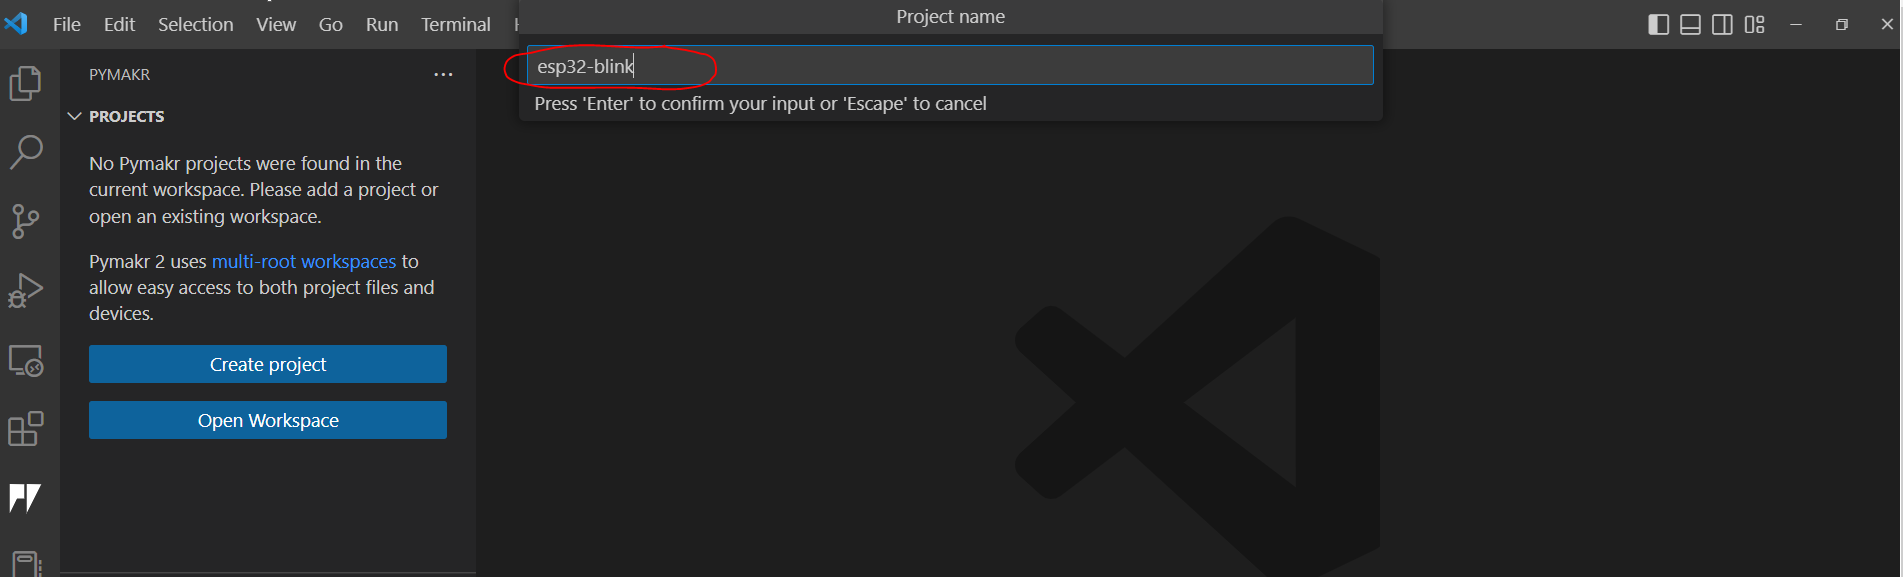
- Locate the folder where you want to create your MicroPython project. In my case, I am using the below folder as the root of my workspace.
c:\MicroPython- Enter the name of the project. For this post, just write “esp32-blink“.
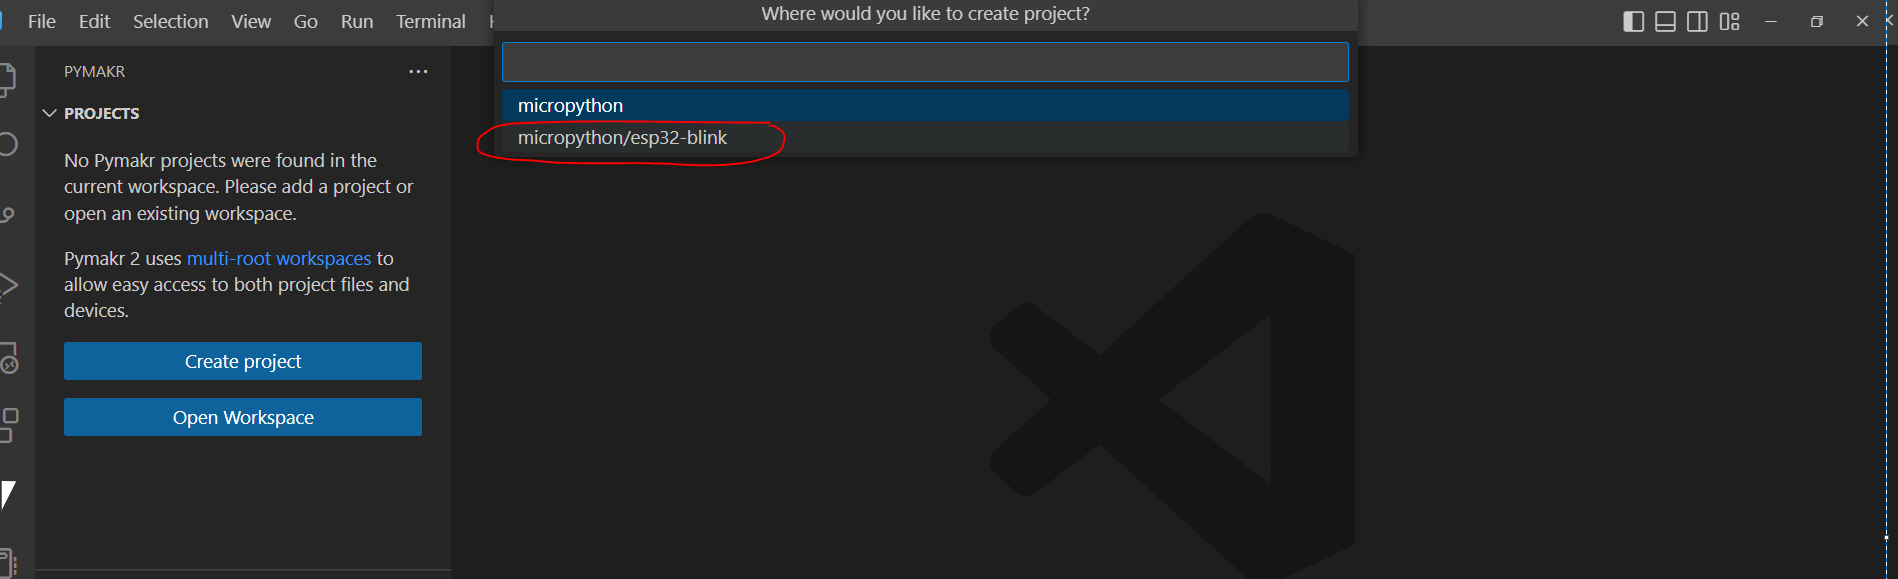
- Select the project location to be “micropython\esp32-blink“. This will create a project called “esp32-blink” under the “micropython” directory.
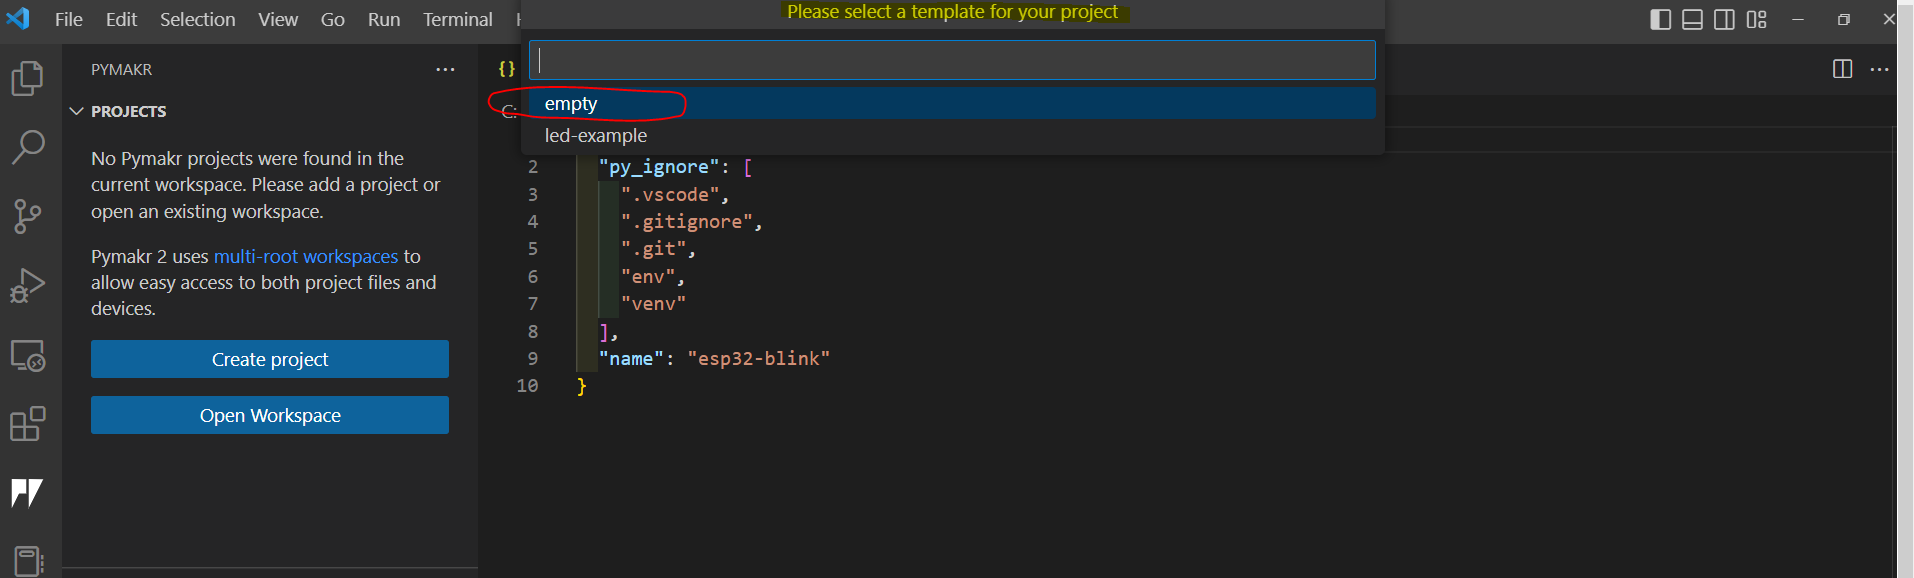
- When asked about what project template to choose, select “empty“.
If you now go into the Explorer tab then you will notice the following files are created in our esp32-blink folder.
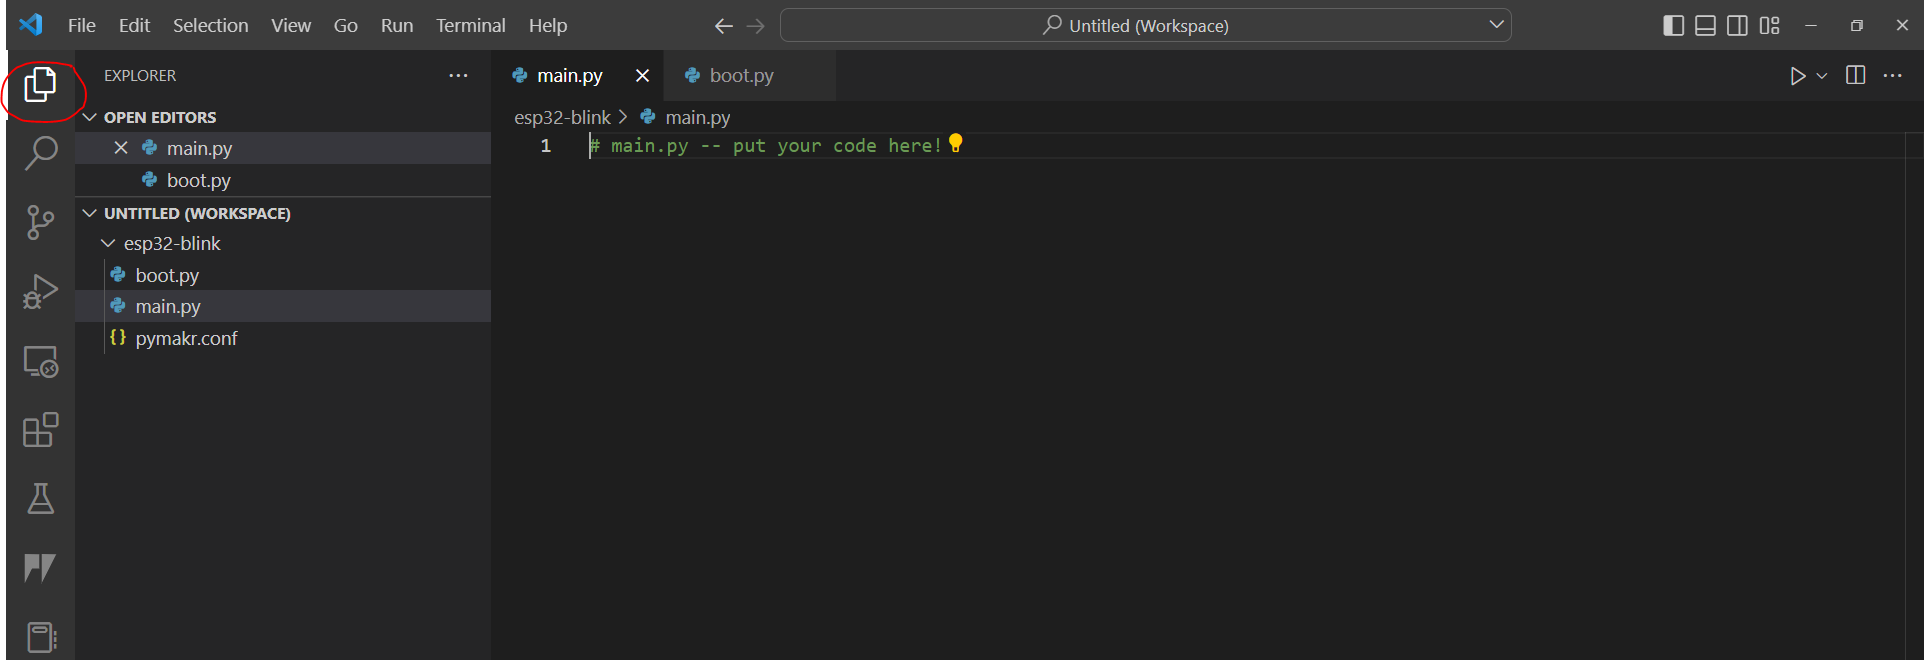
We have the following files that are automatically created by the PyMakr
- boot.py – code in this file is executed every time our MCU reboots
- main.py – this is our main program
- pymakr.conf – pymakr configuration file
Adding Device
Now that we have created our project then we can now begin connecting our ESP32/ESP8266 MCU to our laptop.
Note: Make sure that you have already downloaded the MicroPython firmware for your ESP32/ESP8266 MCU board.
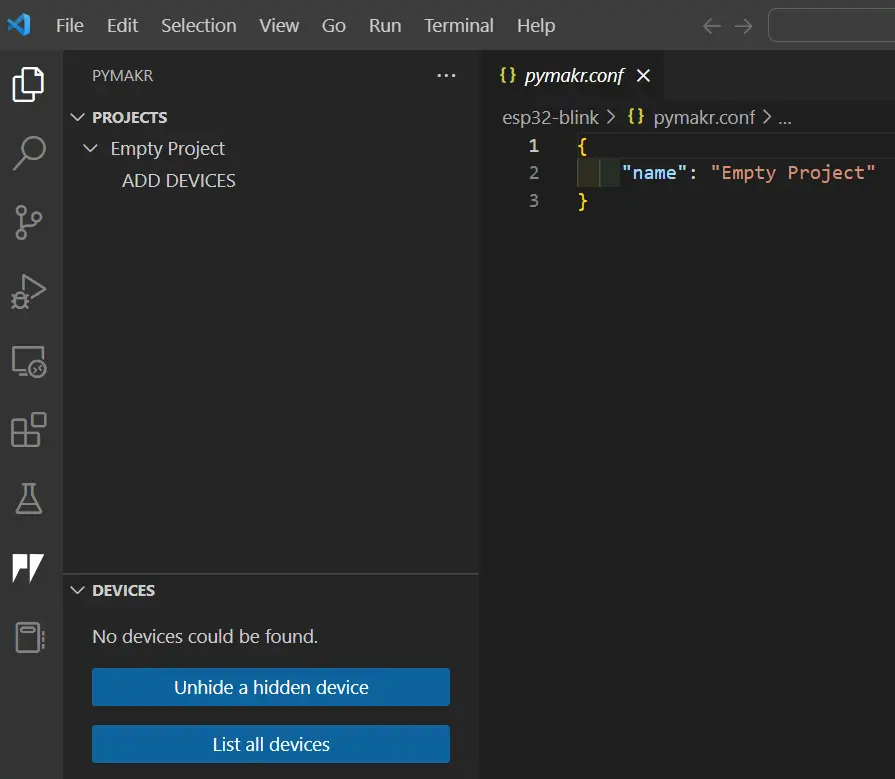
The following is the image of our project when we have not yet connected our ESP32/ESP8266.
If we now connect our ESP32/ESP8266 to our laptop thru the USB cable then you would notice that the PyMakr automatically detected my MicroCOntroller unit.
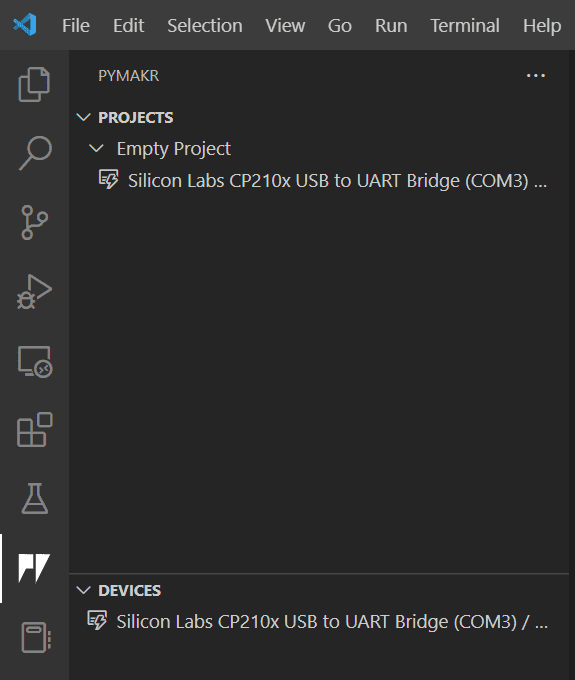
I am using my ESP32 so the USB Driver is automatically detected as a Silab CP210x. Isn’t this cool? 🙂
If for some reason your device was not detected then check if you have installed MicroPython correctly.
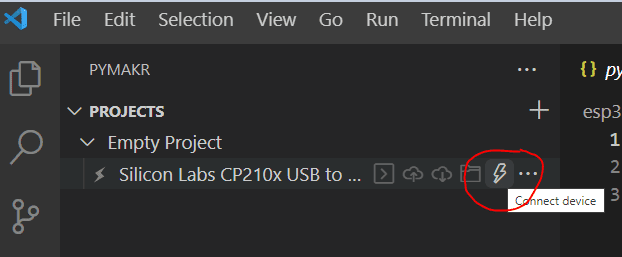
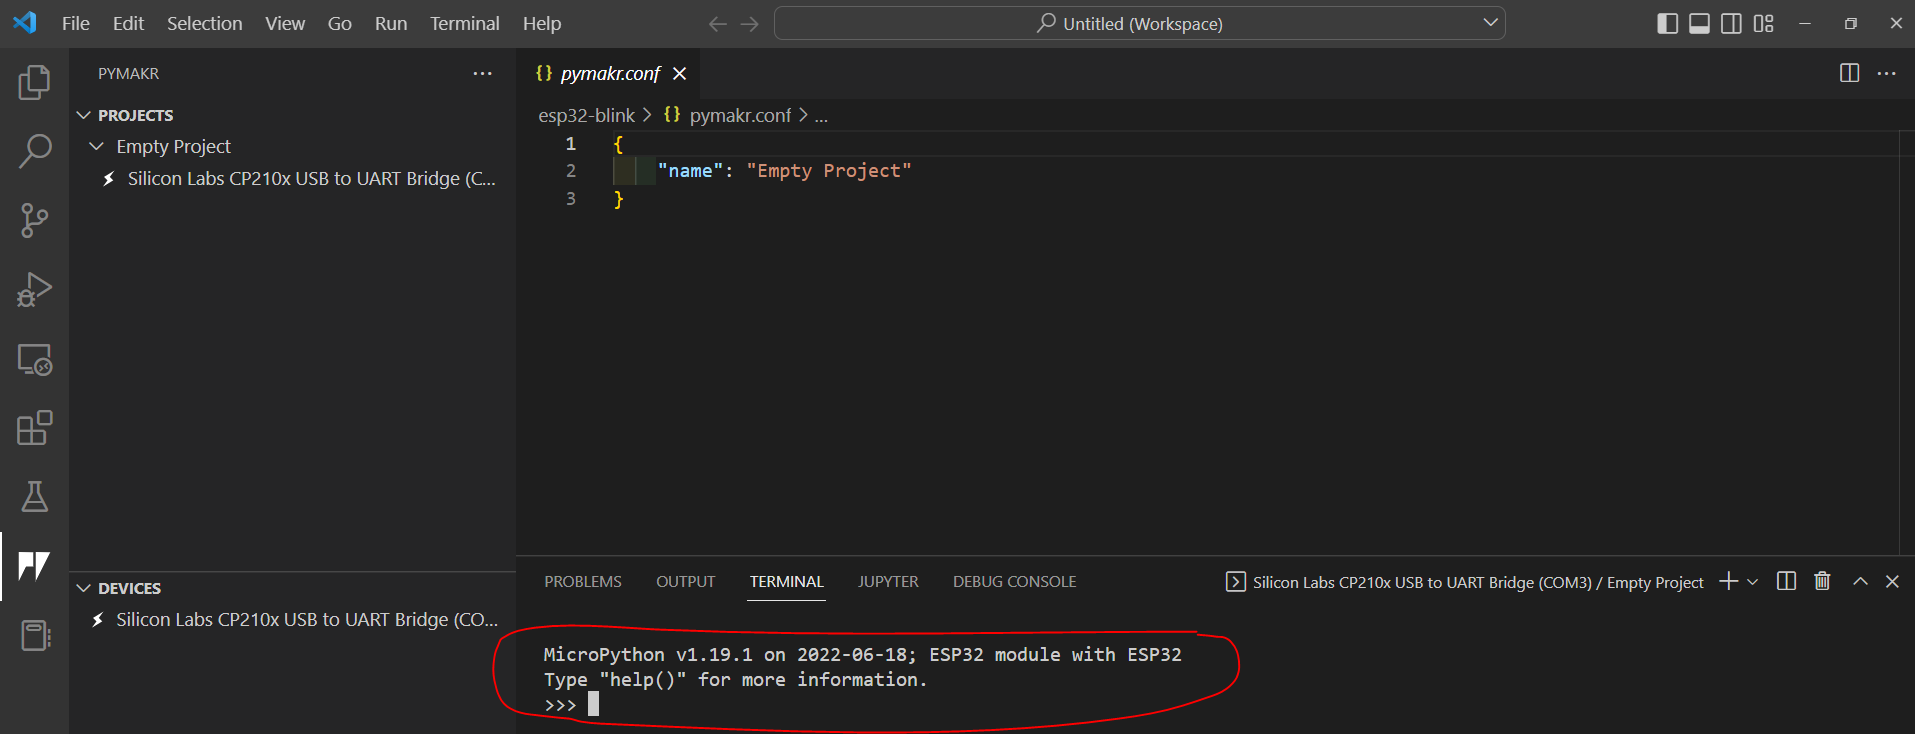
Let us begin connecting to our device by clicking the lightning icon on the right-hand side of the device.
If everything goes well then we could open a terminal to the REPL (Read-Evaluate-Print-Loop) prompt of the MicroPython running in our ESP32.
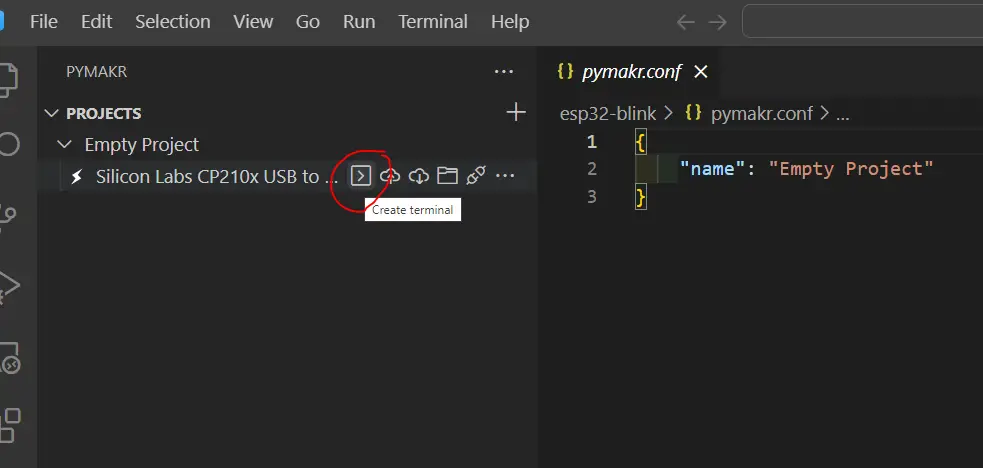
You can now begin typing in code in this REPL prompt.
Creating the LED Blink MicroPython program
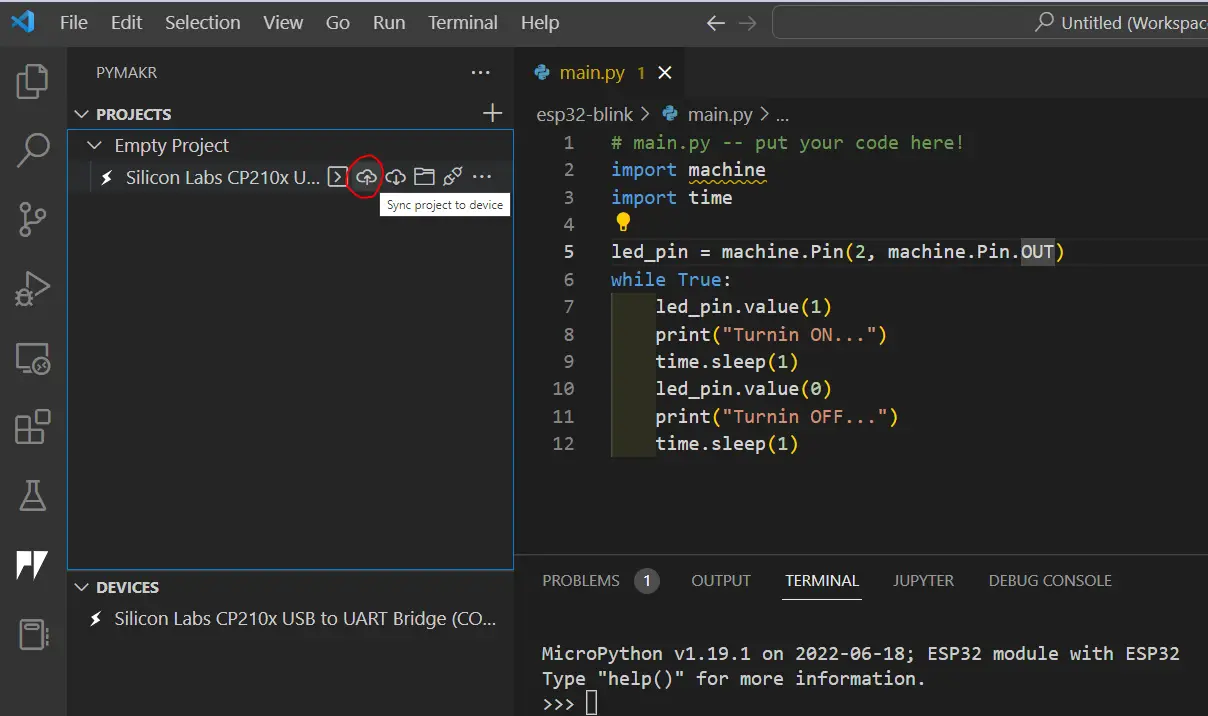
Go back into your Explorer tab and open the main.py file. Add in the following lines of code. This will blink our onboard LED connected to the GPIO2 of our ESP32 MCU.
# main.py -- put your code here!
import machine
import time

led_pin = machine.Pin(2, machine.Pin.OUT)
while True:
    led_pin.value(1)
    print("Turning ON...")
    time.sleep(1)
    led_pin.value(0)
    print("Turning OFF...")
    time.sleep(1)
Uploading our LED Blink program to our ESP32/ESP8266 MCU
When you are done copying the code then it is time to upload it to the file system of our ESP32/ESP8266 MCU.
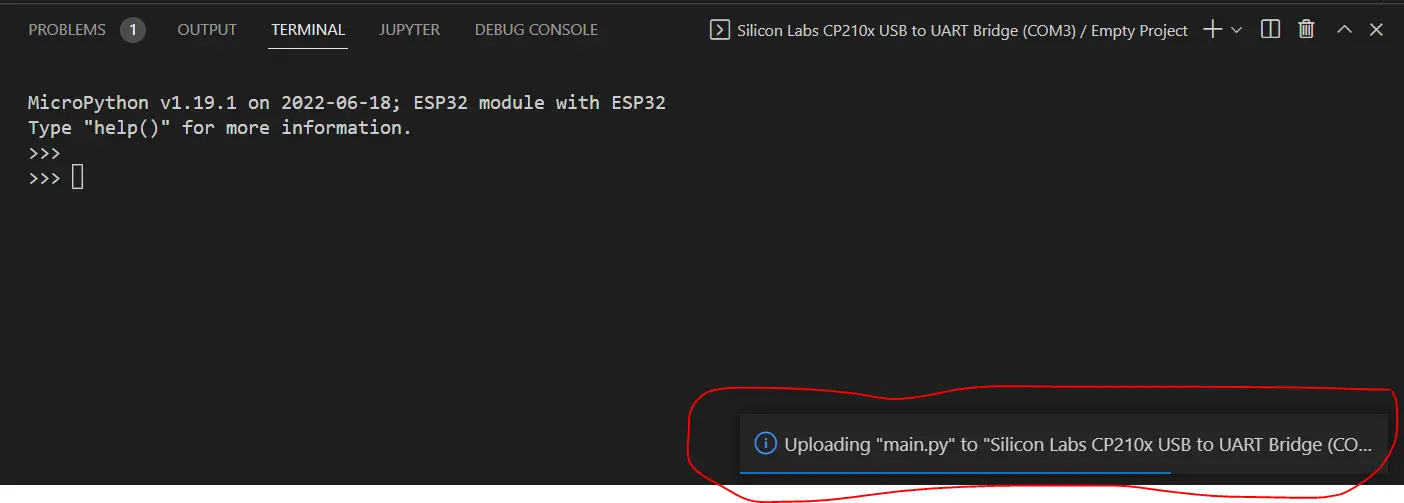
To do that, click the PyMakr extension tab and then click the “Sync project to device”. This will copy our program to the main.py of the MCU file system.
You would see the following message shown on the left-hand side of the terminal. Wait for it to be finished and check if no error was encountered.
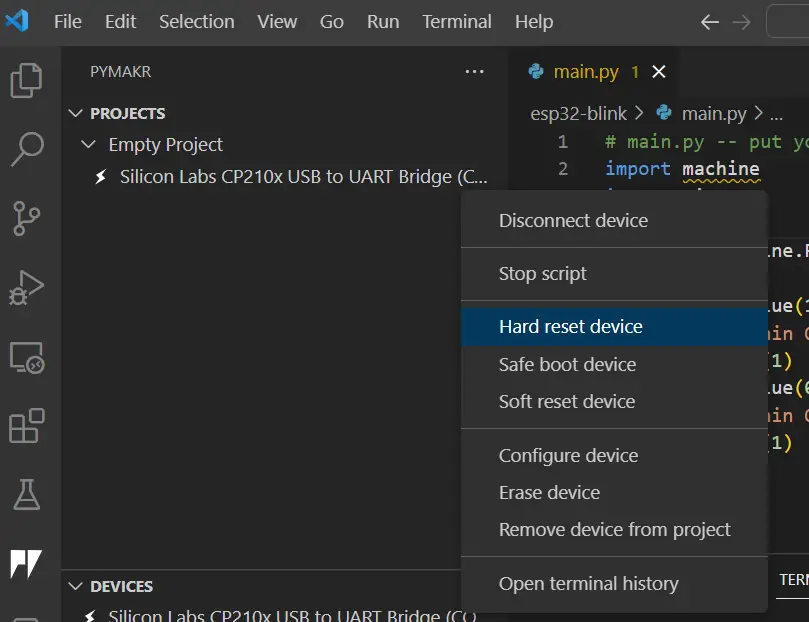
We need to do a hard reset of our ESP32/ESP8266 for us to see if our program works. To do that, click the “…” button and select “Hard Reset Device“
You should be able to see the following messages in your terminal.
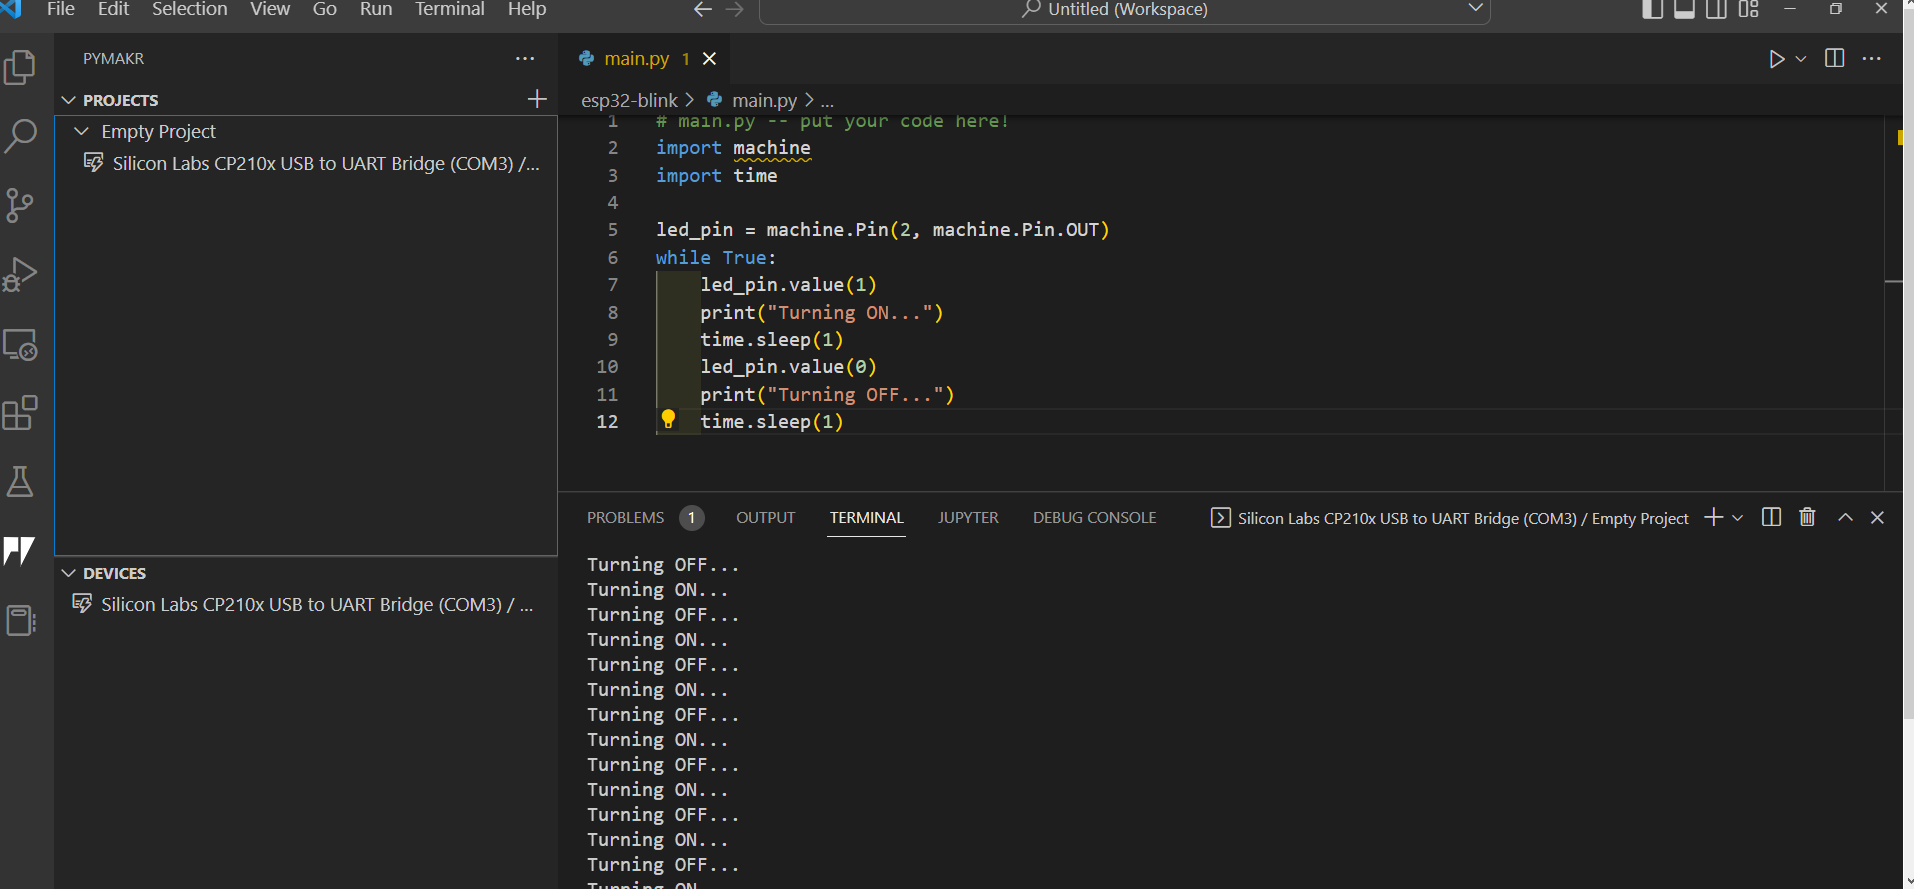
You should see the built-in LED blinking as well.
If you have reached this point then Congratulations! You were able to create a MicroPython program and deploy it to your ESP32/ESP8266 MCU using Visual Studio Code or VSCode and the PyMakr extension! 🙂
Updating your MicroPython Program
If you need to update your MicroPython program then the way to do this is to first stop the script running in your ESP32/ESP8266.
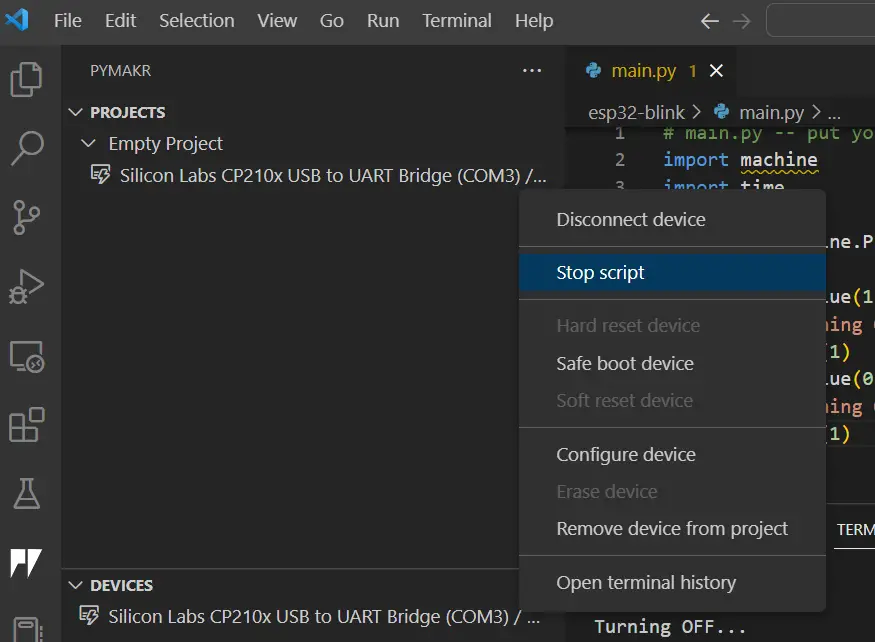
Then you need to click the Sync Project to Device button again.
Open Device in explorer
Another cool feature of PyMakr is the ability for you to see what are the files present in the file system of your ESP32/ESP8266 MCU.
To do that, click the “Open Device in Explorer” button.
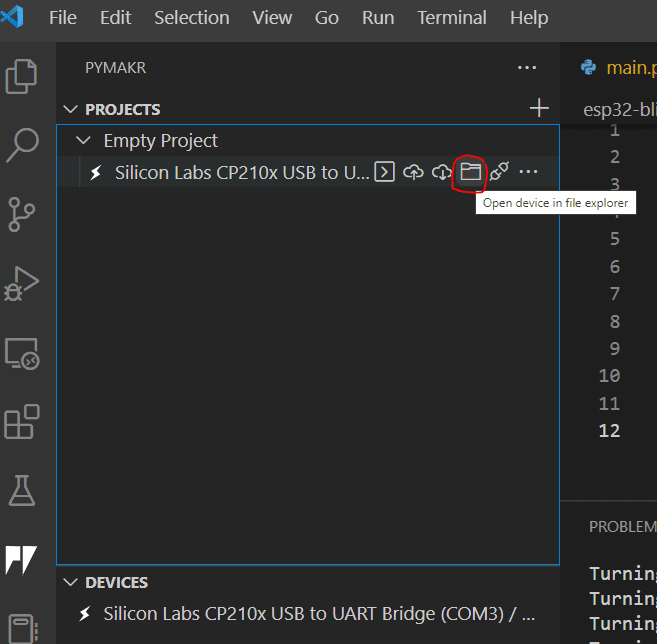
Open your explorer tab and you will see the files inside your ESP32/ESP8266 MCU.
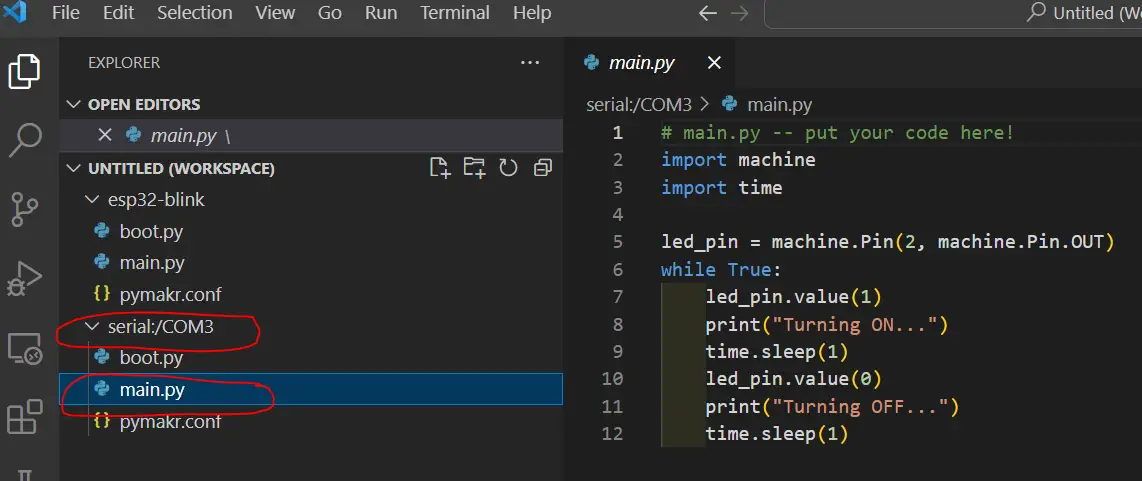
You can click the main.py file in your ESP32/ESP8266 MCU and you can edit the code directly from here. Just make sure to do a “Hard Reset Device” to see your changes.
Wrap up
We have successfully created a MicroPython program using Visual Studio Code or VSCode and uploaded it to the file system of our ESP32/ESP8266 MCU. We have used the excellent features of the PyMakr 2 extensions in doing the programs.
I hope you learn something! Happy Exploring!
Read Next:
Pico W -MicroPython MQTT – BMP/BME 280 Weather Station
Control DS18B20 using MicroPython with a Weather Station Project
Support Me!
I love sharing what I know and hopefully, I was able to help you. Writing helpful content takes so much time and research. If you think you like my work and I have managed to help you then please consider supporting my channel. I would be very grateful and would boost my confidence that what I am doing is making a big change in the world. (No Pun Intended!) 😉
Become a Patron!
Leave a Reply