Introduction
This post will show you how you can publish and subscribe to topics with your MQTT(MQ Telemetry Transport) broker using WebSocket. I have created a very simple application example that will show you how it was able to connect, send, and receive MQTT messages with my Mosquitto broker thru Javascript in the browser.
If you want to see this project in a video format then please see below. You can also watch this on my YouTube channel.
Why use MQTT over WebSocket?
If you are planning to create web applications in the browser that needs to connect with an MQTT broker then using WebSocket is the most viable option for you. The browser in itself cannot directly communicate with the MQTT broker so we need the WebSocket protocol to wrap our MQTT messages. Many MQTT-based web applications are now built using the browser as the tool to display information from the Internet of Things (IoT) devices. WebSocket is fully implemented by most of the current browsers so you are sure that the front-end web applications that you are building would work with any of the MQTT brokers.
If you would like to know more about the features of WebSocket then please read my earlier post about this.
Read More:
Using WebSocket in the Internet of Things (IoT) projects
How to use MQTT over WebSocket?
In order to communicate with the MQTT broker from your browser then you need the MQTT client libraries written in Javascript. You may come across the following Javascript Client libraries when you do a google search.
Paho Javascript Client
The Paho javascript client is hosted by the Eclipse Foundation and has some features that will allow you to communicate with your MQTT broker. However, the project has not been maintained for some time and there are open issues on its GitHub page that have not been attended. Personally, I would not suggest using this library as if you may encounter some issues then you could be on your own in solving them.
mqtt.js
The mqtt.js is an excellent javascript library with an excellent and vibrant community. You can use this library in a Node.js environment or as a stand-alone javascript library loaded thru CDN. In this post, the demo project that I built uses the stand-alone javascript library so there is no need to know Node.js in order to understand it.
Prerequisites
To follow along with this post then you should be familiar with MQTT concepts and have set up your own MQTT Broker. I am using a local Mosquitto application as my MQTT Broker and have enabled the WebSocket port. You can use any other MQTT broker you choose as long as you know how to connect to the WebSocket port.
Related Content:
Install Mosquitto MQTT Windows
How to enable Websockets in Mosquitto MQTT broker?
Also, you should have installed Visual Studio Code and the Live Server extension in order to follow along with this post.
Related Content:
Install Visual Studio Code or VSCode on Windows
Visual Studio Code Live Server Quickstart Guide
You must be comfortable working with web technologies such as HTML/CSS/Javascript.
MQTT over WebSocket Message Flow
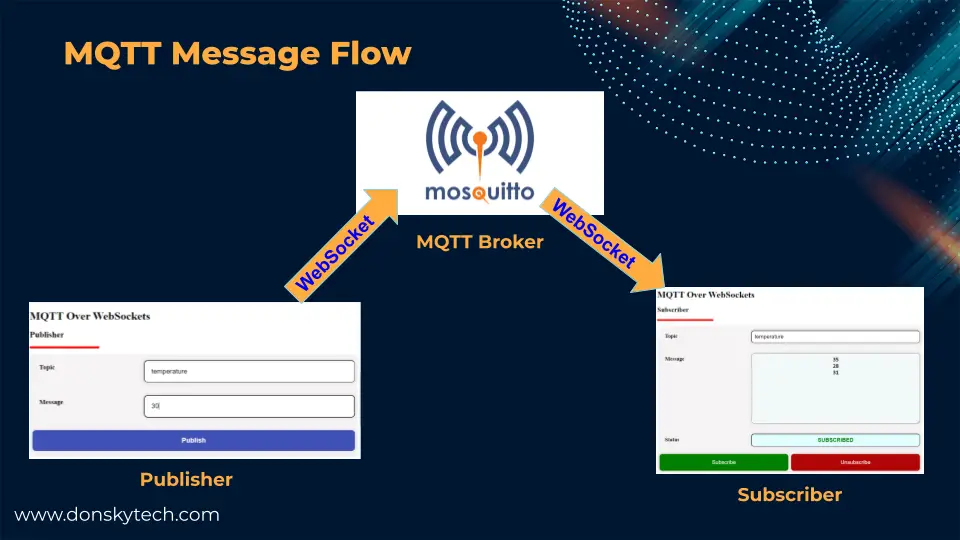
The above image shows how MQTT messages flow when using WebSocket. The Publisher wraps the MQTT packet in a WebSocket envelope and sent thru the TCP to our MQTT Mosquitto broker. The MQTT broker then checks if there are any subscribers subscribed to the topic sent by the Publisher and forwards a WebSocket message to it. The Subscriber then unwraps the WebSocket envelope to read the MQTT packet.
All message exchange between the Publisher to the MQTT Broker and the Subscriber to the MQTT broker is handled by Javascript Code.
Code
Note: Make sure that you have a running MQTT broker before you could continue following the steps below and you are able to communicate with it.
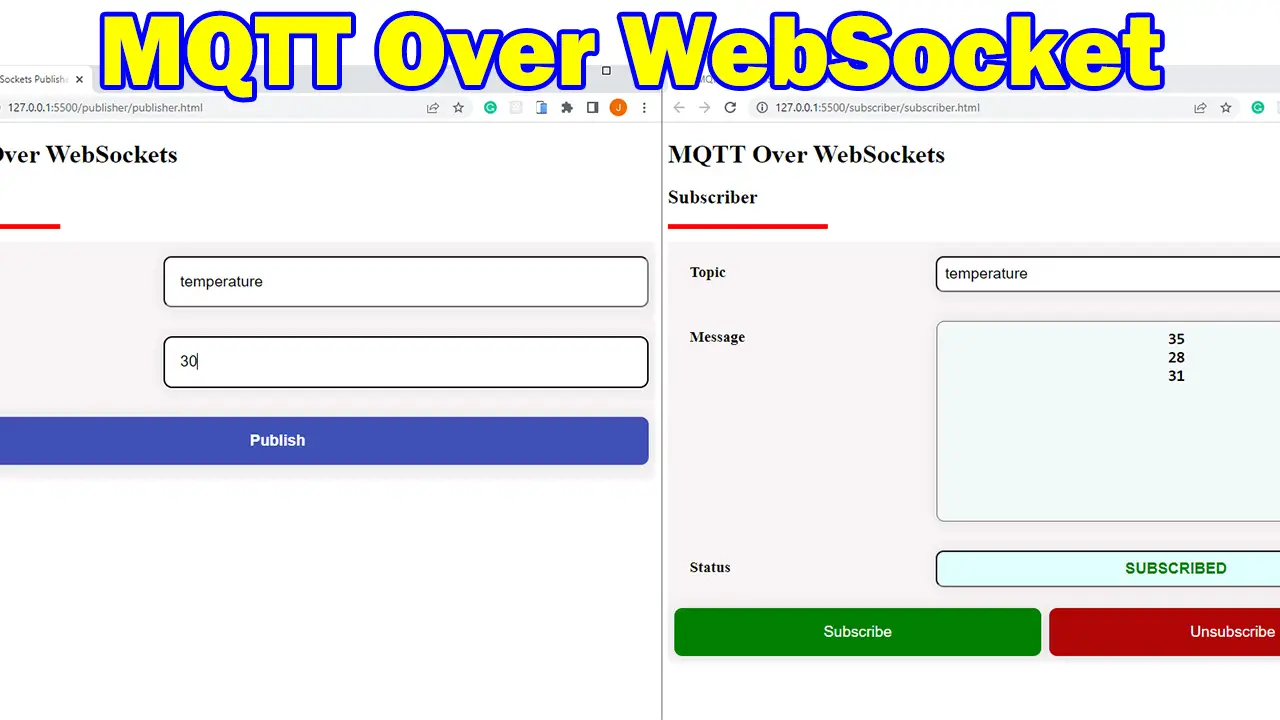
This sample MQTT over WebSocket javascript example project simulates the setup of a typical IoT ecosystem. There is a publisher page that acts as the source of data or a sensor reading some parameters like the current temperature and a subscriber page that displays the list of sensor readings published by our sensor.
Downloading and Running the Project
The complete code for this project is available in my GitHub account. You can either download it as a zip file or clone it using Git using the below command.
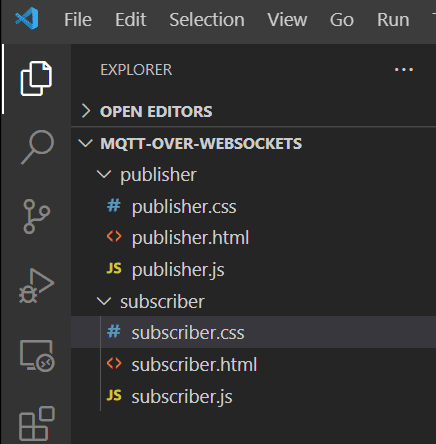
git clone https://github.com/donskytech/mqtt-over-websockets.gitOnce downloaded, open the following project in Visual Studio Code. This project contains two folders, one is the publisher and the other is the subscriber.
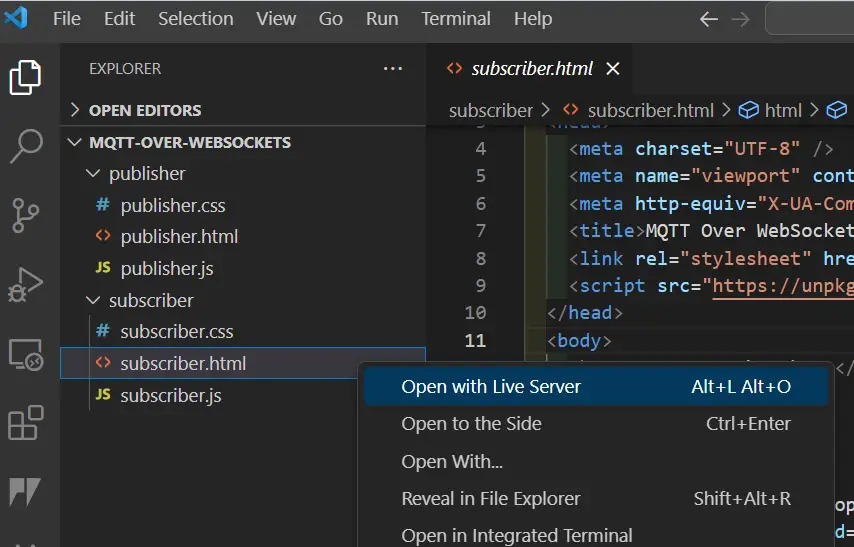
Right-click the publisher.html and then open with Live Server.
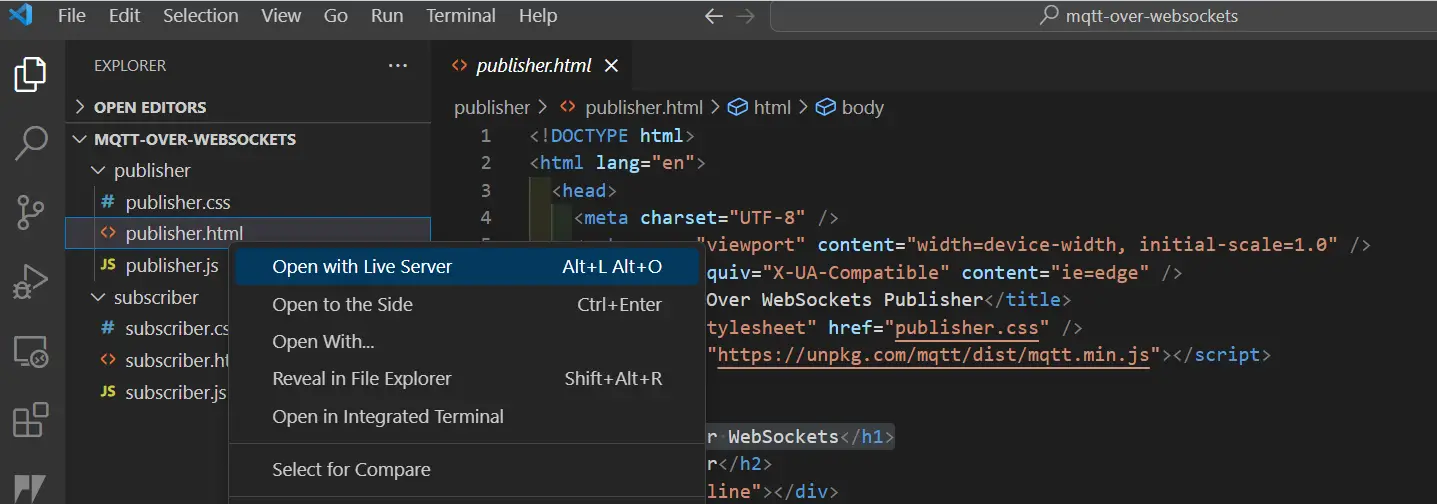
Do the same also with the subscriber.html file.
These would run the two projects in a web server run by the Live Server extension. You can put them side by side to see the MQTT message exchange much better.
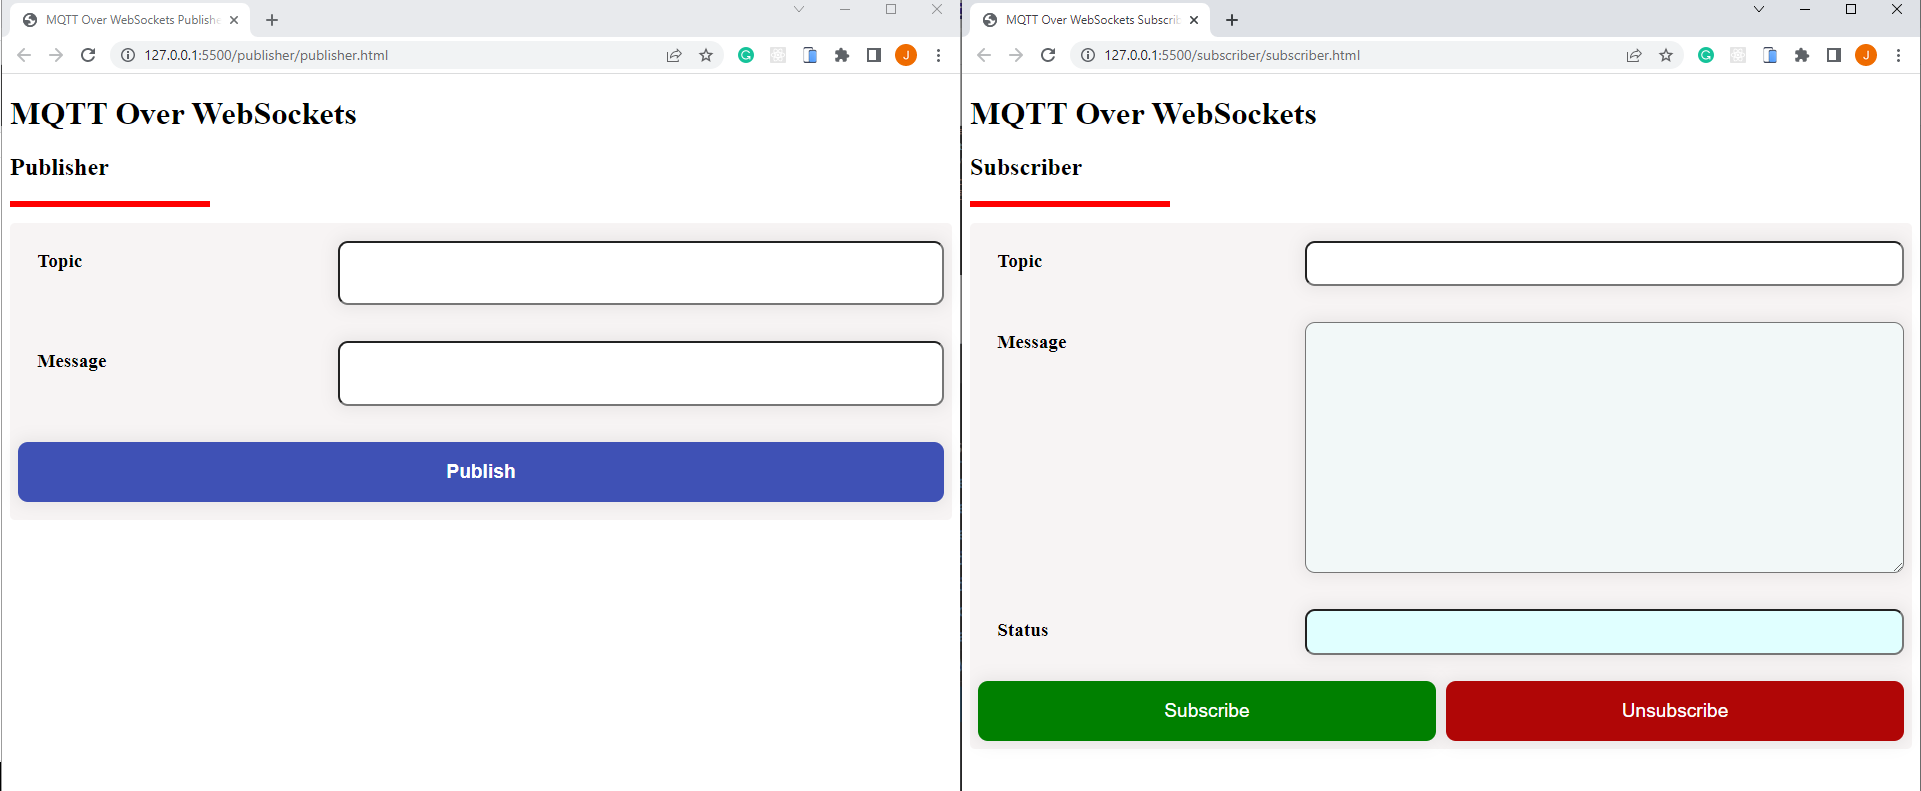
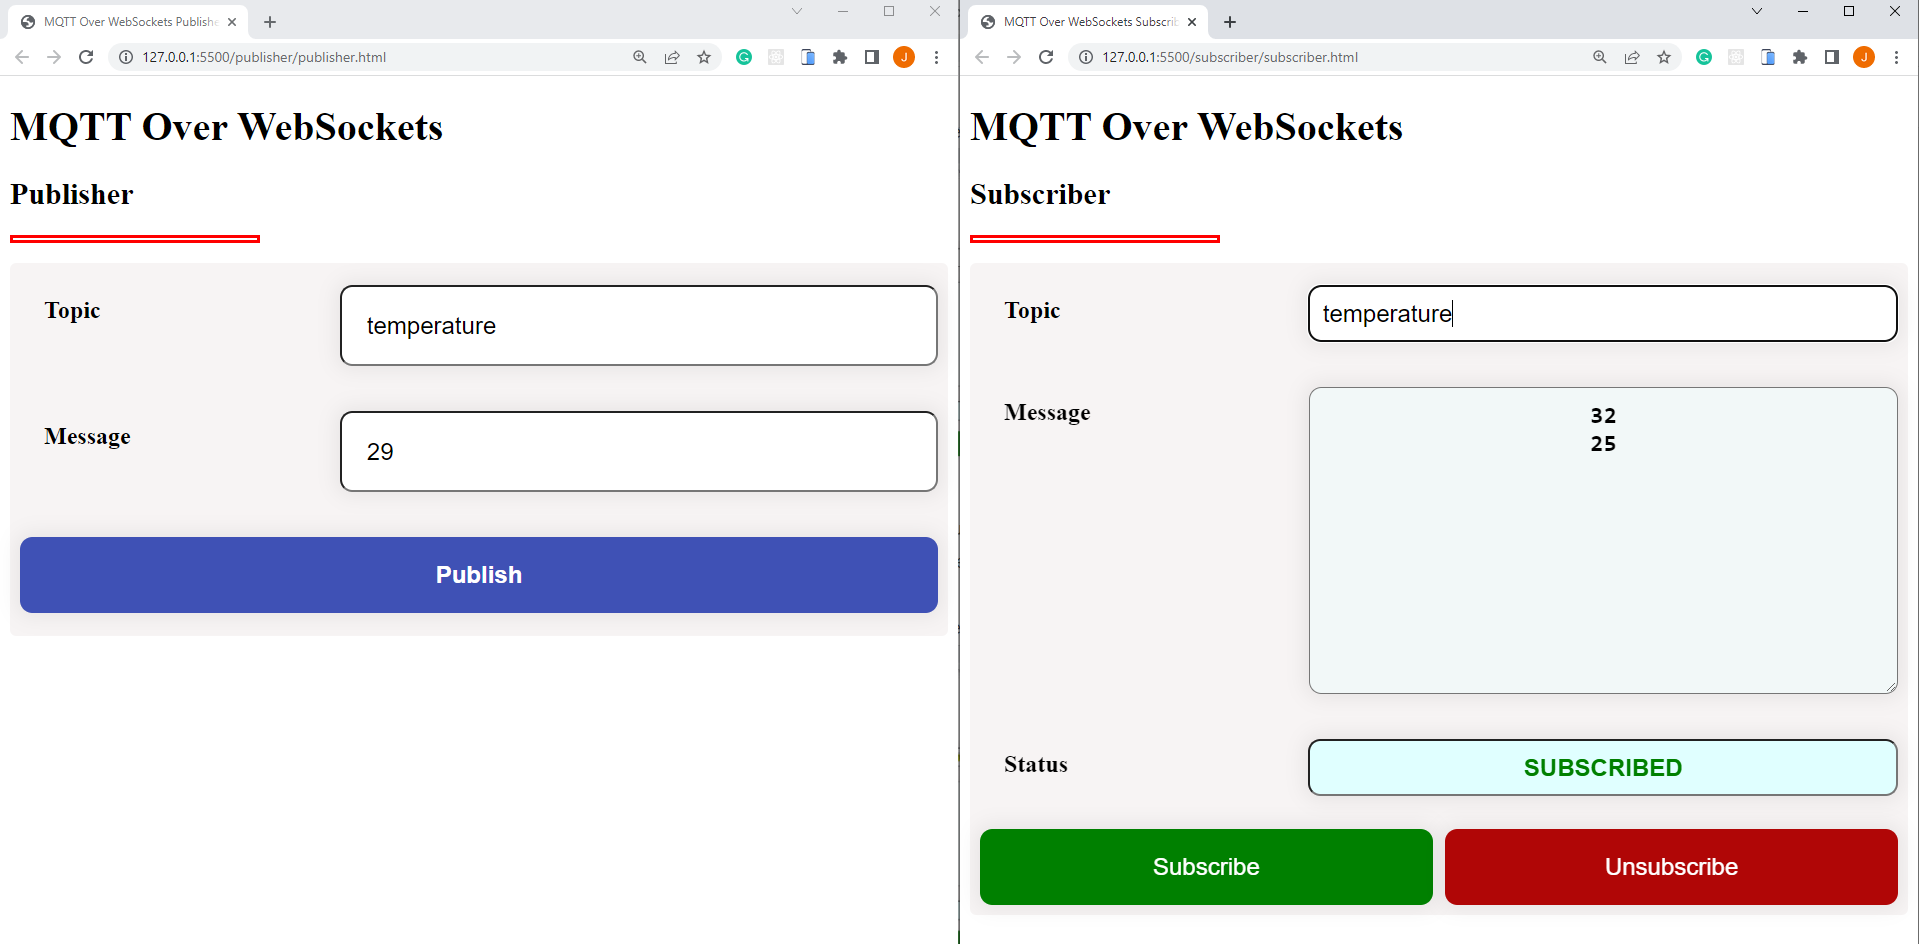
In the subscriber, set the topic to temperature and click the Subscribe button. You should see the status to be “SUBSCRIBED”. In the publisher, put the Topic to temperature also and then set the message to some numbers then click the Publish button. You should be able to see the published temperature in the Message text area of the subscriber page.
The meat of the code is in the subscriber.js and publisher.js files as they contain the majority of the Javascript logic to interact with the MQTT broker using the mqtt.js javascript library.
How to install mqtt.js in the browser?
The mqtt.js is available thru the CDN (Content Delivery Network) https://unpkg.com/mqtt/dist/mqtt.min.js so if you open the publisher.html and subscriber.html file then you would see that I have imported it in the HEAD section of the HTML file.
<!DOCTYPE html>
<html lang="en">
  <head>
    <meta charset="UTF-8" />
    <meta name="viewport" content="width=device-width, initial-scale=1.0" />
    <meta http-equiv="X-UA-Compatible" content="ie=edge" />
    <title>MQTT Over WebSockets Publisher</title>
    <link rel="stylesheet" href="publisher.css" />
    <script src="https://unpkg.com/mqtt/dist/mqtt.min.js"></script>
  </head>
How to connect to the MQTT broker using mqtt.js?
The MQTT.js#Client class wraps a client connection to an MQTT broker over an arbitrary transport method (TCP, TLS, WebSocket, etc). This Client class handles lots of things and includes:
- Regular server pings
- QoS flow
- Automatic reconnections
- Start publishing before being connected
This is created by calling the method mqtt.connect()
let mqttClient;

function connectToBroker() {
  const clientId = "client" + Math.random().toString(36).substring(7);

  // Change this to point to your MQTT broker
  const host = "ws://192.168.100.22:9001/mqtt";

  const options = {
    keepalive: 60,
    clientId: clientId,
    protocolId: "MQTT",
    protocolVersion: 4,
    clean: true,
    reconnectPeriod: 1000,
    connectTimeout: 30 * 1000,
  };

  mqttClient = mqtt.connect(host, options);

  mqttClient.on("error", (err) => {
    console.log("Error: ", err);
    mqttClient.end();
  });

  mqttClient.on("reconnect", () => {
    console.log("Reconnecting...");
  });

  mqttClient.on("connect", () => {
    console.log("Client connected:" + clientId);
  });

  // Received Message
  mqttClient.on("message", (topic, message, packet) => {
    console.log(
      "Received Message: " + message.toString() + "\nOn topic: " + topic
    );
  });
}
Take note of how the host URL is constructed by the below code as it also supports ‘mqtt‘, ‘mqtts‘, ‘tcp‘, ‘tls‘, ‘ws‘, ‘wss‘, ‘wxs‘, ‘alis‘. I am using an unsecured WebSocket connection to my MQTT broker so I am using the following URL pattern ws://192.168.100.22:9001/mqtt. The IP address here refers to the IP Address of my Mosquitto MQTT broker.
  // Change this to point to your MQTT broker
  const host = "ws://192.168.100.22:9001/mqtt";
There are other options that you can set while connecting to your MQTT broker which you can find here.
Also, there are several callback events attached to the Client class that you can use to listen to certain MQTT message exchanges. They are listed below:
connectreconnectclosedisconnectofflineerrorendmessagepacketsendpacketreceive
For example, if you open the subscriber.js then you would notice from there that I have attached a listener to the “message” event which gets called whenever a new MQTT message is received from the broker. This is where I am adding the newly published MQTT message to the Message area of my subscriber page.
  // Received MQTT Message
  mqttClient.on("message", (topic, message, packet) => {
    console.log(
      "Received Message: " + message.toString() + "\nOn topic: " + topic
    );
    const messageTextArea = document.querySelector("#message");
    messageTextArea.value += message + "\r\n";
  });
How to publish topics in mqtt.js?
In order to publish MQTT Messages to our broker then we just need to call the mqtt.Client#publish method on our Client object. A sample of how I used this method can be seen in the code below.
function publishMessage() {
  const messageInput = document.querySelector("#message");

  const topic = document.querySelector("#topic").value.trim();
  const message = messageInput.value.trim();

  console.log(`Sending Topic: ${topic}, Message: ${message}`);

  mqttClient.publish(topic, message, {
    qos: 0,
    retain: false,
  });
  messageInput.value = "";
}
You just need to supply the appropriate topic, message, and additional options in order to be able to send an MQTT message to your broker.
How to subscribe to topics in mqtt.js?
If you want to receive MQTT messages from your broker then you could call the mqtt.Client#subscribe method from your Client class and subscribe to the topic that you want to listen to. An example of the code used in this project is shown below which you can find in the subscriber.js file.
function subscribeToTopic() {
  const status = document.querySelector("#status");
  const topic = document.querySelector("#topic").value.trim();
  console.log(`Subscribing to Topic: ${topic}`);

  mqttClient.subscribe(topic, { qos: 0 });
  status.style.color = "green";
  status.value = "SUBSCRIBED";
}
I have supplied the topic which I inputted from my text box and some additional options.
How to unsubscribe to topics in mqtt.js?
In order to unsubscribe from topics then we could call the mqtt.Client#unsubscribe. Below is an example of how I used the unsubscribe function in this project.
function unsubscribeToTopic() {
  const status = document.querySelector("#status");
  const topic = document.querySelector("#topic").value.trim();
  console.log(`Unsubscribing to Topic: ${topic}`);

  mqttClient.unsubscribe(topic, { qos: 0 });
  status.style.color = "red";
  status.value = "UNSUBSCRIBED";
}
By passing in the topic that I want to unsubscribe and other additional options then I can tell the Mosquitto MQTT broker not to send me updates on that particular topic.
Wrap Up
The MQTT over WebSocket sample application that I have written here shows that it is possible to communicate with your MQTT broker. We were able to subscribe, unsubscribe, and publish to topics using the mqtt.js javascript client.
I hope you learned something. Happy Exploring!
Leave a Reply