Introduction
We are going to set up our 16×2 I2C LCD using the raspberry pi in this post. These LCDs are cheap and are very useful in showing information in any of your Internet of Things (IoT) projects. We will show as well how to drive this component together with some sample code on how to show information on its screen.
If you would like to see the steps done here in an actual video then please look below or watch it on my YouTube channel.
I2C LCD
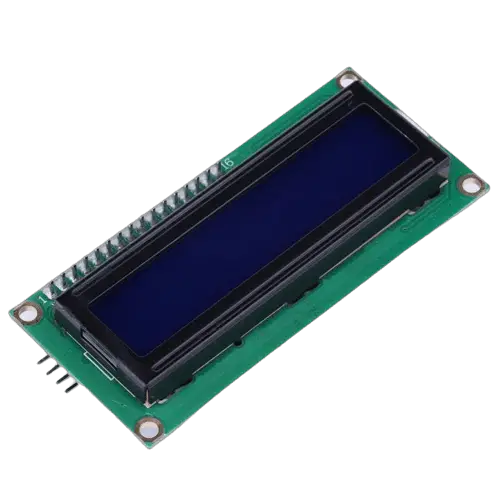
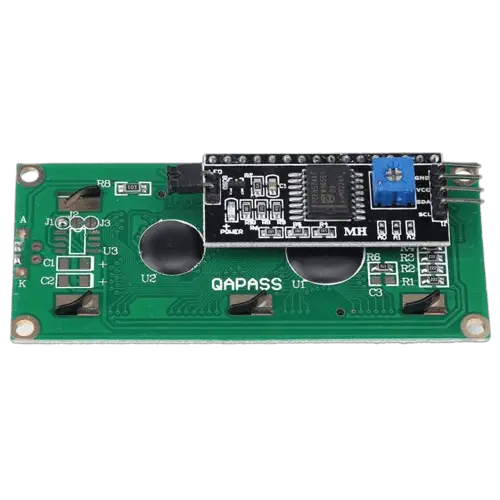
The LCD modules that we are using are powered by the PCF8574 CMOS silicon circuit. This module provides most microcontrollers with a two-line bidirectional bus Inter-Integrated Circuit (I2C). This makes your microcontroller use only two wires (SDA/SCL) when communicating with any device that uses this module.
Prerequisite
The followings are the materials and tools used in this post.
- Raspberry Pi ( I used Raspberry Pi Zero W) – Amazon | AliExpress
- or Raspberry Pi Zero 2 W – Amazon | AliExpress
- or Raspberry Pi 4B – Amazon | AliExpress
- I2C 16X2 LCD Display – Amazon | AliExpress | Bangood
- Breadboard – Amazon | AliExpress | Bangood
- Connecting Wires – Amazon | AliExpress | Bangood
Disclosure: These are affiliate links and I will earn small commissions to support my site when you buy through these links.
You should have installed the latest Raspberry Pi OS in your unit. If not then please check out this post where I installed the latest Raspberry Pi OS in Headless Mode.
Updating our Raspberry Pi
It is a good idea to update your Raspberry Pi OS to the latest version whenever you start working on it and to that just execute the following command. This might take some time so allow it to finish its process.
sudo apt update
sudo apt full-upgrade
sudo reboot
Wiring/Schematic Diagram
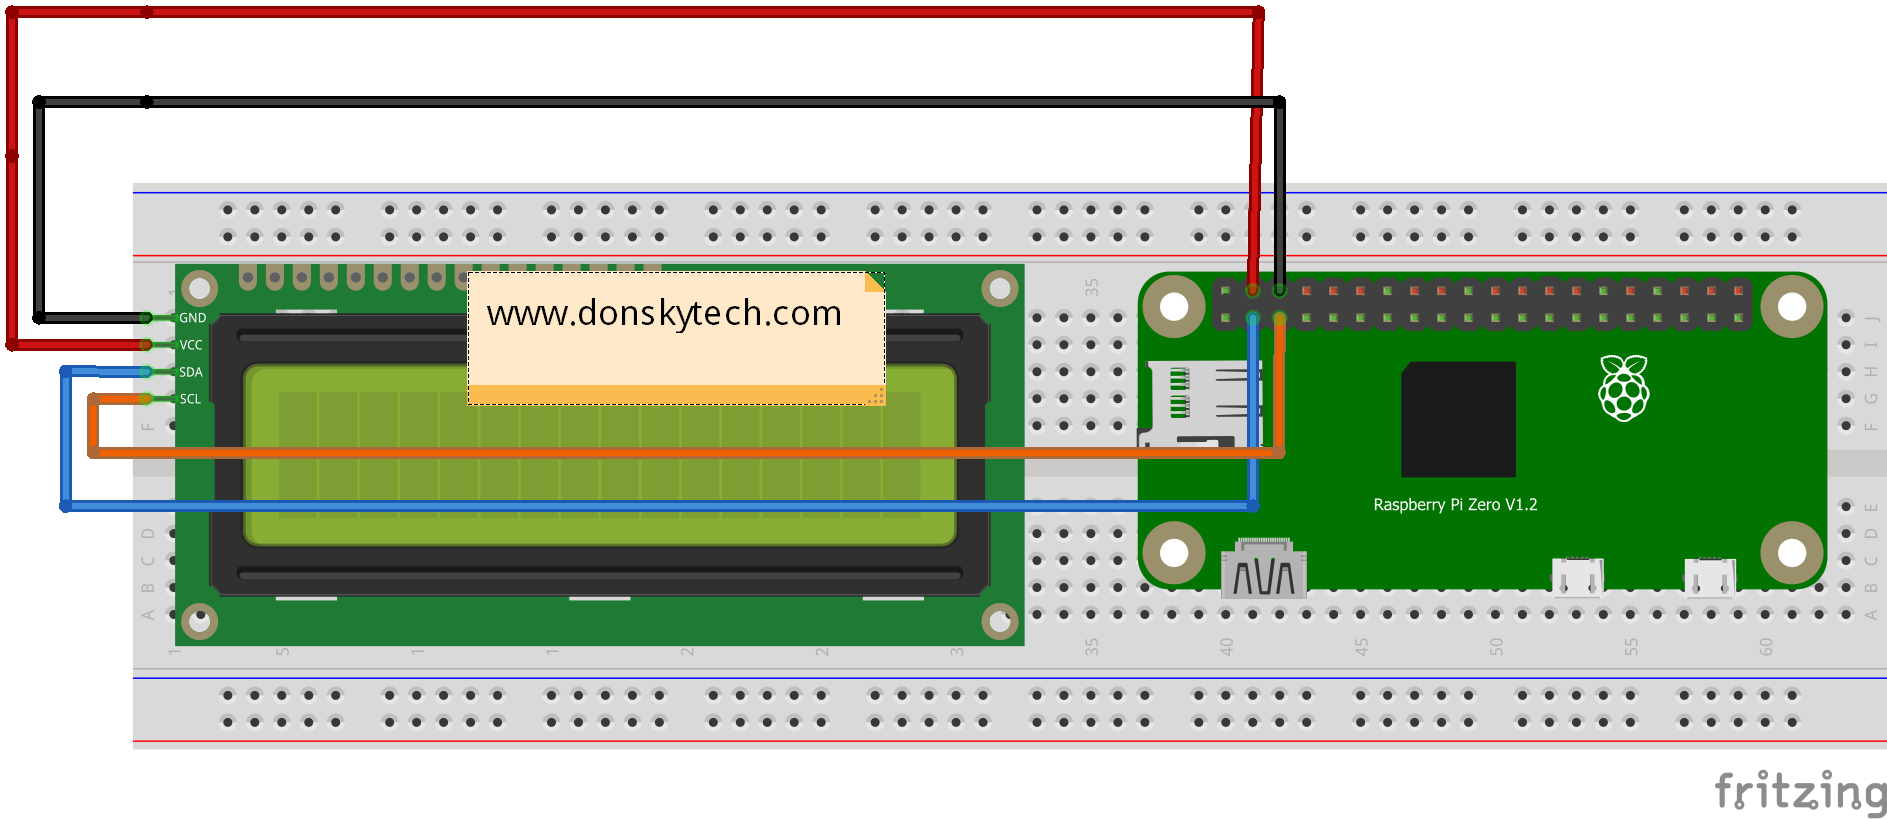
The following is the wiring of our I2C 16X2 LCD Display to our Raspberry Pi. We are powering up our LCD with the 5V output. The 2 wire I2C pins are connected to each other.
| Raspberry Pi | I2C LCD |
|---|---|
| 5V | VCC |
| GND | GND |
| SDA (GPIO2) | SDA |
| SCL (GPIO3) | SCL |
Enable I2C Raspberry Pi
Connect to your raspberry pi either thru the terminal or putty by way of SSH.
Execute the following command
sudo raspi-config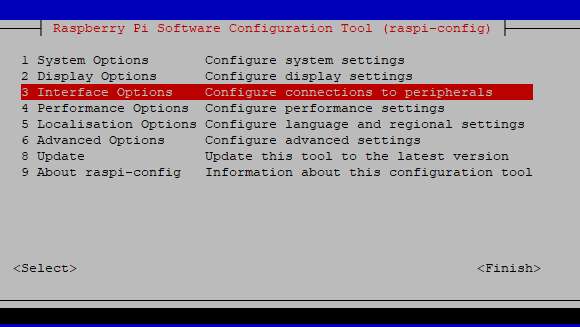
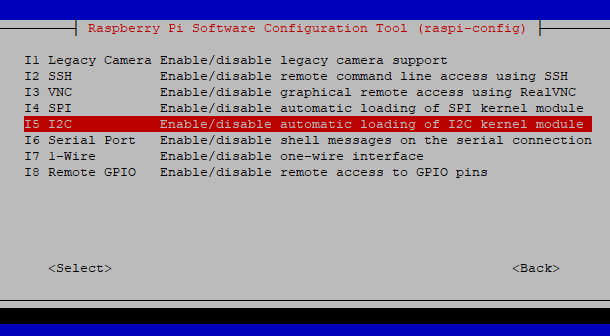
Then we enable the I2C option. Click enter.
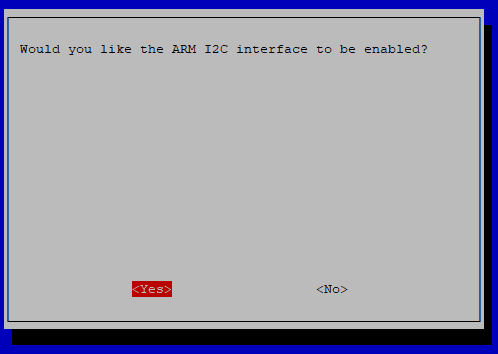
In the next screen, just confirm this option by clicking Yes.
It will say that I2C is now enabled. Click OK and then Finish.
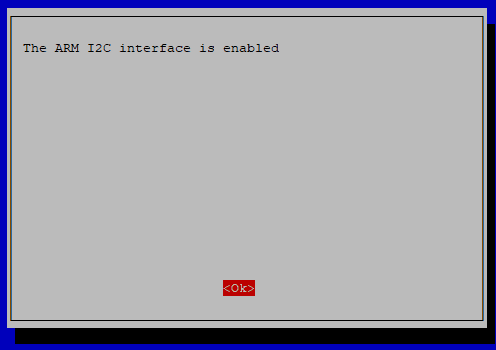
Reboot our raspberry pi by executing the below commands and wait for it to finish restarting then we reconnect to it again.
sudo rebootDetect the I2C Address of our LCD
We then need to check if our I2C bus is detected and if our LCD address is captured by our Raspberry Pi. To do that just execute the following command.
sudo i2cdetect -y 1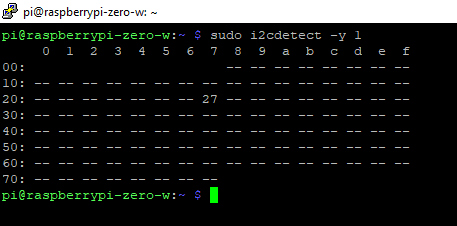
If everything is okay then the address should be displayed like my image above. In this case, it is 0x27. This will be used by our Python script later on so take note of this value.
Install the LCD Library
I found the following library to be really effective and simple so we will use this in driving our I2C LCD display in our post.
Execute the following commands.
cd ~
git clone https://github.com/the-raspberry-pi-guy/lcd.git
cd lcd/
sudo ./install.sh
If you get any permission denied error while running the script then please see the common errors section below. Let the installation finish as this might take some time.
The installer will install dependent packages so we don’t need to install anything. Your raspberry pi will auto reboot. Wait for your unit to go back online again before going into testing.
Testing
After rebooting, we can do the testing of this library. To do that execute the following commands in order.
cd ~
cd lcd
sudo python3 demo_clock.py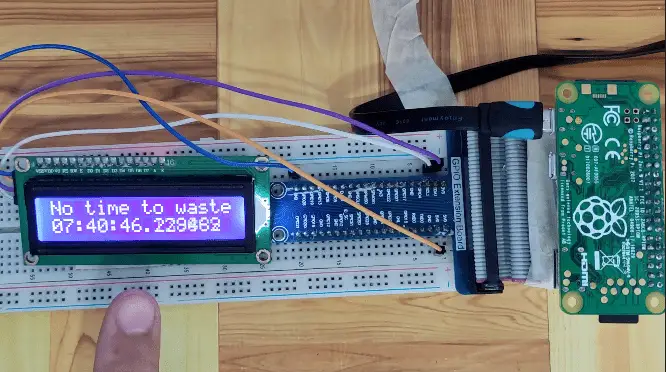
You should be able to see the following details displayed in your I2C LCD display where a running clock is shown. Congratulations!
Let’s try out a new scrolling code taken from one of the demo python scripts. We will show a scrolling text with the following message.
The code to display the following messages is the following. Create the following file using nano and name it test_hello.py
#! /usr/bin/env python
# -*- coding: utf-8 -*-
# Example: Scrolling text on display if the string length is major than columns in display.
# Created by Dídac García.
# Import necessary libraries for communication and display use
import drivers
from time import sleep
# Load the driver and set it to "display"
# If you use something from the driver library use the "display." prefix first
display = drivers.Lcd()
# Main body of code
try:
print("Press CTRL + C to stop this script!")
def long_string(display, text='', num_line=1, num_cols=16):
"""
Parameters: (driver, string to print, number of line to print, number of columns of your display)
Return: This function send to display your scrolling string.
"""
if len(text) > num_cols:
display.lcd_display_string(text[:num_cols], num_line)
sleep(1)
for i in range(len(text) - num_cols + 1):
text_to_print = text[i:i+num_cols]
display.lcd_display_string(text_to_print, num_line)
sleep(0.2)
sleep(1)
else:
display.lcd_display_string(text, num_line)
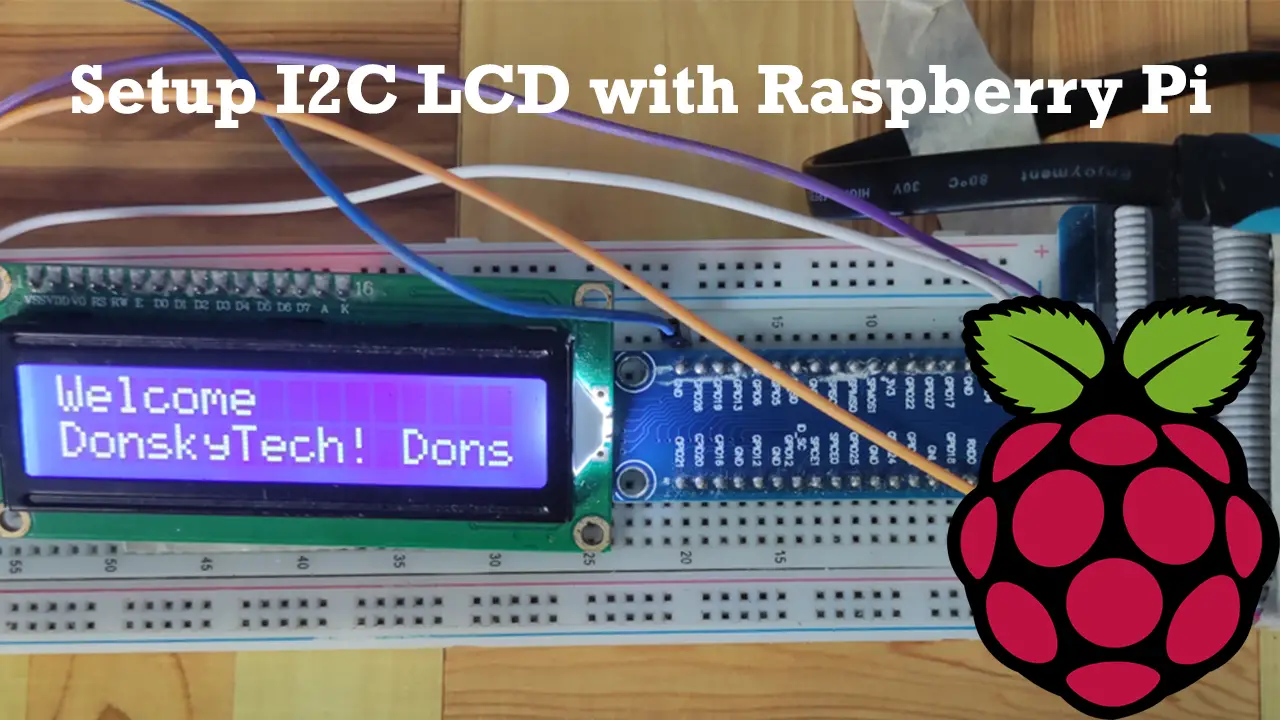
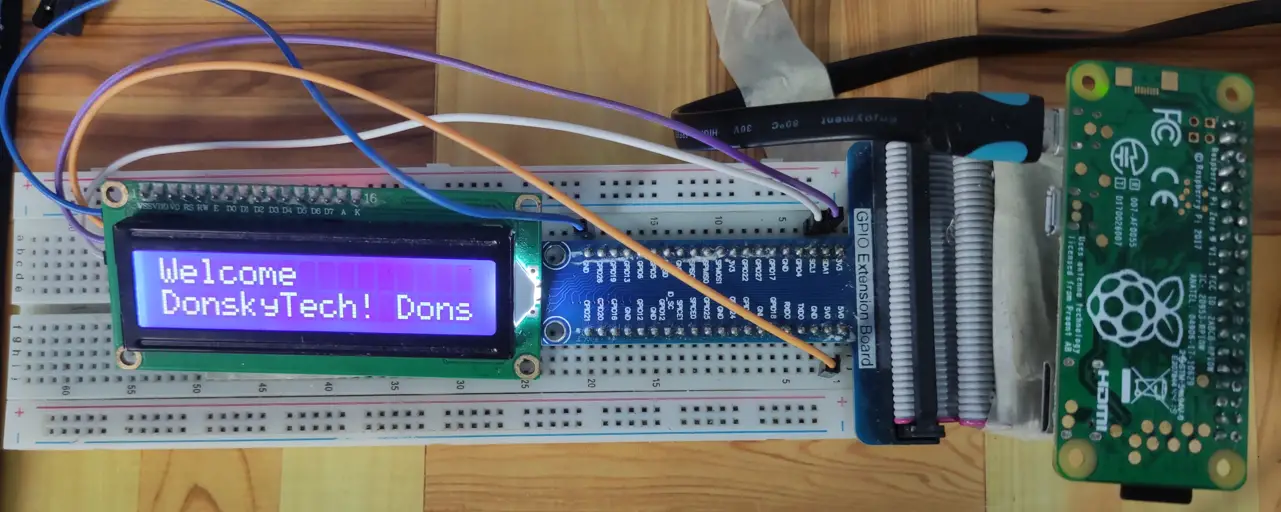
long_string(display, "Welcome", 1)
sleep(1)
while True:
# An example of infinite scrolling text
long_string(display, "DonskyTech! DonskyTech! DonskyTech! DonskyTech!", 2)
except KeyboardInterrupt:
# If there is a KeyboardInterrupt (when you press ctrl+c), exit the program and cleanup
print("Cleaning up!")
display.lcd_clear()The code just displays the message “Welcome” on the first row
If the length of the string exceeds 16 then a loop is needed to display each part of the string.
Common Errors
- ./install.sh: 21: ./setup.sh: Permission denied
When you run the install script in installing the library then execute the following command. This will give the necessary permission for the setup.sh file.
chmod u+x setup.shWrap Up
We have powered up our I2C LCD Display in this post using a very good python library. We have wired it to our Raspberry Pi and is able to display any string information that we want. That’s it!
Happy Exploring!
Read Next:
Keypad with a Database Security System using Raspberry Pi
ESP32 Keypad Database Security System Code
Leave a Reply