Introduction
MQTT or MQ Telemetry Transport is a communication protocol that is very much ideal for memory or bandwidth-constrained devices like our Microcontroller boards. This is ideal for use in any Internet of Things (IoT) project. This tutorial will show you how you can connect, publish, and subscribe to MQTT topics with ESP32/ESP8266 boards and using the Arduino framework.
If you want to see this project in a video format then please see below. You can also watch this on my YouTube channel.
Prerequisites
You will need the following components in order to follow this post.
- ESP32 – Amazon | AliExpress | Bangood
- or ESP8266 – Amazon | AliExpress | Bangood
- Breadboard – Amazon | AliExpress | Bangood
Disclosure: These are affiliate links and I will earn small commissions to support my site when you buy through these links.
You will need an MQTT broker that you can connect to. There are lots of public and privately hosted MQTT brokers in the Cloud nowadays but you can set up your own MQTT broker locally on your laptop or workstation just to learn the MQTT concepts. I am using the Mosquitto broker in this post and you can follow the below posts if you want to set up your own.
Related Content:
Install Mosquitto MQTT Windows
How to enable Websockets in Mosquitto MQTT broker?
I am using PlatformIO IDE and Visual Studio Code to develop this project, but the code is also applicable if you use the Arduino IDE.
Related Content:
PlatformIO Tutorial for Arduino Development
Install Visual Studio Code or VSCode on Windows
To test our MQTT message exchange we are going to use a tool called MQTTX. This application will allow us to connect, publish, and subscribe to MQTT topics.
Related Content:
How to test MQTT using MQTTX?
What is MQTT?

The image above is the typical MQTT setup in a nutshell wherein you have the MQTT broker in the middle and several clients attached or connected to it. The clients can either be a source of information (publisher) or the receiver of information (subscriber) or they can be both.
The MQTT protocol is an excellent communication tool that powers many of the Internet of Things (IoT) projects around the globe. The MQTT architecture above makes it ideal to communicate with the millions of devices that are getting connected to our network.
With the publish/subscribe model of MQTT, we can have multiple clients that can communicate with each other without hardcoding the connections between them. The MQTT broker in the middle serves as the middleman that will handle the message exchange between the sender (publisher) and the intended receivers (subscribers) through the concept of “topic” or the subject of information like the current temperature or the state of the light.
How to install the MQTT Library for Arduino?
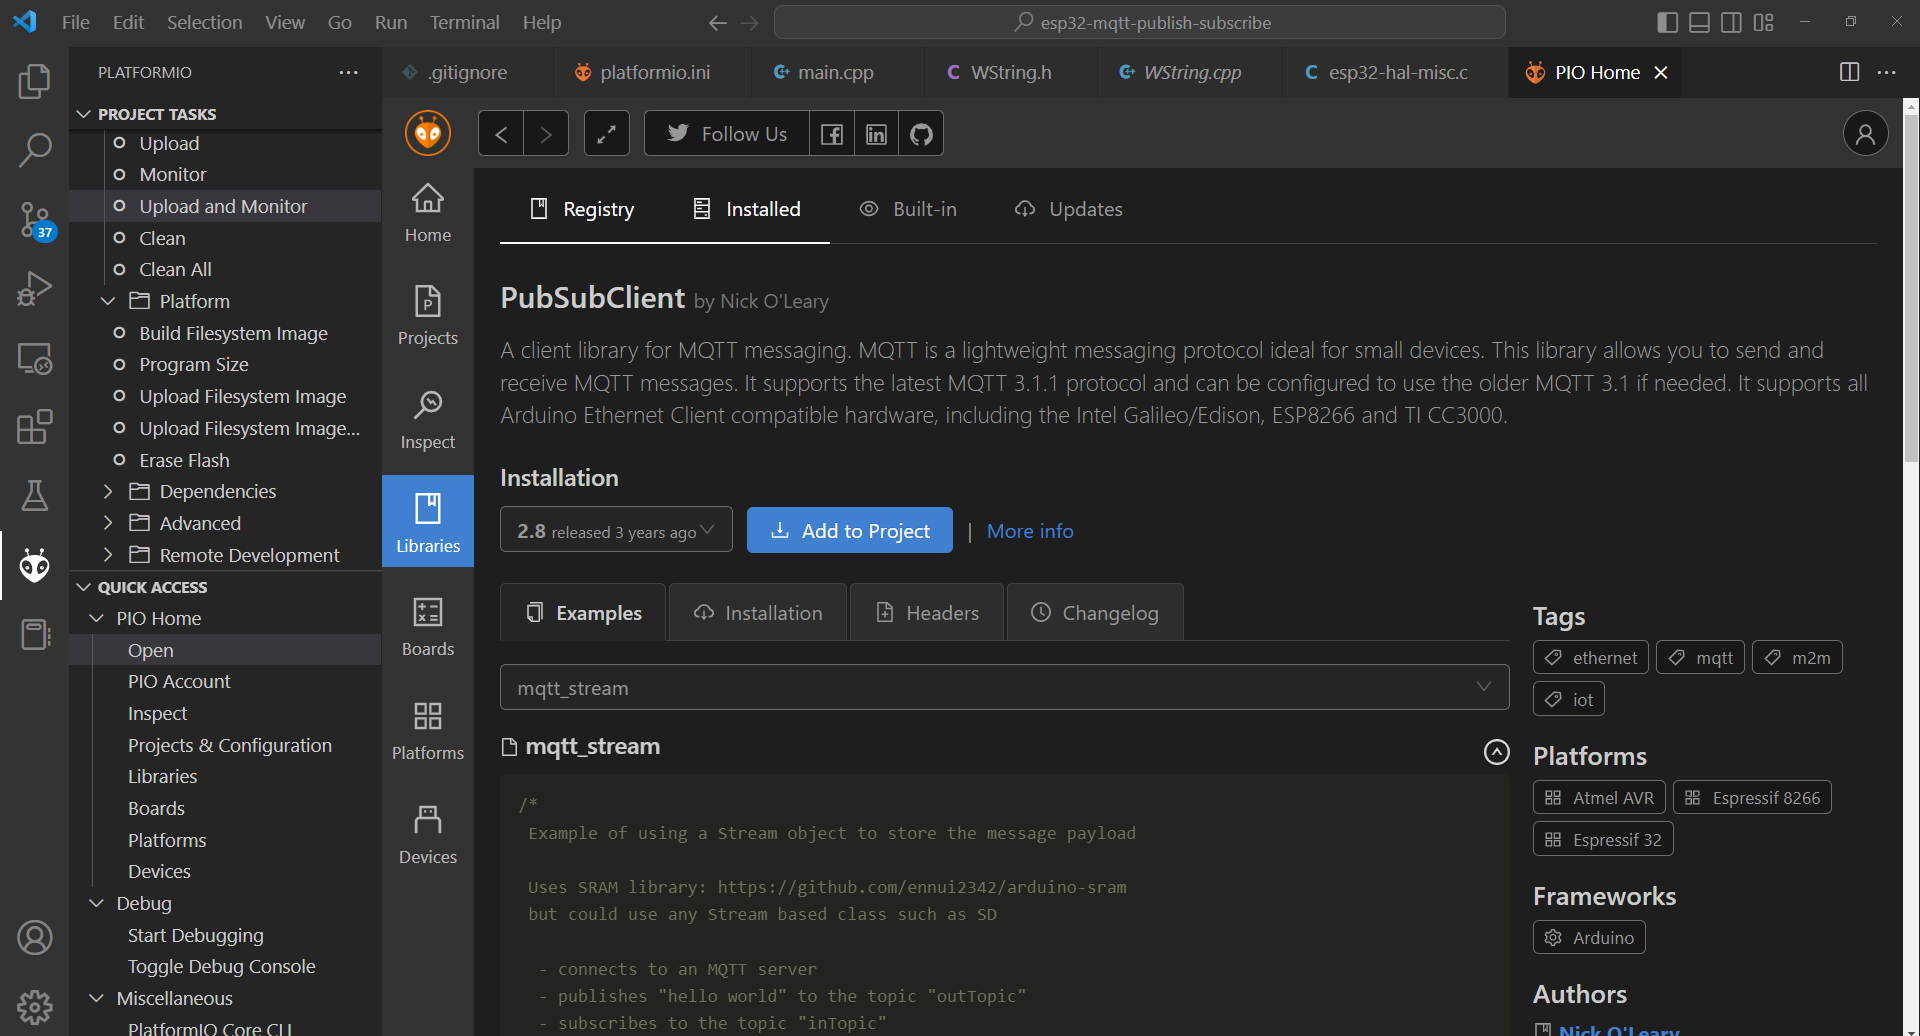
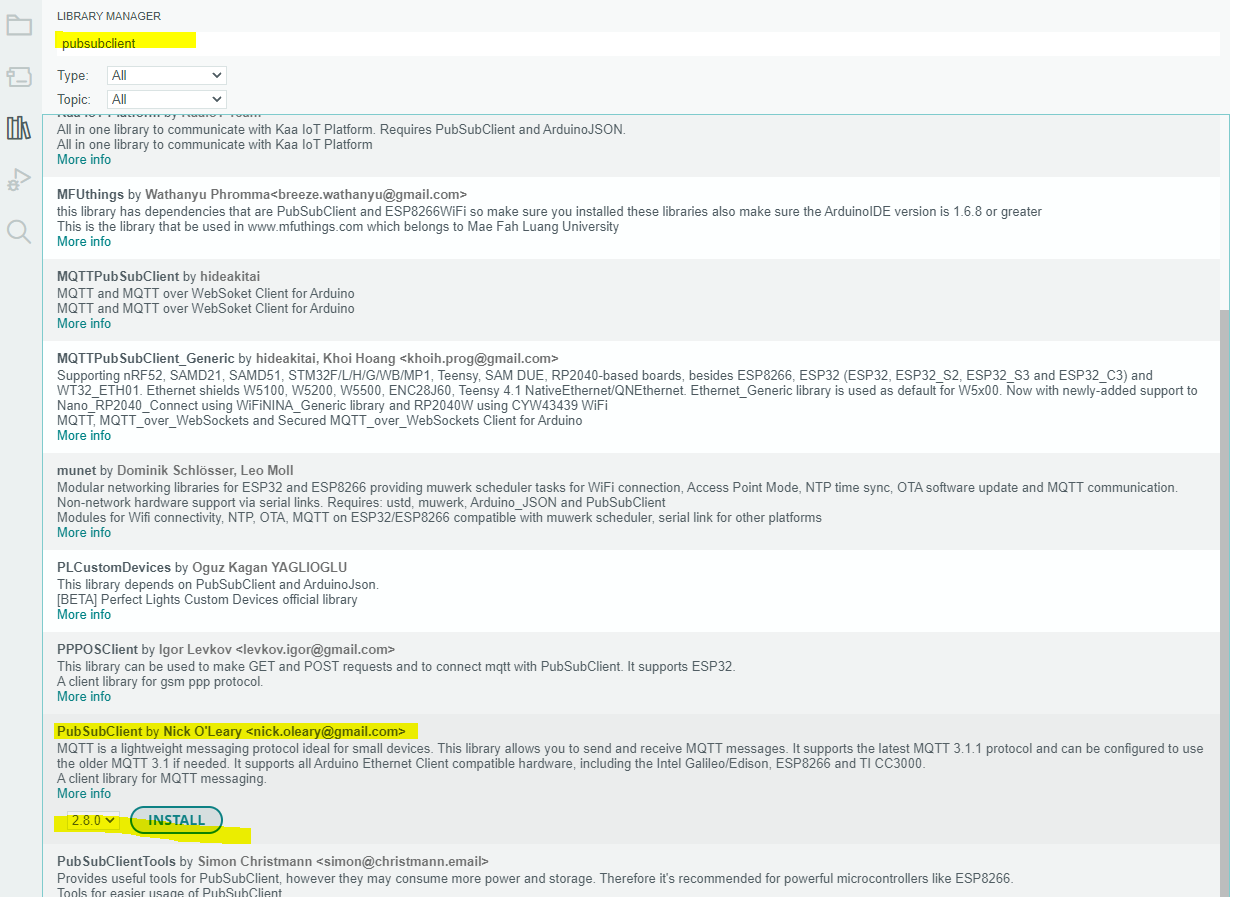
To communicate with an MQTT broker, I am using a library called pubsubclient by Nick O’Leary.
If you are using PlatformIO IDE then you can just go to the Libraries tab search for the pubsubclient and add it to your project.
On the other hand, if you are using the Arduino IDE then you can add the same library as your dependency by clicking the Libraries tab in the left-hand section.
What are we building?
We are going to create a program that will do the following:

- Read the built-in Hall Effect sensor inside our ESP32 and publish its value to a particular topic every 10 seconds. We should be able to see the published MQTT messages.
- Subscribe to a particular MQTT topic (“led”) and receive messages coming from our MQTT broker. If the message says “ON” then we will turn on our built-in LED otherwise we will turn it off.
Code
The complete code for this project is available in my GitHub repository so you can either download it as a zip file or if you know Git clone it using the below command.
git clone https://github.com/donskytech/platformio-projects.git
cd esp32-projects/esp32-mqtt-publish-subscribe
// Open this in Visual Studio Code
code .
The entire Arduino MQTT message exchange logic is located inside the file main.cpp which you can find below. Let us walk through what each line of the code does.
#include <Arduino.h>
#include <WiFi.h>
#include <PubSubClient.h>

// Define the Pin
const int BUILTIN_LED = 2;

// Change this to point to your Wifi Credentials
const char *ssid = "<WIFI_SSID>";
const char *password = "<WIFI_PASSWORD>";
// Your MQTT broker ID
const char *mqttBroker = "192.168.100.22";
const int mqttPort = 1883;
// MQTT topics
const char *publishTopic = "halleffect";
const char *subscribeTopic = "led";

WiFiClient espClient;
PubSubClient client(espClient);

unsigned long lastMsg = 0;
#define MSG_BUFFER_SIZE (5)
char msg[MSG_BUFFER_SIZE];

// Connect to Wifi
void setup_wifi()
{
  delay(10);
  Serial.println();
  Serial.print("Connecting to ");
  Serial.println(ssid);

  WiFi.mode(WIFI_STA);
  WiFi.begin(ssid, password);

  while (WiFi.status() != WL_CONNECTED)
  {
    delay(500);
    Serial.print(".");
  }

  randomSeed(micros());

  Serial.println("");
  Serial.println("WiFi connected");
  Serial.println("IP address: ");
  Serial.println(WiFi.localIP());
}

// Callback function whenever an MQTT message is received
void callback(char *topic, byte *payload, unsigned int length)
{
  Serial.print("Message arrived [");
  Serial.print(topic);
  Serial.print("] ");
  String message;
  for (int i = 0; i < length; i++)
  {
    Serial.print(message += (char)payload[i]);
  }
  Serial.println();

  // Switch on the LED if 'ON' was received
  if (message == "ON")
  {
    Serial.println("Turning ON Built In LED..");
    digitalWrite(BUILTIN_LED, HIGH);
  }
  else
  {
    Serial.println("Turning OFF Built In LED..");
    digitalWrite(BUILTIN_LED, LOW);
  }
}

void reconnect()
{
  // Loop until we're reconnected
  while (!client.connected())
  {
    Serial.print("Attempting MQTT connection...");

    // Create a random client ID
    String clientId = "ESP32Client-";
    clientId += String(random(0xffff), HEX);

    // Attempt to connect
    if (client.connect(clientId.c_str()))
    {
      Serial.println("connected");
      // Subscribe to topic
      client.subscribe(subscribeTopic);
    }
    else
    {
      Serial.print("failed, rc=");
      Serial.print(client.state());
      Serial.println(" try again in 5 seconds");
      // Wait 5 seconds before retrying
      delay(5000);
    }
  }
}

void setup()
{
  Serial.begin(115200);
  pinMode(BUILTIN_LED, OUTPUT);
  // Setup the wifi
  setup_wifi();
  // setup the mqtt server and callback
  client.setServer(mqttBroker, mqttPort);
  client.setCallback(callback);
}
void loop()
{
  // Listen for mqtt message and reconnect if disconnected
  if (!client.connected())
  {
    reconnect();
  }
  client.loop();

  // publish message after certain time.
  unsigned long now = millis();
  if (now - lastMsg > 10000)
  {
    lastMsg = now;
    // Read the Hall Effect sensor value
    int hallEffectValue = hallRead();

    snprintf(msg, MSG_BUFFER_SIZE, "%d", hallEffectValue);
    Serial.print("Publish message: ");
    Serial.println(msg);
    client.publish(publishTopic, msg);
  }
}
Import the necessary Libraries
#include <Arduino.h>
#include <WiFi.h>
#include <PubSubClient.h>
The following are the header files needed for us to communicate with an MQTT broker using our ESP32/ESP8266 board using the Arduino Framework.
If you are using an ESP8266 board then replace the included libraries with the code below.
#include <Arduino.h>
#include <#include <ESP8266WiFi.h>>
#include <PubSubClient.h>
Setup the Wi-Fi network/MQTT configurations
// Define the Pin
const int BUILTIN_LED = 2;

// Change this to point to your Wifi Credentials
const char *ssid = "<WIFI_SSID>";
const char *password = "<WIFI_PASSWORD>";
// Your MQTT broker ID
const char *mqttBroker = "192.168.100.22";
const int mqttPort = 1883;
// MQTT topics
const char *publishTopic = "halleffect";
const char *subscribeTopic = "led";

WiFiClient espClient;
PubSubClient client(espClient);

unsigned long lastMsg = 0;
#define MSG_BUFFER_SIZE (5)
char msg[MSG_BUFFER_SIZE];
Since we are going to control the BUILTIN_LED then we have declared its GPIO pin. If your ESP32 board does not have any built-in LED then you can connect an external LED to any of the GPIO ports.
// Change this to point to your Wifi Credentials
const char *ssid = "<WIFI_SSID>";
const char *password = "<WIFI_PASSWORD>";
Change the variables above to match your Wi-Fi network credentials.
// Your MQTT broker ID
const char *mqttBroker = "192.168.100.22";
const int mqttPort = 1883;
Point the following variables to your MQTT broker IP Address or DNS name and port.
// MQTT topics
const char *publishTopic = "halleffect";
const char *subscribeTopic = "led";
These are the topics that we would like to subscribe to or publish MQTT messages.
WiFiClient espClient;
PubSubClient client(espClient);

unsigned long lastMsg = 0;
#define MSG_BUFFER_SIZE (5)
char msg[MSG_BUFFER_SIZE];
Declare our WifiClient class and pass it as a parameter to our PubSubClient class. We define a message array that will hold our MQTT message when we publish a topic to our broker.
Connect to your Wi-Fi
// Connect to Wifi
void setup_wifi()
{
  delay(10);
  Serial.println();
  Serial.print("Connecting to ");
  Serial.println(ssid);

  WiFi.mode(WIFI_STA);
  WiFi.begin(ssid, password);

  while (WiFi.status() != WL_CONNECTED)
  {
    delay(500);
    Serial.print(".");
  }

  randomSeed(micros());

  Serial.println("");
  Serial.println("WiFi connected");
  Serial.println("IP address: ");
  Serial.println(WiFi.localIP());
}
The code above will connect to our Wi-Fi network. We also initialized our random generator by calling the randomSeed(micros());. This will ensure that the client ID that we are going be using to connect to our MQTT broker is unique.
Process MQTT messages
// Callback function whenever an MQTT message is received
void callback(char *topic, byte *payload, unsigned int length)
{
  Serial.print("Message arrived [");
  Serial.print(topic);
  Serial.print("] ");
  String message;
  for (int i = 0; i < length; i++)
  {
    Serial.print(message += (char)payload[i]);
  }
  Serial.println();

  // Switch on the LED if 'ON' was received
  if (message == "ON")
  {
    Serial.println("Turning ON Built In LED..");
    digitalWrite(BUILTIN_LED, HIGH);
  }
  else
  {
    Serial.println("Turning OFF Built In LED..");
    digitalWrite(BUILTIN_LED, LOW);
  }
}
When an MQTT message is received from our broker then the function above is called. First, we extract the message to a variable and then check if it is equal to “ON” and if it is then we turn on our built-in LED. Otherwise, we turn off our built-in LED.
Note: If we are subscribed to multiple topics then we can query the topic parameter to check what this message is all about. We can add an if statement here to do different things to different topics. In our case, we only subscribe to one topic so there is no need to check the topic.
void reconnect()
{
  // Loop until we're reconnected
  while (!client.connected())
  {
    Serial.print("Attempting MQTT connection...");

    // Create a random client ID
    String clientId = "ESP32Client-";
    clientId += String(random(0xffff), HEX);

    // Attempt to connect
    if (client.connect(clientId.c_str()))
    {
      Serial.println("connected");
      // Subscribe to topic
      client.subscribe(subscribeTopic);
    }
    else
    {
      Serial.print("failed, rc=");
      Serial.print(client.state());
      Serial.println(" try again in 5 seconds");
      // Wait 5 seconds before retrying
      delay(5000);
    }
  }
}
The reconnect() function is used to initiate or reconnect to our MQTT broker. We are generating a unique client ID so that if you are connecting to a public MQTT broker then there will be no collision.
We are also subscribing to the “led” topic using this line client.subscribe(subscribeTopic);. This will allow us to receive MQTT messages that have the topic “led“.
Setup and Loop function
void setup()
{
  Serial.begin(115200);
  pinMode(BUILTIN_LED, OUTPUT);
  // Setup the wifi
  setup_wifi();
  // setup the mqtt server and callback
  client.setServer(mqttBroker, mqttPort);
  client.setCallback(callback);
}
First, We initialize the baud rate of our Serial monitor and then configure our LED as output. Next, we call our setup_wifi(); function to connect with our Wi-Fi. Finally, we set our MQTT client to connect with our broker and assign the callback function whenever an MQTT message is received.
void loop()
{
  // Listen for mqtt message and reconnect if disconnected
  if (!client.connected())
  {
    reconnect();
  }
  client.loop();

  // publish message after certain time.
  unsigned long now = millis();
  if (now - lastMsg > 10000)
  {
    lastMsg = now;
    // Read the Hall Effect sensor value
    int hallEffectValue = hallRead();

    snprintf(msg, MSG_BUFFER_SIZE, "%d", hallEffectValue);
    Serial.print("Publish message: ");
    Serial.println(msg);
    client.publish(publishTopic, msg);
  }
}
In our loop function, we continually listen for MQTT messages using the client.loop() function. In any event, if our MQTT connection is disconnected then we will call the reconnect() function.
We are going to publish an MQTT message to our broker every 10 seconds by reading the values from our built-in Hall Effect sensor using the hallRead() function and then create our message and publish it to our MQTT broker using the client.publish(publishTopic, msg);
You can now upload the entire sketch using the PlatformIO IDE or your Arduino IDE 2. That is all for the code!
How to test the MQTT message exchange?
Test 1: Subscribe to the MQTT topic
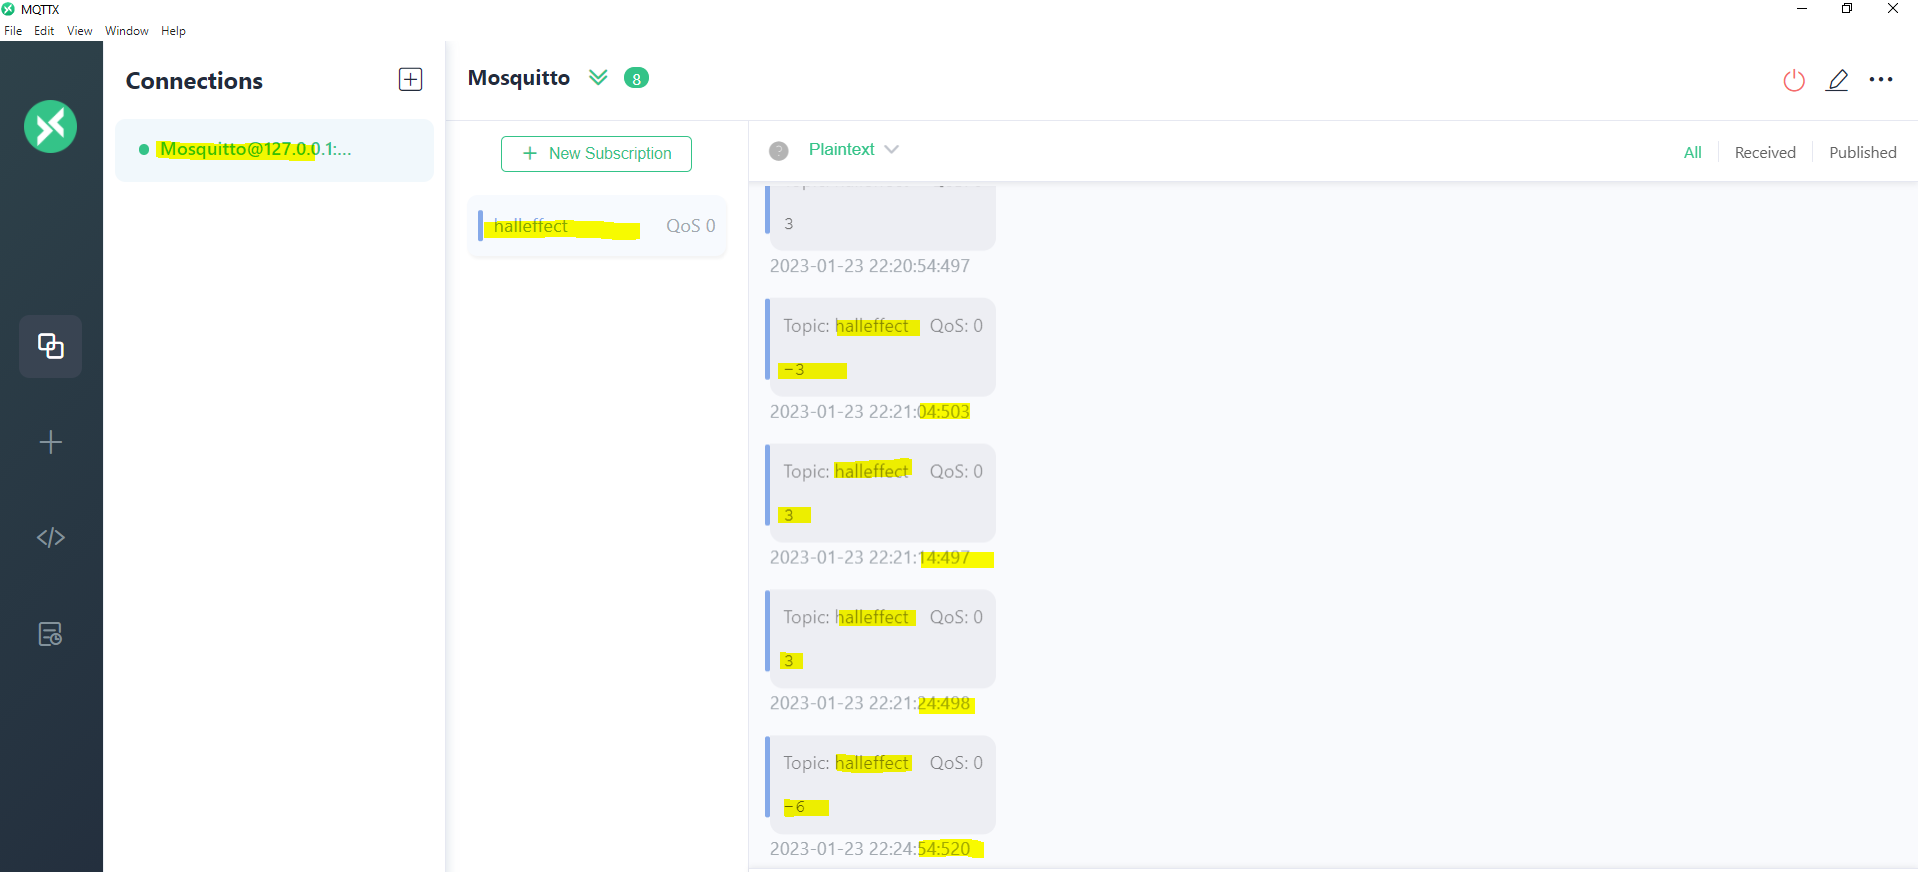
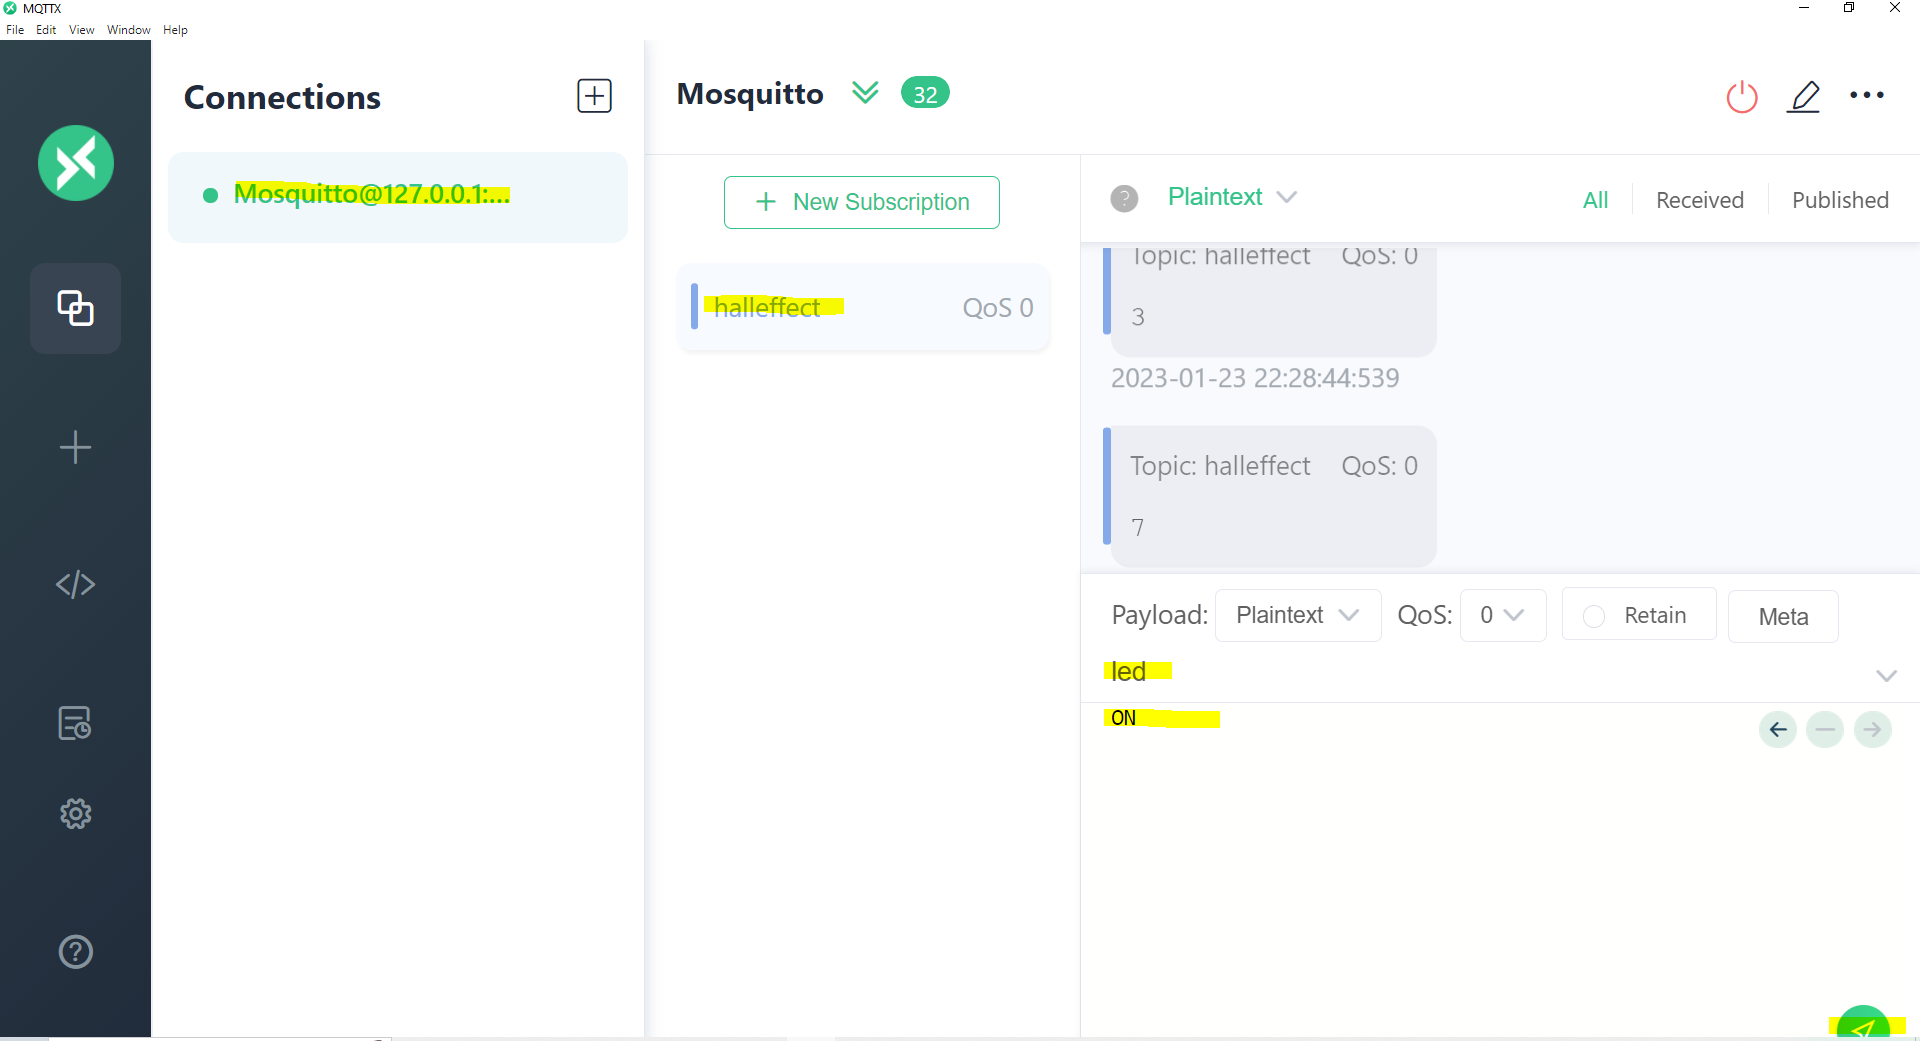
Open your MQTTX application and create a connection to your MQTT broker then create a new subscription to a topic called “halleffect“. You should be able to see the following messages displayed on the message window.
These MQTT messages are coming from our ESP32/ESP8266 board which we have configured to send the readings from the built-in hall-effect sensor every 10 seconds.
Test 2: Publish to MQTT topic
Using the same MQTTX application, send out an “ON” message using the topic “LED“. You should be able to see the built-in LED lighting up. Send an “OFF” message to turn off the built-in LED.
Wrap up
We have successfully connected, published, and subscribed to our MQTT broker with our ESP32/ESP8266 board using the Arduino framework in this post. Using only this knowledge we can now create our own Internet of Things (IoT) project using the publish/subscribe model of MQTT. We will use the knowledge learned in this post in future projects!
Until then, Happy Exploring! 🙂
Support Me!
I love sharing what I know and hopefully, I was able to help you. Writing helpful content takes so much time and research. If you think you like my work and I have managed to help you then please consider supporting my channel. I would be very grateful and would boost my confidence that what I am doing is making a big change in the world. (No Pun Intended!) 😉
Become a Patron!
Leave a Reply