Introduction
Do you need to show a user interface to your users using their browsers to control the Raspberry Pi GPIO (General Purpose Input Output) pins of your Internet of Things (IoT) project? Or probably just a way to display a graph of your last sensor readings then I highly suggest that you learn Flask. This post will show you how to configure your Raspberry Pi to run the Flask web server and how to get started creating web applications
What is Flask?
Flask is a micro web framework written in Python. It is classified as a microframework because it does not require particular tools or libraries.
Wikipedia
Flask is an excellent module to use when you are planning to create web applications on your Raspberry Pi. Don’t let the word “micro” fool you if this is the first time that you have come across this web framework. The goal of Flask is to be simple and easy to use with a minimal learning curve but provide you with the core tools to run a web server.
The excellent Flask documentation will surely help you learn more about this Python project.
Prerequisites
- Raspberry Pi – Amazon | AliExpress
Disclosure: These are affiliate links and I will earn small commissions to support my site when you buy through these links.
You will only need your Raspberry Pi to follow along with this post. I am using my old but still shiny Raspberry Pi Zero W. 🙂
Also, upload the latest Raspberry Pi OS to your device.
Related Content:
Setup Raspberry Pi Headless No Monitor
You should be comfortable working with the terminal/shell of your Raspberry Pi and knows how to open a file in nano/vim and traverse the directory.
How to install Flask on your Raspberry Pi?
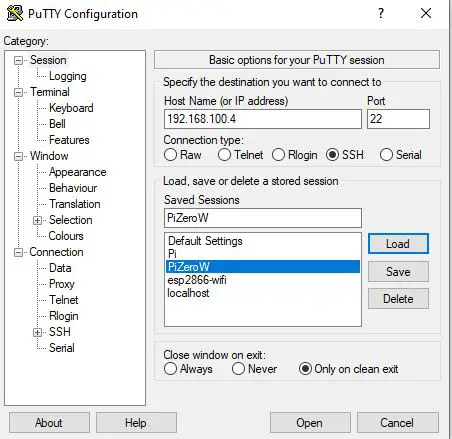
Connect to your Raspberry Pi either thru SSH or Putty. I am using Putty in my case here and log in with your credentials.
Before we proceed it’s always a good idea to update your Raspberry Pi device to the latest patches so execute the following script.
sudo apt update
sudo apt full-upgrade
Related Content:
How to update Raspberry Pi
Next, let us choose a directory where we will create our project files. We will call this is as our root directory.
cd Projects/
mkdir -p flask
cd flask
Let’s create a Python virtual environment where we will install all of our dependencies. Virtual environments are excellent ways to separate the dependencies of different projects. For example, if Project A has a dependency on a library with version 1.0 and Project B has the same dependency on the same library but using version 2.0 then if we install everything in the default Python package installation it will cause problems.
Execute the below commands to create our virtual environment where the name of the module is venv and .venv is the name of our virtual environment.
python -m venv .venvActivate our virtual environment by executing the below command.
pi@raspberrypi-zero-w:~/Projects/flask $ source .venv/bin/activate
(.venv) pi@raspberrypi-zero-w:~/Projects/flask $
The (.venv) at the start of the shell prompt means that we are now in our virtual environment. We can now begin installing the Flask library inside it.
pip install FlaskIf everything looks ok then you should see the following messages displayed at your shell terminal.
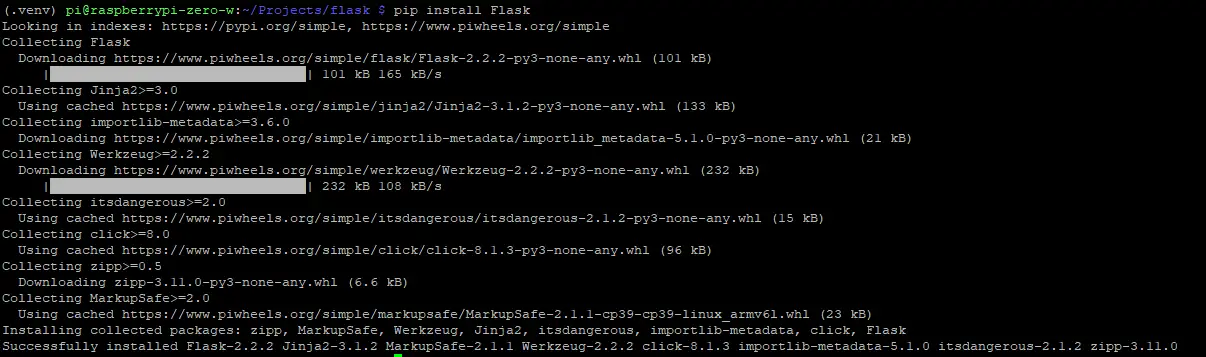
We now have successfully installed Flask so we can now begin exploring its different features.
Exploring Flask
Create a basic Flask application
Create a file called app.py in our root directory and enter the following code. This is the very basic “hello world” program in Flask.
from flask import Flask

app = Flask(__name__)

@app.route('/')
def index():
    return '<p>Hello world</p>'

if __name__ == '__main__':
    app.run(debug=True, host='0.0.0.0')
Let us go thru what each line of code does.
from flask import FlaskFirst, we import the Flask class from our flask package.
app = Flask(__name__)Next, we create an instance of this class and pass in the name of our application module
@app.route("/")
def index():
    return "<p>Hello, World!</p>"
We created a function called index() and add in the decorator route and tell Flask that this would be triggered when somebody types in the “root” URL of our application. The index() function would then return an HTML paragraph with the message “Hello, World!”.
if __name__ == '__main__':
    app.run(debug=True, host='0.0.0.0')
We are going to run our Flask application with the debug option set to true to make errors much more visible and easier to debug. The host=’0.0.0.0′ will make our application visible to our network and listen to all public IPs.
That is all the code you needed to run a basic Flask application on your Raspberry Pi.
How to run our Flask application?
There are two ways how to run our flask application and both options will run our server in development mode.
Option 1: Using “flask run”
This is the recommended way by the Flask project in running your application. To run your application then execute the below command.
flask run --host=0.0.0.0If everything is okay then you should be able to see the following messages displayed in your terminal.
(.venv) pi@raspberrypi-zero-w:~/Projects/flask $ flask run --host=0.0.0.0
 * Debug mode: off
WARNING: This is a development server. Do not use it in a production deployment. Use a production WSGI server instead.
 * Running on all addresses (0.0.0.0)
 * Running on http://127.0.0.1:5000
 * Running on http://192.168.100.183:5000
Press CTRL+C to quit
Note: You can access our Flask Web Application at any of the IP Addresses shown above.
Note: If you have not named your Flask application file as app.py like “hello.py” then you need to tell that to the command interpreter by executing the below code.
flask --app hello run --host=0.0.0.0Option 2: Using app.run()
The second option is the usual way of running a Python file which is by executing the below command.
python app.pyIf everything looks okay then you should be able to see the following messages displayed on your terminal.
^C(.venv) pi@raspberrypi-zero-w:~/Projects/flask $ python app.py
 * Serving Flask app 'app'
 * Debug mode: on
WARNING: This is a development server. Do not use it in a production deployment. Use a production WSGI server instead.
 * Running on all addresses (0.0.0.0)
 * Running on http://127.0.0.1:5000
 * Running on http://192.168.100.183:5000
Press CTRL+C to quit
 * Restarting with stat
 * Debugger is active!
 * Debugger PIN: 860-392-803
How to access our Web Application?
You can open your browser and type in the following URL.
http://<IP Assigned>:5000/This will show you a web page with the following messages shown.
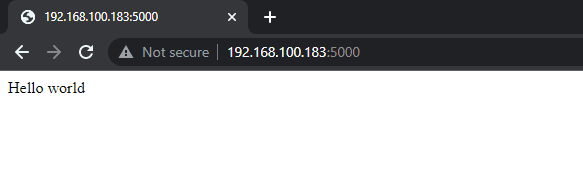
Congratulations, you now have a basic web application running on your Raspberry Pi using the Flask package.
Using Jinja Templates
If you check back with the root route then you will notice that we are returning HTML elements in our application. For simple applications then this could be okay however when you start building pages with multiple HTML pages then this would make it cumbersome.
@app.route('/')
def index():
    return '<p>Hello world</p>'
Let’s begin by creating a new directory or folder and naming it templates.
mkdir -p templates
cd templates
Create a file called orders.html by executing the below command.
nano orders.htmlType in the following HTML code inside orders.html. This is a sample of a Jinja template. A Jinja template does not have any file extensions so any file can be used as a template like XML, HTML, or configuration files.
Think of Jinja as a file processor that substitutes different values for your templates. In our case here, we are trying to show the different orders from different customers. As different customers have different orders so it is a good idea to have a fixed template page to show this.
<!doctype html>
<html>
  <head>
    <title>Flask Jinja Templates</title>
  </head>
  <body>
    <h1>List of Orders:</h1>
    {% if customer_name %}
    <p>Customer Name: <b>{{ customer_name }}</b>!</p>
    {% endif %}
    <ul>
    {% for order in customer_orders %}
        <li>{{ order }}</li>
    {% endfor %}
    </ul>
  </body>
</html>
Normally a Jinja template consists of normal text elements with Jinja delimiters ({}). In our example here, we are creating an HTML file so most of the elements that you are gonna be seeing here are HTML markups.
A Jinja delimiter mostly contains the following:
- {% … %} – are statements. An example is an if or for loop statement
- {{ … }} – used to print template output
- {# … #} – used as comments
    {% if customer_name %}
    <p>Customer Name: <b>{{ customer_name }}</b>!</p>
    {% endif %}
The following statement will first check if the customer_name was passed as an argument when we are rendering the template. If yes then we will create an HTML paragraph and print the customer name. Otherwise, we will print nothing.
    <ul>
    {% for order in customer_orders %}
        <li>{{ order }}</li>
    {% endfor %}
    </ul>
This is an example of a Jinja for loop statement. If for example an argument called customer_orders (which is a list) is passed in when we render our templates then we are going to loop to all the items in the list and print out an HTML List Item. Otherwise, we will print nothing!
We will see in the next section how the arguments are passed in during our template rendering.
Adding additional Flask route
Let us edit our app.py and add the following code.
from flask import Flask, render_template

app = Flask(__name__)

# Our current customer
customer_name = "donsky"
# Customer list of orders
customer_orders = ["shoes", "bags", "cap"]

@app.route('/')
def index():
    return 'Hello world'

@app.route('/orders')
def orders():
    return render_template('orders.html', customer_name=customer_name, customer_orders=customer_orders)

if __name__ == '__main__':
    app.run(debug=True, host='0.0.0.0')
I have added several items to our app.py. Let us scan through what are the things that I have added.
from flask import Flask, render_templateWe have imported the render_template from the Flask package to render our orders.html template.
app = Flask(__name__)

# Our current customer
customer_name = "donsky"
# Customer list of orders
customer_orders = ["shoes", "bags", "cap"]
We have created two variables namely customer_name and customer_orders. Let us say for example that we are going to show the list of orders my customer “donsky“
@app.route('/orders')
def orders():
    return render_template('orders.html', customer_name=customer_name, customer_orders=customer_orders)
A new route was added that will get triggered when somebody types in the following URL “/orders” in their browser. We will then forward this to our template “orders.html” and pass in additional parameters “customer_name” and customer_orders“
Now we are done with our changes so we can restart our Flask web server by executing the below code.
flask run
# or
python app.py
Go to the following URL.
# http://<IP Address>:5000
http://192.168.100.183:5000/orders
You should see the following message displayed in your browser.
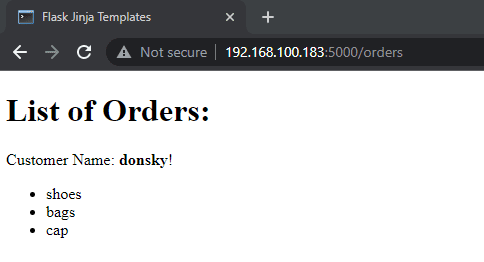
How to add static files to our Flask application?
Now that we have our web server serving our application properly then let’s try to add some minor tweaks to how it looks by adding some CSS (Cascading Style Sheets) and some javascript.
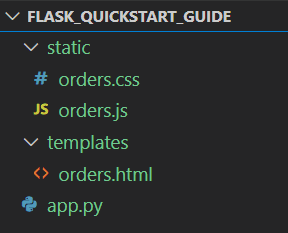
In our root directory create a folder called “static” and inside it create two files called orders.css and orders.js
mkdir -p static
cd static
touch order.css
touch order.js
This is how our project should look now.
Edit your orders.html file and add the following entries in colored.
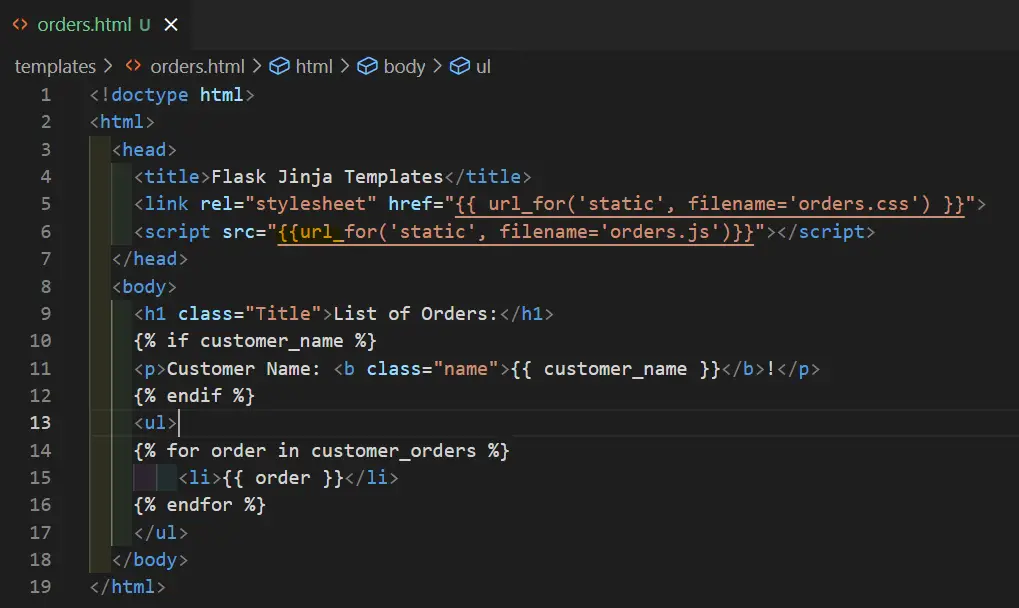
This is now how our code should look like.
<!doctype html>
<html>
  <head>
    <title>Flask Jinja Templates</title>
    <link rel="stylesheet" href="{{ url_for('static', filename='orders.css') }}">
    <script src="{{url_for('static', filename='orders.js')}}"></script>
  </head>
  <body>
    <h1 class="Title">List of Orders:</h1>
    {% if customer_name %}
    <p>Customer Name: <b class="name">{{ customer_name }}</b>!</p>
    {% endif %}
    <ul>
    {% for order in customer_orders %}
        <li>{{ order }}</li>
    {% endfor %}
    </ul>
  </body>
</html>
What we did here is to import our order.css and order.js file in the head section of our HTML. We have also added class to our h1 element and our customer name.
Open your orders.css file and add the following code.
.Title{
color: blue;
}
.name{
color: red;
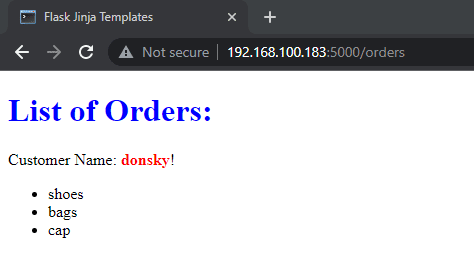
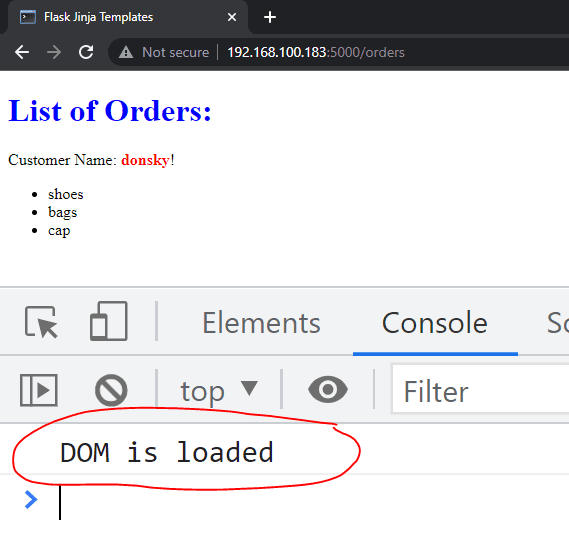
}What this CSS file will do is just change the color of our h1 element to blue and the customer name to red.
Open your orders.js and add the following code.
window.addEventListener('DOMContentLoaded', (event) => {
    console.log('DOM is loaded');
});
This will just print the “DOM is loaded” in our browser console.
Restart your web application again. You should see the following changes done to our application.
Open your web browser developer tools and go to the console tab then you should see the following messages displayed.
That is all for this post! This is just a quickstart guide on how to get started with Flask and if you want to learn more then I suggest that you start reading its documentation more.
The final and completed code is in my GitHub repository if you want to take a look at it.
Wrap Up
We have explored how to get started working with the Flask web server in your Raspberry Pi. We have created a small application that will show some of what it can do. If your project needs to control the GPIO pins of your Raspberry Pi device thru a browser then I suggest that you use Flask.
I hope you learn something. Happy exploring!
Related Next:
Control WS2812B/Neopixels Using Mobile Phones and Raspberry Pi
Raspberry Pi Object Counting using an Infrared sensor
Leave a Reply